background image

ENGLISH

MENU

MODE

DC IN

W

T

HOL

D

DISPLAY

DELETE

AD68-01228A

Owner’s Instruction Book

Before operating the unit, please read this Instruction 

Book thoroughly, and retain it for future reference. 

AF 

Auto-Focus

CCD 

Charge Coupled Device

LCD 

Liquid Crystal Display

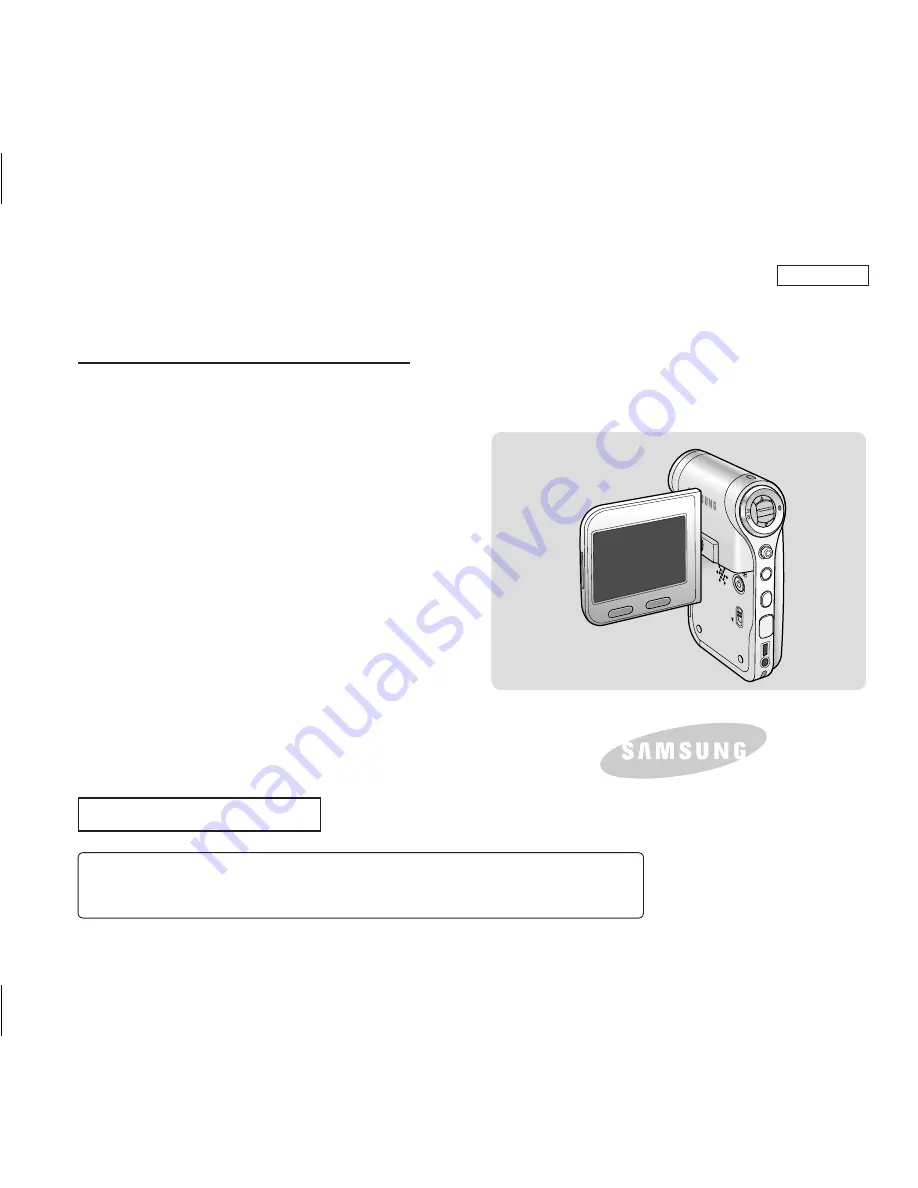
Sports Camcorder

SC-X300/X300L

Use only approved battery packs.

Otherwise, there is a danger of overheating, fire or explosion.

Samsung is not responsible for problems occurring due to using unapproved batteries.

US PATENT 4415844

SC-X300L 01228A-IB-USA 001~007.i3   3

2006-12-19   오후 5:10:36

Summary of Contents for SC-X300

Page 1: ...t for future reference AF Auto Focus CCD Charge Coupled Device LCD Liquid Crystal Display Sports Camcorder SC X300 X300L Use only approved battery packs Otherwise there is a danger of overheating fire or explosion Samsung is not responsible for problems occurring due to using unapproved batteries US PATENT 4415844 SC X300L 01228A IB USA 001 007 i3 3 2006 12 19 오후 5 10 ...

Page 2: ... your safety If the provided plug does not fit into your outlet consult an electrician for replacement of the obsolete outlet Shock Hazard Marking and Associated Graphical Symbols Explanation of Safety Related Symbols 10 Protect the power cord from being walked on or pinched parti cularly at plugs convenience receptacles and the point where they exit from the apparatus 11 Only use attachment acces...

Page 3: ...eceptacles and the point where they exit from the unit GROUNDING CONDUCTORS NEC SECTION 810 21 GROUND CLAMPS POWER SERVICE GROUNDING ELECTRODE SYSTEM NEC ART 250 PART H NEC NATIONAL ELECTRICAL CODE ELECTRIC SERVICE EQUIPMENT GROUND CLAMP ANTENNA LEAD IN WIRE ANTENNA DISCHARGE UNIT NEC SECTION 810 20 19 OUTDOOR ANTENNA GROUNDING If an outside antenna or cable system is connected to the CAMCORDER be...

Page 4: ...he wall outlet and refer servicing to qualified service personnel under the following conditions a When the power supply cord or plug is damaged b If any liquid has been spilled onto or objects have fallen into the CAMCORDER c If the CAMCORDER has been exposed to rain or water d If the CAMCORDER does not operate normally by following the operating instructions adjust only those controls that are c...

Page 5: ...ch can be determined by turning the equipment off and on the user is encouraged to try to correct the interference by one or more of the following measures Reorient or relocate the receiving antenna Increase the separation between the equipment and receiver Connect the equipment into an outlet on a circuit different from that to which the receiver is connected Consult the dealer or an experienced ...

Page 6: ...Rear Left View 14 Side Bottom View 15 External Camera Module View SC X300L only 16 LCD Display 17 OSD On Screen Display in Movie Record Mode Movie Play Mode 17 OSD On Screen Display in MP3 Mode 18 OSD On Screen Display in Voice Record Mode Voice Play Mode 19 OSD On Screen Display in File Browser Mode System Settings Mode 20 Battery Pack Installation Ejection 21 Maintaining the Battery Pack 22 Char...

Page 7: ...plied 32 Inserting Ejecting the memory card SD MMC not supplied 33 Recording 35 Recording 35 Zooming In and Out 36 Playing 37 Playing Movie files on the LCD monitor 37 Playing Multiple Movie Files 38 Setting the Recording Options 40 Setting the Movie Size 40 Setting the Movie Quality 41 Setting the White Balance 42 Setting the Program AE Programmed Auto Exposure 43 Setting the Effect 44 Setting th...

Page 8: ...Copying Mp3 files to the Sports Camcorder 55 Playing 56 Playing Mp3 Files 56 Setting the Mp3 Play Options 57 Deleting Mp3 Files 57 Setting the Repeat Play 58 Setting the Equalizer 59 Locking Mp3 Files 60 Recording 62 Recording Voice Files 62 Playing 63 Playing Voice Files 63 Setting the Voice Play Options 64 Deleting Voice Files 64 Setting the Play Mode 65 Locking Voice Files 66 Contents MP3 Mode ...

Page 9: ...ightness 77 Adjusting Date Time 78 Setting Date Time 78 Setting Date Format 79 Setting Time Format 80 Setting Date Time Display 81 Setting the System Settings 82 Setting the Beep Sound 82 Setting Start up Mode 83 Resetting the Sports Camcorder 84 Selecting Language 85 Setting the Auto Shut off 86 Setting the Demonstration Function 87 Viewing Version Information 88 Contents Using File Browser 67 Se...

Page 10: ...ents 96 Installing Software 97 Installing DV Media Pro 97 Ulead Video Studio 98 Connecting To Other Devices 99 Connecting to a PC using a USB Cable 99 Connecting to a TV monitor 100 Connecting to a VCR DVD Recorder 101 Recording unscrambled content from other digital devices 102 Cleaning and Maintaining the Sports Camcorder 103 After using the Sports Camcorder 103 Cleaning the Body 104 Using the B...

Page 11: ... 105 Using the Sports Camcorder Abroad 106 Self Diagnosis Display 107 Specifications 111 Using the Menu 109 Index 113 Troubleshooting 107 Contents Warranty SEA users only 114 SC X300L 01228A IB USA 001 007 i7 7 2006 12 13 오전 10 30 ...

Page 12: ...aratus from the mains the plug must be pulled out from the mains socket therefore the mains plug shall be readily operable Using the earphone or headphone for an extended time can cause a serious damage to your hearing If you are exposed to a sound in higher than 85db for an extended time you will be adversely affected on your hearing The higher the sound is the more seriously damaged your hearing...

Page 13: ...ners and is contrary to copyright laws All the trade names and registered trademarks mentioned in this manual or other documentation provided with your Samsung product are trademarks or registered trademarks of their respective holders Notes Regarding the Sports Camcorder Notes Regarding COPYRIGHT Notes Regarding Moisture Condensation 1 Do not leave the Sports Camcorder exposed to high temperature...

Page 14: ... firmly in place The new battery pack provided with the product is not charged Before using the battery pack you need to fully charge it Do not drop the battery pack Dropping the battery pack may damage it Fully discharging a Lithium Polymer battery damages the internal cells The battery pack may be prone to leakage when fully discharged To avoid damage to the battery pack make sure to remove the ...

Page 15: ...ht or outdoors it may be difficult to see the picture clearly 3 Direct sunlight can damage the LCD monitor Notes Regarding the LCD Display Do not attempt to service the Sports Camcorder yourself Opening or removing covers may expose you to dangerous voltage or other hazards Refer all servicing to qualified service personnel Precautions Regarding Service Precautions Regarding Replacement Parts When...

Page 16: ... Voice Record Playback with vast memory You can record voices and store it in the memory card not supplied and play back the recorded voice files Download Listen to MP3 Files With the Sports Camcorder you can play back MP3 files stored in the memory card not supplied Enjoy your favorite songs with your Sports Camcorder A Sports Camcorder equipped with External Camera Module SC X300L only The Sport...

Page 17: ...at your local Samsung dealer and service center You can download programs the latest driver software and audio video CODECs from the Samsung Electronics webpage www samsung com Accessories Supplied with the Sports Camcorder Basic Accessories Optional Accessory 3 Audio Video Cable AD39 00001B 2 AC Power Adapter AD44 00105B 1 Lithium Polymer battery pack AD43 00164A 5 Earphones AD30 00006A 4 USB Cab...

Page 18: ...utton 13 Mode button 14 DC IN jack 15 Multi jack 14 14 Location of Controls MENU MODE DC IN W T HOLD DISPLAY DELETE 1 3 8 7 11 12 13 14 15 2 5 6 4 10 9 Note Multi jack is a unified Earphones AV Input Output and External Camera Module jack SC X300L only MENU MODE DC IN W T HOLD DISPLAY DELETE How to Connect Earphones Connect the earphones to the multi jack as shown in the diagram MENU MODE DC IN W ...

Page 19: ...itch 4 Front cover 5 USB port 6 Built in microphone 7 Memory card slot 8 Tripod receptacle 9 Strap hook Usable Memory cards 4GB Max SD MMC 1 3 2 9 Hanging Lens Cover on the Sports Camcorder USB MMC SD 6 5 7 Left side 4 8 Fastening Hand Strap SC X300L 01228A IB USA 008 035 i15 15 2007 02 27 오후 12 33 ...

Page 20: ...300L only 1 Built in microphone 2 Lens 3 Rubber Mount 4 Picture Rotator 5 Record Power indicator 6 Power Record Stop button 7 Clip 8 External Camera Module cable 9 Rubber Mount receptacle 2 3 4 6 5 1 7 8 9 Bottom View SC X300L 01228A IB USA 008 035 i16 16 2006 12 13 오전 10 32 ...

Page 21: ...12 00AM 2007 01 01 Move Play 00 00 00 00 40 05 100 0001 12 00AM 2007 01 01 720X4 0 00 00 15 00 05 20 OK ERROR 100 0001 720i W T 1X 10X W T 1X 10X 1 3 2 7 8 9 10 11 Movie Play Mode S F F Sepia Recording STBY 12 00AM 2007 01 01 Move Play 00 00 00 00 40 05 100 0001 12 00AM 2007 01 01 720X4 0 00 00 15 00 05 20 OK ERROR 100 0001 720i W T 1X 10X W T 1X 10X 12 4 5 13 11 6 14 2 Notes Settings indicated wi...

Page 22: ...ator 14 Battery life indicator 15 Memory Card Indicator 16 File number indicator Current Total Move Play 00 12 OK Life is cool mp3 Everytime mp3 Toxic mp3 Don t push me mp3 Love you mp3 Search 1 10 Pause OK List Life is cool mp3 Sweetbox 00 01 07 00 03 27 Stereo 44 1KHz 1 2Kbps POP POP 2 MP3 Mode Move Play 00 12 OK Life is cool mp3 Everytime mp3 Toxic mp3 Don t push me mp3 Love you mp3 Search 1 10...

Page 23: ...er indicator Current Total 10 Counter Elapsed time 11 Repeat indicator 12 Multi selection indicator Voice Play Mode Stop 2007 01 01 12 00 00 AM SWAV0001 WAV 00 00 12 34 5 4 2007 01 01 12 00 00 AM SWAV0001 WAV 00 00 02 00 00 12 1 1 3 Search Pause OK List Move Play 1 3 OK 2007 01 01 12 00 00 AM 2007 01 01 12 00 10 AM 2007 01 01 12 00 20 AM 00 12 1 Stereo 0KHz 64Kbps Stereo 0KHz 64Kbps 8 7 1 File nam...

Page 24: ...r VIDEO 100SSMOV SMOV0002 AVI SMOV0003 AVI SMOV0004 AVI SMOV0001 AVI 1 4 Move Play OK 1 2 3 10 9 Location of Controls LCD Display OSD On Screen Display in File Browser Mode System Settings Mode 1 Mode indicator 2 Menu tab 3 Setup item 4 Move Help Key 5 Select Help Key 6 Battery life indicator 7 Memory Card Indicator System Settings Mode Move Play OK Dart Coin System Settings Move Select OK USB Mod...

Page 25: ...until it clicks To insert the battery pack Pull the Battery eject switch to eject the battery pack To eject the battery pack Notes Clean the terminals to remove foreign substances before inserting the battery pack If the Sports Camcorder will not be in use for a while remove the battery pack from the Sports Camcorder SB P120A 1200mAh SB P190A 1900mAh Battery 1 2 Insert Eject SC X300L 01228A IB USA...

Page 26: ...s Camcorder In case of notable reduction in operating time contact your nearest Samsung service center to replace the exhausted battery pack Warning When you eject the battery pack from the Sports Camcorder hold the battery pack to prevent it from dropping to the floor Notes Prepare an extra battery if you use the Sports Camcorder outdoors Contact a Samsung retailer to purchase a new battery pack ...

Page 27: ...arge via USB if the power is on The charging time with the USB cable may differ depending on the PC Battery Level Indicator State Message Fully charged 20 40 used 40 60 used 60 80 used 80 95 used Exhausted flickers The device will soon turn off Change the Battery Pack as soon as possible flickers The device will be forced to turn off after 5 seconds Low battery 12 00AM 2006 01 01 Sepia Recording S...

Page 28: ... have any foreign substances between connectors Connecting the AC Power Adapter Connecting the USB Cable USB MMC SD USB MMC SD DC IN jack USB port 1 Turn off the Sports Camcorder by pressing the POWER button Make sure you turn the power off when using the USB cable 2 Insert the battery pack to the unit 3 Open the connector cover of the unit 4 Charge the battery pack by using AC Power Adapter or US...

Page 29: ...ing the Sports Camcorder refer to this page for easy operation The memory card is not supplied 1 Insert the battery pack and the memory card into the Memory Card slot page 33 2 Charge the battery pack by directly connecting the AC Power Adapter to the Sports Camcorder page 24 3 Press the POWER button to turn on the Sports Camcorder 4 Select the desired mode by pressing the MODE button 5 Press the ...

Page 30: ...n set adjust settings regarding the LCD display Date Time Reset and Memory management Functions of Each Mode Movie MP3 Voice Recorder File Browser System Settings Movie MP3 Voice Recorder File Browser System Settings Movie MP3 Voice Recorder File Browser System Settings Movie MP3 Voice Recorder File Browser System Settings Power Saving Function The LCD monitor is turned off after a certain period ...

Page 31: ...to select desired menu item and then press the joystick OK to confirm 4 Press the MENU button to finish The joystick is used to make a selection move the cursor select functions and exit from the menu 1 Move the cursor left right by moving the joystick 2 Move the cursor up down by moving the joystick You can adjust the volume by moving the joystick up down in Movie Mp3 Voice recorder playback mode...

Page 32: ... deleted All All files will be deleted Cancel Cancels deletion Once All indicators will disappear on the screen Twice The LCD monitor turns off 3 times It returns to the initial screen Note Above description applies to the Movie mode If you press the DISPLAY button in Movie mode Once The LCD monitor turns off Twice It returns to the initial screen Note Above description applies to the MP3 Voice Re...

Page 33: ...r manufacturers equipment may not play on this Sports Camcorder Warning Do not turn the power off while recording playing erasing files or formatting Turn the power off before you insert or eject the memory card to avoid losing data Save important files separately Memory cards are made with precision technology They are sensitive and vulnerable to electric shock temperature and humidity Be cautiou...

Page 34: ...els The recording time and capacity may vary if a bad sector section is generated when you record movie files to a memory card Movie Record Time Media SD MMC Capacity 32MB 64MB 128MB 256MB 512MB 1GB 2GB Super Fine 352p approx 1min 20sec approx 3min approx 4min approx 11min approx 21min approx 43min approx 86min 720i 720p approx 50sec approx 2min approx 3min approx 7min approx 14min approx 29min ap...

Page 35: ... Low speed card Please record at lower quality It is because the writing speed of the memory card is slow We recommended using a Memory Card of 1 25MB sec or greater If you are unavoidably using a low write speed memory card lower the recording quality by one level Fine Normal Voice Record Time Number of MP3 files that can be saved Media Capacity MP3 files SD MMC 32MB approx 8files 64MB approx 16f...

Page 36: ...ry card Do not bend drop or apply a strong impact to the memory card Do not use or store in a hot dusty or humid environment Do not allow foreign substances on the memory card terminals Use a soft dry cloth to clean the terminals if required Use a memory card case to avoid losing data from moving and static electricity After a period of use the memory card may get warm This is normal and not a mal...

Page 37: ...level cell system only lower write speed supported The user using a lower write speed memory card for recording a movie may have difficulties storing the movie on the memory card You can even lose your movie data during the recording In an attempt to preserve any bit of the recorded movie the Sports Camcorder forcibly stores the movie on the memory card and displays a warning Low speed card Please...

Page 38: ...on 47 Setting the Digital Zoom 48 Setting the Record mode 49 Setting the Line In Out 50 Setting the Viewing Options 51 Deleting Movie Files 51 Setting the Play mode 52 Locking Movie Files 53 Save important data recordings separately on other media to avoid accidental loss due to a system failure or other reasons How to set to Movie mode How to set to Movie mode 12 00AM 2006 01 01 Sepia Recording S...

Page 39: ...s set the LCD Brightness in System Settings mode page 77 The LCD monitor brightness will not affect the brightness of the recording If you are recording with the LCD monitor closed the built in microphone will not be facing forward which can cause deterioration of the sound strength We recommend recording with the LCD screen open Reading the Counter 1 2 3 12 00AM 2006 01 01 Sepia Recording S F F S...

Page 40: ... Sepia S 720i F F 00 00 04 00 40 01 w T 1X 10X Recording 12 00AM 2006 01 01 Sepia S 720i F F 00 00 00 00 40 05 w T 1X 10X 12 00AM 2006 01 01 Sepia S 720i F F 00 00 02 00 40 03 w T 1X 10X 12 00AM 2006 01 01 Sepia S 720i F F 00 00 04 00 40 01 w T 1X 10X Recording Zoom In Zoom Out Notes Frequent use of zooming may result in higher battery power consumption Optical zoom preserves the image quality Ref...

Page 41: ...No files appears When the earphones Audio Video cable or External Camera Module is connected to the Sports Camcorder the built in speaker will automatically turn off SC X300L only 2 3 12 00AM 2006 01 01 720X480 00 00 00 00 05 20 100 0001 Sepia Recording 12 00AM 2006 01 01 S 720i F F STBY 00 00 00 00 40 05 720X480 00 00 15 00 16 15 100 0004 1 12 00AM 2006 01 01 720X480 00 00 00 00 05 20 100 0001 Se...

Page 42: ...nnected to the Sports Camcorder the built in speaker will automatically turn off SC X300L only Movie Mode Playing Playing Multiple Movie Files 1 2 3 12 00AM 2006 01 01 720X480 00 00 05 00 05 20 100 0001 720X480 00 00 00 00 05 20 100 0001 Sepia Recording 12 00AM 2006 01 01 S 720i F F STBY 00 00 00 00 40 05 Move Play 100 0001 oK ERRoR 12 00AM 2006 01 01 720X480 00 00 05 00 05 20 100 0001 720X480 00 ...

Page 43: ...evel will get louder The volume bar disappears after 1 2 seconds 3 move the joystick down to decrease the volume Each time you move the joystick down the volume bar decreases and the sound level will get quieter The volume bar disappears after 1 2 seconds Notes You can adjust the volume up to 10 steps You can also play the movie file on a TV screen by connecting the Sports Camcorder to a TV page 1...

Page 44: ...d Stop button will move to Movie Record mode 1 2 3 4 Sepia Recording 12 00AM 2006 01 01 S 720i F F STBY 00 00 00 00 40 05 Sepia Recording 12 00AM 2006 01 01 S 352p F F STBY 00 00 00 01 00 07 Movie Move Exit MENU Select oK Size AE 352x240 720x480 Movie Move Exit MENU Select oK Size AE 352x240 720x480 352 720 352 720 Sepia Recording 12 00AM 2006 01 01 S 720i F F STBY 00 00 00 00 40 05 Sepia Recordin...

Page 45: ...43 Movie Move Exit MENU Select oK Quality AE Fine Super Fine Normal N F SF SF Movie Move Exit MENU Select oK Quality AE Fine Super Fine Normal N F SF Sepia Recording 12 00AM 2006 01 01 S 720i F F STBY 00 00 00 00 40 05 Sepia Recording 12 00AM 2006 01 01 S 720i STBY 00 00 00 00 26 43 Movie Move Exit MENU Select oK Quality AE Fine Super Fine Normal N F SF SF Movie Move Exit MENU Select oK Quality AE...

Page 46: ...table for a fluorescent light environment Suitable for an incandescent light environment You can adjust the white balance as you wish based on the recording environment Auto Daylight Fluorescent Tungsten Custom 1 2 3 4 SF Sepia Recording 12 00AM 2006 01 01 S 720i F F STBY 00 00 00 00 40 05 Sepia Recording 12 00AM 2006 01 01 S 720i STBY 00 00 00 00 40 05 Movie Move Exit MENU Select oK white Balance...

Page 47: ...oncerts and school performances Use when the light is very strong such as on the beach or in the snow Auto Sports Spotlight Sand Snow 1 2 3 4 SF Sepia Recording 12 00AM 2006 01 01 S 720i F F STBY Sepia Recording 12 00AM 2006 01 01 S 720i STBY Movie Move Exit MENU Select oK Program AE AE Sports Auto Spotlight F F AE AUTo Movie Move Exit MENU Select oK Program AE Sports Auto Spotlight AE 00 00 00 00...

Page 48: ... Mosaic Sepia Negative Mirror B W 1 2 3 4 Recording 12 00AM 2006 01 01 S SF Sepia Recording 12 00AM 2006 01 01 S 720i F F STBY 00 00 00 00 40 05 720i STBY 00 00 00 00 40 05 Movie Move Exit MENU Select oK Effect AE Art off Mosaic F F Movie Move Exit MENU Select oK Effect Mirror Mirror Negative B w AE Recording 12 00AM 2006 01 01 S SF Sepia Recording 12 00AM 2006 01 01 S 720i F F STBY 00 00 00 00 40...

Page 49: ...menu screen is displayed pressing the Record Stop button will move to Movie Record mode 1 2 3 4 SF Sepia Recording 12 00AM 2006 01 01 S 720i F F STBY 00 00 00 00 40 05 Sepia Recording 12 00AM 2006 01 01 S 720i STBY 00 00 00 00 40 05 Movie Move Exit MENU Select oK EIS off on F F Movie Move Exit MENU Select oK EIS off on TV PC TV PC SF Sepia Recording 12 00AM 2006 01 01 S 720i F F STBY 00 00 00 00 4...

Page 50: ...rned off While the menu screen is displayed pressing the Record Stop button will move to Movie Record mode 1 2 3 4 Sepia Recording 12 00AM 2006 01 01 S 720i F F STBY 00 00 00 00 40 05 Movie Move Exit MENU Select oK Focus MF AF Sepia Recording 12 00AM 2006 01 01 S 720i F F STBY 00 00 00 00 40 05 Movie Move Exit MENU Select oK Focus MF AF TV PC TV PC Sepia Recording 12 00AM 2006 01 01 S 720i F F STB...

Page 51: ... the Record Stop button will move to Movie Record mode 1 2 3 4 Sepia Recording 12 00AM 2006 01 01 S 720i F F STBY 00 00 00 00 40 05 Movie Move Exit MENU Select oK BLC off on Sepia Recording 12 00AM 2006 01 01 S 720i F F STBY 00 00 00 00 40 05 Movie Move Exit MENU Select oK BLC off on TV PC TV PC Sepia Recording 12 00AM 2006 01 01 S 720i F F STBY 00 00 00 00 40 05 Movie Move Exit MENU Select oK BLC...

Page 52: ...on will move to Movie Record mode Sepia Recording 12 00AM 2006 01 01 S 720i F F STBY 00 00 00 00 40 05 Movie Move Exit MENU Select oK Digital Zoom off on Sepia Recording 12 00AM 2006 01 01 S 720i F F STBY 00 00 00 00 40 05 Movie Move Exit MENU Select oK Digital Zoom off on w T 1X 10X TV PC TV PC Sepia Recording 12 00AM 2006 01 01 S 720i F F STBY 00 00 00 00 40 05 Movie Move Exit MENU Select oK Dig...

Page 53: ...vie files recording While the menu screen is displayed pressing the Record Stop button will move to Movie Record mode 1 2 3 Sepia Recording 12 00AM 2006 01 01 S 720i F F STBY 00 00 00 00 40 05 Sepia Recording 12 00AM 2006 01 01 S 720p F F STBY 00 00 00 00 40 05 Movie Move Exit MENU Select oK Record Mode PC TV Movie Move Exit MENU Select oK Record Mode PC TV TV PC TV PC Sepia Recording 12 00AM 2006...

Page 54: ...xit the menu The Sports Camcorder is set to the selected setting Note While the menu screen is displayed pressing the Record Stop button will move to Movie Record mode Movie Mode Setting the Recording Options Setting the Line In Out 1 Movie Move Exit MENU Select oK Line In out In out Movie Move Exit MENU Select oK In out Sepia Recording 12 00AM 2006 01 01 S 720i F F STBY 00 00 00 00 40 05 Line In ...

Page 55: ...cted movie file using the joystick OK Multi Select Multiple movie files can be selected using the joystick OK indicator appears on the selected files Press the PLAY button to delete All All movie files will be deleted Cancel Cancels the deletion Notes Once deleted a file can not be restored Locked files will not be deleted While the menu screen is displayed pressing the Record Stop button will mov...

Page 56: ...ovie Record mode 4 Movie Mode Setting the Viewing Options Setting the Play mode 3 720X480 00 00 00 00 10 40 100 0001 720X480 00 00 10 00 10 30 100 0001 Movie Move Exit MENU Select oK Play Mode Play All Play one Repeat one 1 Movie Move Exit MENU Select oK Play Mode Play All Play one Repeat one 1 1 1 ALL ALL 720X480 00 00 00 00 10 40 100 0001 720X480 00 00 10 00 10 30 100 0001 Movie Move Exit MENU S...

Page 57: ...ENU button Move the joystick left right to select Lock 5 Move the joystick up down to select an option and then press the joystick OK Lock Locks the selected movie file using the joystick OK Multi Select Multiple movie files can be selected using the joystick OK indicator appears on the selected files Press the PLAY button to lock Lock All All movie files are locked Unlock All Unlocks all movie fi...

Page 58: ...Mp3 Files 60 Save important data recordings separately on other media to avoid accidental loss due to a system failure or other reasons How to set to MP3 mode How to set to MP3 mode Movie MP3 Voice Recorder File Browser 2 Set the MP3 mode by pressing the MODE button Power button MENU MODE DC IN W T HOLD LAY DELETE 1 Press the POWER button to turn on the Sports Camcorder 54 54 ENGLISH SC X300L 0122...

Page 59: ... disconnect the cable in the following way 1 Select the removable disk icon and click the right mouse button to select Safely Remove Hardware 2 Select Stop and disconnect the USB cable when the pop up screen disappears Warning Copying and redistributing of mp3 files may violate the copyright law You cannot create a new folder on your Sports Camcorder Notes You can copy a folder on your Sports Camc...

Page 60: ...le stored the message No Files appears 3 Select an mp3 file to play by moving the joystick up down and then press the joystick OK 4 The selected mp3 file is played back Each time you press the PLAY button or Joystick OK play or pause is selected repeatedly To adjust volume move joystick up down Volume indicator appears and disappears after few seconds Setting to Hold MP3 External Camera Module HOL...

Page 61: ...cator appears on the selected files Press the PLAY button All All Mp3 files will be deleted Cancel Cancels the deletion 3 press the PLAY button or Joystick OK The selected MP3 file is played 4 Press the DELETE button on the LCD monitor in pause mode Select an option by moving the joystick up down and then press the joystick OK OK Deletes the selected Mp3 file Cancel Cancels the deletion Notes Lock...

Page 62: ...elect Off no icon is displayed Notes When the earphones Audio Video cable or External Camera Module cable is connected to the Sports Camcorder the built in speaker will not operate You cannot access the menu during playback If you press the Record Stop button in MP3 mode the Sports Camcorder switches to Movie Record mode SC X300L only 4 Move Play oK Life is cool mp3 Everytime mp3 Toxic mp3 Don t p...

Page 63: ... off Pop Search Pause oK List Life is cool mp3 Sweetbox 00 01 07 00 03 27 Stereo 44 1KHz 192Kbps o o PoP PoP oP oP P P P P P P Po Po Po Po Po o o o o oP P P P P P PoP PoP PoP Clas C C C as s C C as Clas Clas as s C C C C C C Cl Cl Cl Cl Cl Cla a a as s s s Clas o PoP o P P Po oP o o o o PoP PoP oP oP P P P P P P Po Po Po Po Po o o o o oP P P P P P PoP Clas C C C as s C C as Clas Clas as s C C C C ...

Page 64: ...ode Move the joystick left right to select Lock 5 Press the joystick OK The selected mp3 file is locked Notes The icon is displayed on the locked file You cannot access the menu during playback If you press the Record Stop button in MP3 mode the Sports Camcorder switches to Movie Record mode Locking Mp3 Files in MP3 playlist 3 4 Move Play oK Life is cool mp3 Everytime mp3 Toxic mp3 Don t push me m...

Page 65: ...ecordings separately on other media to avoid accidental loss due to a system failure or other reasons How to set to Voice Recorder mode How to set to Voice Recorder mode Movie MP3 Voice recorder File Browser 2 Set the Voice Recorder mode by pressing the MODE button MENU MODE DC IN W T HOLD LAY DELETE Power button 1 Press the POWER button to turn on the Sports Camcorder ENGLISH SC X300L 01228A IB U...

Page 66: ...locked up with something this can cause deterioration of the sound strength and noise on the recording So make sure that the microphone is not blocked When you make a voice recording on the Sports Camcorder using the microphone you are recommended to do so at a short distance If the recording is done at a distance the sound strength or quality may be deteriorated 3 2007 01 01 12 00 00 AM SwAV0001 ...

Page 67: ...e menu screen is displayed pressing the Record Stop button will move to Voice Record mode SC X300L only 3 1 SwAV0004 wAV 00 00 00 30 20 00 Stereo 8 0KHz 64Kbps Move Play 3 3 oK 2007 01 01 12 00 00 AM 2007 01 01 12 36 25 AM 2007 01 01 01 00 02 AM Move Play 2 3 oK 2007 01 01 12 00 00 AM 2007 01 01 12 36 25 AM 2007 01 01 01 00 02 AM 2007 01 01 12 36 25 AM SwAV0002 wAV 00 00 12 00 02 15 Stereo 8 0KHz ...

Page 68: ...e PLAY button All All voice files will be deleted Cancel Cancels the deletion Notes Once deleted a file can not be restored Locked files will not be deleted You cannot access the menu during voice playback While the menu screen is displayed pressing the Record Stop button will move to Voice Record mode 4 SwAV0004 wAV 00 00 00 30 20 00 Stereo 8 0KHz 64Kbps Move Play 3 3 oK 2007 01 01 12 00 00 AM 20...

Page 69: ...ss the menu during voice playback While the menu screen is displayed pressing the Record Stop button will move to Voice Record mode 5 4 Voice recorder Exit MENU oK Play All 1 3 Move Exit MENU Select oK 1 3 repeat one 1 Move Play 1 3 oK 2007 01 01 12 00 00 AM 2007 01 01 12 36 25 AM 2007 01 01 01 00 02 AM Move Play 1 3 oK 2007 01 01 12 00 00 AM 2007 01 01 12 36 25 AM 2007 01 01 01 00 02 AM 1 1 6 Voi...

Page 70: ...6 25 A AM M M M 6 01 01 12 36 A 36 AM 2 A 2 A 02 02 2006 01 01 01 00 0 AM 006 01 01 01 00 0 2006 01 01 01 00 0 AM 6 A 00 Move Exit MENU Select oK Lock Multi Select Lock All Lock 1 3 Voice recorder 2006 01 01 12 00 00 AM 2006 01 01 12 36 25 AM 2006 01 01 01 00 02 AM 2006 01 01 12 00 00 AM M M A A 6 25 A 6 25 A 2006 01 01 12 36 25 AM M A A 6 6 006 01 01 12 3 2006 01 0 36 25 A AM M M M 6 01 01 12 36 ...

Page 71: ...cidental loss due to a system failure or other reasons How to set to File Browser mode How to set to File Browser mode Movie MP3 Voice recorder File Browser System Settings 2 Set the File Browser mode by pressing the MODE button MENU MODE DC IN W T HOLD LAY DELETE Power button 1 Press the POWER button to turn on the Sports Camcorder ENGLISH SC X300L 01228A IB USA 055 072 i67 67 2006 12 13 오전 10 37...

Page 72: ...or Folders 3 4 100 0001 MISC MUSIC VIDEo VoICE VIDEo 100SSMoV VIDEo 100SSMoV SMoV0002 AVI SMoV0003 AVI SMoV0004 AVI SMoV0001 AVI 720X480 12 00AM 2006 01 01 01 Sepia Move Play 1 4 1 4 oK Move Play oK Move Play oK 720X480 00 00 05 00 05 20 2 100 0001 MISC MUSIC VIDEo VoICE VIDEo 100SSMoV VIDEo 100SSMoV SMoV0002 AVI SMoV0003 AVI SMoV0004 AVI SMoV0001 AVI 720X480 12 00AM 2006 01 01 01 Sepia Move Play ...

Page 73: ...rs Notes If you slide the W T switch to W WIDE in play mode it returns to the previous screen Once deleted a file can not be restored Locked files will not be deleted The folder with a locked file will not be deleted Only unlocked files in the folder will be deleted If you move the Joystick left the previous folder screen appears If you press the Record Stop button in File Browser mode the Sports ...

Page 74: ...previous folder screen appears If you press the Record Stop button in File Browser mode the Sports Camcorder switches to Movie Record mode 2 3 4 VIDEo 100SSMoV SMoV0002 AVI SMoV0003 AVI SMoV0004 AVI SMoV0001 AVI VIDEo 100SSMoV SMoV0002 AVI SMoV0003 AVI SMoV0004 AVI SMoV0001 AVI MISC MUSIC VIDEo VoICE 1 4 1 4 1 4 Move Play oK Move Play oK Move Play oK Move Exit MENU Select oK File Browser 1 4 VIDEo...

Page 75: ...I SMoV0003 AVI SMoV0004 AVI SMoV0001 AVI Move Play oK MISC MUSIC VIDEo VoICE Move Exit MENU Select oK File Info File Browser oK Close oK SMoV0001 AVI Size 92805 bytes Date 2007 01 01 12 00 00 AM Locked No 1 4 1 4 1 4 Move Play oK Play oK Move Exit MENU oK File Browser 1 13 VIDEo 100SSMoV SMoV0002 AVI SMoV0003 AVI SMoV0004 AVI SMoV0001 AVI Move Play oK MISC MUSIC VIDEo VoICE Move Exit MENU Select o...

Page 76: ...anguage 85 Setting the Auto Shut off 86 Setting the Demonstration Function 87 Viewing Version Information 88 Using USB Mode 89 Transferring files to a computer 89 Using the PC Cam Function 90 Save important data recordings separately on other media to avoid accidental loss due to a system failure or other reasons How to set to System Settings mode How to set to System Settings mode MP3 Voice recor...

Page 77: ...s By default manufacturer s setting is the Mass Storage Before connecting the USB cable check if the Sports Camcorder is set to the appropriate USB mode you want to use Mass Storage Transferring files from the Sports Camcorder to your computer page 89 PC Cam You can use the Sports Camcorder as a PC camera for video chatting video conference and other PC camera applications page 90 3 System Setting...

Page 78: ... memory cards so that the first file number assigned on a new memory card is 1 more than the last file number assigned on the previous memory card Reset When the storage memory is formatted the file number goes back to its default value 100 0001 5 After you finish move to the desired mode by pressing the MODE button Note When you set File No to Series each file is assigned with a different number ...

Page 79: ...e on the operation of the memory card which has not been formatted on the Sports Camcorder Make sure to format the memory card on the Sports Camcorder before using If the memory card is not inserted you can t use the format function A memory card with the protection tab set to lock will not be formatted 4 System Settings Move Select oK Format Start System Settings Move Select oK Format Internal Ex...

Page 80: ...e and total memory space are displayed 5 After you viewing memory space move to the desired mode by pressing the MODE button Notes System requires a small portion of memory space actual storage capacity may differ from the printed memory capacity If the memory card is not inserted you will see No Memory Card on the LCD monitor The OSD indicators of this manual are based on memory capacity of 1GB M...

Page 81: ... the screen whereas moving it down will darken the screen Brightness range You can adjust the LCD Brightness from 0 to 100 5 After you finish setting move to the desired mode by pressing the MODE button Notes A brighter LCD screen setting consumes more battery power Adjust the LCD brightness when the ambient lighting is too bright and the monitor is hard to see LCD Brightness does not affect the b...

Page 82: ... up down Items are displayed in the order of the date format By default it appears in the order of Year Month Date Hour Minute and AM PM 6 After setting the last item press the Joystick OK to finish the setting 7 After you finish setting move to the desired mode by pressing the MODE button Notes See page 81 to set the Date Time to display on the LCD You can set the year up to 2037 3 4 System Setti...

Page 83: ...date is displayed in the order of Year Month Date DD MM YY The date is displayed in the order of Date Month Year MM DD YY The date is displayed in the order of Month Date Year 5 After you finish setting move to the desired mode by pressing the MODE button 4 System Settings Move Select oK Date Format YY MM DD DD MM YY MM DD YY System Settings Move Select oK Date Format YY MM DD MM DD YY DD MM YY M ...

Page 84: ... select an option and then press the Joystick OK 12 Hour The time is displayed as the unit of 12 hours 24 Hour The time is displayed as the unit of 24 hours 5 After you finish setting move to the desired mode by pressing the MODE button 4 System Settings Move Select oK Time Format 12 Hour 24 Hour M M System Settings Move Select oK Time Format 12 Hour M M 24 Hour 12 12 24 24 12 12 24 24 3 System Se...

Page 85: ...e Time is displayed in Movie mode Setting the Sports Camcorder Adjusting Date Time Setting Date Time Display 3 System Settings Move Select oK Date Time off Date Time M M System Settings Move Select oK Date Time Date Time M M Date Time Sepia recording S 720i F F STBY 00 00 00 00 40 05 12 00AM 2007 01 01 12 12 24 24 12 12 24 24 4 System Settings Move Select oK Date Time off Date Time M M System Sett...

Page 86: ...he joystick up down to select an option and then press the joystick OK On Turn the beep sound on Off Turn the beep sound off 5 After you finish setting move to the desired mode by pressing the MODE button Note When the earphones Audio Video cable or External Camera Module is connected to the Sports Camcorder the Beep Sound function will not operate SC X300L only 4 System Settings Move Select oK Be...

Page 87: ...de The Sports Camcorder starts up in the Movie mode Previous Mode The Sports Camcorder starts up in the mode you used last except the System Settings mode 5 After you finish setting move to the desired mode by pressing the MODE button Note Make sure that the start up mode is set to the selected mode when turning on the Sports Camcorder again 4 System Settings Move Select oK Start up Movie Mode Pre...

Page 88: ... pressing the MODE button The System Settings screen appears 3 Move the joystick left right to select Reset and then press the joystick OK The Sports Camcorder will be initialized to the default settings Warning If you reset the Sports Camcorder all functions you set are re initialized to the default factory settings Note After resetting the Sports Camcorder set Date Time Set page 78 3 System Sett...

Page 89: ...tings screen appears 3 Move the joystick left right to select Language 4 Move the joystick up down to select the desired language and then press the joystick OK English Español Français Português Deutsch Italiano Nederlands Polski Русский Iran Arab Magyar ไทย Українська Svenska Türkçe 5 After you finish setting move to the desired mode by pressing the MODE button Note Even if the battery pack or A...

Page 90: ... Notes The Auto Shut off will not function when you connect the AC Power Adapter to the Sports Camcorder The Auto Shut off functions when the battery pack is the only power source If the PC recognizes the USB device properly the Auto Shut off function will be deactivated Auto Shut off will only function when you set this function in System Settings mode Auto Shut Off function is a power saving fea...

Page 91: ... Movie Record mode Setting the Demonstration Function 3 System Settings Move Select oK Demonstration off 5 Minutes Play Now DEMo System Settings Move Select oK Demonstration off 5 Minutes Play Now DEMo Functions 1 Digital Camcorder 2 MP3 Player 3 Stereo Audio recorder 4 PC Camera 5 Data Storage STBY 00 00 00 00 40 05 4 System Settings Move Select oK Demonstration off 5 Minutes Play Now DEMo System...

Page 92: ...ODE button The System Settings screen appears 3 Move the joystick left right to select Version Info The firmware version of the Sports Camcorder is displayed 4 After you view the version information move to the desired mode by pressing the MODE button Viewing Version Information 3 System Settings Move Version Info Samsung Elec Co LTD S w 0 10 Feb 03 2007 00 20 10 Syscon 1 06 Feb 13 2007 08 53 39 D...

Page 93: ...le from the Sports Camcorder to your PC 5 When finished disconnect the USB cable Notes According to the PC type Pop up dialog for Removable disk may appear Disconnecting the USB cable while the data transfer will stop the data transfer and might damage the data stored Multiple USB devices connected to a PC or using USB hubs may cause communication installation errors with the Sports Camcorder Tran...

Page 94: ...on the PC camera function may not work properly Notes You must install the DV Driver page 97 When the USB port connection changed it may require DV Driver re installation page 97 It is recommended to use an AC Power Adapter during data transfer to avoid unintended power outages It supports USB 2 0 standard If the DV Media Pro is not properly installed on your PC you may see the Found New Hardware ...

Page 95: ...e External Camera Module 93 Mounting the External Camera Module on Rubber Mount 93 Using the Long Mount Band 94 Save important data recordings separately on other media to avoid accidental loss due to a system failure or other reasons ENGLISH MENU MODE DC IN W T HOLD DISPLAY DELETE POWER Record Stop button SC X300L 01228A IB USA 073 095 i91 91 2006 12 13 오전 10 38 ...

Page 96: ...WER Record Stop button of the External Camera module to start recording LED lamp lights in red Press the Record Stop button of the Sports Camcorder to start recording 5 Press the POWER Record Stop button of the External Camera module to stop recording Recording stops and the Sports Camcorder is ready again 6 After recording to prevent battery consumption press the POWER Record Stop button of the E...

Page 97: ...Recording a movie using the external camera module does not support anti shake function The W T switch does not operate while you are recording a movie clip with the External Camera Module When you record a movie using the external camera module connection setting the MP3 External Camera Module HOLD switch on the Sports Camcorder to hold helps to prevent accidental operation by locking all button ...

Page 98: ...as illustrated You can use both the short part and long part of Rubber Mount as slots 2 Run the strap through the buckle to adjust the tightness 3 Fasten the strap Notes Dropping the External Camera Module or bumping it to other objects may cause device failure When using the device you must attach it to the rubber mount and be careful not to drop or strike it Direct contact of the Rubber Mount wi...

Page 99: ... to a VCR DVD Recorder 101 Recording unscrambled content from other digital devices 102 Maintenance 103 Cleaning and Maintaining the Sports Camcorder 103 After using the Sports Camcorder 103 Cleaning the Body 104 Using the Built in Rechargeable Battery 104 Regarding the Battery 105 Using the Sports Camcorder Abroad 106 Save important data recordings separately on other media to avoid accidental lo...

Page 100: ...ed to operate properly USB connection using an external USB hub or an additional USB daughterboard is not guaranteed If your OS is Windows 2000 XP Vista 32bit log in as the Administrator administrator of the PC or a user with the equivalent privileges to install the OS If the capacity of PC is low the movie file may not play normally or will often stop If the capacity of PC is low it may take a lo...

Page 101: ...rt establishing connection to a PC If it is not installed some functions will not be supported 1 Click on DV Driver on the Setup screen Driver software required is installed automatically Following drivers will be installed USB PC CAMERA driver USB Streaming Driver USB video transfer 2 Click on Confirm to finish driver installation 3 If the DirectX 9 0 is not installed it is installed automaticall...

Page 102: ... After inserting the CD the setup screen displays automatically Follow the instruction to start installation It is a video editing tool that allows users to edit movie files Notes Please install by using the Software CD that came with this Sports Camcorder We do not guarantee compatibility for different CD versions For movie playback on a PC install software in this order DV Driver DirectX 9 0 Vid...

Page 103: ... or other reason restart the programme or try to disconnect connect the communication cable USB cable again Notes According to the PC type Pop up dialog for Removable disk may appear Multiple USB devices connected to a PC or using USB hubs may cause communication installation errors with the Sports Camcorder Refer to page 96 for PC recommendations on USB use Some PCs meeting the requirements may n...

Page 104: ...nding on the manufacturer 4 Press the POWER button to turn on the Sports Camcorder Movie Record mode is displayed on the TV screen 5 Press the PLAY button or Joystick OK to switch to Movie Play mode 6 Move the joystick left right to select a movie and then press the joystick OK It begins playback To pause playback press the joystick OK Notes When you connect your Sports Camcorder to a TV some indi...

Page 105: ...s 3 Connect the Audio Video cable from TV Input to Video Output of the VCR DVD Recorder 4 Turn on the TV and set the Source to the external input the VCR DVD Recorder is connected 5 Turn on the VCR DVD Recorder and set the Source to the external input source where you connected the Sports Camcorder Note If you wish to input output a movie clip from another device to the Sports Camcorder you must f...

Page 106: ...ress the POWER button to turn on the Sports Camcorder The Movie Record screen appears 4 Press the MENU button Move the joystick left right to select Line In Out 5 Move the joystick up down to select In and then press the joystick OK 6 Play back the other digital devices 7 Press the Record Stop button to start recording 8 To stop recording press the Record Stop button again Notes The quality of an ...

Page 107: ...Sports Camcorder when not in use Battery consumption may vary depending on the condition of use Recording with many starts and stops frequent zooming and recording in low temperatures will shorten actual recording times Dispose of used battery packs promptly Do not dispose of them in fire The battery pack will become warm during charging and use This is not a malfunction The battery pack has a lim...

Page 108: ...fter the battery pack has been removed and other power sources have been disconnected Using the Built in Rechargeable Battery The Sports Camcorder incorporates a rechargeable lithium cell that maintains the date and other settings even when the AC Power Adapter and the battery are removed The rechargeable lithium cell is automatically recharged when the Sports Camcorder is used If the Sports Camco...

Page 109: ... battery packs to water The battery pack is not water resistant Keep the battery out of reach of children If it is swallowed seek medical assistance immediately Wipe the battery with a clean dry cloth to ensure proper contact Do not pick up the battery using metal tools as this may cause a short circuit Do not short the battery or dispose of the battery in fire Do not disassemble the battery The b...

Page 110: ...dings on a television set or to copy them to a video cassette recorder VCR the television set or the VCR must be PAL compatible and have the appropriate Audio Video ports Otherwise you may need to use a separate Video Format Transcoder PAL NTSC format Converter Color System PAL Compatible Countries Regions Australia Austria Belgium Bulgaria China CIS Czech Republic Denmark Egypt Finland France Ger...

Page 111: ...Format the memory card Write error Failed to write Check the memory space or format the memory Read error Failed to read Delete the file Not supported format The format is not supported The file format is not supported Check the supported file on page 29 Write protected Memory card is protected to write Unlock the memory card except MMC MPEG decoding Error The movie file is corrupted Delete the co...

Page 112: ...ove the protection tab of memory card except MMC Remove the lock on the file pages 53 60 66 70 Images on the LCD monitor appear dark Ambient is too bright Ambient temperature is too low Adjust the brightness and angle of LCD Low temperatures may produce a dark LCD display This is not a malfunction Rear of the LCD monitor is hot Prolonged use of the LCD monitor Close the LCD monitor to turn it off ...

Page 113: ...ne Repeat All Play Mode Size 720x480 352x240 Quality Super Fine Fine Normal EIS Digital Zoom Record Mode Line In Out On Off TV PC In Out On Off BLC On Off Focus AF MF Program AE Auto Sports Spotlight Sand Snow MP3 1 Play Equalizer Repeat Lock Lock Multi Select Lock All Unlock All Off Pop Classic Jazz Off Repeat One Repeat Folder Repeat All Shuffle Folder Shuffle All SC X300L 01228A IB USA 096 115 ...

Page 114: ...f 5 Minutes Play Now Off 5 Minutes Version Info Language English Español Français Português Deutsch Italiano Nederlands Polski Русский Iran Arab Magyar ไทย Українська Svenska Türkçe USB Mode Mass Storage PC Cam Format Start Memory Space 000MB 000MB File No LCD Brightness 0 100 Series Reset Play Mode Play One Play All Repeat One Repeat All Lock Lock Multi Select Lock All Unlock All Lock Lock Multi ...

Page 115: ...Type 211K Connectors USB Mini B type USB 2 0 High Speed DC Power In connector Proprietary 3 pins connector Multi jack Earphones ø 3 5 Stereo AV Input Output Video 1 0Vp_p 75Ω Audio 7 5dBm 47KΩ Stereo External CMOS Camera General Operating Temperature 0 C 40 C 32 F 104 F Operating Humidity 10 80 Power Source 3 8V Li ion Polymer Battery Pack 4 8V AC Adapter Power Consumption 2 5W LCD ON Dimensions W...

Page 116: ... Name XC L2N External CMOS Camera CMOS Pixel 1 3 inch CMOS 270K Maximum Video Resolution 720x480 VGA exposure Auto white balance Auto focus type Fixed focal length f 5 56mm F2 0 connector AV Output Video 1 0Vp_p Audio 7 5dBm 47KΩ Input mono general operating temperature 0 C 40 C 32 F 104 F operating humidity 20 80 power source B 3 2V 4 8V power consumption 0 7W Dimensions lxhxd 3 67 inch X 1 37 in...

Page 117: ...o 97 98 E Earphones 14 Effect 44 F File Browser 67 File No 74 Format 75 J Joystick 27 L Language 85 LCD Brightness 77 LOCK 53 60 66 70 M Mode button 26 MENU button 27 MF Manual Focus 46 P PC Cam 90 Program AE 43 Q Quality 41 R Reset 84 S Start up Mode 83 Sepia 44 T Troubleshooting 107 108 U USB 73 V Version Information 88 Voice Record 62 W White Balance 42 Z Zooming In and Out 36 SC X300L 01228A I...

Page 118: ...to the authorized service center EXCLUSIONS WHAT IS NOT COVERED This warranty does not cover damage due to accident fire flood and or other acts of God misuse incorrect line voltage improper installation improper or unauthorized repairs commercial use or damage that occurs in shipping Exterior and interior finish lamps and glass are not covered under this warranty Customer adjustments which are ex...

Page 119: ...e 6 hazardous materials Cadmium Cd Lead Pb Mercury Hg Hexavalent Chromium Cr 6 Poly Brominated Biphenyls PBBs Poly Brominated Diphenyl Ethers PBDEs in our products If you have any questions or comments relating to Samsung products please contact the SAMSUNG customer care center Samsung Electronics America inc 1 800 SAMSUNG 726 7864 www samsung com SC X300L 01228A IB USA 001 007 i2 2 2006 12 13 오전 ...

Reviews: