background image

Maintenance

English

56


Maint

enanc

e

Slim Ice Maker (applicable models only)

NOTE

•  When cleaning the component parts of the Slim Ice Maker such as the 

water bin

ice 

bucket

, and 

ice template

, make sure they are completely dry after cleaning.

•  When cleaning the Slim Ice Maker unit, make sure to completely dry the inner and outer 

parts of the unit after cleaning. Incomplete dryness may cause the ice maker lever to 
fail. In this case, dry the Slim Ice Maker completely for 2-3 days. Then, try again.

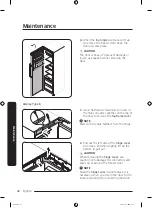
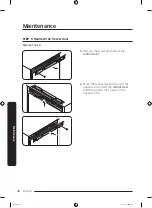
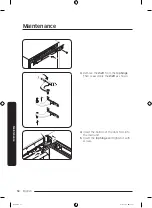
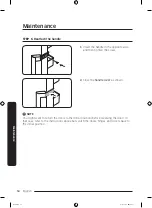
To remove the component parts

Water bin

Fully open the 

water bin

, and then pull out.

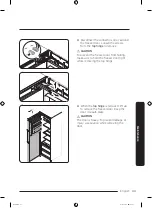
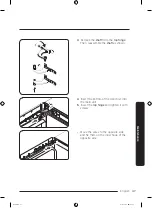
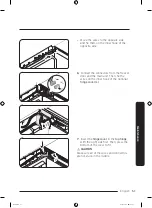
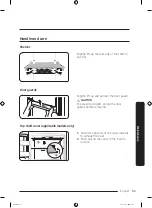
Ice template

1. 

Open the 

ice template cover

 to reveal 

the 

ice template

.

2. 

Slightly pull out the left side of the 

ice 

template

, and then pull out the other 

side to remove.

Untitled-9   56

2021-12-28     3:42:20

Summary of Contents for RZ32M7125SA/EU

Page 1: ...Refrigerator User manual freezer only RZ32 Free Standing Appliance Untitled 9 1 2021 12 28 3 42 12...

Page 2: ...ance is intended to be used in household and similar applications such as 23 Instructions about the WEEE 24 Installation 25 Refrigerator at a glance 25 Step by step installation 26 Operations 31 Featu...

Page 3: ...d from 8 years and above and persons with reduced physical sensory or mental capabilities or lack of experience and knowledge if they have been given supervision or instruction concerning use of the a...

Page 4: ...room must be 1 m in size for every 8 g of R 600a refrigerant inside the appliance The amount of refrigerant in your particular appliance is shown on the identification plate inside the appliance Refri...

Page 5: ...e refrigerator so that it is not in contact with or drip onto other food Two star frozen food compartments are suitable for storing pre frozen food storing or making icecream and making ice cubes One...

Page 6: ...in severe personal injury property damage and or death CAUTION Hazards or unsafe practices that may result in severe personal injury and or property damage NOTE Useful information that helps users un...

Page 7: ...liance contains a small amount of isobutane refrigerant R 600a a natural gas with high environmental compatibility that is however also combustible When transporting and installing the appliance care...

Page 8: ...h or at either end Do not bend the power cord excessively or place heavy objects on it Do not pull or excessively bend the power cord Do not twist or tie the power cord Do not hook the power cord over...

Page 9: ...ed or damaged by the back of the refrigerator Keep the packing materials out of reach of children There is a risk of death from suffocation if a child puts the packing materials on his or her head The...

Page 10: ...c shock Never use gas pipes telephone lines or other potential lightning attractors as an electrical ground You must ground the refrigerator to prevent any power leakages or electric shocks caused by...

Page 11: ...lat surface Keep the ventilation space in the appliance enclosure or mounting structure clear of obstructions Allow the appliance to stand for 2 hours before loading foods after installation and turni...

Page 12: ...o not touch the inside walls of the freezer or products stored in the freezer with wet hands This may cause frostbite Do not put a container filled with water on the refrigerator If spilled there is a...

Page 13: ...nside the refrigerator freezer unless they are of a type recommended by the manufacturer If you smell pharmaceutical or smoke pull out power plug immediately and contact your Samsung Electronics servi...

Page 14: ...rator Do not place a lighted candle in the refrigerator for removing bad odours This may result in an electric shock or fire Do not stand on top of the appliance or place objects such as laundry light...

Page 15: ...esult in explosion or fire Use only the LED Lamps provided by the manufacturer or its service agents Bottles should be stored tightly together so that they do not fall out This product is intended onl...

Page 16: ...ficulty changing a non LED light contact a Samsung service center If the product is equipped with LED lamps do not disassemble the Lamp Covers and LED lamps yourself Contact a Samsung service center P...

Page 17: ...best performance from the product Do not place food too close to the vents at the rear of the refrigerator as this can obstruct free air circulation in the refrigerator compartment Wrap food up prope...

Page 18: ...the air vents are blocked especially with a plastic bag the refrigerator can be over cooled Wipe excess moisture from the inside and leave the doors open Otherwise odor and mold may develop If the re...

Page 19: ...ered the appliance unplug the power plug and contact your nearest service center Failing to do so may result in an electric shock or fire Use a clean dry cloth to remove any foreign matter or dust fro...

Page 20: ...product When disposing of this refrigerator remove the door door seals and door latch so that small children or animals cannot become trapped inside Children should be supervised to ensure that they d...

Page 21: ...o warm in the frozen food compartment if sited for an extended period of time in a location where ambient air temperatures are constantly below the temperatures for which the appliance is designed In...

Page 22: ...to thaw You can then use the low temperatures of the frozen products to cool food in the refrigerator Do not keep the door of the refrigerator open for too long when putting food in or taking food ou...

Page 23: ...ar applications such as staff kitchen areas in shops offices and other working environments farm houses and by clients in hotels motels and other residential type environments bed and breakfast type e...

Page 24: ...ste and recycle them responsibly to promote the sustainable reuse of material resources Household users should contact either the retailer where they purchased this product or their local government o...

Page 25: ...ocal regulations To prevent electric shock unplug the power cord before servicing or replacements Refrigerator at a glance The actual image and provided component parts of the refrigerator may differ...

Page 26: ...ruct ventilation Away from direct sunlight Adequate room for opening and closing the door Away from a heat source Room for maintenance and servicing Temperature range between 10 C and 43 C Clearance S...

Page 27: ...01 02 04 05 06 07 03 01 01 more than 50 mm recommended 02 130 03 377 04 967 05 575 06 5 5 07 1194 unit mm NOTE The measurements in the above table may differ depending on the measuring method Untitled...

Page 28: ...rear wall and save power consumption STEP 3 Flooring The surface to install the refrigerator must support a fully loaded refrigerator To protect the floor put a large piece of cardboard on each foot o...

Page 29: ...e rear side The refrigerator can be levelled using the front legs that have a special screw leveller for levelling purposes Use a flat head screwdriver for levelling To adjust the height of the left s...

Page 30: ...until the refrigerator reaches the set temperature Now the refrigerator is ready for use NOTE When the refrigerator powers on the alarm will sound To turn off the alarm press Freezer STEP 6 Final che...

Page 31: ...English 31 Operations Feature panel TYPE A 01 03 02 04 TYPE B 01 02 03 04 Operations Untitled 9 31 2021 12 28 3 42 14...

Page 32: ...e setting To freeze large amounts of food activate Power Freeze for at least 20 hours before putting food in the freezer NOTE Using Power Freeze increases power consumption Make sure you turn it off a...

Page 33: ...ntry Slim Ice Maker applicable models only 01 02 03 04 05 01 Water bin 02 Ice maker lever 03 Ice bucket 04 Ice template 05 Ice template cover NOTE If you do not intend to make ice remove the Slim Ice...

Page 34: ...encounter a water leak open the water bin and check if the water bin s passage to the ice template is frozen If this is the case pour lukewarm water into the water bin up to the max line Let the pass...

Page 35: ...door open The ice in the ice bucket melts and jams In case of a power failure make sure to empty the ice bucket before making ice Use only potable water NOTE The ice cubes may not dispense at once de...

Page 36: ...pull up the front end of the top shelf cover 2 Then push the cover inwards to the end NOTE To remove or put an item from the freezer you must fold up the top shelf cover first The top shelf cover is...

Page 37: ...igure in the inner bottom of the main unit Then remove the Slim Ice Maker NOTE Removal of the top shelf cover and the drawers does not affect thermal and mechanical characteristics of the freezer A de...

Page 38: ...the reversal You must wait for at least an hour after door reversing is complete This is to prevent electric shock that could occur Tools required not provided Phillips screwdriver Flat head screwdriv...

Page 39: ...ch screw on the upper and lower side of the handle 3 Use a flat head screwdriver to remove the handle screw caps x2 Then insert the handle screw caps in the opposite side CAUTION To prevent physical d...

Page 40: ...the figure of the wire cover with both hands lift up the wire cover 3 Turn the wire cover to the front by 90 degrees and then push up to remove NOTE Keep both the space cover and the wire cover in a...

Page 41: ...aution not to damage the connectors and wires on or around the freezer door NOTE Keep the hinge cover in a safe place It is necessary when you return the door to the initial position before reversing...

Page 42: ...another on the top of the door to remove the top frame cover NOTE Start with the hole farthest from the hinge 2 Pull out the left side of the hinge cover to remove and then slightly lift up the botto...

Page 43: ...ON To prevent the freezer door from falling make sure to hold the freezer door tight while removing the top hinge 4 When the top hinge is removed lift up to remove the freezer door Keep the door in a...

Page 44: ...the auto closer 1 From the freezer door remove the auto closer lever by loosening the screws on the lever and the screws in the opposite side 2 Insert the auto closer lever in the opposite side and ti...

Page 45: ...ve the rear bolt next to the shaft 3 Remove the shaft bolt beneath the bottom hinge 4 Use a Phillips screwdriver to remove the shaft 5 Insert the shaft in the opposite side 6 Reinsert and tighten the...

Page 46: ...tach the freezer door Display Type A 1 Remove the screw and pull out the control cover 2 Move the connectors and wires to the opposite side Insert the control cover and then tighten the screws on the...

Page 47: ...hen reassemble the shaft as shown 4 Insert the bottom of the door first into the main unit 5 Insert the top hinge and tighten it with screws Move the wires to the opposite side and fix them on the inn...

Page 48: ...k of the optional hinge cover L 7 Insert the hinge cover in the top hinge with the right side first Then press the bottom of the cover to fit CAUTION Make sure all of the wires and connectors are not...

Page 49: ...the space cover L into the original position NOTE The appearance of the covers differ with the model Display Type B 1 Remove the screw and pull out the control cover 2 Move the connectors and wires t...

Page 50: ...aintenance 3 Remove the shaft from the top hinge Then reassemble the shaft as shown 4 Insert the bottom of the door first into the main unit 5 Insert the top hinge and tighten it with screws Untitled...

Page 51: ...ors from the freezer door and the main unit Then fix the wires on the inner hook of the optional hinge cover L 7 Insert the hinge cover in the top hinge with the right side first Then press the bottom...

Page 52: ...in the part a diagonally Then slide the end of the cover to the left to lock For models that have the display panel on the top of the freezer push in the left end of the top frame cover then the right...

Page 53: ...the wire cover Turn the cover by 90 degrees to the front and then push down to fit in 10 Insert the space cover L into the original position NOTE The appearance of the covers differ with the model Un...

Page 54: ...de and then tighten the screw 2 Close the handle cover as shown NOTE You might want to return the doors to the initial position before reversing the door In that case refer to the instructions above b...

Page 55: ...guards Slightly lift up and pull out the door guard CAUTION To prevent accidents empty the door guards before removing Top shelf cover applicable models only 1 2 1 Push the right side of the cover in...

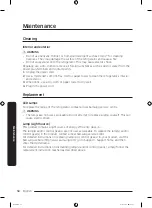
Page 56: ...completely dry the inner and outer parts of the unit after cleaning Incomplete dryness may cause the ice maker lever to fail In this case dry the Slim Ice Maker completely for 2 3 days Then try again...

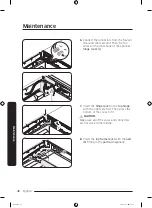
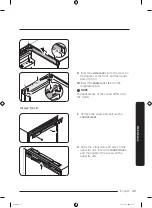
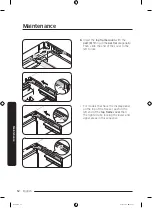
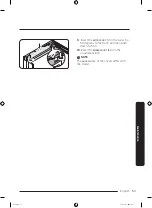
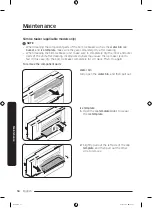
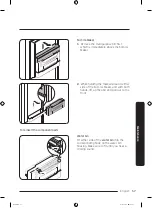
Page 57: ...ding the marked area on either side of the Slim Ice Maker unit with both hands lift up the unit and pull out to the front To reinsert the component parts Water bin Fit either side of the water bin int...

Page 58: ...power cord Replacement LED Lamps To replace the lamps of the refrigerator contact a local Samsung service centre WARNING The lamps are not user serviceable Do not attempt to replace a lamp yourself Th...

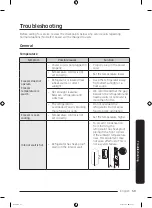
Page 59: ...heat source Not enough clearance between refrigerator and sides rear We recommend that the gap between the refrigerator and nearby walls or cabinets is more than 50 mm The refrigerator is overloaded F...

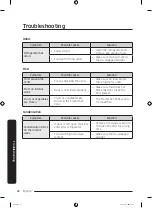
Page 60: ...efrigerator vents Frost on interior walls Door is not closed properly Make sure food does not block the door Clean the door gasket Fruits or vegetables are frozen Fruits or vegetables are stored in th...

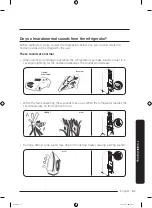
Page 61: ...arting or ending an operation the refrigerator may make sounds similar to a car engine igniting As the operation stabilizes the sounds will decrease Clicking or Chirping Buzzing While the fan is opera...

Page 62: ...s or decreases plastic parts contract and expand creating knocking noises These noises occur during the defrosting cycle or when electronic parts are working Cracking For ice maker models When the wat...

Page 63: ...oduct may not operate properly at temperatures outside of the specific range You can find climate class on label inside of your refrigerator Effective temperature range The refrigerator is designed to...

Page 64: ...ncrease Remember to turn it off when you don t need it and return the freezer to your original temperature setting How to store for best preservation applicable models only Cover foods to retain moist...

Page 65: ...osing its flavour or drying out place in airtight containers Refrigerator Freezer Storage Chart The freshness longevity depends on temperature and exposure to moisture Since product dates aren t a gui...

Page 66: ...ish 3 4 days 1 month Fish salad 1 day Not recommended Dried or pickled fish 3 4 weeks Fruits Product Refrigerator Freezer Apples 1 month Peaches 2 3 weeks Pineapple 1 week Other fresh fruit 3 5 days 9...

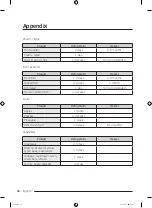
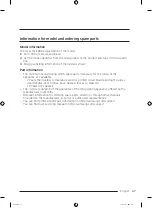
Page 67: ...nce are available 7 Years thermostats temperature sensors printed circuit boards and light sources door handles door hinges trays baskets boxes or drawers 10 Years door gaskets The minimum duration of...

Page 68: ...SAMSUNG customer care center Country Contact Center Web Site SINGAPORE 1800 7267864 1800 SAMSUNG Other 1800 4252997 1800 GALAXYS HHP www samsung com sg support UK 0333 000 0333 www samsung com uk supp...

Reviews: