English - 35
MAINT
AIN
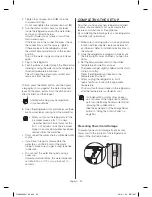
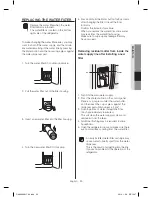
REPLACING THE WATER FILTER
Replace the water filter when the water
filter indicator turns red.
The water filter is located on the bottom
right side of the refrigerator.
To make changing the water filter easier, you may
want to shut off the water supply, and then drain
any water remaining in the water line by pressing
the Water button and then pressing a glass against
the water dispenser pad.
1. Turn the water filter 90˚ counter-clockwise.
LOCK
UN
LO
CK
LO
CK
LOCK
UN
LO
CK
LO
CK
LOCK
UN
LOC
K
LO
CK
LOCK
UN
LO
CK
LO
CK
LOCK
2. Pull the water filter out of the filter housing.
LOCK
UN
LO
CK
LO
CK
LOCK
UN
LO
CK
LO
CK
LOCK
UN
LOC
K
LO
CK
LOCK
UN
LO
CK
LO
CK
LOCK
3. Insert a new water filter into the filter housing.
LOCK
UN
LO
CK
LO
CK
LOCK
UN
LO
CK
LO
CK
LOCK
UN
LOC
K
LO
CK
LOCK
UN
LO
CK
LO
CK
LOCK
4. Turn the new water filter 90˚ clockwise.
LOCK
UN
LO
CK
LO
CK
LOCK
UN
LO
CK
LO
CK
LOCK
UN
LOC
K
LO
CK
LOCK
UN
LO
CK
LO
CK
LOCK
5. Press and hold the Water button for 3 seconds
after changing the filter to reset the filter
indicator.
Confirm the indicator turns blue.
When you replace the water filter, some water
may leak from the water filter housing.
Make sure to wipe up any leakage that may
have occurred.
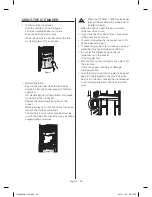
Removing residual matter from inside the
water supply line after installing a new
filter
LOCK
Water
Ice
1. Turn ON the main water supply.
2. Press the Water button on the control panel.
Place a cup or glass under the water outlet,
and then push the cup or glass against the
dispenser pad until you hear a "click".
3. Flush 3 gallons of water through the filter.
(Flush approximately 6 minutes.)
This will clean the water supply system and
remove air from the lines.
4. Additional flushing may be required in some
households.
5. Open the refrigerator door and make sure there
are no water leaks coming from the water filter.
A newly installed water filter cartridge may
cause water to briefly spurt from the water
dispenser.
This is the result of air getting into the line.
It poses no problem to the operation of the
refrigerator.
DA68-02981C-00.indb 35
2014. 1. 28. �� 10:47
Summary of Contents for RS25H5121
Page 39: ...Memo DA68 02981C 00 indb 39 2014 1 28 10 48...
Page 79: ...M mo DA68 02981C 00 indb 39 2014 1 28 10 48...
Page 82: ...DA68 02981C 3 AR indd 39 2014 1 28 10 40 DA68 02981C 00 indb 2 2014 1 28 10 48...
Page 83: ...38 DA68 02981C 3 AR indd 38 2014 1 28 10 40 DA68 02981C 00 indb 3 2014 1 28 10 48...
Page 88: ...33 1 2 3 4 DA68 02981C 3 AR indd 33 2014 1 28 10 40 DA68 02981C 00 indb 8 2014 1 28 10 48...
Page 89: ...32 DA68 02981C 3 AR indd 32 2014 1 28 10 40 DA68 02981C 00 indb 9 2014 1 28 10 48...
Page 92: ...29 DA68 02981C 3 AR indd 29 2014 1 28 10 40 DA68 02981C 00 indb 12 2014 1 28 10 48...
Page 106: ...15 DA68 02981C 3 AR indd 15 2014 1 28 10 39 DA68 02981C 00 indb 26 2014 1 28 10 48...
Page 107: ...14 24 ISO DA68 02981C 3 AR indd 14 2014 1 28 10 39 DA68 02981C 00 indb 27 2014 1 28 10 48...
Page 109: ...12 DA68 02981C 3 AR indd 12 2014 1 28 10 39 DA68 02981C 00 indb 29 2014 1 28 10 48...
Page 110: ...11 DA68 02981C 3 AR indd 11 2014 1 28 10 39 DA68 02981C 00 indb 30 2014 1 28 10 48...
Page 113: ...8 LED LED DA68 02981C 3 AR indd 8 2014 1 28 10 39 DA68 02981C 00 indb 33 2014 1 28 10 48...
Page 114: ...7 DA68 02981C 3 AR indd 7 2014 1 28 10 39 DA68 02981C 00 indb 34 2014 1 28 10 48...
Page 115: ...6 DA68 02981C 3 AR indd 6 2014 1 28 10 39 DA68 02981C 00 indb 35 2014 1 28 10 48...
Page 116: ...5 DA68 02981C 3 AR indd 5 2014 1 28 10 39 DA68 02981C 00 indb 36 2014 1 28 10 48...
Page 117: ...4 DA68 02981C 3 AR indd 4 2014 1 28 10 39 DA68 02981C 00 indb 37 2014 1 28 10 48...
Page 118: ...3 DA68 02981C 3 AR indd 3 2014 1 28 10 39 DA68 02981C 00 indb 38 2014 1 28 10 48...

