background image

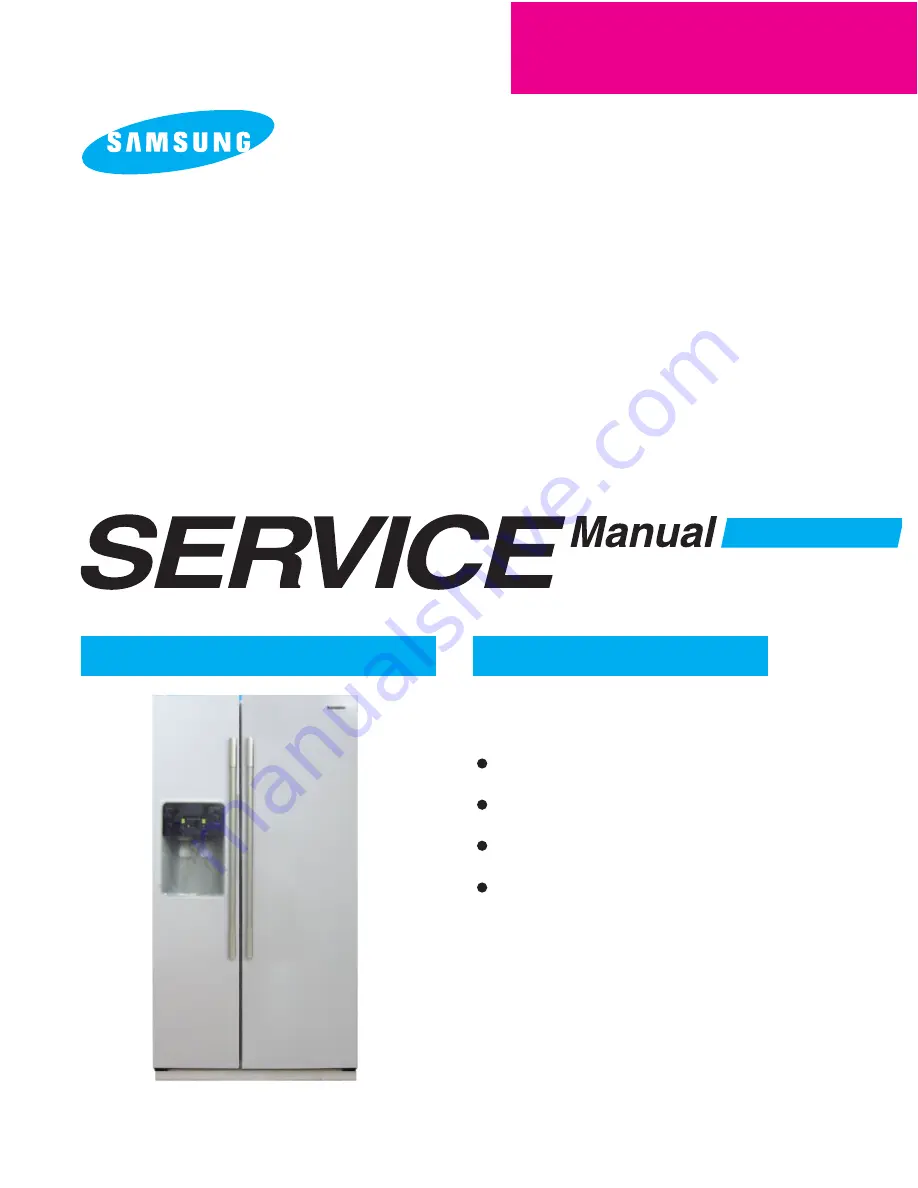
SIDE BY SIDE

MODEL NAME : RS2530B

MODEL CODE : 
RS2530BSH/XA

C


REFRIGERATOR

BASIC : RS2530

REFRIGERATOR

PRODUCT FEATURE

For the latest parts information, Please access to our service web site (http://itself.sec.samsung.co.kr)

Twin X AirFlow

Xtra Space

TM

Door Alarm

Vegetable Crisper

Summary of Contents for RS2530B SERIES

Page 1: ...DEL CODE RS2530BSH XAC REFRIGERATOR BASIC RS2530 REFRIGERATOR PRODUCT FEATURE For the latest parts information Please access to our service web site http itself sec samsung co kr Twin X AirFlow Xtra SpaceTM Door Alarm Vegetable Crisper ...

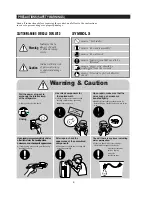
Page 2: ... same as they did before disassembly Check the conditions surrounding the installed refrigerator When the refrigerator is located at humid or wet place or the installed state is unstable change the location If necessary instal a ground conductor This appliance must be properly grounded especially if there is a possibility of electrical leakage Do not allow consumers to use one outlet for several p...

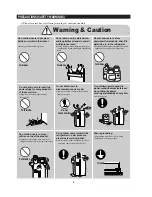
Page 3: ...c shock Warning Warning Caution Caution Unplug Use rated components for the replacement Check for the correct model rated voltage rated current operating temperature and so on Upon repair make sure that the wires such as harness are bundled tightly Bundle wires tightly for them not to be detached by an external force and not to get wet Check if there is any trace indicating water permeation If the...

Page 4: ...uct Opening or closing the door may cause things to fall down witch may cause injury Forbidden Forbidden Forbidden Forbidden Warning Caution Do not allow users to disassemble repair or alter It may cause fire or abnormal operation leading to injury Do not disassemble Do not allow users to insert the power plugs for many products at the same time May cause abnormal generation of heat or fire Forbid...

Page 5: ... 4 1 TEST FORCED OPERATION FORCED DEFROST 27 4 2 RESTORATION OF OPERATION CONDITIONS FOR POWER FAILURE 28 4 3 ALARM 28 4 4 EXHIBITION MODE 28 4 5 SELF DIAGNOSIS 29 4 6 LOAD STATUS DISPLAY 31 4 7 OPTION SETTING 32 4 8 OPTION TABLE 34 ...

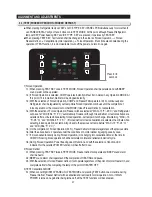
Page 6: ...hough forced defrost or test cancellation are selected after a minute while selecting forced operation set temp will not change Maintaining MAX 13 F 25 C and MID 35 6 F 2 C If forced defrost or test cancellation are selected in a minute while selecting forced operation set temp will go back to the previous set temp before MAX 13 F 25 C and MID 35 6 F 2 C 1 5 On the completion of Forced Operation 2...

Page 7: ... min consecutively as Freezer Refrigerator DOOR opened SOUND alarm Ding Dong shall be heard 2 2 If the door is still open afterward sound alarm will be circulated to SOUND Ding Dong generating movement at the interval of a min 2 3 Alarm stops when Freezer Refrigerators are all closed 1 In the case of instant power failure and initialization of PANEL DISPLAY these can make customer s NON SENSE CALL...

Page 8: ...LTER RESET KEY LIGHT KEY for 8 sec it will be canceled automatically 2 Self diagnosis during normal operation 2 1 When pressing ICE TYPE and FILTER RESET LIGHT KEYS simultaneously for 6 sec in normal operation of the fridge temp set DISPLAY will be All ON OFF for 2 sec at the interval of 0 5 sec and when pressing ICE TYPE and FILTER RESET LIGHT KEYS simultaneously for 8 sec including TOGGLE for 2 ...

Page 9: ...all out Deforst SENSOR HOUSING in the evaporator of Freezer contact facilure breakge of wire short circuit inferior sensor and others Indicating a defect when the temp sensing of Freezer Defrost SENOSR is above 149 F 65 C and below 58 F 50 C The voltage should be within the range of 4 7V 0 6V between MAIN PCB CN30 4 and 6 Freezer Defrost ERROR 5 Freezer MIN Fall out Freezer Heater Housing contact ...

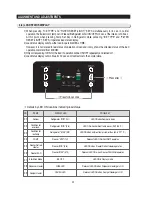
Page 10: ... for 30 sec and it will restore to the normal state ALIGNMENT AND ADJUSTMENTS 4 6 LOAD STATUS DISPLAY Press after NO ITEMS DISPLAY LED PROBLEM 01 02 03 04 05 06 07 08 09 Damper Condition for over load Condition for low temp COMP Freezer Defrost Heater Freezer FAN Exhibition Mode Dispenser Heater Damper Heater Refrigerator MIN 1 st Refrigerator MID 3 rd Refrigerator MAX 5 th Freezer MIN 1 st Freeze...

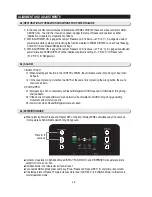
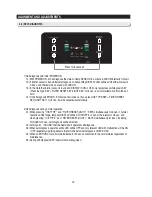
Page 11: ...26 6 F 3 C means that it is controlled by 26 6 F 3 C increase than the temp set on the display panel 1 1 As shown in the draft press the Freezer button and the FILTER RESET BUTTON OR LIGHTING BUTTON for 12 seconds simultaneously Except the Freezer the Fridge LEDs all LEDs will be turned off 1 2 When it is changed to the option mode all of the OPTION CATEGORY I1 I5 and the OPTION SETTING V1 V4 will...

Page 12: ...r button and the Ice Type button respectively 1 5 The option function will be set in the EEPROM before shipment so do not change the setting except special cases For the option function the setting will be completed when it is reverted to the normal display in 20 seconds So do not turn off the power before it is reverted to the normal display 1 6 Make sure to set the OPTION CATE I1 I5 first and th...

Page 13: ...V2 V3 V4 0 1 2 3 4 5 6 7 0 F 0 C 0 9 F 0 5 C 1 8 F 1 0 C 2 7 F 1 5 C 3 6 F 2 0 C 4 5 F 2 5 C 5 4 F 3 0 C 6 3 F 3 5 C 8 9 10 11 12 13 14 15 0 9 F 0 5 C 1 8 F 1 0 C 2 7 F 1 5 C 3 6 F 2 0 C 4 5 F 2 5 C 5 4 F 3 0 C 6 3 F 3 5 C 7 2 F 4 0 C SET VALUE Option Value COMMON VALUE V1 V2 V3 V4 Freezer TEMP SHIFT AD PJT SET ITEM MODEL SET VALUE Option Value COMMON DISPLAY Option Item VALUE I1 I2 I3 I4 I5 1 VAL...

Page 14: ...ONS INSTALLATION 3 1 DISPLAY DESIGN 17 3 2 TEMP CONTROL 17 3 3 POWER FREEZING 18 3 4 CHILD LOCK 18 3 5 ICE DISPENSER WATER DISPENSER 19 3 6 FAN MOTOR DELAY COMPRESSOR ROOM 20 3 7 ICE MAKER 20 3 8 DEFROST 24 3 9 INSTALLATION 25 ...

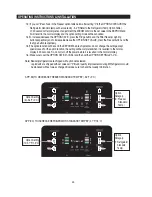
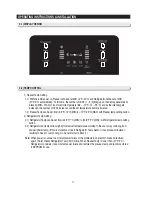
Page 15: ...frigerator Temp Setting 2 1 Refrigerator Temp can be set from 44 6 F 7 C MIN to 33 8 F 1 C MAX with Refrigerator temp setting button 2 2 Refrigerator set temp varies slightly from actual temperature according to the user s way of storing food and peripheral temp If food is stored too close to Refrigerator Temp Sensor it can block air circulation resulting in weak or over cooling So be careful not ...

Page 16: ...lly and Freezer operates according to the set temp 1 5 When it becomes conditions for Defrost during Power Freeze Defrost gets delayed and it starts operating upon completion of Power Freeze When Power Freeze is selected during Defrost Power Freeze ICON lights up immediately But Comp and Freezer Fan gets on upon completion of Defrost But the initial 4hr Defrost comes before Power Freeze When Child...

Page 17: ... a certain period 3sec after changing Filter FILTER INDICATOR LED becomes green with Ding Dong sound When FILTER RESET is pressed water count is reset to 0 When the filter is replaced reset the indicator by pressing the FILTER RESET button for 3 second at the same time 2 3 After Filter reset when 270 Gallon water is used including water used in making ice FILTER INDICATOR LED becomes orange and wh...

Page 18: ... the Motor Voltage Sensor becomes above 0 55V during counter rotation of the Eject Motor the counter rotation stops When it is not detected that the Motor Voltage Sensor becomes more than 0 55V for a minute after the counter rotation it is considered as an error and initialization gets started again in an hour It stands by for the initial Ejection for a cycle 2 hours after completion of initializi...

Page 19: ...initial water supplying quit the water supply movement If the number of the previous water supply is three times supply water for 3 times and when judged as No Water Supply quit the water supplying movement In this case the Ejection Stand By Time is 70 110 min When judged as No Water Supply in the previous water supply supply water for 5 sec 1 5sec 1sec and 2 sec for 4 times According to condition...

Page 20: ...of the ice maker sensor is satisfied 3 4 As long as the temp of the temp sensing part maintains below 1 4 F 17 C for more than 5 min the Ejection will be carried out If the temp fluctuates below 1 4 F 17 C above 1 4 F 17 C the Ejection will be carried out after 5 min at the temp below 1 4 F 17 C while counting the Stand by Time entering the temp below 1 4 F 17 C Low water pressure 5s 5s 1 5s 5s 1 ...

Page 21: ...tation or until the horizontal S W is ON Low after 5 sec from the beginning of the third step when using horizontal S W If the door of the F Room is open stop the clockwise rotation and start the rotation after the door is closed During the temporary pause the clockwise rotation will not be counted 4th step Ice separating step Standby for 2 sec at the maximum twist point It is the movement to twis...

Page 22: ...imes with the normal function and the ice making stops the ICE TEST shall operate At this point if the normal Ejection and Water Supply are operated by the TEST S W there would be Ding Dong sound for once before the Water Supply and the third ERROR MODE will be cancelled executing the normal ice making 1 Freezer Defrost shall be determined by COMP ON total hour 2 On the initial POWER ON Defrost in...

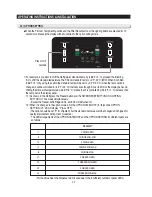
Page 23: ...ve all protective tape and pad in refrigerators Connect water lines and power cord Adjust the clearance between the doors 3 Set the temperature control to the temperature and wait for an hour The refrigerator should get slightly chilled and the motor runs smoothly 4 Once the refrigerator temperature is sufficiently low You can store food in the refrigerator After starting the refrigerator it takes...

Page 24: ...ntroduction of main function 8 2 2 Comparison of Design Change 9 2 3 Model Specification Comparison Chart 10 2 4 Model Specification 11 2 5 Electric Parts Specification 12 2 6 Dimensions Inch 14 2 7 Optional Material Specifications 15 ...

Page 25: ...vents on every shelf level This provides even distribution of cooling inside cabinets to keep your food fresh longer Xtra SpaceTM Vertical room next to the ice maker in the freezer provides space for pizza etc Door Alarm Beep sound reminds you the door is open Vegetable Crisper Optimized humidity control keeps vegetables fruits fresh 2 1 Introduction of main function ...

Page 26: ...ntrol type Compartment Lighting 30W Handle Design A Top Long Bar plastic Freezer Compartment Basket Type Wire Basket Flat door plate Cover Hinge Type Exposed type New Design Dispenser Display Flat control type Compartment Lighting 40W New Handle Design Al oval half bar Freezer Compartment Basket Type Plastic Box Contour door plate Cover Hinge Type Hidden type 9 ...

Page 27: ...10 2 3 Model Specification Comparison Chart PRODUCT SPECIFICATIONS ...

Page 28: ...D H H Rated Voltage and Frequency Rated Input Electric Heater Rated Power Consumption Refrigerator Type Refrigerant Refrigerant Input Amount Product Weight Item Specification NetCapacity Total Fridge Freezer M Mo od de el l 24 8 Cu Ft 15 5 Cu Ft 9 3 Cu Ft before packing 291 Ib after packing 326 Ib 115V 60 3 9A 310W Dispenser without beverage station RS2530B ...

Page 29: ...mponents Room Temperature Sensor Components Defrost Related Components Freezer Refrigerator Defrost Cycle Defrost Cycle Model SPEC F Defrost Sensor Bimetal Operating temperature FirstDefrostCycle ConcurrentdefrostofFandR Defrost Cycle FRE Pause time Condenser Dryer Refrigerant Capillary tube THERMISTOR F SENSOR 502AT Temperature Selection 24 20 14 1 3 7 COLD NORMAL WARM COLD NORMAL WARM Temperatur...

Page 30: ...denser for COMP Package type Running Starting Model Operation Model Temp ON Temp OFF Starting Relay Over load Relay 250VAC 12μ F J531Q32E4R7M18 4 7Ω 20 4TM445PHBZZ 53 125 5 69 5 115V 60Hz IS 27210SND6A DC12V IS 27210SCD6A AC125V 40W 1 A15 AC125V 40W 1 A15 AC125V 1 5A 2 AC125V 1 5A BSBN BRASS SCREW Bimetal Rated Voltage MOTOR AC FAN MOTOR DAMPER MOTOR AC CIRCUIT Lamp FRE Lamp REF Door Switch Power ...

Page 31: ...14 PRODUCT SPECIFICATIONS 35 9 45 8 16 3 21 2 50 7 20 3 29 5 34 8 28 9 3 15 3 1 3 4 3 70 68 7 32 3 2 6 Dimensions Inches ...

Page 32: ... SPECIFICATIONS 2 7 Optional Material Specifications Photographe Part Name FILTER WATER ASSY DA29 00003B ASSY PACKING SUB DA99 00240A LAMP INCANDENT 4713 001206 Fridge 1pcs Freezer 1pcs 120V 40W Part Code Remarks ...

Page 33: ... DAMPER IN THE REFRIGERATOR 40 5 13 TWIN COOL IN THE REFRIGERATOR 41 5 14 REFRIGERATOR THERMISTOR 41 5 15 DOOR BIN IN FREEZER 41 5 16 FREEZER DOOR LIGHT SWITCH 41 5 17 PLASTIC DRAWER IN FREEZER 42 5 18 FREEZER SHELF 42 5 19 ICE DISPENSER ICE MAKER 42 5 20 ICE MAKER KIT 43 5 21 ICEMAKER THERMISTOR 43 5 22 AUGER MOTOR CASE 43 5 23 FREEZER LIGHT 44 5 24 EVAPORATOR COVER IN THE FREEZER 44 5 25 EVAPORA...

Page 34: ...losed remove the upper hinge cover along the arrow using a screwdriver and then disconnect the wires 2 Remove hinge screws and ground screw counter clockwise and take off the upper hinge along the arrow Take care when removing the door to ensure that it does not fall on you 3 Remove the door from the lower hinge by carefully lifting the door Be careful not to pinch the water tubing and the wire ha...

Page 35: ...hen removing the door to ensure that it does not fall on you 3 Remove the door from the lower hinge by lifting the door 4 Remove the lower hinge from the bracket by lifting the lower hinge in the direction of the arrow How To Do Be careful not to scratch Caution Be careful not to scratch Caution When diassembling make sure the unit turned off Caution 5 3 DOOR GASKET Part name Door Gasket Descripti...

Page 36: ...Lift the handle upward motion with on Be careful not to scratch Caution 5 5 CONTROL PANEL Part name Control Panel Descriptive Picture 1 Unscrew the screw is located in the lower portion of the display 2 Insert a flat blade screwdriver on the slot as shown and unlock the tabs 3 Disconnect the wire connector How To Do Be careful not to scratch When diassembling make sure the unit turned off Caution ...

Page 37: ...s far as it goes 2 Lift it up and remove it How To Do DISASSEMBLY AND REASSEMBLY 5 8 REFRIGERATOR LIGHT Part name Refrigerator Light Descriptive Picture The refrigerator light is located in the upper portion of refrigerator 1 Place a flat screwdriver under the light cover hooks and remove it pusing in the direction of the arrow 2 Replace the bulb with a new one How To Do 5 7 GALLON DOOR BIN REFRIG...

Page 38: ...he ice maker and the water dispenser 1 Remove the Deli Bin by holding the handle pulling it out and then lifting up the back side of the Deli Bin bottom smoothly with the other hand 2 Turn the water filter 1 2 turn counterclockwise and pull it down 3 To install the filter align the indication mark unlock position and push it up while turning 1 2 turn clockwise until the lock position is aligned Do...

Page 39: ...or is visible 2 Disconnect the wire connector and remove the switch 5 16 FREEZER DOOR LIGHT SWITCH Part name Door Bin In Freezer How To Do Descriptive Picture The door bins allow storage of perishable items 1 Push the bin up and slide it out 5 15 DOOR BIN IN FREEZER 5 14 REFRIGERATOR THERMISTOR Part name Refrigerator Thermistor Descriptive Picture The refrigerator thermistor is located inside of t...

Page 40: ...WER IN FREEZER Part name Freezer Shelf How To Do 5 18 FREEZER SHELF Descriptive Picture The shelves slide out for easy access for frozen items 1 Slide the shelf out until it reaches its stop 2 Tilt down and slide it out of the compartment Part name Ice Dispenser Ice Maker How To Do Descriptive Picture The ice dispenser is located in the upper portion of the freezer This assembly stores ice made by...

Page 41: ... maker in 5 Tighten the screws 2 of the ice maker support 5 20 ICE MAKER KIT WIRE CONNECTOR SUPPORT OF ICE MAKER FRONT OF ICE TRAY GEARED MOTOR SHAFT FRONT LOCKING TAB TAB HOLES ICE MAKER KIT LOCKING TAB Part name Ice Maker Thermistor How To Do Descriptive Picture The Ice Maker thermistor is located in its bottom The temperature signal sends the micro processor 5 21 ICEMAKER THERMISTOR Thermistor ...

Page 42: ... screw 2 of assy cover supt motor fre 2 Remover four screws of assy cover supt motor fre 3 Remove the assy cover supt motort fre by pulling it 4 Remove screw of the assy cover multi fre and disconnect the wires 5 Remove assy cover multi fre by pulling it 6 Remove two screws of the cover evap front 7 Pull the cover evap front Be careful of injury ASSY COVER MULTI FRE ASSY COVER SUPT MOTOR FRE COVER...

Page 43: ...fan spring and than remove fan and protector motor 2 Remove screw located at the four corners of the fan bracket 3 Take the fan motor assembly off Part name Evaporator In Freezer How To Do Descriptive Picture Evaporator is located in the bottom of freezer to produce cold air driven across the evaporator coils 1 Take off the ductwork in Freezer 2 Disconnect the wire connector Heater Bimental and Th...

Page 44: ...lide up and take off the compressor cover to see the machine compartment 4 Remove screw 2 on the cover When the solenoids receive a signal from the microprocessor they supply water to the water dispenser or the ice maker 1 Remove bracket screw on cabinet 2 Take the solenoids assembly out 3 Disconnect water tubes 5 28 MACHINE COMPARTMENT ELECTRIC BOX When diassembling make sure the unit turned off ...

Page 45: ...nd the compressor 1 Lift up the rib under the support motor 2 Pull the support motor 5 29 MACHINE COMPARTMENT ELECTRIC BOX Condenser The condenser is located in the machine compartment The heat is extracted by condenser fan 1 Desolder the compressor discharge the condenser outlet 2 Take out the condenser If you want to aseemble follow the reverse order Be careful of injury Caution ...

Page 46: ...es not operate 52 6 4 When FAN DAMPER does not operate 53 6 5 When Defrost does not operate 56 6 6 When Alarm Sound continues without stop 59 6 7 When Room Lamp does not light up 60 6 8 Dispenser Lamp Malfunction 61 6 9 When Water Valve Does Not Operate 62 6 10 When Crush Crushed Ice Cube Cubed Ice does not operate well 63 ...

Page 47: ...eferring to the followings Is Power of primery DC TRANS applied Start NO Change DC TRANS Is Power of secondary DC TRANS applied NO PCB REG101 Change PCB Change Is 12V terminal normal NO Change PCB REG102 Change PCB Is 5V terminal normal NO Do repairing Are wire connections of PANEL PCB normal NO Change PANEL PCB Is PANEL PCB normal NO YES YES YES YES YES YES Change MAIN PCB ASS Y Pre Check ...

Page 48: ... of Ambient Sensor of MAIN PCB Connector CN31 normal 1 4 NO YES Checksolderingfault short LeadTouch Is MICOM Pin 54 input voltage normal NO 0 5V Measuredvalue 0 5V Measured value 4 5V YES Check Main Panel PCB again Change ChangeTempSensor Is Refrigerator Temp Sensor normal Start NO YES Connectorcontacttrouble re insertion Is the insertion of MAIN PCB connector CN30 normal NO YES Shortbetweenconnec...

Page 49: ...olderingfault short LeadTouch Is MICOM Pin 57 input voltage normal NO YES Change MAIN PCB ChangeDefrostSensor Is Defrost Sensor normal Start NO YES Connectorcontacttrouble re insertion Is MAIN PCB CN30 insertion normal NO YES ShortbetweenconnectorSensors Is the connection wire between MAIN PCB connector CN30 and Defrost Sensor blue normal NO YES Checksolderingfault short LeadTouch Is MICOM Pin 58 ...

Page 50: ...MAIN PCB picks up theTemp as a desired level Is Forced Operation on Start NO Soldering checkout Change MICOM or PCB Is the MICOM 29 output HIGH 5V NO Change or repair IC3 Change PCB Is the IC3 15 LOW NO Change or repair RELAY Change PCB Is COMP RELAY normal NO Insert Connector completely Check its connection Is contact of CONNECTOR CN71 13contact normal NO Change repair COMP Does COMP ASS Y Functi...

Page 51: ...ON condition 1 When Freezer FAN F FAN does not operate StartForcedOperation Is it during Forced Operation Start NO YES NormalF FAN Does Fan operate with DOOR S W presses YES YES ChangeDOORS W Is DOOR S W normal NO YES Checksoldering ChangePCB Is voltage of MICOM 49 normal NO YES Re insertConnectorCN71 Is insertion of CN71 W BLUE of MAIN PCB normal NO YES Checksoldering ChangePCB Is voltage of MICO...

Page 52: ... YES DAMPERisnormal Does DAMPER operates with DOOR S W pressed YES NO ChangeDOORS W Is DOOR S W normal NO YES Checksoldering ChangePCB Is voltage of MICOM 50 normal NO YES CheckConnectorCN75 again Is insertion of CN75 of MAIN PCB normal NO YES Checksoldering ChangePCB Are voltage of MICOM Pin 44 45 46 outputed NO YES ChangeDAMPER Is DAMPER normal NO YES Check wire assembly and connections between ...

Page 53: ...hange PCB Is RELAY RY77 normal NO Check contact of Connector CN71 again Is contact of Connector CN71 ORANGE normal NO YES YES YES YES YES YES Check wire assembled status of FAN MOTOR 3 When Comp Cooling Fan does not operate Comp Fan DELAY Higher than 64 4 F 18 C Comp Fan operates immediately upon COMP ON Lower than 53 6 F 12 C Comp Fan gets off regardless of COMP Ambient Temp Range Load Operation ...

Page 54: ...erminated and COMP will remain off following the Temp FUSE short off The fault can be picked up with self diagnosis POWER ON OFF MaintainForcedOperationfora certaintime Dose Defrost work upon Forced Defrost KEY pushed Is concerned Defrost Sensor Temp higher than 12 C Start NO NO YES YES Is power supplied to Defrost Heater YES NO Checksoldering ChangePCB Is MICOM 30 HIGH 5V NO YES CheckIC3 ChangePC...

Page 55: ... Appendix TABLE Normal Does the Function return to the normal after Heating YES NO ChangeconcernedSensor Is each concerned Defrost Sensor Temp higher than the terminated Temp Is the input voltage of MICOM 58 higher than the voltage upon the terminated Temp NO YES YES ChangeTemppick uppart ChangePCB NO Change PCB A ...

Page 56: ...0a In this case even though Door gets opened Room Lamp does not comes ON 1 When Ding Dong sound continues Start Change PCB Check ON OFF again Note ContacttroubleofConnector Insertitagain Is insertion of MAIN PCB Connector CN30 normal YES NO RepairDOORS W pressingpart Does DOOR S W come in out well YES NO CheckwireofDOORSWITCH Is voltage of MICOM 49 50 according DOOR SWITCH ON OFF YES NO 2 When Bee...

Page 57: ...mal NO YES Re insertPANELPCBConnector Checkcontacts Is inssertion of PANEL PCB Connector normal NO YES Re assemblePANELPCBCOVER Is there any pressed KEY NO YES Change PANEL PCB 4 When PANEL PCB KEY is not selected 3 When PANEL PCB doesn t light up CheckREG101parts ChangePCB Is MAIN PCB 12V normal REG101 Start NO YES Re insertConnector Checkcontacts Is Connector of Upper Hinge Cover inserted well N...

Page 58: ... do not light up Start NORMAL Note DOOROPEN Is Door Open YES NO Replace or troubleshoot the DOOR S W Is DOOR SWITCH NORMAL YES NO Replace LAMP Is Room LAMP R F NORMAL YES NO Troubleshoot WIRE HARNESS Is the voltage 12V on LAMP RELAY Coil of PBA SUB in CASE PBA PANEL when you open the door YES NO Replace PBA SUB Is the LAMP RELAY of PBA SUB in CASE PBA PANEL On when you open the door YES NO ...

Page 59: ...1 have right voltage output YES NO Connectorcheck repair Does panel PCB CN2 connector connected well YES NO Connectorcheck MainPCB change MainPCBCN50and PanelPCBCN1connectioncheck Does Panel PCB F room R room temperature display work well YES NO CHECK METHOD Separate the switch and check the resistance with teste When S W is selected or stands by 0 Ω or Ω is pick up 1 Only 0 Ω is pick up S W SHORT...

Page 60: ... Connector contact defect 3 Check Connection Hose defect Pre Check Normal checkthe watervalvehose Is valve operation confirmation sound heard when Water S W pushed NO YES Solderingshort check PCBchange Does Main PCB MICOM 21 have high 5V output YES NO Solderingshort check PCBchange Does Main PCB MICOM 11 have low 0V output YES NO Solderingshort check PCBchange Is the contact point of main PCB RELA...

Page 61: ...ector NO NO NO Crush Does Cube Ice come out upon extracting Normal operation YES NO Is PANEL PCB Cube selected Select Cube NO Is it in Cube MOTOR Cube Check WIRE Check MOTOR NO Is DISPENSER ICE S W selected Select DISPENSER ICE S W NO Is Input Vac outputted at MAIN PCB CN70 CN71 Check WIRE Faulty MAIN PCB Change YES YES YES NO YES YES YES YES CUBE MAIN PCB Normal Check other parts Check wires betw...

Page 62: ...11 CIRCUIT DIAGRAM 81 ...

Page 63: ...IT 84 12 3 RESET CIRCUIT 84 12 4 EEPROM DETECTION CIRCUIT 84 12 5 DOOR SWITCH DETECTON CIRCUIT 85 12 6 TEMP SENSING CIRCUIT 86 12 7 DAMPER CIRCUIT 88 12 8 DISPLAY Circuit 89 12 9 Load Control Circuit 90 12 10 ICE MAKER OPERATION CIRCUIT 92 12 11 OPTION Circuit 93 ...

Page 64: ...r is applied currents will be rectified via B and DC360V will be generated at the both terminals of the capacitor C001 The Top Switch TNY268P will be automatically switched to the optimum state according to the secondary load conditions When currents flow between Top S W D and S 5PIN 7PIN there will be currents generated i n the TRANS and the currents i nduced to the TRANS upon power off between D...

Page 65: ...ts and when specifications for Resonator change the timing system of MICOM changes resulting in errors Rated parts must be used Terminal Oscillation Frequency Xin 19 Xout 18 8 0MHz 8 0MHz 12 3 RESET CIRCUIT RESET Circuit allows the whole program to go back to the initial setting by initializing parts such as the RAM in MICOM with the power supply into MICOM or with an instant power failure Upon th...

Page 66: ... which is recognized as door is opened and turn off the fan at different load When the door is closed the voltage goes out from R402 to Switch the MICOM is applied with OV and the door is recognized as closed 3 Q401 is the circuit to turn off the auger motor operation when the door is opened If the door is closed Vcc voltage of R402 works as ground via door switch OV is applied to the base of Q401...

Page 67: ... versa R302 4 6 9 and C301 C303 C305 are parts for noise prevention but they are not related to temp sensing characteristics 2 If Vf is the incoming voltage to MICOM in case of F Sensor Vf equals Rth Vcc R301 Rth Where Rth is resistance of THERMISTOR corresponding to Temp Please refer to the Appendix Temp to Sensor Resistance Voltage conversion table Temp to MICOM Terminal Voltage included on A S ...

Page 68: ... 3 501 3 453 3 405 3 356 3 307 3 258 3 208 3 158 3 107 3 057 3 006 2 955 2 904 2 853 2 802 2 751 2 7 2 649 2 599 2 548 2 498 2 449 2 399 2 35 2 301 Temp 12 C 53 6 F 13 C 55 4 F 14 C 57 2 F 15 C 59 0 F 16 C 60 8 F 17 C 62 6 F 18 C 64 4 F 19 C 66 2 F 20 C 68 0 F 21 C 69 8 F 22 C 71 6 F 23 C 73 4 F 24 C 75 2 F 25 C 77 0 F 26 C 78 8 F 27 C 80 6 F 28 C 82 4 F 29 C 84 2 F 30 C 86 0 F 31 C 87 8 F 32 C 89...

Page 69: ...al is provided to TA7774P from Micom send combined signal to Quad Polar step motor to rotate on certain direction This makes clockwise or counter clockwise rotation to make the damper open or close 3 Since the damper always touches the cold air DC 12V 1W heater is installed always on to prevent the malfunction from moisture and is controlled on conditions Operation conditions can be changed Micon ...

Page 70: ... provided to power frequency When the switch is pressed R502 6 8 and R501 12 decrease the signal and less than 5 1V peak to peak signal is provided to MICOM the MICOM recognizes the grid 6 is provided and change the function corresponding to switch key Refer the circuit diagram below CIRCUIT DESCRIPTION ...

Page 71: ...f IC5 KID65783AP or TD62783AP Output wave always goes through LED input terminal with DC11 12V on every period At this time if SINK signal comes out at IC4 DC11 12V is applied to LED input terminal and output terminal sinks to OV which turn on LED for 2ms For example to turn on Power Fre LED IC4 16 pin sinks to 0V when IC5 16 becomes DC 11 12V making Power Fre LED turn on GRID WAVE PATTERN 12 9 Lo...

Page 72: ... and goes into the ground While current flows to the coil the magnetic power arise it turns on the secondary contact point inside of RY75 and operates when the AC power is supplied to the both side of comp When MICOM 29 Pin becomes Low 0V IC3 4 Pin becomes Low which makes Power cut and current of RY75 RELAY cut So secondary contact becomes off due to magnetic field cut which makes Comp off 4 All o...

Page 73: ... 11 output port of IC4 gets on and the current flows into Ground making motor rotates This motor rotates the gear and rotates the ejection tray The tray twists to separate the ice from the tray and return to the horizontal state 3 For restoration motor stops for 2 seconds when the ejection is completed and to rotate in opposite direction output horizontal MICOM port with high and perform horizonta...

Page 74: ...ned on after the modification Refer to the table below the default factory values are highly recommended unless exceptional cases OP11 OP12 OP11 OP12 MODEL RS2 11 RS2 21 RS2 31 FUNTION No Cruch 3 Step Light Cruch 3 Step Light Cruch 5 Step P F L T Lock Filter Indicator D601 D602 Fill Time 5 Sec 6 Sec 7 Sec 10 Sec Remark Flow Sensor Not USE Jumper USE OP2 Water Fill Time Cantrol Option Diode 1N4148 ...

Page 75: ...Display Control Part 4 Ice Maker Control Part 5 Temp Sensor Door Switch Sensing Part 6 EXT Sensor Ice Water Switch Sensing Part 7 DC Power Supply Part 8 Motor Damper Control Part 9 EEPORM Part 10 Buzzer Control Part 9 PCB DIAGRAM 9 1 PART ARRANGEMENT Main Board 78 ...

Page 76: ...PCB DIAGRAM 9 2 SUB PCB CONNECTOR CONFIGURATION 79 ...

Page 77: ...Display Control Part 4 Ice Maker Control Part 5 Temp Sensor Door Switch Sensing Part 6 EXT Sensor Ice Water Switch Sensing Part 7 DC Power Supply Part 8 Motor Damper Control Part 9 EEPORM Part 10 Buzzer Control Part 9 PCB DIAGRAM 9 1 PART ARRANGEMENT Main Board 78 ...

Page 78: ...PCB DIAGRAM 9 2 SUB PCB CONNECTOR CONFIGURATION 79 ...

Page 79: ... WIRESHORT COIL WIRECUT COIL WIRESHORT COIL WIRECUT COIL WIRESHORT COIL WIRECUT COIL WIRESHORT COIL WIRECUT MOTOR WIRESHORTMOTOR WIRECUTOR HOUSINGSLIPPEDAWAY MOTOR WIRESHORT MOTOR WIRECUTORHOUSINGSLIPPEDAWAY WATER VALVE ICE MAKER CN70 CN71 0Ω Ω WATER VALVE DISPENSER CN70 CN71 0Ω Ω AUGER MOTOR CN70 CN71 0Ω Ω CUBE SOLENOID CN70 CN71 0Ω Ω COMP FAN MOTOR CN71 0Ω Ω F FAN MOTOR CN71 0Ω Ω Turn off Power ...

Page 80: ...CUIT RY74NOCONTACTOPEN FAULTYDRIVINGCIRCUIT RY79NOCONTACTOPEN FAULTYDRIVINGCIRCUIT RY77NOCONTACTOPEN FAULTYDRIVINGCIRCUIT RY71NOCONTACTOPEN FAULTYDRIVINGCIRCUIT RY72NOCONTACTOPEN FAULTYDRIVINGCIRCUIT Turn on Power and check status of Relay Driving Circuit by checking followings according to load operation RY75 SV CN71 CN70 RY73 RY74 SV CN71 CN70 RY74 0V CN71 CN70 RY73 RY74 0V CN71 CN70 RY74 0V CN7...

Page 81: ...change so check it when asking for parts Reference 13 3 SERVICE PARTS LIST FOR CIRCUIT CODE NO 1 2 3 4 PBA MAIN PBA PANEL TRANS DC SENSOR DA41 00219K DA41 00406A DA26 00022A DA32 00006D DA32 00006D DA32 00006B DA32 10108B PBA PANEL IN ELECTRONIC ELECTRONIC 115V 60Hz DEF SENSOR F SENSOR R SENSOR ICE MAKER SENSOR AMBIENT SENSOR ...

Page 82: ...specifications for initial development 11 VALUE 21 GOOD 31 BETTER SAMSUNG 30 BEST BUY 30A BBY 06 M C Improvement Brightness Appearance 30B Contour Door Application 40 ENERGY STAR V W X Y Z Other Area COLOR WW WHITE PCM SH STAINLESS PLATINUM DOOR STAINLESS PLATINUM CABI STAINLESS PLATINUM SW SNOW WHITE SL NOBLE STAINLESS Buyer Code XAA XAC CUR Label Location ...

Page 83: ...America Compressor oil Freol α 15 Capillary tube Dia Length 0 033 130 Dryer Molecular Sieve XH 9 Clearance must be provided for air circulation AT TOP 1 2 2 5 5c cm m AT SIDES 1 8 0 0 3 3c cm m AT REAR 1 2 2 5 5c cm m RS2530B PBA MAIN DA41 00219K PBA PANEL DA41 00406A TRANS DC 115V 60Hz DA26 00022A SENSOR DEF SENSOR DA32 00006D SENSOR F SENSOR DA32 00006D SENSOR R SENSOR DA32 00006B SENSOR ICE MAK...

Page 84: ...t corners of the refrigerator to dissipate heat generated during the refrigeration process Condensation can occur when you leave the door open for a long time Did you stop the ice making function Is there any ice in the storage unit Is the water pipe connected and the shut off valve open Is the freezer temperature too warm Did you wait for 12 hours after installation of the water supply line befor...

Page 85: ...ed in chute Supply line or shutoff valve is clogged Water filter clogged Dispenser is LOCKED Replace filter cartridge with new cartridge or with plug Check to see if package is holding door open See about the controls This is normal Turn on icemaker or water supply Remove cubes and move the feeler arm to the ON position Break up with fingertip pressure and discard remaining clumps Freezer may be t...

Page 86: ...ary Tube Evaporator Suction Pipe Compressor Capillary Tube Accumulator Evaporator Suction Pipe Dryer Muffler Condenser Hot Pipe Hot Pipe Compressor 17 Refrigeration Cycle and Cool Air Circulation Route 17 1 Refrigerant Route in Refrigeration cycle ...

Page 87: ...102 Refrigeration Cycle and Cool Air Circulation Route 17 2 Cool Air Circulation Freezer Refrigerator ...

Page 88: ...bi metal Defrost on for over 80 minutes 8 PANTRY DAMPER HEATER ERROR Sensor system in Pantry Room errors 9 CR SENSOR 4 Door CR Compartment Sensor Error This can be an Electric wire cut short circuit contact failure or missing sensor Cause is also a temperature reading 122 or 58 F 9 PANTRY SENSOR ERROR CR Compartment Sensor Error This can be an Electric wire cut short circuit contact failure or mis...

Page 89: ...rature reading 122 or 58 F 20 FRENCH DOOR ICE ROOM SENSOR Ice Room Compartment Sensor Error This can be an Electric wire cut short circuit contact failure or missing sensor housing Cause is also a temperature reading 122 or 58 F 21 F DEFROSTING ERROR Freezer Compartment defrosting heater wire cut short circuit contact failure missing sensor housing or defective temperature fuse bi metal Defrost on...

Page 90: ...Ice Maker Sensor Error This can be a wire cut short circuit contact failure or missing sensor This can also be caused by a temperature Samsung Refrigerator Diagnostic Code Quick Guide Samsung Single Evaporator Refrigerator Diagnostic Code Quick Guide reading 149 or 58 F No Error Items Display LED TROUBLE 1 R SENSOR Fridge 5 Fridge Compartment Sensor Error This can be a wire cut short circuit conta...

Page 91: ...operating Check for loose connections Use Quick Test Mode do Door lock Unlock Test Motor Test 12 dS 22 Door is detected as open while trying to lock the door Door is detected as open while trying to lock e door Go to Quick Test Mode and then do Door Q Lock Unlock Test 13 bE 25 Motor hall sensor signals sent without motor operation Replace Machine Control Board 14 29 Abnormal high low temperature o...

Page 92: ...Door Sense circuit FE Power source frequency E Invalid power source Frequency Check for Non Utility power supply dF Door Circuit Failure Invalid state for more than 256 milliseconds Check for Loose or open wire terminals in Door Sense circuit hE or HE Heater Error Invalid heating Temp in running the dryer Check for Restricted vent system Thermistor resistance bE Button Error PCB key closed for 75 ...

Page 93: ...he door opens during sensor cooking Error Code Gas Sensor Error Case E 1X E 41 Open E 42 Short 42 E 43 T1 Max Time Error E 44 Dry Up E 45 Cooling Error 3minutes E 46 Primary Open Error 3minutes E 47 The door opens during cooking Error Code Easy PH Sensor Error Case E4 E 51 Open Sense Failure E 53 Read Write Error E 54 Zero not to be set Error Code EEPROM Error Case E 5X E 61 Open E 62 Short E 63 T...

Page 94: ... replace oven sensor 2 Check the broil bake and convection heater Check the resistance of each 3 Check whether DLB of sub PCB Broil Bake and Convection heater relay are being activated 4 Check wiring harnesses between main PCB on sub PCB 5 Check the resistance of oven sensor connector on main PCB Normal 2850Ω SE Shorted key 1 Check if cable of keypad has been inserted into connector of main PCB 2 ...

Page 95: ...Dishwasher Diagnostic Code Quick Guide Leakage Error LE When leakage sensor detects 4 5V or below for 1 seconds Base part hose connection defect Sump and Tub assembly defect Drain Pump assembly defect Main PBA defect Heater Error HE When the temperature change is 4Ԩ or less within the first 10 minutes after the heating starts Heater defect Heater Relay defect Heater terminal not connected Main Wir...

Reviews: