Fast Track Troubleshooting
IMPORTANT SAFETY NOTICE
–
“For Technicians Only”
This service data sheet is
intended for use by persons having electrical, electronic, and mechanical experience
and knowledge at a level generally considered acceptable in the appliance repair trade.
Any attempt to repair a major appliance may result in personal injury and property
damage. The manufacturer or seller cannot be responsible, nor assume any liability for
injury or damage of any kind arising from the use of this data sheet.
Models Covered:
RM255****
4 Door Refrigeration
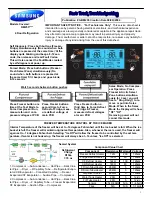
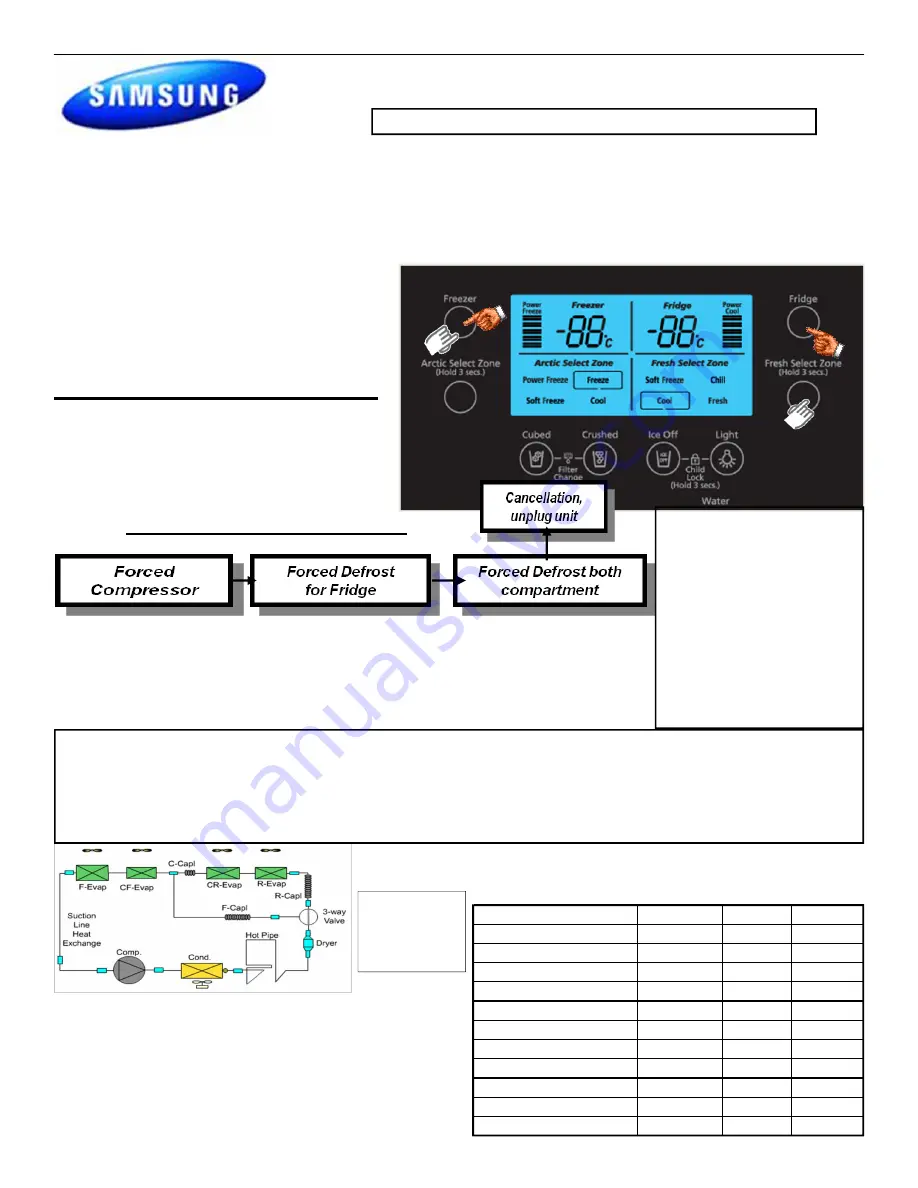
Wait 5 seconds between button pushes
Self Diagnosis: Press both buttons (Freezer–
Fridge)
simultaneously
(No sound when both
buttons are pressed at the same time) ’til the
display quits blinking and beeps, 8-12 sec-
onds, then release and read Fault Codes.
This will also cancel the Fault Mode created
by self-diagnosis at power up.
Forced Mode: Press both buttons (Freezer–
Fresh Select Zone)
simultaneously
(No
sound when both buttons are pressed at
the same time) ‘til it beeps and goes blank,
8-12 seconds
Publication # tsRM255 Creation Date 08/24//2009
Component Value Chart
Component
Resistance Wattage Voltage
Freezer Defrost Heater
72
Ω
200
120vac
Fridge Defrost Heater
180
Ω
80
120vac
CF Defrost Heater
144
Ω
100
120vac
CR Defrost Heater
180
Ω
80
120vac
F Drain Tube/Heater
2880
Ω
5
120vac
R Drain Tube/Heater
2880
Ω
5
120vac
Dispenser Heater
2880
Ω
5
120vac
Water Tank Heater
29
Ω
5
12vdc
Fill Tube Heater
29
Ω
5
12vdc
Sensors
2.5k
Ω
-89k
Ω
N/A
1~4.5vdc
Fans
N/A
N/A
7~12vdc
1. Compressor
→
Sub-condenser
→
Hot Pipe
→
Back Clus-
ter Pipe
→
Dryer
→
R Capillary Tube
→
Refrigerator Evapo-
rator /CR Evaporator
→
Connected Capillary
→
Freezer
Evaporator/CF Evaporator
→
Suction Pipe
→
Compressor
2. Compressor
→
Sub-condenser
→
Hot Pipe
→
Back Clus-
ter Pipe
→
Dryer
→
F Capillary Tube
→
Freezer Evaporator/
CF Evaporator
→
Suction Pipe
→
Compressor
Press Freezer button one
time at the Test Mode to
Force Compressor Run,
measure fan and com-
pressor voltages at PCB
Press Freezer button a
second time to Force
Defrost of Fridge, meas-
ure defrost voltage at
main PCB
Press Freezer button a
third time to Force Defrost
for Fridge & Freezer,
measure defrost voltages
at main PCB
Refrigerant
Charge
R134a
7.76 oz
Sales Mode, No Compres-
sor Operation: Press
Freezer & Arctic Select
Zone buttons simultane-
ously for 3 sec ( you will
hear a “Ding Dong”) to re-
move or put into Sales
Mode. When in the Sales
Mode the Display will show
"OF" "OF"
Removing power will not
cancel this mode.
Sealed System
FREEZER TEMPERATURE CONTROL BY THE ICE MAKER
Interior Temperature of the freezer will be set to -14 degrees Fahrenheit until the ice bucket is full. When the ice
bucket is full, the freezer will maintain original set temperature. Also, whenever the ice is used, the freezer will
again set to -14 degrees Fahrenheit. Selecting "Ice Off” will allow the freezer to be controlled by the set tem-
perature. If water is not hooked up, the freezer will always be at –14 unless “Ice Off” is selected.
1

