


05 The Samsung Smart Remote
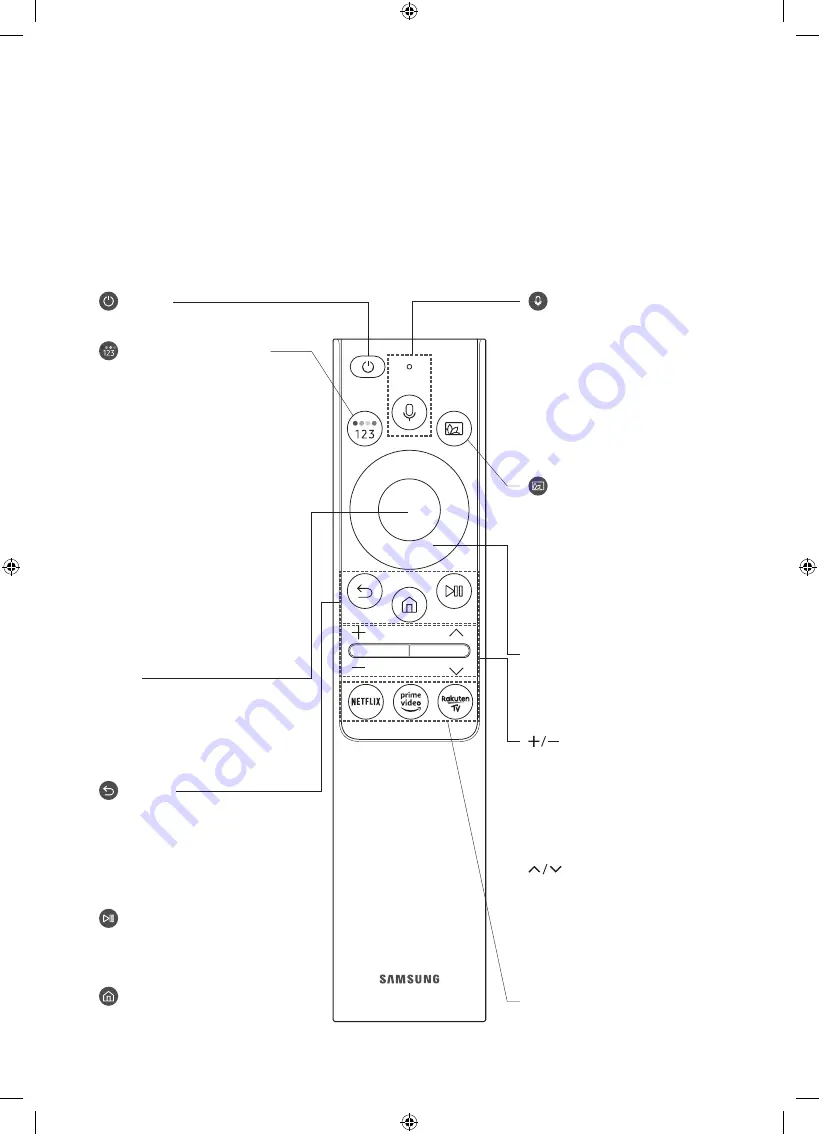
About the Buttons on the Samsung Smart Remote
•
The images, buttons, and functions of the Samsung Smart Remote may differ depending on
the model.
•
The Universal Remote function operates normally only when you use the Samsung Smart
Remote that comes with the TV.
(Power)
Press to turn the TV on or off.
(Colour / Number button)
Each time you press this button, the
coloured buttons window and the
virtual numeric pad are displayed
alternately.
•
Use these coloured buttons
to access additional options
specific to the feature you are
using.
•
Press to bring up the virtual
numeric pad on the screen. Use
the numeric keypad to enter
numeric values. Select numbers
and then select
Done
to enter
a numeric value. Use to change
the channel, enter a PIN, enter a
ZIP code, etc.
•
When pressed for 1 second or
more, the TTX menu appears.
(Return)
Returns to the previous menu.
When pressed for 1 second or
more, the running function is
terminated. When pressed while
you are watching a programme, the
previous channel appears.
(Play/pause)
When pressed, the playback
controls appear while the media
content is playing.
(Smart Hub)
Returns to the Home Screen.
(Volume)
Move the button up or down to
adjust the volume. To mute the
sound, press the button. When
pressed for 1 second or more, the
Accessibility Shortcuts
menu
appears.
(Channel)
Move the button up or down to
change the channel. To see the
Guide
screen, press the button.
•
When pressed for 1 second or
more, the
Channel List
screen
appears.
Press each button to run its
function.
Select
Selects or runs a focused item.
When pressed while you are
watching a broadcast programme,
detailed programme information
appears.
Directional button (up/down/left/
right)
Moves the focus and changes the
values seen on the TV's menu.
(Voice Assistant)
Runs Voice Assistant. Press and
hold the button, say a command,
and then release the button to run
Voice Assistant.
•
The supported Voice Assistant's
languages and features may
differ by geographical region.
(Ambient Mode)
In TV mode, press this button to
enter
Ambient Mode
.
If you press the button when the
TV is turned off, the TV turns on in
Ambient Mode
.
•
When pressed for 1 second
or more, the
Shortcuts
menu
screen appears.
English - 21


