English -
Energy Saving
This feature adjusts the brightness of the TV in order to reduce power consumption. When watching TV at night, set the
Energy Saving
mode option to
High
to reduce eye fatigue as well as power consumption.
Off
: Turns off the energy saving function.
Low
: Sets the TV to low energy saving mode.
Medium
: Sets the TV to medium energy saving mode.
High
: Sets the TV to high energy saving mode.
Press the
TOOLS
button to display
Tools
menu.
You can also set the Energy Saving option by selecting
Tools → Energy Saving
.
Software Upgrade
To keep your product up-to-date with new Digital Television features then
software upgrades are periodically broadcast as part of the normal Television
signal. It will automatically detect these signals and display the software
upgrade banner. You are given the option to install the upgrade.
By USB
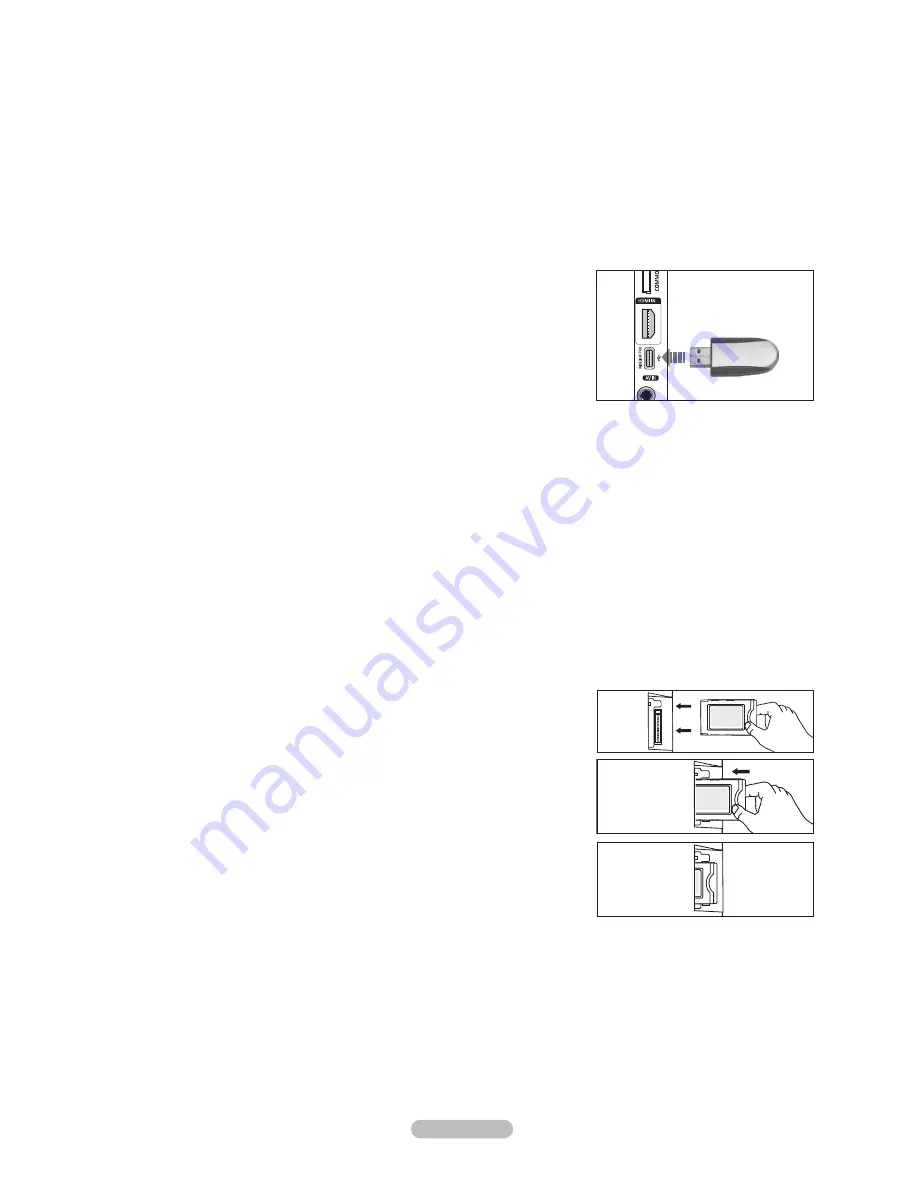
Insert a USB drive containing the firmware upgrade into TV. Please be careful
to not disconnect the power or remove the USB drive while upgrades are being
applied. The TV will turn off and turn on automatically after completing the
firmware upgrade. Please check the firmware version after the upgrades are complete. When software is upgraded, video and
audio settings you have made will return to their default (factory) settings. We recommend you write down your settings so that
you can easily reset them after the upgrade.
By Channel
Upgrades the software using the broadcasting signal.
Standby Mode Upgrade
To continue software upgrade with master power on, Select On by pressing the ▲ or ▼ button. 45 minutes after entering
standby mode, a manual upgrade is automatically conducted. Since the power of the unit is turned on internally, the screen
may be on slightly for the product. This phenomenon may continue for more than 1 hour until the software upgrade is
completed.
Alternative Software
To display the software version information.
Common Interface
Installing the CI Card
a. Purchase the CI CAM module by visiting your nearest dealer or by phone.
b. Insert the CI CARD into the CAM in the direction of the arrow until it fits.
c. Insert the CAM with the CI CARD installed into the common interface slot.
Insert the CAM in the direction of the arrow, right up to the end so that it is
parallel with the slot.
d. Check if you can see a picture on a scrambled signal channel.
CI Menu
This enables the user to select from the CAM-provided menu.
Select the CI Menu based on the menu PC Card.
Application Info.
This contains information on CAM inserted in the CI slot and displays it.
The Application Info inserting is about the CI CARD. You can install the CAM
anytime whether the TV is ON or OFF.
1.
Purchase the CI CAM module by visiting your nearest dealer or by phone.
.
Insert the CI CARD into the CAM in the direction of the arrow until it fits.
3.
Insert the CAM with the CI CARD installed into the common interface slot. (Insert the CAM in the direction of the arrow, right
up to the end so that it is parallel with the slot.)
4.
Check if you can see a picture on a scrambled signal channel.
❑
T
❑
❑
N
4
TV Side Panel
USB Drive
BN68-01757B-Eng.indb 26
2008-08-29 오후 3:30:09


