background image

English - 14

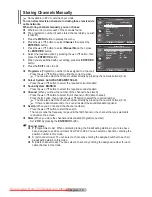
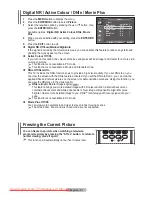
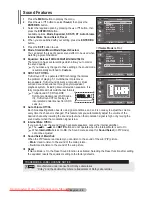
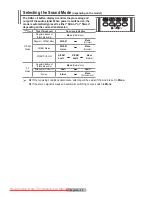
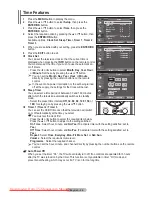
Storing Channels Manually

  Not available in DTV or external input mode.

You can store television channels, including those received via 

cable networks.

When storing channels manually, you can choose:

 

Whether or not to store each of the channels found.

 

The programme number of each stored channel which you wish 

to identify.

1

  Press the 

MENU

 button to display the menu.

2

  Press the ▲ or ▼ button to select 

Channel

, then press the 

ENTER/OK

 button.

3

  Press the ▲ or ▼ button to select 

Manual Store

, then press 

the 

ENTER/OK

 button.

4

  Select the required option by pressing the ▲ or ▼ button, then 

press the 

ENTER/OK

 button.

5

  When you are satisfied with your setting, press the 

ENTER/OK


button.

6

  Press the 

EXIT

 button to exit.

 

Programme

 (Programme number to be assigned to a channel)

−  Press the ▲ or ▼ button until you find the correct number.

  You can also select the channel number directly by pressing the numeric buttons (0~9).

 

Colour System

Auto/PAL/SECAM/NTSC4.43

−  Press the ▲ or ▼ button to select the required colour standard.

 

Sound System

BG/DK/I/L

−  Press the ▲ or ▼ button to select the required sound standard.

 

Channel

 (When you know the number of the channel to be stored)

−  Press the ▲ or ▼ button to select 

C

 (Air channel) or 

S

 (Cable channel).

−  Press the ► button, then press the ▲ or ▼ button to select the required number.

  You can also select the channel number directly by pressing the numeric buttons (0~9).

  If there is abnormal sound or no sound, reselect the sound standard required.

 

Search

 (When you do not know the channel numbers)

−  Press the ▲ or ▼ button to start the search.

−  The tuner scans the frequency range until the first channel or the channel that you selected is 

received on the screen.

 

Store

 (When you store the channel and associated programme number)

−  Set to 

OK

 by pressing the 

ENTER/OK

 button.


Channel mode


P

 (Programme mode): When completing tuning, the broadcasting stations in your area have 

been assigned to position numbers from P00 to P99. You can select a channel by entering the 

position number in this mode.


C

 (Air channel mode): You can select a channel by entering the assigned number to each air 

broadcasting station in this mode.


S

 (Cable channel mode): You can select a channel by entering the assigned number for each 

cable channel in this mode.


Move 

 Enter 

 Return

Country   

:


United Kingdom

Auto Store  


Manual Store 


Channel Manager     

Sort 


Name 


Fine Tune   


LNA 


:


Off 

Channel

T V


Move 

 Enter 

 Return

Programme 

:


P     1 

Colour System 

:


Auto 

Sound System 

:


BG 

Channel   

:


C       4 

Search 


:


63     MHz 

Store 


:


Manual Store

T V

BN68-01352A-01Eng.indd   14

2007-10-06   ¿ÀÈÄ 5:50:30

Downloaded From TV-Manual.com Manuals

Summary of Contents for PS-63P76FD

Page 1: ...____________ PDP TELEVISION PLASMA DISPLAY PANEL Owner s Instructions Before operating the unit please read this manual thoroughly and retain it for future reference ON SCREEN MENUS Picture In Picture PIP Energy Saving TELETEXT Option SRS TruSurround XT Digital Natural Image engine BN68 01352B_ _Cover indd 1 2007 10 06 ÀÈÄ 6 20 37 Downloaded From TV Manual com Manuals ...
Page 2: ...mpact on the performance of the product Avoid operating the TV at temperatures below 5 C 41 F A still image displayed too long may cause permanent damage to the PDP Panel Watching the PDP TV in 4 3 format for a long period of time may leave traces of borders displayed on the left right and centre of the screen caused by the difference of light emission on the screen Playing a DVD or a game console...

Page 3: ...ontrol Sound Features 22 Selecting the Sound Mode depending on the model 23 Function Description Time Features 24 Language Blue Screen Melody Light Effect Energy Saving HDMI Black Level 25 Using the Game Mode 26 Wall mount adjustment Sold separately PS 50P96FD 27 Viewing the Picture in Picture PIP 28 Screen Burn Protection 29 PC Display Setting up Your PC Software Based on Windows XP 30 Display Mo...

Page 4: ... from interference When connecting a cable open the ferrite core and clip it around the cable near the plug Turn the ferrite core around the part of the DVI cable close to the PC when the HDMI2 port and the PC are connected with the HDMI DVI cable PS 58P96FD Using the Stand Base Two or more people should carry the PDP Never lay the PDP on the floor because of possible damage to the screen Always k...

Page 5: ... use the buttons as you use the and buttons on the remote control 4 C P Press to change channels In the on screen menu use the C P buttons as you use the and buttons on the remote control 5 ENTER OK Press to confirm a selection 6 Power button Press to turn the TV on and off Power Indicator Blinks and turns off when the power is on and lights up in stand by mode Remote Control Sensor Aim the remote...

Page 6: ...ple in the room Prolonged use of headphones at a high volume may damage your hearing Continued Whenever you connect an audio or video system to your set ensure that all elements are switched off When connecting an external device match the colour of the connection terminal to the cable The product colour and shape may vary depending on the model The product colour and shape may vary depending on t...

Page 7: ...it 9 HDMI IN 1 HDMI IN 2 Connect to the HDMI jack of a device with HDMI output These inputs can also be used as a DVI connection with separate analog audio inputs An optional HDMI DVI cable will be necessary to make this connection When using the optional HDMI DVI adapter the DVI analog audio inputs on your TV allow you to receive left and right audio from your DVI device Not compatible with PC Wh...

Page 8: ...source selection Previous channel DTV menu display a Records for Live Broadcasting b VCR DVD Function Rewind Stop Play Pause Fast Forward c Next channel Previous channel d Exit the on screen menu e Control the cursor in the menu f Use to see information on the current broadcast g Runs the Anynet view functions and sets up Anynet devices h Picture In Picture On Off i Picture effect selection Refer ...

Page 9: ...gn nearby Switching Your Television On and Off The main lead is attached to the rear of the television 1 Plug the main lead into an appropriate socket The main voltage is indicated on the rear of the television and the frequency is 50 or 60Hz 2 Press the Power button On Off on the front of the television or press the POWER button on the remote control to switch the television on The programme that...

Page 10: ...mode press the POWER button on the remote control The message Start Plug Play is displayed Press the ENTER OK button 2 The Language menu will automatically appear after several seconds 3 Select the appropriate language by pressing the or button Press the ENTER OK button The message Select Home Mode when installing this TV at home is displayed 4 Press the or button to select Shop or Home then press...

Page 11: ...e ENTER OK button is not pressed the message will automatically disappear after several seconds 11 Select Yes pressing the or button then press the ENTER OK button Auto Store menu is displayed 12 Press the ENTER OK button to start search the analog channels The analog channel search will start and end automatically After all the available analog channels are stored the screen for searching digital...

Page 12: ...te directly by pressing the numeric buttons on the remote control 16 Press the ENTER OK button to confirm your setting The message Enjoy your viewing is displayed When you have finished press the ENTER OK button Even if the ENTER OK button is not pressed the message will automatically disappear after several seconds If you want to reset this feature 1 Press the MENU button to display the menu 2 Pr...

Page 13: ...y and clear any channels you do not wish to watch 1 Press the MENU button to display the menu 2 Press the or button to select Channel then press the ENTER OK button 3 Press the ENTER OK button again The available countries are listed 4 Select your country by pressing the or button then press the ENTER OK button Even though you have changed the country setting in this menu the country setting for D...

Page 14: ... Press the or button to select C Air channel or S Cable channel Press the button then press the or button to select the required number You can also select the channel number directly by pressing the numeric buttons 0 9 If there is abnormal sound or no sound reselect the sound standard required Search When you do not know the channel numbers Press the or button to start the search The tuner scans ...

Page 15: ...ogrammes by muting out video and audio 6 Press the or button to select Child Lock then press the ENTER OK button 7 Select On by pressing the or button then press the ENTER OK button 8 Press the or button to select Channel List then press the ENTER OK button 9 Move to the field by pressing the buttons select a channel to be locked and press the ENTER OK button If you press the ENTER OK button again...

Page 16: ...ames will be assigned automatically when channel information is broadcast These names can be changed allowing you to assign new names 1 Press the MENU button to display the menu 2 Press the or button to select Channel then press the ENTER OK button 3 Press the or button to select Name then press the ENTER OK button 4 Press the or button to select the channel to be assigned to a new name then press...

Page 17: ...e Channel OSD On Screen Display from White to Red and add the mark LNA Low Noise Amplifier This function is very useful in the situation that the TV is used in weak signal LNA amplifies the TV signal in the weak signal area a low noise preamplifier boosts the incoming signal 1 Press the MENU button to display the menu 2 Press the or button to select Channel then press the ENTER OK button 3 Press t...

Page 18: ... Select the required option by pressing the or button then press the ENTER OK button 6 When you are satisfied with your setting press the ENTER OK button 7 Press the EXIT button to exit Contrast Brightness Sharpness Colour Tint In TV AV S Video modes of the PAL system you cannot use the Tint Function Contrast Brightness Colour Tone PC Mode Press the or button until you reach the optimal setting Co...

Page 19: ...the adjustment value will refresh the adjusted screen Select the required option by pressing the or button then press the ENTER OK button Press the or button until you reach the optimal setting Reset The previously adjusted white balance will be reset to the factory defaults My Colour Control Pink Green Blue White Reset This setting can be adjusted to suit your personal preferences Pink Green Blue...

Page 20: ...enables the positioning and sizing of the screen to up down direction using the or button as well as the screen size Move the screen up down using the or button after selecting the by pressing the or button Resize the screen vertically using the or button after selecting the by pressing the or button Selecting the Screen Mode When setting the picture size to Auto Wide in a 16 9 wide TV you can det...

Page 21: ...an view the screen with the DNIe feature activated If you set the DNIe to Demo you can view the applied DNIe and normal pictures on the screen for demonstration purposes Using this function you can view the difference in the visual quality DNIeTM Digital Natural Image engine This feature brings you more detailed image with 3D noise reduction detail enhancement contrast enhancement and white enhanc...

Page 22: ...n signal conditions and so it is not easy to adjust the volume every time the channel is changed This feature lets you automatically adjust the volume of the desired channel by lowering the sound output when the modulation signal is high or by raising the sound output when the modulation signal is low Internal Mute Off On If you want to hear the sound through separate speakers cancel the internal ...

Page 23: ...tereo Regular broadcast Standard audio Mono Normal use Regular NICAM Mono NICAM Mono Normal NICAM Stereo NICAM stereo Mono Normal NICAM DUAL I II NICAM dual 1 NICAM dual 2 Mono Normal A2 Stereo Regular broadcast Standard audio Mono Normal use Bilingual or DUAL I II Dual I Dual II Stereo Stereo Mono Forced mono If the receiving conditions deteriorate listening will be easier if the mode is set to M...

Page 24: ...essing the or button Timer 1 Timer 2 Timer 3 You can set the On Off timers so that the television will switch on or off automatically at the time you select You must set the clock first Press the or button to select the required item below Press the or button to adjust to the setting satisfied On Time Select hour minute and No Yes To activate timer with the setting satisfied set to Yes Off Time Se...

Page 25: ... Off Switches off the Energy Saving mode Standby Mode On The blue LED lights while in Standby mode and it turns off when your TV is turned on Watching Mode On The blue LED lights when watching TV and it turns off when your TV is turned off On The blue LED always lights Set the Light Effect to Off to reduce the power consumption Energy Saving Off Low Medium High This feature adjusts the screen brig...

Page 26: ... connect another external device cancel game mode in the Setup menu If you display the TV menu in Game mode the screen shakes slightly Game Mode is not available in TV mode If Game Mode is On Picture Mode is automatically changed to Standard and users cannot change the mode Sound Mode in the Sound menu is deactivated Adjust the sound using the equalizer The Reset Sound function is activated Select...

Page 27: ...adjusted Using the remote Control Buttons Button Operations Wall mount angle adjustment Tilt Up Tilt Down Move right Move left Reset Moves to the initial installation position Red Green Yellow Remembering the position and moving to the remembered position Remembers 3 positions with the Red Green and Yellow buttons Moves to the remembered position using these 3 colour buttons For installation refer...

Page 28: ... to exit PIP On Off You can activate or deactivate the PIP function You can select these options simply by pressing the PIP button on the remote control Table of PIP Settings Main Picture Sub Picture Component HDMI1 2 3 PC Analog TV broadcasts only Ext1 Ext2 Source TV Ext 1 Ext 2 AV You can select a source of the sub picture Size You can select a size of the sub picture If main picture is in PC an...

Page 29: ...hanging the colour of pixels to white Use this function when there are remaining after images or symbols on the screen especially when you displayed a still image on the screen for a long time Signal Pattern This function helps remove after images on the screen by moving all the pixels on the PDP according to a pattern Use this function when there are remaining after images or symbols on the scree...

Page 30: ... Desktop then click on Properties The Display Properties will be displayed 2 Click on Settings tab then set the Display Mode with reference to the Display Modes Table You do not need to change the Colours settings 3 Click on Advanced A new settings dialog box will be displayed 4 Click on the Monitor tab then set the Screen refresh rate with reference to the Display Modes Table Set the Vertical Fre...

Page 31: ...023 67 500 60 000 63 981 74 620 76 824 79 976 75 000 66 587 70 000 72 809 75 000 70 000 60 317 72 188 75 000 72 000 60 000 70 069 75 029 75 000 60 000 60 020 70 000 72 000 75 025 60 000 59 934 28 560 31 500 31 500 45 500 40 000 50 000 49 500 78 434 65 000 75 000 78 750 108 000 108 000 108 000 128 943 132 752 135 000 162 000 138 500 HDMI DVI Input Mode Resolution Horizontal Frequency kHz Vertical F...

Page 32: ...1 Press the or button to select Coarse or Fine then press the ENTER OK button 2 Press the or button to adjust the screen quality vertical stripes may appear or the picture may be blurry Press the ENTER OK button Position Adjust the PC s screen positioning if it does not fit the TV screen 1 Adjust the position by pressing the button 2 Press the ENTER OK button Auto Adjustment Auto adjustment allows...

Page 33: ... the menu 2 Press the or button to select Setup then press the ENTER OK button 3 Press the or button to select Home Theatre PC then press the ENTER OK button 4 Select Off or On by pressing the or button then press the ENTER OK button 5 Press the EXIT button to exit This function is available only in PC mode Move Enter Return Plug Play Language English Time Game Mode Off Blue Screen Off Melody Off ...

Page 34: ... following illustration Press the D MENU button to display the menu Guide Now Next Guide Full Guide Scheduled List Default Guide Now Next Full Guide Channel Auto Store Manual Store Edit Favourite Channels Channel List All Favourites Default Setup Menu Transparency High Medium Low Opaque Parental Lock Parental Rating Change PIN Subtitle Off On Subtitle Mode Normal Hard of hearing Audio Format PCM D...

Page 35: ...urrent programme may be displayed While viewing a programme press the INFO button The programme information is displayed The information is displayed Parental Rating Video Type SD HD Radio Audio Type Mono Stereo Dual Dolby Digital Existence of Teletext or DVB Subtitle Audio Language To exit from banner information press the INFO button Audio Language Subtitle Language Teletext Language Preference ...

Page 36: ...al connection is displayed 1 2 Manual Store You can specify the channel for a fast channel search Channel Press the or numeric buttons 0 9 to select a channel The available channels are 21 68 The corresponding frequency for the selected channel is automatically set Frequency You can specify the frequency KHz using the numeric buttons 0 9 If you do not know the exact frequency follow the above step...

Page 37: ...u press the or button to select the required channel Press the green button The space for entering the number is a blank Enter the new channel number Press ENTER OK button to store or RETURN button to cancel Press the button to delete an entered digit If you enter a number already assigned to another channel the number is assigned to the selected channel and the previous number assigned to the sel...

Page 38: ...ecomes available Now Next Guide For the six channels indicated in the left hand column displays the Current programme and the Next programme information Full Guide Displays the programme information as time ordered One hour segments Two hours of programme information is displayed which may be scrolled forwards or backwards in time Press the or button to select Now Next Guide or Full Guide Press th...

Page 39: ...elect a programme by pressing the or button then press the green button If necessary select the programme to be deleted by pressing the or button then press the blue button When watching analog TV the reserved DTV channel cannot be changed The channel is only changed automatically to the reserved channel when you are watching DTV Scheduling programme only functions with the television already turn...

Page 40: ...l be displayed and you will not be able to change the channel even if you press the ENTER OK button When the message No Data appears and you cannot change the channel press the channel number directly using the numeric buttons 3 Language This menu consists of 4 sub menus Audio Language Subtitle Language Teletext Language and Preference 3 1 Audio Language Subtitle Language Teletext Language You can...

Page 41: ...setting the Audio Language Subtitle Language and Teletext Language of the Language menu refer to page 40 are automatically changed to the selected language The Audio Language Subtitle Language and Teletext Language of the Language menu show a list of languages supported by the current channel and the selection is highlighted If you change this language setting the new selection is only valid for t...

Page 42: ... Press the ENTER OK button Press the or button to select the age rating you want to lock out then press the ENTER OK button If you want to change the PIN code press the or button to select Change PIN then press the ENTER OK button Enter your new PIN code by using the numeric buttons 0 9 The message Confirm New PIN is displayed Re enter your new PIN code to confirm by using the numeric buttons 0 9 ...

Page 43: ...f PCM and Dolby Digital the input format is applied regardless of the setting If the input signals are not any of those the setting is not applied Digital Text Enable Disable UK only If the programme is broadcast with digital text this feature is enabled MHEG Multimedia and Hypermedia Information Coding Experts Group An International standard for data encoding systems used in multimedia and hyperm...

Page 44: ...e ENTER OK button then the current software version is shown To display the software version information press the ENTER OK button again Manual Upgrade Press the ENTER OK button to search for new software from the currently broadcasting channels Standby Mode upgrade On Off Press the ENTER OK button To continue software upgrade with master power on Select On by pressing the or button 45 minutes aft...

Page 45: ... Card menu Reset You can reset the values stored to the factory default values The Reset operation deletes all channel information and user preferences returning all values to their default factory state Press the ENTER OK button with Reset selected The Enter PIN is displayed Enter your current 4 digit PIN code by using the numeric buttons 0 9 The warning message is displayed All values will be re...

Page 46: ...Optical on your TV and Digital Audio Input on the receiver Connect only one receiver You can listen to 5 1 channel sound through the home theatre s speakers Otherwise you can only listen to 2 channel stereo sound in other cases Make sure to connect the Digital Audio IN Optical of the home theatre and the TV correctly to listen to TV sound through the home theatre However you cannot listen to sound...

Page 47: ...on It is switched to the selected device 4 If you cannot find a device you want press the or button to select Searching Connections then press the ENTER OK button The meassage Configuring Anynet connection is displayed When searching devices completes the connected devices are listed in the Anynet menu Switching to the selected devices may take up to 2 minutes You cannot cancel the operation durin...

Page 48: ...lt in Tuner After switching to the device when you are watching a TV programme CH button Audio Device When a Receiver is activated VOL button MUTE button The Anynet function only works when the remote control is set to TV The REC button works only while in the recordable state You cannot control Anynet devices using the buttons on the side of the TV You can control Anynet devices only using the TV...

Page 49: ...r TV Check if the Anynet Function of Anynet device is set on I want to start Anynet Check if the Anynet device is properly connected to the TV and check if the Anynet HDMI CEC is set to On in the Anynet Setup menu Press the TV button on the TV remote control to switch to TV Then press the Anynet button to show the Anynet menu and select a menu you want I want to exit Anynet Select View TV in Anyne...

Page 50: ...u press it in the LIST mode it switches into the List save mode In the List save mode you can save teletext page into list using the store button 6 sub page Used to display the available sub page 7 page up Used to display the next teletext page 8 page down Used to display the previous teletext page 9 cancel Used to display the broadcast when searching for a page 0 reveal Used to display the hidden...

Page 51: ...earch indications Date and time Text Status information FASTEXT information Teletext information is often divided between several pages displayed in sequence which can be accessed by Entering the page number Selecting a title in a list Selecting a coloured heading FASTEXT system Press the TV DTV button to exit from the teletext display Downloaded From TV Manual com Manuals ...

Page 52: ... may cause damage to the inside of the TV set For wall mounts that do not comply with the VESA standard screw specifications the length of the screws may differ depending on their specifications Do not use screws that do not comply with the VESA standard screw specifications Do not use fasten the screws too strongly this may damage the product or cause the product to fall leading to personal injur...

Page 53: ... and 4 but try one of the other codes listed for your brand of VCR If no other codes are listed try each VCR code 000 through 080 Note on Using Remote Control Modes VCR When your remote control is in VCR mode the volume buttons still control your TV s volume Setting Up the Remote to Operate Your Cable Box 1 Turn off your cable box 2 Press the CABLE button on your TV s remote control 3 Press the SE...

Page 54: ...emote control is in DVD mode the volume buttons still control your TV s volume Setting Up the Remote to Operate Your Set Top Box 1 Turn off your STB 2 Press the STB button on your TV s remote control 3 Press the SET button on your TV s remote control 4 Using the number buttons on your remote control enter three digits of the STB code listed on page 56 of this manual for your brand of STB Make sure...

Page 55: ...082 083 021 056 059 007 008 018 021 026 037 062 006 036 073 074 075 076 021 006 021 024 025 034 005 019 041 075 Brand MITSUBISHI MONTGOMERY WARD MTC MULTITECH NEC OPTIMUS PANASONIC PENTAX PENTEX RESEARCH PHILCO PHILIPS PIONEER PORTLAND PROSCAN QUARTZ QUASAR RADIO SHACK REALISTIC RCA SANSUI SANYO SCOTT SEARS SHARP SHIMTOM SIGNATURE SONY SYLVANIA SYMPHONIC TANDY TASHIKA TATUNG TEAC TECHNICS TEKNIKA ...

Page 56: ...PRISM JANEIL JERROID JVC Code 023 043 018 034 019 035 015 016 017 019 022 045 060 061 062 065 066 067 068 074 069 070 069 018 024 032 027 025 069 070 071 069 069 065 046 047 048 063 064 069 056 022 015 017 020 020 059 063 069 070 Brand LG Goldstar MAGNAVOX MEMOREX MOTOROLA MACOM MITSUBISHI NEXT LEVEL PHILIPS PRIMESTAR PANASONIC PAYSAT PROSCAN RCA RADIOSHACK REALISTIC STS STAR TRAK SKY SKY LIFE SHA...

Page 57: ...077 078 079 082 080 125 081 095 066 146 067 068 090 060 061 089 133 135 069 074 074 064 113 071 073 091 110 089 092 091 022 033 115 116 073 051 108 109 073 059 100 106 107 074 075 025 031 057 058 054 055 056 076 093 074 094 073 Brand NORCENT NEXT BASE NEC NANTAUS NESA OPTOMEDIA ELECTRONICS OPTIVIEW ONKYO PHILCO PRINCETON PROSCAN PANASONIC PHILIPS ROTEL RIO RCA RAITE ROWA SAMPO SONY SHERWOOD SVA SY...

Page 58: ...an the upper edge of the remote control transmission window Check that the and ends of the batteries are inserted correctly Check that the batteries are drained Screen is black and power indicator light blinks steadily On your computer check Power Signal Cable The TV is using its power management system Move the computer s mouse or press any key on the keyboard On your equipment check STB DVD etc ...

Page 59: ...465 X 838 X 100 mm 1465 X 905 X 345 mm 1528 x 1001 x 88 mm 1528 x 1087 x 423 mm Weight Body With stand 45 kg 53 kg 59 kg 64 kg 68 kg 89 kg Environmental Considerations Operating Temperature Operating Humidity Storage Temperature Storage Humidity 10 C to 40 C 50 F to 104 F 10 to 80 non condensing 20 C to 45 C 4 F to 113 F 5 to 95 non condensing This device is a Class B digital apparatus Design and ...

Page 60: ...m uncontrolled waste disposal please separate this from other types of wastes and recycle it responsibly to promote the sustainable reuse of material resources Household users should contact either the retailer where they purchased this product or their local government office for details of where and how they can take this item for environmentally safe recycling Business users should contact thei...

Page 61: ...sung contattate il Servizio Clienti Samsung Contact Samsung wereldwijd Wanneer u suggesties of vragen heeft met betrekking tot Samsung producten gelieve contact op te nemen met de consumenten dienst van Samsung Contacte SAMSUNG GLOBAL Se tem algumas dúvidas ou comentários sobre os produtos Samsung contacte por favor a nossa linha de apoio a clientes Samsung Obrnite se na SAMSUNG WORLD WIDE GLOBALN...

Page 62: ...sung com be NETHERLANDS 0900 20 200 88 0 10 Min www samsung com nl NORWAY 815 56 480 www samsung com no POLAND 0 801 801 881 022 607 93 33 www samsung com pl PORTUGAL 80 8 200 128 www samsung com pt REPUBLIC OF IRELAND 0818 717 100 www samsung com ie SLOVAKIA 0800 SAMSUNG 726 7864 www samsung com sk SPAIN 902 10 11 30 www samsung com es SWEDEN 0771 400 200 www samsung com se SWITZERLAND 0800 SAMSU...

Reviews: