31
ENG
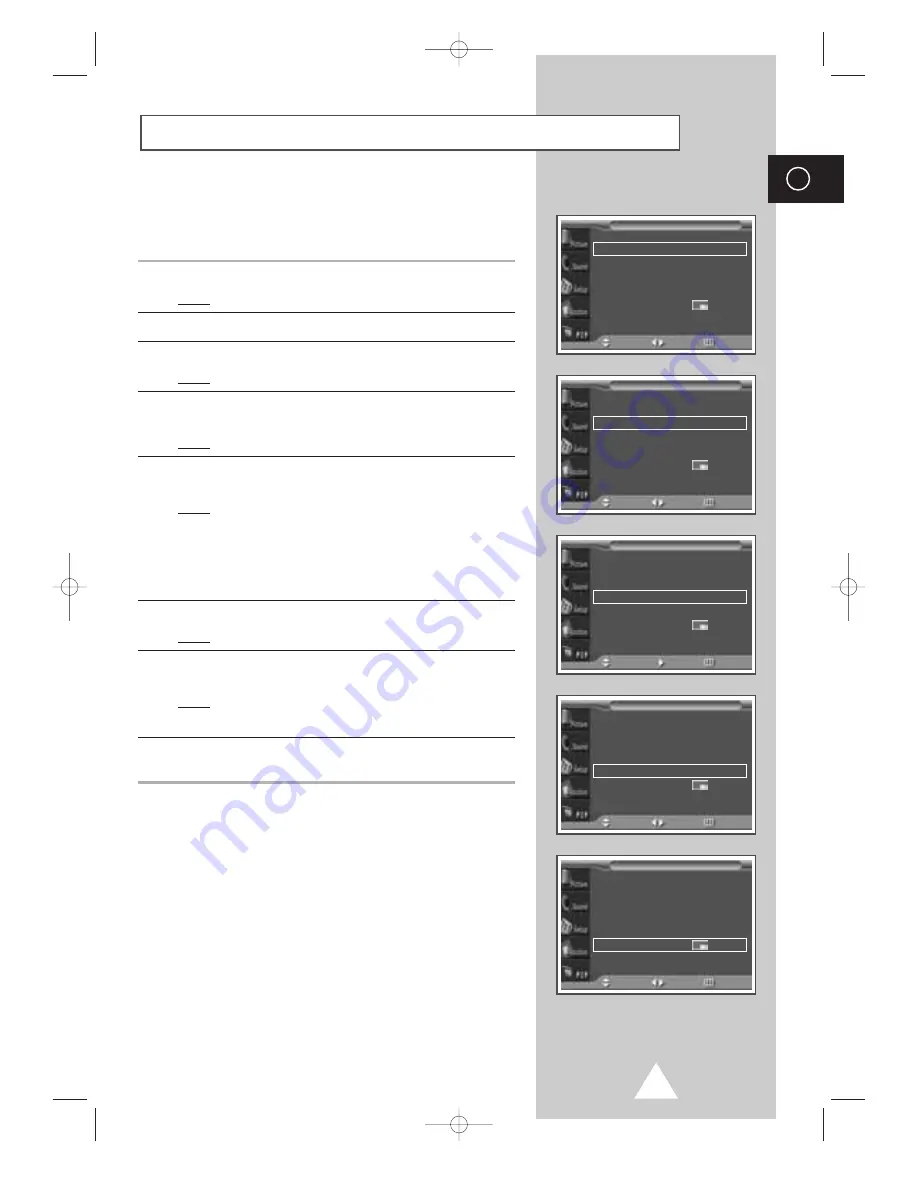
You can display a sub picture within the main picture. In this way
you can monitor the video input from any connected devices while
monitoring other video input.
1
Press the
MENU
button.
Result:
The main menu is displayed.
2
Press the
▲
or
▼
button to select
PIP
.
3
Press the
√
button.
Result:
The
PIP
option is selected.
4
Set to
On
by pressing the
œ
or
√
button for activating the PIP
feature.
Result:
The options available in the
PIP
group are displayed.
5
Press the
▲
or
▼
button to select
Sel.
. Select a source of the sub
picture by pressing the
œ
or
√
button.
Result:
The sources are displayed in the following order:
Video - S-Video - Component - PC - DVI
➣
For further details about selecting a source, refer to
“Selecting the source of sub picture depending on the source
of main picture” on page 32.
6
Press the
▲
or
▼
button to select
Swap
. Press the
√
button.
Result:
The main picture and sub picture are interchanged.
7
Press the
▲
or
▼
button to select
Size
. Select a size of the sub
picture by pressing the
œ
or
√
button.
Result:
The sizes are displayed in the following order:
Large - Small - Double1 - Double2
8
Press the
▲
or
▼
button to select
Locate
. Select a location of the
sub picture by pressing the
œ
or
√
button.
Viewing the Picture In Picture (PIP)
PIP
œ
œ
On
√
√
Sel.
œ
œ
Video
√
√
Swap
√
√
Size
œ
œ
Large
√
√
Position
œ
œ
√
√
Sound Sel.
œ
œ
Main
√
√
PIP
Move
Sel.
Return
PIP
œ
œ
On
√
√
Sel.
œ
œ
Video
√
√
Swap
√
√
Size
œ
œ
Large
√
√
Position
œ
œ
√
√
Sound Sel.
œ
œ
Main
√
√
PIP
Move
Sel.
Return
PIP
œ
œ
On
√
√
Sel.
œ
œ
Video
√
√
Swap
√
√
Size
œ
œ
Large
√
√
Position
œ
œ
√
√
Sound Sel.
œ
œ
Main
√
√
PIP
Move
Sel.
Return
PIP
œ
œ
On
√
√
Sel.
œ
œ
Video
√
√
Swap
√
√
Size
œ
œ
Large
√
√
Position
œ
œ
√
√
Sound Sel.
œ
œ
Main
√
√
PIP
Move
Sel.
Return
PIP
œ
œ
On
√
√
Sel.
œ
œ
Video
√
√
Swap
√
√
Size
œ
œ
Large
√
√
Position
œ
œ
√
√
Sound Sel.
œ
œ
Main
√
√
PIP
Move
Enter
Return
BN68-00528A-01_ENG 2003.11.20 4:14 PM Page 31


