background image

13

1. Introduction

Safety information

These warnings and precautions are included to prevent injury to you and 

others, and to prevent any potential damage to your machine. Be sure to read 

and understand all of these instructions before using the machine. After reading 

this section, keep it in a safe place for future reference.

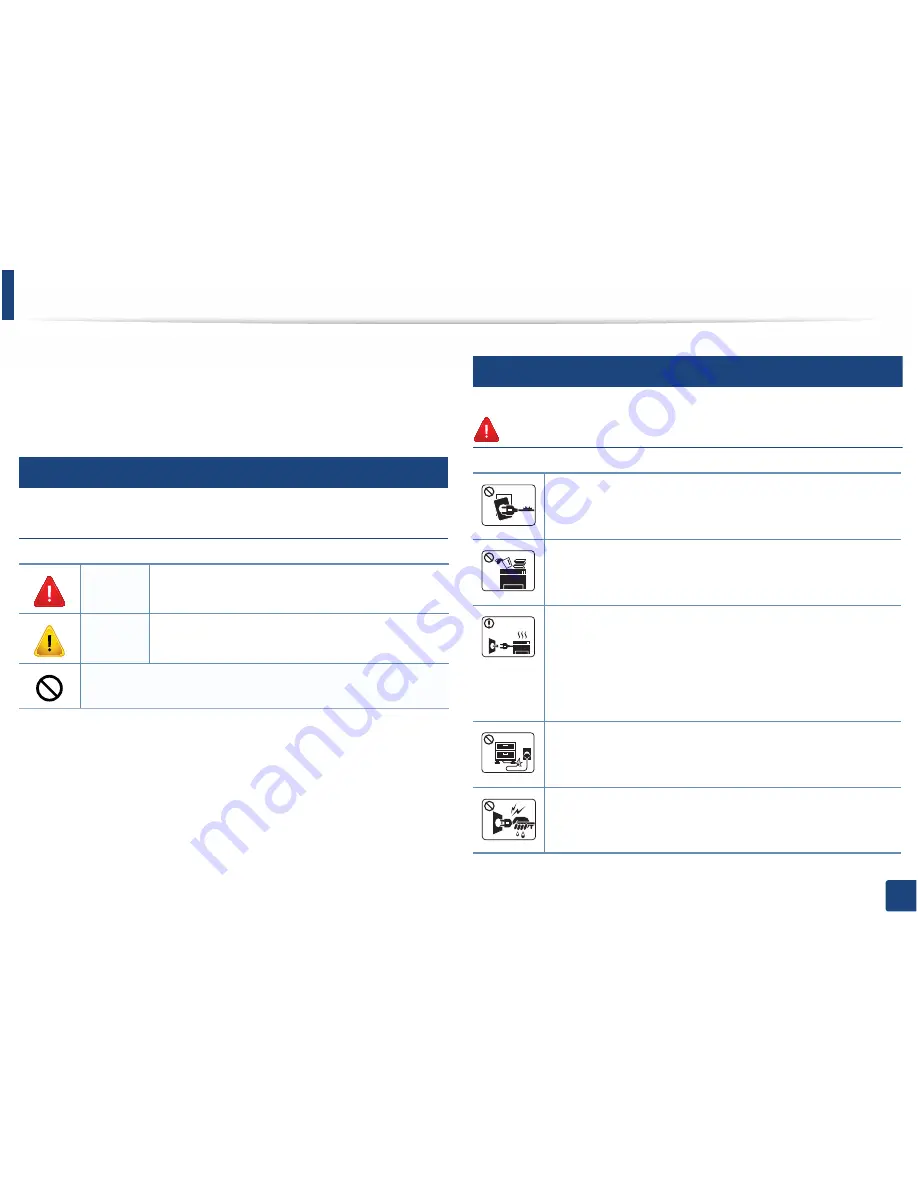
Important safety symbols

Explanation of all icons and signs used in this chapter

Operating environment

 Warning

Warning

Hazards or unsafe practices that may result in severe 

personal injury or death.

Caution

Hazards or unsafe practices that may result in minor 

personal injury or property damage.

Do not attempt.

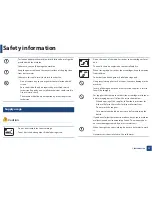
Do not use if the power cord is damaged or if the electrical outlet is 

not grounded.

This could result in electric shock or fire. 

Do not place anything on top of the machine (water, small metal or 

heavy objects, candles, lit cigarettes, etc.).

This could result in electric shock or fire. 

If the machine gets overheated, it releases smoke, makes 
strange noises, or generates an odd odor, immediately turn off 
the power switch and unplug the machine.

The user should be able to access the power outlet in case of 
emergencies that might require the user to pull the plug out.

This could result in electric shock or fire. 

Do not bend, or place heavy objects on the power cord. 

Stepping on or allowing the power cord to be crushed by a heavy 

object could result in electric shock or fire. 

Do not remove the plug by pulling on the cord; do not handle the 

plug with wet hands. 

This could result in electric shock or fire. 

Summary of Contents for PROXPRESS M332 SERIES

Page 1: ...ning installation basic operation and troubleshooting on windows ADVANCED This guide provides information about the installation advanced configuration operation and troubleshooting on various OS envi...

Page 2: ...ting 48 3 Maintenance Ordering supplies and accessories 55 Available consumables 56 Available accessories 58 Available maintenance parts 59 Storing the toner cartridge 60 Redistributing toner 62 Repla...

Page 3: ...3 BASIC 5 Appendix Specifications 108 Regulatory information 116 Copyright 127...

Page 4: ...ow before using the machine Key benefits 5 Features by models 8 Useful to know 11 About this user s guide 12 Safety information 13 Machine overview 19 Control panel overview 23 Turning on the machine...

Page 5: ...features on page 211 To save electricity this machine automatically conserves electricity by substantially reducing power consumption when not in use We recommend using recycled paper for saving energ...

Page 6: ...er installation process This is available only for Windows If you have Internet access you can get help support application machine drivers manuals and order information from the Samsung website www s...

Page 7: ...can connect and set various wireless network settings using a USB cable or a network cable Using the Wi Fi Direct You can conveniently print from your mobile device using the Wi Fi or Wi Fi Direct fea...

Page 8: ...inter driver and software when you insert the software CD into your CD ROM drive For windows select the printer driver and software in the Select Software to Install window Operating System M332x seri...

Page 9: ...tya Samsung AnyWeb Printa SyncThru Web Service M382xND M382xDW only SyncThru Admin Web Service M382xND M382xDW only Easy Eco Driver Easy Capture Manager a Download the software from the Samsung websit...

Page 10: ...TX wired LAN NetworkInterface802 11b g n wireless LANb M382xDW only Eco printing Duplex 2 sided printing USB memory interface Memory module M382xND M382xDW only Optional tray Tray2 M382xND M382xDW onl...

Page 11: ...n Check the meanings of LED indications in this manual and troubleshoot accordingly see Understanding the status LED on page 98 A paper jam has occurred Open and close the door see Front view on page...

Page 12: ...ng on its options or model you purchased The screenshots in this user s guide may differ from your machine depending on the machine s firmware driver version The procedures in this user s guide are ma...

Page 13: ...is damaged or if the electrical outlet is not grounded This could result in electric shock or fire Do not place anything on top of the machine water small metal or heavy objects candles lit cigarette...

Page 14: ...ctric shock or fire If the plug does not easily enter the electrical outlet do not attempt to force it in Call an electrician to change the electrical outlet or this could result in electric shock Do...

Page 15: ...f you have a medical condition that prevents you from lifting do not lift the machine Ask for help and always use the appropriate amount of people to lift the device safety Then lift the machine If th...

Page 16: ...machine is not well ventilated this could result in fire Do not overload wall outlets and extension cords This can diminish performance and could result in electric shock or fire The machine should b...

Page 17: ...ser unit This could cause an explosion or uncontrollable fire When storing supplies such as toner cartridges keep them away from children Toner dust can be dangerous if inhaled or ingested Using recyc...

Page 18: ...ety information 18 1 Introduction When changing the toner cartridge or removing jammed paper be careful not to let toner dust touch your body or clothes Toner dust can be dangerous if inhaled or inges...

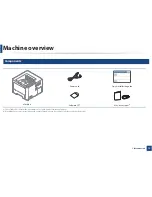
Page 19: ...rd Quick installation guide Machine Software CDa a The software CD contains the print drivers user s guide and software applications Misc accessoriesb b Miscellaneous accessories included with your ma...

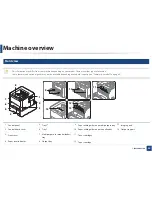
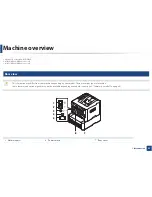
Page 20: ...e depending on model or country see Features by models on page 8 1 Control panel 5 Tray 2a 9 Paper width guides on a multi purpose tray 13 Imaging unitc 2 Control board cover 6 Tray 1 10 Paper width g...

Page 21: ...There are various types of machine Some features and optional goods may not be available depending on model or country see Features by models on page 8 a Optional Not available for M382xD b M3320 M382...

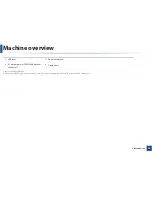
Page 22: ...2 USB port 5 Power receptacle 3 5V output port for IEEE 1284B parallel connectorb 6 Duplex unit a Not available for M382xD b The optional IEEE 1284B parallel connector can be used by plugging in both...

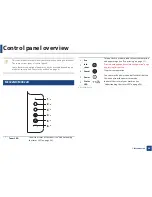
Page 23: ...the status of the toner see Understanding the status LED on page 98 1 2 3 4 5 6 2 Eco Turn on the Eco mode to reduce toner consumption and paper usage see Eco printing on page 51 3 Info sheet Printsad...

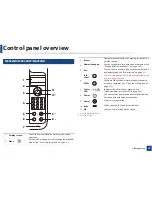
Page 24: ...09 5 Eco Turn on the Eco mode to reduce toner consumption and paper usage see Eco printing on page 51 6 Info sheet Printsademopageandnetworkconfigurationa page by pressing this button WPSb Configures...

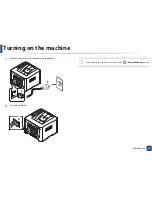
Page 25: ...25 1 Introduction Turning on the machine 1 Connect the machine to the electricity supply first 2 Turn the switch on If you want to turn the power off press theG Power Wakeup button 1 2 2...

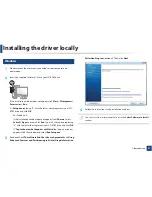
Page 26: ...network connected machine s driver see Installing driver over the network on page 142 If you are a Mac LinuxSGor UNIX operating systems user refer to the Installation for Mac on page 132 Installation...

Page 27: ...ion window does not appear from Charms select Search Apps and search for Run Type in X Setup exe replacing X with the letter that represents your CD ROM drive and click OK If Tap to choose what happen...

Page 28: ...software CD V4 driver is not installed If you want to use the V4 driver in the Desktop screen you can download from the Samsung website www samsung com find your product Support or downloads If you w...

Page 29: ...all 3 Follow the instructions in the installation window 4 Insert the software CD into your CD ROM drive and install the driver again see Installing the driver locally on page 26 From the Windows 8 St...

Page 30: ...nu Overview and Basic Setup This chapter provides information about the overall menu structure and the basic setup options Menu overview 31 Machine s basic settings 34 Media and tray 36 Basic printing...

Page 31: ...epending on options or models If so it is not applicable to your machine Some menu names may differ from your machine depending on its options or the models The menus are described in the Advanced Gui...

Page 32: ...s MP Tray Paper Size Paper Type Tray x Paper Size Paper Type Paper Source Tray 1 Tray 2c MP Tray Auto c This option only appears when an optional tray is installed Resolution Standard High Resol Clear...

Page 33: ...Setup TCP IP IPv4 DHCP BOOTP Static TCP IP IPv6 IPv6 Protocol DHCPv6 Config Ethernet Ethernet Port Ethernet Speed 802 1x Wi Fib Wi Fi On Off Wi Fi Settings WPS Wi Fi Direct Wi Fi Signal CLR Wi Fi Set...

Page 34: ...re printed on reports If however they are not correct you need to change it for the correct time being Enter the correct time and date using arrows or numeric keypad see Keypad letters and numbers on...

Page 35: ...the option you want then press OK 5 Press OK to save the selection 6 Press Cancel to return to ready mode Refer to below links to set other settings useful for using the machine See Setting the paper...

Page 36: ...Using inflammable print media can cause a fire Use designated print mediaG see Print media specifications on page 110 Make sure not to use the inkjet photo paper with this machine It could cause damag...

Page 37: ...ry To change the paper size adjust the guides as shown below Paper quantity indicator shows the amount of paper in the tray 1 Full 2 Empty 3 Loading paper in the tray Illustrations on this user s guid...

Page 38: ...aper length lever to locate them in the correct paper size slot marked at the bottom of the tray to adjust to the size see Tray overview on page 36 U 3 Flex or fan the edge of the paper stack to separ...

Page 39: ...tings on the control panel a To print in application open an application and start the print menu b Open Printing Preferences see Opening printing preferences on page 49 c Press the Paper tab in Print...

Page 40: ...al feeder tray This also applies to other types of print media Always load the specified print media only to avoid paper jams and print quality problems see Print media specifications on page 110 Flat...

Page 41: ...Opening printing preferences on page 49 c Press the Paper tab in Printing Preferences and select an appropriate paper type For example if you want to use a label set the paper type to Label d Select M...

Page 42: ...ess than 6 mm curl and should not contain air Condition should not be wrinkled nicked nor damaged Temperature should resist the heat and pressure of the machine during operation Use only well construc...

Page 43: ...e area where the envelope s seams meet Transparency To avoid damaging the machine use only transparencies designed for use in laser printers Must withstand the machine s fusing temperature Place them...

Page 44: ...at with no more than 13 mm of curl in any direction Condition Do not use labels with wrinkles bubbles or other indications of separation Make sure that there is no exposed adhesive material between la...

Page 45: ...ocess wet ink can come off preprinted paper reducing print quality Glossy Photo Recommended media Glossy paper Letter for this machine by HP Brochure Paper Product Q6611A only Recommended media Glossy...

Page 46: ...c Press the Paper tabGand select an appropriate paper If you want to use special sized paper such as billing paper select the Paper tab Size Edit and set CustomGPaper Size Settings in the Printing Pr...

Page 47: ...Media and tray 47 2 Menu Overview and Basic Setup Illustrations on this user s guide may differ from your machine depending on its options or models Check your machine type see Front view on page 20...

Page 48: ...user see Basic printing on page 243 The following Printing Preferences window is for Notepad in Windows 7 1 Open the document you want to print 2 Select Print from the File menu 3 Select your machine...

Page 49: ...t appears in this user s guide may differ depending on the machine in use When you select an option in Printing Preferences you may see a warning mark or An mark means you can select that certain opti...

Page 50: ...ces for future use To save a Favorites item follow these steps 1 Change the settings as needed on each tab 2 Enter a name for the item in the Favorites input box 3 Click Save 4 Enter name and descript...

Reviews: