


English - 8
Press the
POWER
button on the remote control.
You can also use the
POWER
button on the TV.
➢
It may take a while for the picture to appear.
Turning the TV On and Off
Viewing the Menus
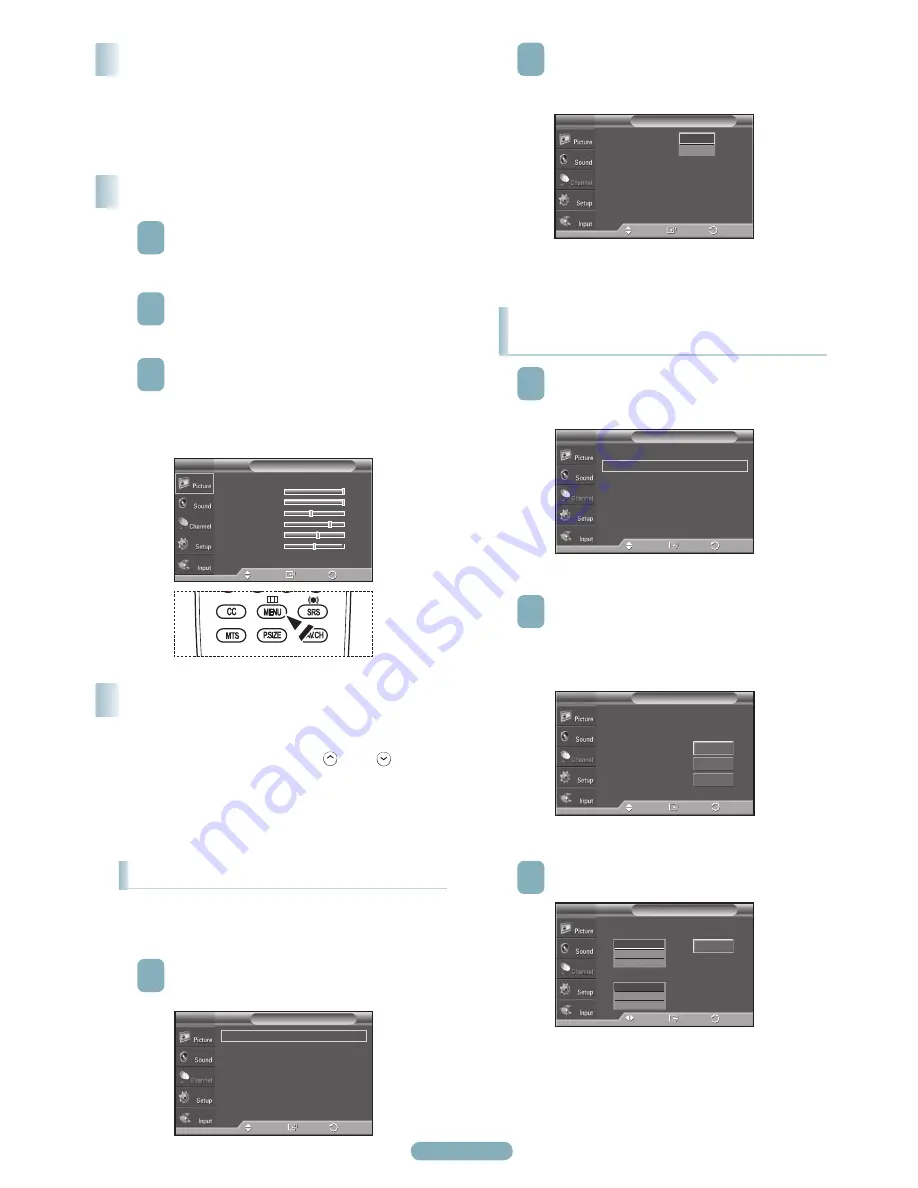
1
With the power on, press the
MENU
button.
The main menu appears on the screen. Its left side
has five icons:
Picture
,
Sound
,
Channel
,
Setup
,
Input
.
2
Press the ▲ or ▼ button to select one of the icons.
Then press the
ENTER
button to access the icon’s
sub-menu.
3
Press the
EXIT
button to exit.
➢
If you do not press the EXIT button, it takes
about one minute until the on-screen menu
disappears.
Your TV can memorize and store all of the available channels
for both “off-air” (air) and cable channels. After the available
channels are memorized, use the CH
W.LINK
or CH
W.LINK
button
to scan through the channels. This eliminates the need to
change channels by entering the channel digits. There are
three steps for memorizing channels: selecting a broadcast
source, memorizing the channels (automatic) and adding and
deleting channels (Channel Lists).
Memorizing the Channels
Selecting the Video Signal-source
2
Press the
ENTER
button to select
Antenna
.
Press the ▲ or ▼ button to select
Air
or
Cable
,
then press the
ENTER
button.
Press the
EXIT
button to exit.
Mode
: Standard
►
Cell Light
10
Contrast
100
Brightness
45
Sharpness
75
Color
55
Tint G 50
R 50
▼
More
Picture
T V
Enter
Move
Exit
Antenna
: Air
Auto Program
Clear Scrambled Channel
Channel List
Name
Fine Tune
Signal Strength
Channel
T V
Enter
Move
Air
Cable
Return
Storing Channels in Memory
(Automatic Method)
1
Press the
MENU
button to display the menu.
Press the ▲ or ▼ button to select
Channel
, then
press the
ENTER
button.
2
Press the ▲ or ▼ button to select Auto Program,
then press the
ENTER
button.
● Air
: Air antenna signal.
● Cable
: Cable antenna signal.
● Auto
: Air and Cable antenna signals
.
3
Press the ▲ or ▼ button to select the antenna
connection, then press the
ENTER
button.
Antenna
: Air
►
Auto Program
►
Clear Scrambled Channel
►
Channel List
►
Name
►
Fine Tune
►
Signal Strength
►
Channel
T V
Enter
Move
Return
Auto Program
T V
Select the antenna to execute the Auto
Program function.
Air
Cable
Auto
Start
Start
Enter
Move
Return
Start
Selects a cable signal type for your location.
Auto Program
T V
Enter
Move
Return
Analog
Digital
Start
STD
HRC
IRC
STD
HRC
IRC
Before your television can begin memorizing the available
channels, you must specify the type of signal source that is
connected to the TV (i.e. an Air or a Cable system).
1
Press the
MENU
button.
Press the ▲ or ▼ button to select
Channel
, then
press the
ENTER
button.
Antenna
: Air
►
Auto Program
►
Clear Scrambled Channel
►
Channel List
►
Name
►
Fine Tune
►
Signal Strength
►
Channel
T V
Enter
Move
Return
BN68-01822A-00Eng.indd 8
2008-08-12 오후 5:44:53


