background image

17

English

03

Basic Featur

es


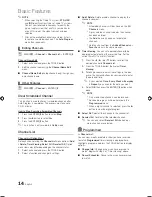
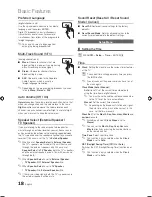
HDMI Black Level (Normal / Low)

: Lets you select the 

black level on the screen to adjust the screen depth.


Available only in HDMI mode.


Film Mode (Off / Auto)

: Sets the TV so that it 

senses and then process film signals from all sources 
automatically and adjusts the picture for optimum 
quality.


Available in TV, AV, COMPONENT (480i / 1080i) 
and HDMI (480i / 1080i).


Screen Burn Protection

: To reduce the possibility of 

screen burn, this unit is equipped with screen burn 
prevention technology. The Time setting allows you to 
program the time between movement of the picture in 
minutes.

Pixel Shift (Off / On)

: Using this function, you can 

minutely move pixels on the PDP in horizontal or vertical 
direction to minimize after images on the screen.


Optimum condition for pixel shift

Item

TV/AV/Component/

HDMI/PC

Horizontal

0~4

4

Vertical

0~4

4

Time

 (minute)

1~4 min

4 min


The 

Pixel Shift

 value may differ depending on the 

TV size (inches) and mode.


This function is not available in the 

Screen Fit


mode.

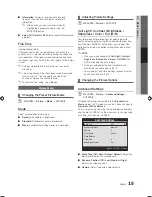
Scrolling

: This function removes after-images on the 

screen by moving all the pixels on the PDP according 
to a pattern. Use this function when there are remaining 
after-images or symbols on the screen, especially when 
you displayed a still image on the screen for a long time.


The after-image removal function has to be 
executed for a long time (approximately 1 hour) 
to effectively remove after-images on the screen. 
If the after-image is not removed after performing 
the function, repeat the function again.


Press any key on the remote control to cancel this 
feature.

Side Gray (Dark / Light)

: When you watch TV with the 

screen ratio set to 4:3, the screen is prevented from any 
damage by adjusting the white balance on both extreme 
left and right sides.

Picture Reset (Reset Picture Mode / 

Cancel)

Resets your current picture mode to its default settings.

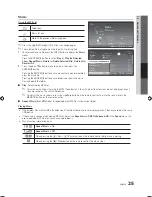
Sound Menu


¦

Changing the Preset Sound Mode


O

MENU

m


Sound


Mode


ENTER

E

Select an option using the up and down arrow keys, and the 
press 

ENTER

.

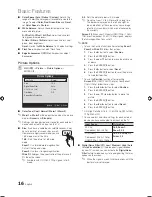
Mode 

Use the up and down arrow keys to select an option, and 
then press 

ENTER

.


Standard

: Selects the normal sound mode.


Music

: Emphasizes music over voices.


Movie

: Provides the best sound for movies.


Clear Voice

: Emphasizes voices over other sounds.


Custom

: Increase the intensity of high-frequency sound 

to allow a better listening experience for the hearing 
impaired.


¦

Adjusting Sound Settings


O

MENU

m


Sound


Equalizer


ENTER

E

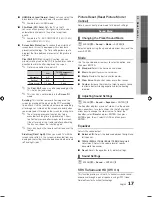
The Equalizer displays a series of sliders. Use the up and 
down arrow keys to select a slider. Use the left and right 
arrow keys to change the slider’s value. To Reset the 
Equalizer, select 

Reset

 and press 

ENTER

, then press 

ENTER

 again. To exit, select CLOSE, and then press 

ENTER

.

Equalizer

Adjusts the sound output.


Balance L/R

: Adjusts the balance between the right and 

left speaker.


100Hz / 300Hz / 1KHz / 3KHz / 10KHz

 (Bandwidth 

Adjustment): Adjusts the volume level of specific 
bandwidth frequencies.


Reset

: Resets the equalizer to its default settings.


¦

Sound Settings


O

MENU

m


Sound


ENTER

E

SRS TruSurround HD (Off / On) 

This function provides a virtual 5.1 channel surround sound 
experience through a pair of speakers using HRTF (Head 
Related Transfer Function) technology.

[PD450-ZX]BN68-03325C-00L02.indb   17

2011-01-13   오전 10:39:29

Summary of Contents for pl43d450

Page 1: ...muníquese con SAMSUNG WORLD WIDE Si desea formular alguna pregunta o comentario en relación con los productos de Samsung comuníquese con el centro de atención al cliente de SAMSUNG Country Customer Care Center Web Site Address MEXICO 01 800 SAMSUNG 726 7864 www samsung com C P 11570 AV Presidente Masaryk No 111 Int 701 Col Chapultepec Morales Delegacion Miguel Hidalgo Mexico D F IMPORTADO POR SAMS...

Page 2: ...r expands due to a change in the surrounding environment such as temperature or humidity This is normal and not a defect of the unit Cell Defects The PDP uses a panel consisting of 2 360 000 HD level to 6 221 000 FHD level pixels which require sophisticated technology to produce However there may be a few bright or dark pixels on the screen These pixels will have no impact on the performance of th...

Page 3: ...Adjusting Sound Settings 17 Sound Settings 17 y y Setup Menu 18 Setting the Time 18 Using the Sleep Timer 19 Setting the On Off Timer 19 Locking Programs 19 Economical Solutions 21 Other Features 21 y y Support Menu 22 Advanced Features y y Media Play 23 Connecting a USB Device 23 y y Anynet 26 Setting Up Anynet 27 Switching between Anynet Devices 28 Recording 28 Listening through a Receiver 28 Tr...

Page 4: ...leaning Cloth y y Power Cord Ferrite Core 2EA 3301 002049 Ferrite Core for Power Cord The ferrite cores are used to shield the cables from interference When connecting the ferrite core to a cable open the ferrite core and clip it around the cable near the plug as shown in the figure x x A One ferrite core should be no more than 8 inches from the end of the cord that is inserted into the TV x x B I...

Page 5: ...e TV to the Stand 3 Fasten four screws M4 X L8 at position NOTE x x Make sure to distinguish between the front and back of the Stand and Guide Stand when assembling them x x Make sure that at least two people lift and move the PDP TV Do not insert your fingers into the stand base slot of the TV when installing the stand base x4 M4 X L12 x4 M4 X L8 Rear Front M4 X L12 x4 Top View DO NOT USE CHEMICA...

Page 6: ...OSD on screen display of your TV s features y Adjusts the volume In the OSD use the y buttons as you would use the and buttons on the remote control z Changes the channels In the OSD use the z buttons as you would use the and buttons on the remote control Standby mode Your TV enters Standby mode when you turn it off and continues to consume a small amount of electric power To be safe and to decrea...

Page 7: ...te Channel Lists on the screen p 19 Displays the channel list on the screen p 13 Selects the on screen menu items and changes the values seen on the menu Exits the menu MTS Press to choose stereo mono or Separate Audio Program SAP broadcast p 18 P SIZE Lets you choose the picture size p 16 CC Controls the caption decoder p 21 Press to directly access channels Press to select additional digital cha...

Page 8: ...E button Select Air Cable or Auto 4 Selecting and memorizing channels The channel search will start automatically This can take up to 30 minutes For more information refer to Channel Auto Program in the e Manual y y Press the ENTERE button at any time to interrupt the memorization process 5 Setting the Clock Mode Press the or button Press the or button to select Auto or Manual and then press ENTER...

Page 9: ...oblem occurs ask the manufacturer of the external device about the HDMI version and if out of date request an upgrade x x Be sure to purchase a certified HDMI cable Otherwise the picture may not display or a connection error may occur Using a Component up to 720p 1080i or an Audio Video 480i only Cable Available devices DVD player Blu ray player cable box STB satellite receiver VCR When connecting...

Page 10: ...he TV s optical jack When the TV is receiving a DTV signal the TV will send 5 1 CH sound to the amplifier or DVD home theater When the source is a digital component such as a DVD player Blu ray player cable box STB Set Top Box satellite receiver and you connected it to the TV via HDMI you will only hearf 2 CH audio from the amplifier or DVD home theater If you want to hear 5 1 CH audio connect the...

Page 11: ...32 750 95 750 VESA DMT 640 x 480 640 x 480 640 x 480 800 x 600 800 x 600 800 x 600 1024 x 768 1024 x 768 1024 x 768 1280 x 720 1360 x 768 31 469 37 500 37 861 37 879 46 875 48 077 48 363 56 476 60 023 45 000 47 712 59 940 75 000 72 809 60 317 75 000 72 188 60 004 70 069 75 029 60 000 60 015 25 175 31 500 31 500 40 000 49 500 50 000 65 000 75 000 78 750 74 250 85 500 VESA GTF 1280 x 720 52 500 70 0...

Page 12: ... with an HDMI to DVI cable select DVI PC under Edit Name to enter a device name If you connected an AV device to the HDMI IN 1 DVI port with an HDMI to DVI cable select DVI Devices mode under Edit Name to enter a device name Basic Features How to Navigate Menus Before using the TV follow the steps below to learn how to navigate the menu and select and adjust different functions SLEEP P SIZE A B C ...

Page 13: ...f the selected channels x x T Tools Displays the Channel List option menu The options menus may differ depending on the situation Channel Status Display Icons Icons Operations c A channel selected A channel set as a Favorite A reserved Program Using Favorite Channels O O MENUm Channel Channel List ENTERE Add to Favorite Delete from Favorite t Set channels you watch frequently as Favorites 1 Select...

Page 14: ... channel to display the channels you want NOTE x x All deleted channels will be shown on the All Channels menu x x A gray colored channel indicates the channel has been deleted x x The Add menu only appears for deleted channels x x Delete a channel from the Added Channels or Favorite menu in the same manner Timer Viewing You can set a desired channel to be displayed automatically at the reserved t...

Page 15: ...ENTERE Cell Light Contrast Brightness Sharpness Color Tint G R Your television has several options for adjusting picture quality Select an option using the up and down arrow keys and then press ENTER Use the arrow keys to adjust the option value or select an option setting When done press ENTER NOTE x x When you make changes to Cell Light Contrast Brightness Sharpness Color or Tint G R the OSD wil...

Page 16: ... screen burn which are not covered by the warranty Screen Fit When your TV inputs HDMI 720p 1080i 1080p or Component 1080i 1080p signals displays the full image without any cut off NOTE x x To use the Position function after selecting Zoom1 Zoom2 or Wide Fit follow these steps 1 Press the button to select Position 2 Press the ENTERE button 3 Press the or button to move the picture up or down 4 Pre...

Page 17: ... repeat the function again Press any key on the remote control to cancel this feature Side Gray Dark Light When you watch TV with the screen ratio set to 4 3 the screen is prevented from any damage by adjusting the white balance on both extreme left and right sides Picture Reset Reset Picture Mode Cancel Resets your current picture mode to its default settings Sound Menu Changing the Preset Sound ...

Page 18: ... only When you set Speaker Select to TV Speaker both the TV s speakers and the external speakers are on You will hear sound through both When Speaker Select is set to External Speaker x x TV Speaker Off External Speaker On When Speaker Select is set to TV Speaker x x TV Speaker On External Speaker On If there is no video signal both the TV s speakers and the external speakers will be mute Sound Re...

Page 19: ...uto Power Off available only when the TV is turned on by the Timer The TV will be automatically turned off after 3 hours of being left idle to prevent overheating Locking Programs V Chip The V Chip feature automatically locks out programs that are deemed inappropriate for children The user must enter a PIN personal identification number before any of the V Chip restrictions are set up or changed N...

Page 20: ...cally block any category that deals with more sensitive material For example if you block the 8 ans category then 13 ans 16 ans and 18 ans will automatically be blocked also Downloadable U S Rating Parental restriction information can be used while watching DTV channels NOTE x x If information is not downloaded from the broadcasting station the Downloadable U S Rating menu is deactivated x x Paren...

Page 21: ...ption Off On You can switch the caption function on or off If captions are not available they will not be displayed on the screen CC The Caption feature doesn t work with devices connected to the TV through the Component HDMI or PC input jacks Caption Mode You can select the desired caption mode The availability of captions depends on the program being broadcast Default CC1 CC4 Text1 Text4 analog ...

Page 22: ...evice s user manual Sound Test Yes No Use the built in melody sound to check for sound problems If you hear no sound from the TV s speakers before performing the sound test make sure Speaker Select is set to TV Speaker in the Sound menu and then try the speakers again You will hear the melody during the test even if you have set Speaker Select is set to External Speaker or have muted the sound by ...

Page 23: ... Class Bulk Only Transport device Examples of MSC are Thumb drives and Flash Card Readers Both USB and HUB are not supported x Before connecting your device to the TV please back up your files to prevent them from damage or loss of data SAMSUNG is not responsible for any data file damage or data loss x Please connect directly to the USB port of your TV If you are using a separate cable connection ...

Page 24: ...the connection x x If a file deleted from the PC is still found when Media Play is run use the Empty the Recycle Bin function on the PC to permanently delete the file Photo Viewing a Photo or Slide Show 1 Press the INFO button to display the option View Start Slide Show Delete Delete All Deselect All 2 Press the or button to select Start Slide Show then press the ENTERE button During the slide sho...

Page 25: ...modulated MP3 file may cause a sound problem y y Music function information icons Repeat Music is On Repeat Music is Off When pressing the Play Pause button on the remote control while music is playing When pressing the Stop button on the remote control the music stops Photo Photo Music Setup SUM 307 2MB 973 7MB Music Photo Music Setup SUM 307 2MB 973 7MB DSC_0558 JPG 580 440 78 0KB 03 14 SUM Phot...

Page 26: ... an MP3 file during a slide show You can select Music On or Music Off Background Music Setting While a slide show is in progress use the Background Music Setting to select a music file to listen to Select an MP3 file as the background music Repeat Music Select to determine whether to repeat playing the music when all MP3 files in the current folder have been played Screen Saver Select to set the w...

Page 27: ...connected device menus For example if a DVD recorder is connected the disc menu of the DVD recorder will appear device_name INFO Shows the play menu of the connected device E g If a DVD recorder is connected the play menu of the DVD recorder will appear Receiver Sound is played through the receiver If you have connected more than one recording device they are displayed as recorder If you have conn...

Page 28: ...sing the REC button will record whatever you are currently watching If you are watching video from another device the video from the device is recorded Before recording check whether the antenna jack is properly connected to the recording device To properly connect an antenna to a recording device refer to the recording device s users manual Listening through a Receiver You can listen to sound thr...

Page 29: ...n the Anynet menu Press the SOURCE button on the TV remote control and select a non Anynet device Press z PRE CH to change the TV mode Note that the channel button operates only when a tuner embedded Anynet device is not connected The message Connecting to Anynet device appears on the screen You cannot use the remote control when you are configuring Anynet or switching to a view mode Use the remot...

Page 30: ...may fall and result in severe personal injury NOTE x x Standard dimensions for wall mount kits are shown in the table below x x Samsung wall mount kits contain a detailed installation manual and all parts necessary for assembly are provided x x Do not use screws that do not comply with the VESA standard screw specifications x x Do not use screws that are longer than the standard length or do not c...

Page 31: ...between the TV the wall and other objects to ensure proper ventilation Failing to do so may result in a fire or a problem with the TV caused by an increase in its internal temperature When using a stand or wall mount use parts provided by Samsung Electronics only x x If you use parts provided by another manufacturer it may result in a problem with the product or an injury due to the product fallin...

Page 32: ...crews and string are not supplied please purchase these additionally 2 Remove the screws from the back center of the TV put the screws into the clamps and then fasten the screws onto the TV again Screws may not be supplied with the product In this case please purchase the screws of the following specifications 3 Connect the clamps fixed onto the TV and the clamps fixed onto the wall with a strong ...

Page 33: ...15 Adjust Energy Saving option in the Setup menu p 21 Try resetting the picture to view the default picture settings go to MENU Picture Picture Reset p 17 There is a dotted line on the edge of the screen If the picture size is set to Screen Fit change it to 16 9 p 16 Change cable satellite box resolution The picture is black and white If you are using an AV composite input connect the video cable ...

Page 34: ...to CC1 p 21 Some channels may not have caption data The picture is distorted macro block error small block dots pixelization Compression of video contents may cause picture distortion especially with fast moving pictures such as sports and action movies A low signal can cause picture distortion This is not a TV problem PC Connection A Mode Not Supported message appears Set your PC s output resolut...

Page 35: ...ase stand from the TV and reassemble it The channel menu is greyed out unavailable The Channel menu is only available when the TV source is selected Your settings are lost after 30 minutes or every time the TV is turned off If the TV is in the Store Demo mode it will reset audio and picture settings every 30 minutes Change the settings from Store Demo mode to Home Use mode in the Plug Play procedu...

Page 36: ...0 C 10 to 80 non condensing 4 F to 113 F 20 C to 45 C 5 to 95 non condensing Stand Swivel Left Right 0 Model Name PL43D450 PL43D451 PL51D450 PL51D451 Screen Size 43 inches 51 inches Sound Output 10 W X 2 10 W X 2 Dimensions WxDxH Body With stand 39 8 x 2 2 x 24 5 inches 1011 8 x 56 0 x 622 4 mm 39 8 x 9 7 x 27 5 inches 1011 8 x 245 7 x 698 7 mm 46 8 x 2 2 x 27 8 inches 1187 8 x 56 0 x 706 6 mm 46 ...

Page 37: ...r 18 External Speaker 18 F FAV CH button 7 13 Film Mode 16 Fine Tune 15 Flesh Tone 15 Frequency 11 H HDMI 9 26 Home Theater 11 26 I Installation Space 31 L Language 21 License 36 M Media Play 23 Melody 22 Mono 18 Music 25 N Navigate 12 O Optimal resolution 11 P Photo 24 Picture Size 16 Plug Play 8 Power Indicator 6 R Receiver 28 Recording 28 Remote Control 7 Repeat Music 25 S Select All 14 Self Di...

Page 38: ...uido similar a un crujido puede producirse cuando el aparato se contrae o se expande debido a un cambio ambiental de temperatura o humedad Este hecho es normal y no se trata de ningún defecto en la unidad Defecto de celda La PDP utiliza un panel compuesto de 2 360 000 píxeles nivel HD a 6 221 000 nivel FHD que requieren una sofisticada tecnología para su producción No obstante puede que existan un...

Page 39: ... sonido 17 Configuración del sonido 17 y y Menú de configuración 18 Configuración de la hora 18 Uso del temporizador de desconexión 19 Activación y desactivación del temporizador 19 Programas de bloqueo 19 Soluciones económicas 21 Otras funciones 21 y y Menú de asistencia técnica 22 Funciones avanzadas y y Media Play 23 Conexión de un dispositivo USB 23 y y Anynet 26 Configuración de Anynet 27 Con...

Page 40: ...l del usuario y y Paño de limpieza y y Cable de alimentación y y Tarjeta de garantía Guía de seguridad Guía rápida de configuración Núcleo de ferrita 2 unidad Núcleo de ferrita para cable de alimentación El núcleo de ferrita se utiliza para proteger los cables de las interferencias Cuando conecte un cable abra el núcleo de ferrita y sujételo al cable cerca del enchufe tal como se muestra en la ilu...

Page 41: ...r levantado conéctelo al soporte 3 Atornille los tornillos M4 x L8 en la posición NOTA x x Para realizar el montaje debe tener en cuenta cuál es la parte frontal y cuál la posterior del soporte y el soporte de la guía x x Asegúrese de que al menos dos personas levanten y muevan el TV PDP No introduzca los dedos en la ranura de la base del soporte del televisor cuando esté montando ésta x4 M4 X L12...

Page 42: ...e botón como lo haría con el botón ENTERE del mando a distancia MENU Muestra un menú en pantalla la OSD visualización en pantalla de las funciones del TV y Ajustar el volumen En la OSD utilice los botones y de igual modo que los botones y del mando a distancia z Cambian los canales En la OSD utilice los botones z de igual modo que los botones y del mando a distancia Modo de espera No deje el telev...

Page 43: ... la pantalla pág 19 Muestra la lista de canales en la pantalla pág 13 Selecciona los elementos del menú en pantalla y cambia los valores que aparecen en el menú Sale del menú MTS Púlselo para elegir estéreo monoaural o un programa de audio independiente emisión SAP pág 18 P SIZESelecciona el tamaño de imagen pág 16 CC Controla el decodificador de subtítulos pág 21 Pulse para acceder directamente a...

Page 44: ...Uso domiciliario estándar Pulse el botón del volumen del televisor Cuando vea la OSD del volumen mantenga pulsado el botón MENUdurante 5 segundos 3 Selección de una antena Pulse los botones o y a continuación pulse el botón ENTERE Permite seleccionar Aire Cable o Auto 4 Selección de un canal Pulse los botones o y a continuación pulse el botón ENTERE Seleccione la fuente del canal que desea memoriz...

Page 45: ...onecta al televisor un dispositivo externo que utiliza una versión más antigua del modo HDMI En tales casos consulte al fabricante del dispositivo externo acerca de la versión HDMI y si ésta es antigua solicite una actualización x x Debe adquirir un cable certificado HDMI De lo contrario la imagen puede no mostrarse o producirse un error de conexión Uso de un cable de componentes hasta 720p 1080i ...

Page 46: ...o del terminal óptico del televisor Cuando el televisor recibe una señal DTV envía el sonido de 5 1 canales al amplificador o sistema Home Theater DVD Cuando la fuente es un componente digital como un reproductor DVD Blu Ray receptor de cable o satélite decodificador y está conectada al televisor a través de HDMI sólo se oye el sonido de 2 canales del amplificador o del sistema Home Theater DVD Si...

Page 47: ...750 VESA DMT 640 x 480 640 x 480 640 x 480 800 x 600 800 x 600 800 x 600 1024 x 768 1024 x 768 1024 x 768 1280 x 720 1360 x 768 31 469 37 500 37 861 37 879 6 875 48 077 48 363 56 476 60 023 45 000 47 712 59 940 75 000 72 809 60 317 75 000 72 188 60 004 70 069 75 029 60 000 60 015 25 175 31 500 31 500 40 000 49 500 50 000 65 000 75 000 78 750 74 250 85 500 VESA GTF 1280 x 720 52 500 70 000 89 040 N...

Page 48: ...uerto HDMI IN 1 DVI con el cable HDMI a DVI se debe configurar el TV en el modo DVI PC en el menú Editar Nombre PN51D450 only Cuando se conecta un cable HDMI DVI al puerto HDMI IN 1 DVI se debe configurar el televisor en los modos DVI PC o DVI devices en Editar Nombre Funciones básicas Cómo desplazarse por los menús Antes de usar el televisor siga los pasos siguientes para conocer cómo explorar el...

Page 49: ...os x x T Herramientas Muestra el menú de opciones Lista de canales Los menús de las opciones pueden cambiar dependiendo de la situación Iconos de la pantalla de estado del canal Iconos Función c Canal seleccionado Canal configurado como favorito Programa reservado Uso de los canales favoritos O O MENUm Canal Lista de canales ENTERE Agregar a Favoritos Borrar de Favoritos t Configure los canales qu...

Page 50: ...r Suprima o añada un canal para que se muestren los canales que desee NOTA x x Todos los canales borrados se mostrarán en el menú Todos los canales x x Un canal de color gris quiere decir que se ha suprimido x x El menú Añadir sólo aparece con los canales borrados x x Suprima un canal del menú Canales agregados o Favoritos de la misma manera Visual tempor Se puede establecer que el canal que se de...

Page 51: ...ENTERE Modo Seleccione el tipo de imagen preferido Dinámico Adecuado para un entorno iluminado Normal Adecuado para un entorno normal Cine Adecuado para ver películas en un entorno oscuro Ajuste de la configuración de la imagen O O MENUm Imagen ENTERE Luz de la celda Contraste Brillo Definición Color Tinte V R El televisor tiene diferentes opciones de configuración para controlar la calidad de la ...

Page 52: ... pantalla por la retención de la imagen que no está cubierto por la garantía Ajuste pantalla Cuando se cambian los canales analógicos muestra la intensidad de la señal NOTA Después de seleccionar Zoom1 Zoom2 o Ajuste ancho 1 Pulse el botón para seleccionar Posición 2 Pulse el botón ENTER E 3 Pulse los botones o para desplazar la imagen hacia arriba o hacia abajo 4 Pulse el botón ENTER E 5 Pulse el...

Page 53: ...presión de restos de imágenes debe aplicarse durante largo tiempo aproximadamente 1 hora para que sea efectiva Si los restos de imágenes no desaparecen después de ejecutar la función repita el proceso Pulse cualquier tecla del mando a distancia para cancelar esta función Lateral gris Oscuro Claro Cuando se ve la televisión con una relación de pantalla establecida en 4 3 ésta se puede proteger de u...

Page 54: ...omo Altavoz externo x x Altavoz de TV Apagado Altavoz externo Encendido Compruebe si Seleccionar altavoz está establecido como Altavoz de TV x x Altavoz de TV Encendido Altavoz externo Encendido Si no hay señal de vídeo ambos altavoces se silencian Reinicio del sonido Reiniciar todo Reinic modo sonido Cancelar Reiniciar todo Restablezca todas las configuraciones de sonido predeterminadas de fábric...

Page 55: ...ionado el día Apagado automático sólo disponible cuando el televisor se ha encendido con el temporizador El televisor se apagará automáticamente 3 horas después de que se haya dejado inactivo para prevenir un sobrecalentamiento Programas de bloqueo V Chip La función V Chip bloquea automáticamente los programas que no se consideran apropiados para los menores El usuario debe introducir primero un c...

Page 56: ...alquier categoría que trate material más sensible Por ejemplo si bloquea la categoría 8 ans también se bloquearán automáticamente 13 ans 16 ans y 18 ans Clasificación U S Descargable La información de la restricción de bloqueo se puede usar mientras se ven los canales DTV NOTA x x Si la información no se descarga desde la emisora el menú Clasificación U S Descargable está desactivado x x La inform...

Page 57: ...a como Normal y el de Sonido como Cine Ecualizador no está disponible Subtítulo Mensajes de texto en pantalla Subtítulo Apagado Encendido Puede activar o desactivar la función de subtítulos Si los subtítulos no están disponibles no se mostrarán en la pantalla CC La función de subtítulos no está disponible en los modos Componente HDMI ni PC Modo de Subtítulo Puede seleccionar el modo de subtítulo d...

Page 58: ...ye sonido en los altavoces del televisor antes de realizar la prueba de sonido asegúrese de que Seleccionar altavoz esté configurado como Altavoz de TV en el menú Sonido La melodía se oirá durante la prueba aunque Seleccionar altavoz esté establecido como Altavoz externo o se haya silenciado el sonido con el botón MUTE Sí Si sólo puede oír sonido de un altavoz o no se oye sonido durante la prueba ...

Page 59: ...ositivo de clase de almacenamiento masivo MSC USB MSC es un dispositivo de clase de almacenamiento masivo sólo de transporte de gran capacidad Ejemplos de MSC son las unidades de almacenamiento en miniatura y los lectores de tarjetas Flash No se admite ni el HUB ni el USB x Antes de conectar el dispositivo al televisor haga una copia de seguridad de sus archivos para evitar daños o pérdidas de dat...

Page 60: ...un archivo borrado del PC aún se encuentra cuando se ejecuta el reproductor multimedia utilice la función Vaciar la papelera de reciclaje del PC para borrar permanentemente el archivo Photo Visualización de una foto o una presentación 1 Pulse el botón INFO ara mostrar la opción Ver Inic vis aut Borrar Borrar todo Deselecc todos 2 Pulse los botones o para seleccionar Inic vis aut y pulse el botón E...

Page 61: ...zador y SRS TruSurround HD en el menú Sonido Un archivo MP3 demasiado modulado puede ocasionar problemas de sonido y y Iconos de información de la función de la música Repetir música está establecido como Encendido Repetir música está establecido como Apagado Cuando se pulsa el botón Reproducir Pausa del mando a distancia mientras se está reproduciendo música Cuando se pulsa el botón Detener del m...

Page 62: ...ca Encendido o Música Apagado Configuración de la música de fondo Cuando se está realizando una presentación se puede cambiar a Configuración de la música de fondo para seleccionar un archivo de música y escucharlo Seleccione un archivo MP3 como música de fondo Repetir música Se selecciona para determinar si se desea repetir la reproducción de la música cuando se han reproducido todos los archivos...

Page 63: ...dispositivo Muestra los menús del dispositivo conectado Por ejemplo si se ha conectado un grabador de DVD se muestra el menú del disco del grabador de DVD INFO nombre_dispositivo Muestra el menú de reproducción del dispositivo conectado Por ejemplo si se ha conectado un grabador de DVD se muestra el menú del disco del grabador de DVD Grabación grabador Inicia inmediatamente la grabación en el grab...

Page 64: ...está viendo en ese momento Si está viendo un vídeo desde otro dispositivo se graba el vídeo de éste Antes de grabar compruebe si la toma de antena está conectada correctamente al dispositivo de grabación Para conectar correctamente una antena a un dispositivo de grabación consulte el manual del usuario del dispositivo de grabación Escucha a través de un receptor Se puede escuchar sonido a través d...

Page 65: ...Pulse el botón SOURCE del mando a distancia del televisor y seleccione un dispositivo que no sea Anynet Pulse z PRE CH y FAV CH para cambiar el modo TV Tenga en cuenta que el botón de canal sólo funciona cuando no hay ningún dispositivo Anynet con sintonizador incorporado conectado En la pantalla aparece el mensaje Conectando al dispositivo Anynet El mando a distancia no se puede utilizar cuando s...

Page 66: ...x Las dimensiones estándar de los equipos de montaje mural se muestran en la tabla siguiente x x Al adquirir el equipo de montaje mural también se distribuye un manual de instalación detallado y todas las piezas necesarias para el montaje x x No use tornillos que no cumplan las especificaciones de tornillos estándar VESA x x No use tornillos con una longitud superior a la medida estándar o que no ...

Page 67: ...l producto y otros objetos por ejemplo paredes para asegurar la ventilación adecuada En caso contrario se podría producir un incendio por un incremento de la temperatura interna del producto Cuando utilice un soporte o un montaje mural use sólo las piezas proporcionadas por Samsung Electronics x x Si utiliza piezas proporcionadas por otros fabricantes podría tener problemas con el producto o éste ...

Page 68: ...laje Las grapas los tornillos y la cadena no se suministran con el producto deberá adquirirlos por separado 2 Quite los tornillos de la parte central posterior del televisor y con ellos monte las grapas en el televisor Quizás con el televisor no vayan incluidos los tornillos En tal caso debe adquirirlos por separado con estas especificaciones 3 Monte una cadena fuerte entre las grapas del televiso...

Page 69: ...pción Ahorro energía en el menú Configuración pág 21 Intente reiniciar la imagen para ver la configuración de imagen predeterminada vaya a MENU Imagen Reinicio de la imagen pág 17 Hay una línea de puntos en el borde la pantalla Si el tamaño de la imagen está establecido en Ajuste pantalla cámbielo a 16 9 pág 16 Cambie la resolución del decodificador de cable satélite La imagen se ve sólo en blanco...

Page 70: ...pág 21 Algunos canales no tienen datos de subtítulos La imagen se ve distorsionada error de macrobloques microbloques puntos pixelización La compresión de los contenidos de vídeo puede causar imágenes distorsionadas especialmente en las escenas de movimiento rápido como en los deportes y las películas de acción Un nivel de señal débil puede causar imágenes distorsionadas No es un problema del tele...

Page 71: ...base del soporte de televisor y vuelva a montarla El menú del canal se ve atenuado no disponible El menú Canal sólo está disponible cuando está seleccionada la fuente TV La configuración se pierde después de 30 minutos o cada vez que se apaga el televisor Si el televisor está en el modo Demo comercio la configuración del audio y la imagen se restablecerá cada 30 minutos Cambie la configuración del...

Page 72: ... F a 40 F 10 al 80 sin condensación 4 F a 113 F 20 C a 45 C 5 al 95 sin condensación Giro del soporte izquierda derecha 0 Nombre del modelo PL43D450 PL43D451 PL51D450 PL51D451 Tamaño de pantalla 43 pulgadas 51 pulgadas Sonido salida 10 W x 2 10 W x 2 Dimensiones An x Pr x Al Cuerpo principal Con el soporte 39 8 x 2 2 x 24 5 pulgadas 1011 8 x 56 0 x 622 4mm 39 8 x 9 7 x 27 5 pulgadas 1011 8 x 245 7...

Page 73: ...caciones 36 F Fotos 24 Frequency 11 G Grabación 28 H HDMI 9 26 Herramientas 3 Home Theater 11 26 I Idioma 21 Indicador de encendido 6 L Licencia 36 Lista de fuentes 12 M Mando a distancia 7 Melodía 22 Menú de canales 13 Modo de espera 6 Modo película 16 Mono 18 Montaje mural 30 Música 25 Música de fondo 26 N Navegar 12 P Pilas 7 Plug Play 8 R Receptor 28 Reloj 18 Repetir música 25 Reproductor mult...

Page 74: ...This page is intentionally left blank ...

Reviews: