background image

30

_ funcionamiento del horno

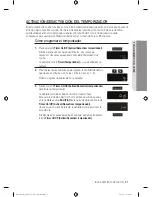
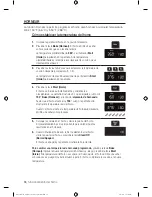
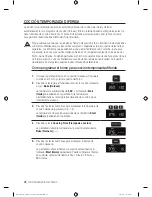
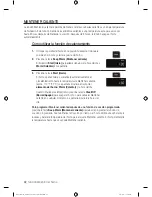
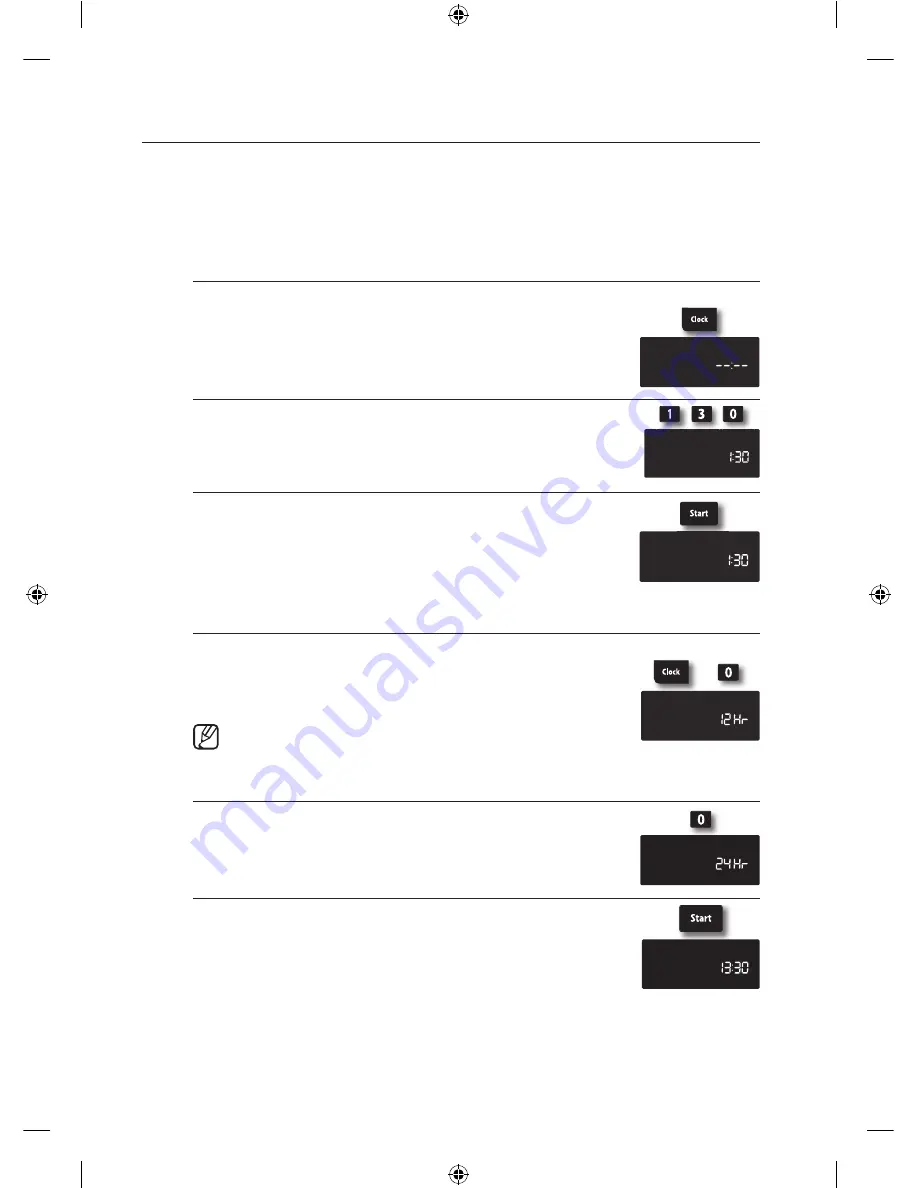
aJUStE dEL rELoJ

El reloj debe ajustarse para mostrar la hora correcta para permitir el buen funcionamiento de las opciones 

de temporizador del horno. El reloj se puede ajustar para mostrar una pantalla de 12 o 24 horas.  

El ajuste predeterminado es el de 12 horas.

La hora del día no se puede cambiar durante una cocción programada, un inicio retardado, la auto-

limpieza o la operación de la función Shabat.

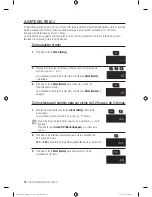
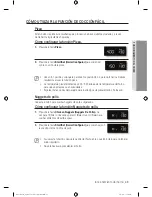
Cómo ajustar el reloj

1. 

Presione la tecla 

Clock (Reloj)

.

2. 

Ingrese la hora actual en horas y minutos usando las teclas de 

números (por ej.: 1, 3, 0).
La pantalla mostrará la hora del día y el indicador 

Start (Inicio)


parpadeará.

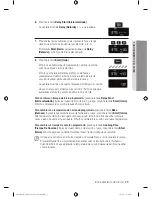
3. 

Presione la tecla 

Start (Inicio)

 para configurar y poner en 

funcionamiento el reloj.
La pantalla mostrará la hora del día y el indicador 

Start (Inicio) 

se 

apagará.

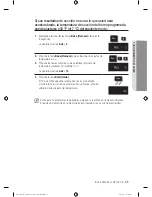
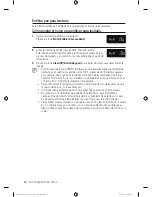
Cómo efectuar el cambio para ver ciclos de 12 horas o de 24 horas

1. 

Mantenga presionadas las teclas 

Clock (Reloj)

 y 

0

 durante 

3 segundos. 

La pantalla mostrará el modo en uso (por ej.: 12 horas).

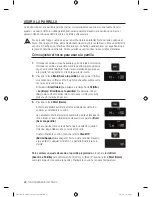
Si se presiona una tecla antes que la otra, aparecerá 

-- --

 en la 

pantalla.  

Presione la tecla 

Clear/Off (Borrar/Apagar) 

y comience de 

nuevo.

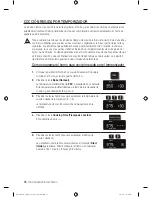
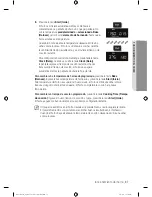
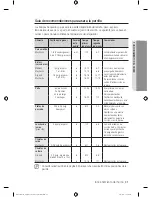
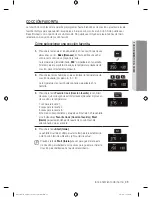
2. 

Presione la tecla 

0

 para cambiar el ajuste de la pantalla entre 

12 horas y 24 horas.

12 h

 o 

24 h

 aparecerá en la pantalla dependiendo de su selección.

3. 

Presione la tecla 

Start (Inicio)

 para cambiar el modo de 

visualización del reloj.

NX58F5300SS_AA_DG68-00509A-04_EN+MES.indb   30

3/30/2016   3:37:56 PM

Summary of Contents for NX58F5300SS

Page 1: ... Gas Range user manual imagine the possibilities Thank you for purchasing this Samsung product NX58F5500SS NX58F5500SB NX58F5500SW NX58F5300SS ENGLISH NX58F5300SS_AA_DG68 00509A 04_EN MES indb 1 3 30 2016 3 37 33 PM ...

Page 2: ... means greater convenience for you when cooking for the holidays or when entertaining A cooktop with 5 burners Power burners simmer burners as well as a center oval burner provide flexible cooktop heat for a variety of cookware The center oval burner provides even heating over large areas so it is perfect for griddle cooking A center oval burner is only provided for the NX58F5500SS NX58F5500SB NX5...

Page 3: ...ntial risk for personal injury or property damage CAUTION To reduce the risk of fire explosion electric shock or personal injury when using your gas range follow these basic safety precautions Do NOT attempt Do NOT disassemble Do NOT touch Follow directions explicitly Unplug the power cord from the electrical outlet Make sure the range is plugged into an earth grounded electrical outlet to prevent...

Page 4: ... neighbor s phone Follow the gas supplier s instructions If you cannot reach your gas supplier call the fire department Installation and service must be performed by a qualified installer service agency or the gas supplier ANTI TIP DEVICE WARNING WARNING Tip Over Hazard A child or adult can tip the range and be killed Install anti tip device to range and or structure per installation instructions ...

Page 5: ...nstallation instructions found in the Installation Manual Failure to follow these instructions can result in death serious personal injury and or property damage DO NOT step sit lean on the door or drawer to prevent accidental tipping of the range STATE OF CALIFORNIA PROPOSITION 65 WARNING US ONLY WARNING This product contains chemicals known to the State of California to cause cancer and birth de...

Page 6: ...ry to repair or replace this appliance on your own unless it is specifically recommended in this manual This appliance should be serviced only by a qualified service technician Know the location of the gas shut off valve and how to shut it off if necessary Properly remove or destroy the packaging materials after the appliance is unpacked Electrical Mechanical Unplug or disconnect power before serv...

Page 7: ...dren not to touch or play with the controls or any part of the range We recommend you utilize the control door lockout feature to reduce the risk of mis use by children Before disposing of the range cut off the power cord to prevent it from being connected to a power source Remove the door to prevent children and animals from getting trapped Fire Do not touch oven burners drawer burners or interio...

Page 8: ...its unattended at high heat settings Boilovers cause smoke and greasy spillovers could ignite Do not use a flame to check for gas leaks Instead use a brush to spread a soapy water mixture around the area you are checking If there is a gas leak you will see small bubbles in the soapy water mixture at the point of the leak Do not place portable appliances or any other object other than cookware on t...

Page 9: ...ended large or dangerous flame Heating of beverages can result in delayed eruptive boiling To prevent delayed eruptive boiling ALWAYS allow heated beverages to stand at least 20 seconds after you have turned the burner off so that the temperature in the liquid can stabilize In the event of scalding follow these FIRST AID instructions Immerse the scalded area in cold water for at least 10 minutes C...

Page 10: ... with the current Natural Gas Installation Code CAN CGA B149 1 or the current Propane Installation Code CAN CGA B149 2 and with local codes where applicable This range has been design certified by ETL according to ANSI Z21 1 latest edition and Canadian Gas Association according to CAN CGA 1 1 latest edition Do not install this range in a place which is exposed to a strong draft Installation and se...

Page 11: ...an one appliance into this circuit The range is supplied with a 3 pronged grounded plug This cord MUST be plugged into a mating grounded 3 prong outlet that meets all local codes and ordinances If you are unsure your electrical outlet is properly grounded have it checked by a licensed electrician If codes permit the use of a separate ground wire we recommend that a qualified electrician determine ...

Page 12: ...staller must replace the 5 surface burner orifices and 2 oven orifices with the provided LP orifice set and reverse the GPR adapter WARNING These adjustments must be made by a qualified service technician in accordance with the manufacturer s instructions and all codes and requirements of the authority having jurisdiction Failure to follow these instructions could result in serious injury or prope...

Page 13: ...cated behind the range under the oven control panel at the top and bottom of the oven door and under the lower warming or storage drawer Large scratches on or sharp blows to the door glass can cause the glass to break or shatter Make sure the wall coverings around the range can withstand heat up to 200 F 93 C generated by the range Avoid placing cabinets above the range This reduces the hazard cau...

Page 14: ...urface burners unattended at HIGH flame settings Boilovers cause smoking and greasy spillovers can ignite Stand away from the range when frying Adjust the top burner flame size so it does not extend beyond the edge of the cookware Flames that extend past cookware edges can be hazardous To decrease spattering when cooking foods with lots of liquid such as meat sauce or stew adjust the the flame to ...

Page 15: ...amed they should only be flamed under a ventilation hood that is on Always make sure foods being fried are thawed and dried Moisture of any kind can cause hot fat to bubble up and over the sides of the pan Never move a pan or deep fat fryer full of hot fat Always let it cool before moving Always make sure the controls are OFF and the grates are cool before you remove them to prevent any possibilit...

Page 16: ...the oven for storage Stored items can be damaged or ignite Keep the oven free from grease buildup Reposition oven racks only when the oven is cool to prevent burning or personal injury Do not heat unopened containers Pressure in the container could build up resulting in an explosion and or personal injury Only use glass cookware that is recommended for use in gas ovens This prevents fire flare ups...

Page 17: ...r and or steam can cause burns or personal injury Do not use aluminum foil to line the lower drawer Aluminum foil will trap heat and alter the warming performance of the drawer It could also damage the interior finish Never use the lower warming drawer in the upper oven Never put the lower warming drawer in the upper oven during a self cleaning cycle Never leave jars or cans of fat drippings in or...

Page 18: ...cleaning operation Never self clean with the lower drawer or drawer pan placed in the oven If the self cleaning operation malfunctions turn off the oven disconnect the power supply and contact a qualified service technician Do not use oven cleaners Commercial oven cleaners or oven liners should NEVER be used in or around any part of the oven Residue from oven cleaners will damage the inside of the...

Page 19: ... On Off 32 Positioning the oven racks 33 Oven vent 33 Oven light 34 Baking 36 Timed cooking 38 Delay timed cooking 40 Broiling 42 Keep warm 43 Using the easy cook feature 45 Favorite cooking 47 Sabbath function 49 Extra features MAINTAINING YOUR APPLIANCE 51 51 Care and cleaning of the oven 54 Care and cleaning of the cooktop 58 Changing the oven light 59 Removing and replacing the oven door 61 Re...

Page 20: ...ight rear burner control Right front burner control OVEN COMPONENTS Oven racks 2 Removable oven bottom Removable oven door STORAGE DRAWER COMPONENTS Removable Storage drawer 1 DISPLAY OVEN VENT centered under oven control panel COOKTOP COMPONENTS Heavy duty continuous cast grates Left burner grate Center burner grate Right burner grate Cooktop burner caps Cooktop burners Cooktop burner heads 5 Coo...

Page 21: ... rear burner control Center burner control Right rear burner control Right front burner control OVEN COMPONENTS Oven racks 2 Removable oven bottom Removable oven door STORAGE DRAWER COMPONENTS Removable Storage drawer 1 DISPLAY OVEN VENT centered under oven control panel COOKTOP COMPONENTS Heavy duty continuous cast grates Left burner grate Center burner grate Right burner grate Cooktop burner cap...

Page 22: ...ate MANUALLY LIGHTING A GAS SURFACE BURNER If a power failure occurs the surface burners can still be lit manually Use extreme caution when manually lighting a surface burner 1 Hold a long gas grill lighter to the surface burner you want to light 2 Push in and turn the control knob for that burner to the LITE position 3 After the burner has lit set the control knob and the burner to the desired se...

Page 23: ...iling Food RIGHT REAR RR Low simmering Chocolate Casseroles Sauces CENTER OVAL BURNER Using Griddle Pancakes Hamburgers Fried Eggs Hot Sandwiches CENTER ROUND BURNER General heating Low simmering General Food Tomato Sauce Casseroles LEFT FRONT LF Quick heating Boiling Food LEFT REAR LR General heating Low simmering General Food Tomato Sauce Casseroles Tomato sauce needs to be stirred during the lo...

Page 24: ...colors easily STAINLESS STEEL Slow heat conductor with uneven cooking results Is durable easy to clean and resists staining CAST IRON A poor conductor but retains heat very well Cooks evenly once cooking temperature is reached ENAMELWARE Heating characteristics will vary depending on base material GLASS Slow heat conductor Glass cookware is designed for two usages top of range cooking or oven use ...

Page 25: ...me Preheat Condition Cook Condition Pancakes 5 min 5 MED HI 4 MED Hamburgers 5 min 7 HI 5 MED HI Fried Eggs 5 min 7 HI 5 MED LO Bacon None 4 MED Breakfast Sausages 5 min 7 HI 5 MED Grilled Cheese Sandwich 4 min 7 HI 6 MED HI DO NOT remove the griddle plate until the cooktop grates surfaces and griddle plate are completely cooled The griddle plate on the cooktop may become very hot when using the c...

Page 26: ...age the griddle surface Do not use the griddle as a cutting board DO NOT place or store items on the griddle plate DO NOT use the griddle after turning it over on the grate DO NOT use the griddle plate for another purpose Avoid cooking extremely greasy foods grease spill over can occur The griddle can become hot when surrounding burners are in use NX58F5300SS_AA_DG68 00509A 04_EN MES indb 26 3 30 ...

Page 27: ...n operations are controlled with electronic touch pads Use the following pads to program and operate all oven cooking cleaning and timing functions All programmed settings and cooking statuses will show on the digital display 7 8 9 10 11 12 13 14 2 3 4 5 1 15 6 7 8 9 10 11 12 13 14 2 3 4 5 1 15 6 NX58F5300SS_AA_DG68 00509A 04_EN MES indb 27 3 30 2016 3 37 37 PM ...

Page 28: ... Activates the favorite cook feature This feature lets you preprogram up to three frequently used cooking cycles so they can be set and started with the touch of a button 10 Cooking Time Touch this pad and then the desired amount of time you want your food to cook The oven will automatically shut off when the time has elapsed 11 Timer On Off Touch to select the timer feature Activates a kitchen ti...

Page 29: ... Clean 2 hours 4 hours Keep Warm 3 hours Bread Proof 12 hours Always bake and or broil with the oven door closed If you open the oven door while the oven is operating and leave it open the oven burner will stop in 1 minute This is not a product failure The oven will automatically start again when you close the door Application mode Bake Broil Pizza Bread Proof Chicken Nuggets Favorite Cook NX58F53...

Page 30: ...ll show the time of day and the Start indicator will blink 3 Press the Start pad to set and start the clock The display will show the time of day and the Start indicator will turn off How to change between a 12 hour and 24 hour display 1 Press and hold the Clock and 0 pads for 3 seconds The display will show the present mode e g 12Hr If one pad is pressed before the other will appear in the displa...

Page 31: ...d three times to turn off or cancel the kitchen timer The display will show Timer and will blink in the display 2 Press the number pads to enter the amount of time you want in minutes or hours and minutes e g 1 5 The set time will show in the display 3 Press the Timer On Off pad to start the timer The display will show the remaining time When time has elapsed the oven will beep and the display wil...

Page 32: ... is cool When placing an oven rack in the topmost rack position position 7 make sure the rack is stably situated on the embossed stop Oven rack positions TYPE OF FOOD RACK POSITION Hamburgers and steaks 6 or 7 Toasts 5 or 6 Biscuits muffins brownies cookies 4 Bundt or pound cakes 3 Angel food cake pies 2 Roasts small or large ham turkeys 1 or 2 Baking layer cakes Centering the baking pans in the o...

Page 33: ...ustion problems and ensures good cooking results Since the vent and area around the vent can become hot use care when placing items near the oven vent Hot steam could heat or melt items placed in front of the oven vent OVEN LIGHT The oven has a light that is located on the rear oven wall in the upper right rear corner The light can be turned on or off by touching the OVEN LIGHT pad on the oven con...

Page 34: ...ating The display will show a blinking along with 150 Bake and the Bake element icon until the oven reaches 150 Then the display will just show the actual oven temperature When the oven reaches the desired baking temperature it will beep 6 times 5 Place the food in the oven and close the oven door Preheating is very important for good baking results 6 When baking is complete remove the item s from...

Page 35: ...erature adjustments 3 Press the number pads for the desired temperature adjustment for example 1 0 The display will show AdJ and 10 4 Press the Start pad The oven will beep twice and the display will show the time of day The next time you bake the oven will use the new temperature setting This adjustment will not affect the broiling or the self cleaning temperatures The adjustment will be retained...

Page 36: ...ng is completed Eating spoiled food can result in sickness from food poisoning How to set the oven for timed cooking 1 Position the oven rack in the desired location Place the food in the oven and close the oven door 2 Press the Bake pad The default temperature 350 will blink on the display If the default temperature is the desired cooking temperature skip to step 4 3 Press the number pads for the...

Page 37: ...s elapsed the oven will automatically shut off and the display will show the time of day To change a programmed baking temperature press the Bake pad enter the new baking temperature and press the Start pad If the oven temperature is above the new setting the oven will beep 6 times then show the new setting The oven will complete cooking at the new temperature To change a programmed cooking time p...

Page 38: ...poiled food can result in sickness from food poisoning How to set the oven for delay timed cooking 1 Position the oven rack in the desired location Place the food in the oven and close the oven door 2 Press the pad for the desired cooking operation e g Bake The default temperature 350 and the Start indicator will blink on the display If the default temperature is the desired cooking temperature sk...

Page 39: ...rogrammed starting time press the Delay Start pad enter the new starting time and then press the Start pad The oven will start cooking at the new start time To change a programmed baking temperature press the Bake pad enter the new baking temperature and then press the Start pad If the oven temperature is above the new setting the oven will beep 6 times then show the new setting The oven will comp...

Page 40: ...1 Close the oven door 2 Press the Broil pad once for Hi and twice for Lo The oven will beep every time a pad is pressed The Start indicator will blink to the right of Hi or Lo and Broil on the display Use Lo to cook foods such as poultry or thick cuts of meat thoroughly without overbrowning them 3 Press the Start pad The oven will automatically light the top oven burner and start cooking The displ...

Page 41: ... Slash fat Well Done 6 12 14 6 8 Medium 1 5 in thick 2 to 2 5 lbs 6 15 18 14 17 Well Done 6 18 22 17 19 Chicken 1 whole cut up 2 to 2 5 lbs Split lengthwise 4 30 35 15 20 Broil skin side down first Spread open Brush with melted butter before and halfway through broiling 2 breasts 5 15 20 7 12 Fish Fillets 0 25 to 0 5 in thick 6 6 10 3 4 Handle and turn very carefully Brush with lemon butter before...

Page 42: ...play 3 Press the Start pad The oven will automatically light and start preheating to the Keep Warm temperature approx 170 F 77 C The display will show the oven element icon Warm and the time of day When warming is completed press the Clear Off pad to shut off the oven or to cancel Keep Warm at any time The display will show the time of day To program Keep Warm after a timed cooking function press ...

Page 43: ...ature is 400 F You may adjust the oven temperature to fit your needs Follow the package instructions for preheating and baking times Chicken Nuggets Use this function is to cook convenience style frozen chicken nuggets How to set the Chicken Nuggets function 1 Press the CHICKEN NUGGETS pad once for HI or twice for LO Use LO to cook thick style foods 2 Press the Start Set pad to begin chicken nugge...

Page 44: ...e functions produce the best results when started while the oven is cool we recommend that you wait until the oven has cooled down and Hot disappears from the display To avoid lowering the oven temperature and lengthening proofing time do not open the oven door unnecessarily Check bread products early to avoid over proofing Do not use the proofing mode for warming food or keeping food hot The proo...

Page 45: ...ip to step 3 2 Press the number pads for the desired cooking temperature for example 3 7 5 The selected cooking temperature will blink on the display 3 Press the Favorite Cook pad the number of times that corresponds to where you want to store the operation and temperature 1 time for recipe 1 2 times for recipe 2 3 times for recipe 3 The corresponding number and the setting will show in the displa...

Page 46: ... of the default or actual temperature until the selected temperature is reached The oven will beep 6 times The default or actual temperature the cooking function the cooking function icon and the time of day will be displayed When the oven reaches the desired cooking temperature it will beep 6 times 4 Place the food in the oven and close the oven door Preheating is very important for good baking o...

Page 47: ...efault temperature is the desired cooking temperature skip to step 4 3 Press the number pads for the desired cooking temperature for example 3 7 5 The selected cooking temperature will blink on the display 4 Press the Start pad 5 Press and hold the Clock and Timer On Off pad at the same time for 3 seconds The display will show SAb The oven signals display LEDs and all oven controls except the numb...

Page 48: ...and 9 hours and 99 minutes Proceed with step 4 from How to set the Sabbath function How to change the temperature and exit the Sabbath function To change a programmed baking temperature press the Bake pad enter the new baking temperature and press the Start pad In approximately 20 seconds the control panel will click and the oven will complete cooking at the new temperature To exit the Sabbath fun...

Page 49: ...t ON 12 Hr or OFF Hr 3 Press the Start pad to save and start the feature settings Fahrenheit or Centigrade Temperature Selection The oven control can be programmed to display temperatures in Fahrenheit or Centigrade The oven has been preset at the factory to display in Fahrenheit How to change the display from Fahrenheit to Centigrade or from Centigrade to Fahrenheit 1 Press the Broil and 0 pads a...

Page 50: ... 1 Press the Oven Light and 0 pads at the same time for 3 seconds The display will show Snd On sound on or Snd OFF sound off The default setting is Snd On 2 Press the 0 pad to toggle between Snd On and Snd OFF 3 Press the Start pad to save and set the audible signal setting NX58F5300SS_AA_DG68 00509A 04_EN MES indb 50 3 30 2016 3 37 43 PM ...

Page 51: ...oapy water Never use steel wool or abrasive cleansers Protect the surface from sharp objects All of the above items can damage the surface Oven control panel 1 To lock the oven controls and the oven door press and hold the Start Set pad for 3 seconds This prevents accidental oven operation and appliance tipping The oven will beep and the display will show Loc the time of day and the Lock icon 2 Cl...

Page 52: ...proved stainless steel cleaner to a damp clean cloth or paper towel Clean a small area carefully following the instructions on the cleaner Stainless steel should always be cleaned with the grain in the stainless steel if applicable 3 Dry and buff with a clean dry soft cloth 4 Repeat steps 2 and 3 as necessary Do not spray any type of cleaner into the manifold panel holes Within these holes are ign...

Page 53: ...faces that require different cleaning techniques The gasket on the inside surface of the oven door should never be cleaned or moved to clean other surfaces The gasket is made of woven material which is essential for a good heat seal The inside door surface outside of the gasket should be cleaned by hand with hot soapy water and a soapy plastic scouring pad Rinse and dry thoroughly with a clean sof...

Page 54: ...oapy water Rinse and completely dry all surfaces including back and stem hole Do not use spray cleaners on the surface burner control panel Spray entering the valve holes could contact electrical components resulting in death personal injury or product damage 4 Clean stainless steel surfaces with stainless steel cleaner on a damp soft cloth See page 52 5 Replace the control knobs in the OFF positi...

Page 55: ...s or abrasive cleaners on any burner part 6 Rinse thoroughly and completely dry all parts before they are reassembled Starter electrodes are not removable and should only be wiped clean when the controls are in the OFF position 7 Set all burner heads on top of the manifold valves in the same location you removed them from The hole on the side of the burner heads goes over the electrodes The burner...

Page 56: ...nge cooktop 10 Push in and turn each surface burner control knob to the LITE position let each burner light and then set each control knob back to a burner setting to make sure each burner operates properly NX58F5300SS_AA_DG68 00509A 04_EN MES indb 56 3 30 2016 3 37 47 PM ...

Page 57: ...e the surface 1 Make sure all surface burners are OFF 2 When surfaces have cooled remove the burner grates Do not remove or lift the cooktop during cleaning Doing so could damage the gas lines leading to the surface burner manifolds causing poor and or dangerous operation 3 Clean the cooktop surface with warm soapy water and a soft damp cloth If spill goes under a surface burner remove the surface...

Page 58: ...re the oven and the light bulb are cool 2 Open the oven door If the oven racks are in the way they can be repositioned or removed before you change the oven light 3 Turn the glass light cover in the rear upper right corner counterclockwise to remove it 4 Turn the bulb counterclockwise to remove it from its socket 5 Replace the bulb with a new 40 watt appliance bulb Turn the bulb clockwise until it...

Page 59: ...rned on while the door is removed To remove the door 1 Completely open the oven door 2 Unlock the two hinge locks Pull each hinge lock down towards the door frame to unlock them so they look like the illustration to the right 3 Close the door to the removal position approximately 5 degrees from vertical 4 Firmly grasp both sides of the oven door and lift the door up and out until the hinge arms cl...

Page 60: ...f the door frame When the door is held at about 5 degrees the hinge arms will slide in and down 4 Completely open the oven door If the door will not fully open the hinge arms are not correctly inserted into the slots in the bottom of the door 5 Lock both hinge locks Push each lock up against the front frame of the oven cavity 6 Close the door 7 Reconnect power to the range Hinge lock NX58F5300SS_A...

Page 61: ...es come out of the two nylon drawer guides Then lift to remove the drawer 3 Clean the drawer in warm soapy water Rinse and dry thoroughly To replace the storage drawer 1 Place the top of both drawer sides in the openings on the two nylon drawer guides and push in enough to support the drawer 2 Replace any stored content and push in the drawer while slightly lifting the front to close it NX58F5300S...

Page 62: ...l ventilated room away from the range Do not line the oven oven racks or oven bottom with aluminum foil Doing so will result in poor heat distribution produce poor baking results and cause permanent damage to the oven interior The aluminum foil will melt onto and adhere to the interior oven surfaces Do not force the oven door open during the self cleaning cycle It will damage the automatic door lo...

Page 63: ... not the self cleaning cycle will not start Do NOT use the surface burners while the oven is operating in the self clean mode Before a self cleaning check whether the door is locked A blinking Lock icon indicates the oven door is in the process of being locked When the Lock icon is on the oven door is locked When Loc is shown in the display it indicates the door lock feature is on Press and hold t...

Page 64: ... the selected cleaning cycle time and the Lock icon will blink until the door is locked Then the Lock icon will stay on until the cycle is over and the oven temperature is below 392 F 200 C The oven temperature will rise and hold the preset self clean temperature for the duration of the selected cleaning cycle The display will count down the cleaning cycle in minutes and hours When the time elapse...

Page 65: ... blink under the selected cleaning cycle time 3 Press the Delay Start Pad The display will show Delay and 4 Press the number pads to set the time you want the oven to turn on e g 4 3 0 The Start indicator will blink under the selected Delay Start time and Delay on the display 5 Press the Start Pad The display will show the Delay Start time and the Lock icon The oven door lock will engage automatic...

Page 66: ...locks Escaping hot air and or steam could burn you The internal oven temperature must be below 392 F 200 C for the automatic door lock to disengage The door lock must be disengaged before another cooking function can be set After the oven has cooled wipe down the oven surfaces with a damp cloth to remove any ash residue Stubborn spots can be cleaned with a soap filled steel wool pad Lime deposits ...

Page 67: ...re the floor is level strong and stable If the floor sags or slopes contact a carpenter Check and level the range See the Installation Instructions The kitchen cabinets are not properly aligned and make the range appear to be not level Ensure that cabinets are square and provide sufficient room for installation The oven control beeps and displays an error code You have a function error code See th...

Page 68: ...or lock is turned on The display will show the Lock icon Hold the oven door open and press the START SET pad for 3 seconds The oven will beep and the Lock icon will turn off Gas Pressure Regulator shut off switch is in the off position Call a qualified service technician Display goes blank The electrical outlet Ground Fault Interrupter GFI or GFCI has been tripped and needs to be reset Your digita...

Page 69: ...SABBATH pad for 3 seconds Oven light lamp will not turn on The oven door lock is turned on The display will show the Lock icon Hold the oven door open and press the START SET pad for 3 seconds The oven will beep and the Lock icon will turn off The Sabbath function has been activated SAb and the time of day will show in the display All other controls and signals will be deactivated To cancel the Sa...

Page 70: ... Cleaning cycle This is the first time the oven has been cleaned This is normal The oven will always smoke more the first time it is cleaned Wipe up all excessive soiling before starting the self cleaning cycle If smoke persists press the CLEAR OFF pad Open the windows to clear the smoke from the room After the oven has cooled and unlocked wipe up excessive soil and reset the oven for self cleanin...

Page 71: ...is temporary The insulation around the inside of the oven emits an odor the first few times the oven is used Oven racks are difficult to slide Apply a small amount of vegetable oil to a paper towel and wipe edges of the oven racks with the paper towel Racks become dull and hard to slide when they are left in the oven during a self clean cycle Warming drawer or storage drawer does not slide smoothl...

Page 72: ...blem persists disconnect all power to the range for at least 30 seconds and then reconnect the power If this does not solve the problem call for service See the instructions below this chart Oven overheating Press the Clear Off pad and restart the oven If the problem persists disconnect all power to the range for at least 30 seconds and then reconnect the power If this does not solve the problem c...

Page 73: ... caused by the use of cleaners other than the recommended cleaners and pads and damage to the cooktop caused by hardened spills of sugary materials or melted plastic that are not cleaned according to the directions in the use and care guide are not covered SAMSUNG does not warrant uninterrupted or error free operation of the product EXCEPT AS SET FORTH HEREIN THERE ARE NO WARRANTIES OR CONDITIONS ...

Page 74: ...ung com ca_fr support French REGISTRATION Please register your product online at www samsung com register QUESTIONS For questions about features operation performance parts accessories or service call 1 800 726 7864 or visit our Web site at www samsung com us support www samsung com ca support English www samsung com ca_fr support French Model Serial Please attach your receipt or a copy to this ma...

Page 75: ...memo NX58F5300SS_AA_DG68 00509A 04_EN MES indb 75 3 30 2016 3 37 51 PM ...

Page 76: ...s to explain product operation correct improper installation or perform normal cleaning or maintenance QUESTIONS OR COMMENTS COUNTRY CALL OR VISIT US ONLINE AT U S A Consumer Electronics 1 800 SAMSUNG 726 7864 www samsung com us support CANADA 1 800 SAMSUNG 726 7864 www samsung com ca support English www samsung com ca_fr support French DG68 00509A 04 NX58F5300SS_AA_DG68 00509A 04_EN MES indb 76 3...

Page 77: ...de gas manual del usuario imagina las posibilidades Gracias por adquirir este producto Samsung NX58F5500SS NX58F5500SB NX58F5500SW NX58F5300SS ESPAÑOL NX58F5300SS_AA_DG68 00509A 04_EN MES indb 1 3 30 2016 3 37 51 PM ...

Page 78: ...ine para festividades o cuando reciba huéspedes Una cubierta con 5 quemadores Los quemadores de potencia los quemadores a fuego lento así como el quemador ovalado central ofrecen un calor de cubierta flexible para una variedad de recipientes de cocción El quemador ovalado central proporciona un calentamiento parejo en grandes áreas por lo tanto es ideal para la cocción con comal El quemador ovalad...

Page 79: ...sonales o daño a la propiedad PRECAUCIÓN Para reducir el riesgo de incendio explosión descarga eléctrica o lesiones personales cuando utilice su estufa de gas siga estas instrucciones básicas de seguridad NO intentar NO desensamblar NO tocar Siga las instrucciones fielmente Desenchufe el cable de alimentación del tomacorriente Asegúrese de que la estufa esté conectada a un tomacorriente con cable ...

Page 80: ...veedor de gas Si no puede comunicarse con el proveedor de gas llame al departamento de bomberos La instalación y el servicio técnico deben ser realizados por un instalador calificado agencias de servicio técnico o el proveedor de gas DISPOSITIVO ANTI INCLINACIÓN ADVERTENCIA ADVERTENCIA Peligro de caída Un niño o un adulto podrían inclinar la estufa y morir Instale el dispositivo anti inclinación e...

Page 81: ...iones de instalación que se encuentran en el Manual de instalación No seguir estas instrucciones puede ocasionar muerte lesiones personales graves o daños a la propiedad NO se pare siente apoye sobre la puerta ni el cajón para evitar la inclinación accidental de la estufa ADVERTENCIA SOBRE LA STATE OF CALIFORNIA PROPOSITION 65 SOLO EE UU ADVERTENCIA Este producto contiene productos químicos recono...

Page 82: ...ue este manual lo recomiende específicamente Este artefacto debe ser reparado únicamente por un técnico de servicio calificado Debe conocer la ubicación de la válvula de cierre del gas y cómo cortar éste si es necesario Destruya o quite adecuadamente los materiales de embalaje luego de desembalar el artefacto Electricidad Mecánica Desenchufe o desconecte la alimentación antes de realizar tareas de...

Page 83: ...les la puerta para reducir el riesgo de que los niños los usen incorrectamente Antes de desechar la estufa corte el cable de alimentación para evitar que se lo conecte a una fuente de alimentación Quite la puerta para evitar que niños y animales puedan quedar atrapados Fuego No toque los quemadores del horno los quemadores del cajón ni las superficies internas del horno durante o inmediatamente de...

Page 84: ...roducen humo y los derrames de sustancias grasas pueden arder en llamas No utilice una llama para verificar si hay pérdidas de gas En lugar de ello utilice un cepillo para esparcir una mezcla de agua jabonosa alrededor del área que está verificando Si hay una pérdida de gas verá pequeñas burbujas en la mezcla de agua jabonosa en el punto de la pérdida No coloque artefactos portátiles ni ningún otr...

Page 85: ...sar un incendio involuntario grande o peligroso El calentamiento de bebidas puede provocar un retraso en el punto de ebullición Para evitar el retraso en el punto de ebullición SIEMPRE deje reposar las bebidas calentadas durante al menos 20 segundos después de apagar el quemador para que la temperatura del líquido pueda estabilizarse En caso de escaldaduras siga estas instrucciones de PRIMEROS AUX...

Page 86: ...CAN CGA B149 1 actual o con el Código de instalación para propano CAN CGA B149 2 actual y con los códigos locales cuando corresponda El diseño de esta estufa ha sido certificado por ETL según la versión más reciente de ANSI Z21 1 y por Canadian Gas Association Asociación de Gas de Canadá según la versión más reciente de CAN CGA 1 1 No instale esta estufa en un lugar que esté expuesto a una corrien...

Page 87: ...oméstico a este circuito La estufa está equipada con un enchufe de 3 clavijas con conexión a tierra Este cable DEBE enchufarse a un tomacorriente adecuado de 3 clavijas con conexión a tierra que cumpla todos los códigos y ordenanzas locales Si no está seguro de que el tomacorriente disponga a conexión a tierra debe verificarlo un electricista matriculado Si los códigos permiten el uso de un conduc...

Page 88: ...eemplazar los 5 orificios de los quemadores superiores y los 2 orificios del horno con el juego de orificios para LP y también debe invertir el adaptador GPR ADVERTENCIA Estos ajustes debe realizarlos un técnico de servicio calificado de acuerdo con las instrucciones del fabricante y con todos los códigos y requisitos de la autoridad pertinente No seguir estas instrucciones puede ocasionar lesione...

Page 89: ... control en las partes superior e inferior de la puerta del horno y debajo del cajón inferior de almacenamiento o calentamiento Las grandes rayaduras o los golpes fuertes en la puerta de vidrio pueden hacer que el vidrio se rompa o estalle Asegúrese de que los revestimientos de las paredes que rodean a la estufa soporten el calor hasta 200 F 93 C generado por la estufa Evite colocar gabinetes sobr...

Page 90: ...HIGH Alta Los derrames por exceso de hervor producen humo y los derrames de sustancias grasas pueden arder en llamas Aléjese de la estufa durante la cocción mediante fritura Ajuste el tamaño de la llama del quemador superior para que no sobresalga de los bordes del recipiente Las llamas que se extienden fuera de los bordes del recipiente pueden ser peligrosas Para disminuir las salpicaduras cuando...

Page 91: ...imentos solo debe hacerse debajo de una campana de ventilación encendida Asegúrese siempre de que los alimentos que se van a freír estén descongelados y secos Cualquier tipo de humedad puede causar que la grasa caliente burbujee y se derrame del recipiente Jamás mueva un recipiente o freidora de inmersión que esté llena de grasa caliente Siempre deje que se enfríe antes de moverlo Asegúrese siempr...

Page 92: ...de almacenamiento Los elementos almacenados pueden dañarse o prenderse fuego Mantenga el horno libre acumulaciones de grasa Cambie de posición las parrillas del horno solo cuando el horno esté frío para evitar quemaduras o lesiones personales No caliente envases que no hayan sido abiertos La presión en el recipiente podría acumularse y causar una explosión o lesiones personales Utilice solo recipi...

Page 93: ...o al abrir el cajón El vapor o aire caliente que escapen pueden producir quemaduras o lesiones personales No utilice papel de aluminio para revestir el cajón inferior El papel de aluminio atrapará el calor y modificará el rendimiento del calentamiento del cajón Además podría dañar el acabado interior No use el cajón inferior de calentamiento en el horno superior No coloque el cajón inferior de cal...

Page 94: ...o limpieza Nunca realice la auto limpieza si el cajón inferior o el recipiente del cajón están en el horno Si la operación de auto limpieza funciona mal apague el horno desconecte el suministro eléctrico y comuníquese con un técnico de servicio calificado No utilice limpiadores de hornos Los limpiadores comerciales de hornos o los forros para hornos no deben utilizarse JAMÁS en el horno ni alreded...

Page 95: ...e las parrillas del horno 33 Abertura de ventilación del horno 33 Luz del horno 34 Hornear 36 Cocción regida por temporizador 38 Cocción temporizada diferida 40 Asar a la parrilla 42 Mantener caliente 43 Cómo utilizar la función de cocción fácil 45 Cocción favorita 47 Función Shabat 49 Funciones adicionales MANTENIMIENTO DE SU ELECTRODOMÉSTICO 51 51 Cuidado y limpieza del horno 54 Cuidado y limpie...

Page 96: ...o COMPONENTES DEL HORNO Parrillas de horno 2 Parte inferior desmontable del horno Puerta del horno desmontable COMPONENTES DEL CAJÓN DE ALMACENAMIENTO Cajón de almacenamiento desmontable 1 PANTALLA ABERTURA DE VENTILACIÓN DEL HORNO centrada debajo del panel de control del horno COMPONENTES DE LA CUBIERTA DE COCCIÓN Rejillas de fundición continua para uso intenso Rejilla del quemador izquierdo Reji...

Page 97: ...mador trasero derecho Control del quemador delantero derecho COMPONENTES DEL HORNO Parrillas de horno 2 Parte inferior desmontable del horno Puerta del horno desmontable COMPONENTES DEL CAJÓN DE ALMACENAMIENTO Cajón de almacenamiento desmontable 1 PANTALLA ABERTURA DE VENTILACIÓN DEL HORNO centrada debajo del panel de control del horno COMPONENTES DE LA CUBIERTA DE COCCIÓN Rejillas de fundición co...

Page 98: ...se produce un corte de energía eléctrica los quemadores superiores igualmente pueden encenderse en forma manual Utilice una precaución extrema cuando encienda un quemador exterior en forma manual 1 Lleve un encendedor de la parrilla de gas largo al quemador superior que desea encender 2 Empuje la perilla de control correspondiente al quemador y gírela a la posición LITE Encender 3 Una vez que se e...

Page 99: ...a TRASERO DERECHO TD Cocción a fuego lento baja Chocolate guisos salsas CENTRO QUEMADOR OVALADO Uso de comales Panqueques hamburguesas huevos fritos sándwiches calientes CENTRO QUEMADOR REDONDO Calentamiento general Cocción a fuego lento baja Alimentos en general Salsa de tomate guisos DELANTERO IZQUIERDO DI Calentamiento rápido Comida hervida TRASERO IZQUIERDO TI Calentamiento general Cocción a f...

Page 100: ...e calor pero su color se altera con facilidad ACERO INOXIDABLE Lento conductor de calor los resultados de cocción pueden ser desparejos Es duradero fácil de limpiar y resistente a las manchas HIERRO FUNDIDO Mal conductor de calor pero retiene muy bien el calor Una vez alcanzada la temperatura necesaria produce cocción uniforme UTENSILIOS ESMALTADOS Las características de conducción de calor depend...

Page 101: ... cocción Panqueques 5 min 5 mediana alta 4 mediana Hamburguesas 5 min 7 alta 5 mediana alta Huevos fritos 5 min 7 alta 5 mediana baja Tocino Ninguna 4 mediana Salchichas para el desayuno 5 min 7 alta 5 mediana Emparedado de queso grillado 4 min 7 alta 6 mediana alta NO quitar la placa del comal hasta que las rejillas de la cubierta las superficies y la placa del comal se hayan enfriado completamen...

Page 102: ...ar la superficie del comal No utilice el comal como tabla para cortar NO coloque ni almacene objetos sobre la placa del comal NO utilice el comal luego de darlo vuelta sobre la rejilla NO utilice la placa del comal para otros fines Evite cocinar alimentos extremadamente grasosos ya que pueden ocurrir derrames El comal puede calentarse cuando se utilizan los quemadores que lo rodean NX58F5300SS_AA_...

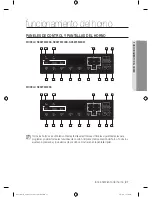
Page 103: ...os se controlan con teclas táctiles electrónicas Utilice las siguientes teclas para programar y operar todas las funciones de cocción limpieza y temporización del horno Todos los ajustes programados y los estados de cocción se mostrarán en la pantalla digital 7 8 9 10 11 12 13 14 2 3 4 5 1 15 6 7 8 9 10 11 12 13 14 2 3 4 5 1 15 6 NX58F5300SS_AA_DG68 00509A 04_EN MES indb 27 3 30 2016 3 37 56 PM ...

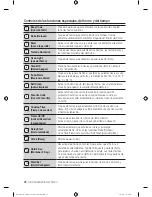
Page 104: ...rno 9 Favorite Cook Cocción favorita Activa la función de cocción favorita Esta función permite programar hasta tres ciclos de cocción utilizados con mayor frecuencia para poder establecerlos e iniciarlos tocando solamente un botón 10 Cooking Time Tiempo de cocción Toque esta tecla y luego establezca el tiempo de cocción que desea El horno se apagará automáticamente una vez transcurrido el tiempo ...

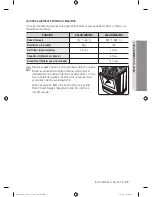
Page 105: ...s Keep Warm Mantener caliente 3 horas Bread Proof Entibiar pan para leudado 12 horas Siempre se debe hornear o asar con la puerta del horno cerrada Si deja la puerta del horno abierta mientras el horno está en funcionamiento el quemador del horno se detendrá en 1 minuto No es una falla del producto Cuando cierre la puerta el horno se pondrá en marcha automáticamente Modo de aplicación Bake Hornear...

Page 106: ...el indicador Start Inicio parpadeará 3 Presione la tecla Start Inicio para configurar y poner en funcionamiento el reloj La pantalla mostrará la hora del día y el indicador Start Inicio se apagará Cómo efectuar el cambio para ver ciclos de 12 horas o de 24 horas 1 Mantenga presionadas las teclas Clock Reloj y 0 durante 3 segundos La pantalla mostrará el modo en uso por ej 12 horas Si se presiona u...

Page 107: ...ar o cancelar el temporizador de cocina La pantalla mostrará Timer Temporizador y parpadeará en la pantalla 2 Presione las teclas numéricas para ingresar la cantidad de tiempo que desea en minutos o en horas y minutos por ej 1 5 El tiempo ingresado aparecerá en la pantalla 3 Presione la tecla Timer On Off Activar Desactivar temporizador para iniciar el temporizador La pantalla mostrará el tiempo r...

Page 108: ...mente cuando el horno se encuentre frío Cuando coloque una parrilla en la posición superior posición 7 asegúrese de que la parrilla se apoye en forma estable en el tope incorporado Posiciones de las parrillas en el horno TIPO DE ALIMENTO POSICIÓN DE LA PARRILLA Hamburguesas y bistec 6 o 7 Tostadas 5 o 6 Panecillos muffins brownies galletas 4 Panqués o pasteles en molde savarin 3 Pastel de ángel pa...

Page 109: ...ura los buenos resultados de cocción Dado que la abertura de ventilación y el área que la rodea pueden calentarse tenga cuidado cuando coloque elementos cerca de la abertura de ventilación del horno El vapor caliente podría calentar o derretir elementos colocados delante de la abertura de ventilación del horno LUZ DEL HORNO El horno tiene una luz que está ubicada en la parte trasera de la pared de...

Page 110: ...pantalla mostrará un que parpadea junto con 150 Bake Hornear y el icono del elemento de horneado hasta que el horno alcance los 150 Luego la pantalla solo mostrará la temperatura real del horno Cuando el horno alcance la temperatura de horneado deseada emitirá una señal sonora 6 veces 5 Coloque la comida en el horno y cierre la puerta del horno El precalentamiento es muy importante para obtener bu...

Page 111: ...tes de temperatura o 3 Presione las teclas numéricas para establecer el ajuste de temperatura deseado por ejemplo 1 0 La pantalla mostrará AdJ y 10 4 Presione la tecla Start Inicio El horno emitirá una señal sonora dos veces y la pantalla mostrará la hora del día La próxima vez que hornee el horno utilizará el nuevo ajuste de temperatura Este ajuste no afectará las temperaturas para asar a la plan...

Page 112: ...evedad La ingestión de alimentos en mal estado puede producir intoxicación alimentaria Cómo programar el horno para cocción regida por el temporizador 1 Coloque la parrilla del horno en la posición deseada Coloque la comida en el horno y cierre la puerta del horno 2 Presione la tecla Bake Hornear La temperatura predeterminada 350 parpadeará en la pantalla Si la temperatura predeterminada es la tem...

Page 113: ...icamente y la pantalla mostrará la hora del día Para cambiar una temperatura de horneado programada presione la tecla Bake Hornear ingrese la nueva temperatura de horneado y presione la tecla Start Inicio Si la temperatura del horno es superior al nuevo ajuste el horno emitirá una señal sonora 6 veces y luego mostrará el nuevo ajuste El horno completará la cocción a la nueva temperatura Para cambi...

Page 114: ...entos en mal estado puede producir intoxicación alimentaria Cómo programar el horno para cocción temporizada diferida 1 Coloque la parrilla del horno en la posición deseada Coloque la comida en el horno y cierre la puerta del horno 2 Presione la tecla para el funcionamiento en la cocción deseada por ej Bake Hornear La temperatura predeterminada 350 y el indicador Start Inicio parpadearán en la pan...

Page 115: ...cla Delay Start Inicio retardado ingrese el nuevo tiempo de inicio y luego presione la tecla Start Inicio El horno comenzará la cocción a la nueva hora de inicio Para cambiar una temperatura de horneado programada presione la tecla Bake Hornear ingrese la nueva temperatura de horneado y luego presione la tecla Start Inicio Si la temperatura del horno es superior al nuevo ajuste el horno emitirá un...

Page 116: ...z para Hi Alto y dos veces para Lo Bajo El horno emitirá una señal sonora cada vez que se presione la tecla El indicador Start Inicio parpadeará a la derecha de Hi Alto o Lo Bajo y Broil Asar a la parrilla en la pantalla Use Lo Bajo para cocinar comidas tales como aves o cortes de carne gruesos sin tostarlos en exceso 3 Presione la tecla Start Inicio El horno encenderá automáticamente el quemador ...

Page 117: ... 1 5 pulg espesor 2 a 2 5 lbs 6 15 18 14 17 Muy hecho 6 18 22 17 19 Pollo 1 entero trozado 2 a 2 5 libras abrir a lo largo 4 30 35 15 20 Asar primero con la piel hacia abajo Abrir para extender Cepillar con mantequilla derretida antes de asar y en la mitad del asado a la parrilla 2 pechugas 5 15 20 7 12 Filetes de pescado 0 25 a 0 5 pulg de espesor 6 6 10 3 4 Manejar y dar vuelta con mucho cuidado...

Page 118: ...rt Inicio El horno se encenderá y comenzará automáticamente el precalentamiento hasta la temperatura de Mantener caliente aprox 170 F 77 C La pantalla mostrará el icono del elemento del horno Warm Calentar y la hora del día Cuando finalice el calentamiento presione la tecla Clear Off Borrar Apagar para apagar el horno o para cancelar Mantener caliente en cualquier momento La pantalla mostrará la h...

Page 119: ... Puede ajustar la temperatura del horno para que se adapte a sus necesidades Siga las instrucciones del paquete para los tiempos de precalentado y horneado Nuggets de pollo Use esta función para cocinar nuggets de pollo congelados Cómo configurar la función Nuggets de pollo 1 Presione la tecla Chicken Nuggets Nuggets De Pollo una vez para HI Alta o dos veces para LO Baja Use LO Baja para cocinar a...

Page 120: ...estas funciones producen mejores resultados si se inician cuando el horno esta frío le recomendamos que aguarde hasta que el horno se haya enfriado y Hot Caliente desaparezca de la pantalla Para evitar reducir la temperatura del horno y extender el tiempo de leudado no abra la puerta del horno si no fuese necesario Controle el pan y alimentos similares para evitar que se excedan en este proceso No...

Page 121: ...las teclas numéricas para establecer la temperatura de cocción deseada por ejemplo 3 7 5 La temperatura de cocción seleccionada parpadeará en la pantalla 3 Presione la tecla Favorite Cook Cocción favorita la cantidad de veces que corresponda a donde desee almacenar el proceso de cocción y la temperatura 1 vez para la receta 1 2 veces para la receta 2 3 veces para la receta 3 El número correspondie...

Page 122: ...emperatura predeterminada o real hasta que se alcance la temperatura seleccionada El horno emitirá una señal sonora 6 veces La temperatura predeterminada o real la función de cocción el icono de función de cocción y la hora del día aparecerán en la pantalla Cuando el horno alcanza la temperatura de cocción deseada emite una señal sonora 6 veces 4 Coloque la comida en el horno y cierre la puerta de...

Page 123: ... es la temperatura deseada de cocción pase directamente al paso 4 3 Presione las teclas numéricas para establecer la temperatura de cocción deseada por ejemplo 3 7 5 La temperatura de cocción seleccionada parpadeará en la pantalla 4 Presione la tecla Start Inicio 5 Mantenga presionadas las teclas Clock Reloj y Timer On Off Activar Desactivar temporizador a la vez durante 3 segundos En la pantalla ...

Page 124: ...iempo entre 1 minuto y 9 horas y 99 minutos Proceda con el paso 4 de Cómo configurar la función Shabat Cómo cambiar la temperatura y salir de la función Shabat Para cambiar una temperatura de horneado programada presione la tecla Bake Hornear ingrese la nueva temperatura de horneado y presione la tecla Start Inicio En aproximadamente 20 segundos el panel de control hará clic y el horno completará ...

Page 125: ...ionar ON 12 Hr u OFF Hr 3 Presione la tecla Start Inicio para guardar e iniciar el ajuste de la función Selección de temperatura en Fahrenheit o Centígrados Se puede programar el control del horno para que las temperaturas se muestren en grados Fahrenheit o Centígrados El horno viene de fábrica configurado para mostrar las temperaturas en Fahrenheit Cómo cambiar la pantalla de Fahrenheit a Centígr...

Page 126: ...clas Oven Light Luz del horno y 0 a la vez durante 3 segundos La pantalla mostrará Snd On sonido activado o Snd OFF sonido desactivado El ajuste predeterminado es Snd On sonido activado 2 Presione la tecla 0 para seleccionar Snd On sonido activado o Snd OFF sonido desactivado 3 Presione la tecla Start Inicio para guardar y configurar el ajuste de señal sonora NX58F5300SS_AA_DG68 00509A 04_EN MES i...

Page 127: ...os Proteja la superficie de los objetos filosos Todos estos elementos pueden dañar la superficie Panel de control del horno 1 Para bloquear los controles del horno y la puerta del horno mantenga presionada la tecla Start Set Inicio Configurar durante 3 segundos Esto evita el funcionamiento accidental del horno y que el artefacto se incline El horno emitirá una señal sonora y la pantalla mostrará L...

Page 128: ...dable aprobado a un paño húmedo limpio o una toalla de papel Limpie una pequeña área con cuidado siguiendo las instrucciones del limpiador El acero inoxidable siempre debe limpiarse en la dirección del grano del acero inoxidable si corresponde 3 Seque y lustre con un paño limpio suave y seco 4 Repita los pasos 2 y 3 según sea necesario No rocíe ningún tipo de limpiador en los orificios del panel d...

Page 129: ...ene múltiples superficies que requieren distintas técnicas de limpieza La junta en la superficie interior de la puerta del horno nunca debe limpiarse ni moverse para limpiar otras superficies La junta está confeccionada con un material tejido que es esencial para un cierre bien sellado La superficie interior de la puerta fuera de la juta debe limpiarse a mano con agua jabonosa caliente y una espon...

Page 130: ...que por completo todas las superficies incluidos el orificio del vástago y la parte posterior No use limpiadores en aerosol sobre el panel de control de los quemadores superiores Si el rocío ingresa a los orificios de las válvulas podría entrar en contacto con los componentes eléctricos y causar la muerte lesiones personales o daños al producto 4 Limpie las superficies de acero inoxidable con un l...

Page 131: ...e acero ni limpiadores abrasivos en ninguna parte de los quemadores 6 Enjuague bien y seque por completo todas las partes antes de que se vuelvan a montar Los electrodos de encendido no son desmontables y solo deben limpiarse cuando los controles están en posición OFF apagado 7 Coloque los cabezales de los quemadores sobre las mismas válvulas en las que estaban antes de extraerlos El orificio del ...

Page 132: ...e la estufa 10 Presione y gire cada perilla de control de los quemadores superiores a la posición LITE Encender deje que se encienda cada quemador y luego vuelva a ajustar la perilla de control a un ajuste del quemador para asegurarse de que cada quemador funcione correctamente NX58F5300SS_AA_DG68 00509A 04_EN MES indb 56 3 30 2016 3 38 06 PM ...

Page 133: ...quemadores superiores estén en OFF Apagado 2 Cuando las superficies se enfrían retire las rejillas de los quemadores No retire ni levante la cubierta durante la limpieza Hacerlo podría dañar las líneas de gas que llevan a los distribuidores de los quemadores superiores generando un mal funcionamiento o un funcionamiento peligroso 3 Limpie la superficie de la cubierta con agua jabonosa tibia y un p...

Page 134: ...horno Si las parrillas del horno representan un obstáculo pueden cambiarse de lugar o retirarse antes de cambiar la luz del horno 3 Gire la cubierta de vidrio de la luz en el ángulo trasero superior derecho en sentido contrario a las agujas del reloj para retirarla 4 Gire la bombilla en sentido contrario a las agujas del reloj para retirarla de su casquillo 5 Reemplace la bombilla con una nueva bo...

Page 135: ...uerta 1 Abra completamente la puerta del horno 2 Desbloquee las dos trabas de las bisagras Empuje cada traba de bisagra hacia abajo hacia el marco de la puerta para desbloquearlas para que queden como se indica en la ilustración a la derecha 3 Cierre la puerta en la posición de remoción de la puerta aproximadamente 5 grados de la posición vertical 4 Sujete firmemente ambos lados de la puerta y lev...

Page 136: ...a puerta abierta alrededor de 5 grados los brazos de la bisagra se podrán deslizar hacia dentro y hacia abajo 4 Abra completamente la puerta del horno Si la puerta no se abre por completo los brazos de las bisagras no están correctamente insertados en las ranuras en la parte inferior de la puerta 5 Bloquee ambas trabas de las bisagras Empuje cada traba hacia arriba contra el marco frontal de la ca...

Page 137: ... guías de nailon del cajón Luego levante para retirar el cajón 3 Limpie el cajón en agua jabonosa tibia Enjuague y seque bien Para volver a colocar el cajón de almacenamiento 1 Coloque la parte superior de los dos laterales del cajón en las aberturas de las dos guías de nailon del cajón y empuje hacia adentro lo suficiente como para que sostengan el cajón 2 Vuelva a colocar todo el contenido almac...

Page 138: ... de la estufa No recubra el horno las parrillas del horno ni la parte inferior del horno con papel de aluminio Hacerlo podría tener como consecuencia una mala distribución del calor producir malos resultados de horneado y causar daños permanentes al interior del horno El papel de aluminio se derretirá y se adherirá a las superficies interiores del horno No fuerce la apertura de la puerta del horno...

Page 139: ...omenzará NO use los quemadores superiores mientras el horno funciona en el modo de auto limpieza Antes de la auto limpieza verifique que la puerta esté bloqueada Un icono de Bloqueo que parpadea indica que la puerta del horno está en proceso de bloquearse Cuando el icono de Bloqueo está activado la puerta del horno está bloqueada Cuando aparece Loc Bloqueo en la pantalla esto indica que la función...

Page 140: ... del ciclo de limpieza seleccionado y el icono de Bloqueo parpadeará hasta que se bloquee la puerta Luego el icono de Bloqueo permanecerá encendido hasta que el ciclo finalice y la temperatura del horno sea inferior a los 392 F 200 C La temperatura del horno aumentará y mantendrá la temperatura de auto limpieza predeterminada mientras dure el ciclo de limpieza seleccionado La pantalla mostrará la ...

Page 141: ...del ciclo de limpieza seleccionado 3 Presione la tecla Delay Start Inicio retardado La pantalla mostrará Delay Retardo y 4 Presione las teclas numéricas para establecer la hora a la que desea que el horno se encienda por ej 4 3 0 El indicador Start Inicio parpadeará debajo de la hora de inicio retardado seleccionada y Delay Retardo en la pantalla 5 Presione la tecla Start Inicio La pantalla mostra...

Page 142: ... salen podrían quemarlo La temperatura interna del horno debe estar por debajo de los 392 F 200 C para que la traba automática de la puerta se desconecte La traba de la puerta debe desconectarse antes de que se pueda establecer otra función de cocción Una vez que se enfrió el horno limpie las superficies del horno con un paño húmedo para retirar cualquier residuo de cenizas Las manchas difíciles p...

Page 143: ... está combado o tiene una pendiente llame a un carpintero Controle y nivele la estufa Consulte las instrucciones de instalación Son los gabinetes de cocina los que están desalineados y hacen que la estufa parezca desnivelada Asegúrese de que los gabinetes se encuentren en escuadra y dejan suficiente lugar para la instalación El control del horno emite una señal sonora y muestra un código de error ...

Page 144: ...mostrará el icono de Bloqueo Mantenga la puerta del horno abierta y presione la tecla START SET INICIO CONFIGURAR durante 3 segundos El horno emitirá una señal sonora y el icono de Bloqueo se apagará El interruptor de cierre del Regulador de presión de gas está en posición OFF Apagado Llame a un técnico de servicio calificado La pantalla queda en blanco El tomacorriente eléctrico equipado con un i...

Page 145: ...tecla SABBATH Shabat durante 3 segundos La luz del horno lámpara no se enciende El bloqueo de la puerta del horno está activado La pantalla mostrará el icono de Bloqueo Mantenga la puerta del horno abierta y presione la tecla START SET INICIO CONFIGURAR durante 3 segundos El horno emitirá una señal sonora y el icono de Bloqueo se apagará Se ha activado la función Shabat SAb y la hora del día apare...

Page 146: ...orno siempre emitirá más humo la primera vez que se limpia Limpie toda la suciedad excesiva antes de iniciar el ciclo de auto limpieza Si el humo persiste presione la tecla CLEAR OFF BORRAR APAGAR Abra las ventanas para sacar el humo del lugar Una vez que el horno se enfrió y desbloqueó limpie la suciedad excesiva y reinicie el horno para la auto limpieza Después de un ciclo de auto limpieza la pu...

Page 147: ...a difícil deslizar las parrillas del horno Aplique una pequeña cantidad de aceite vegetal sobre una toalla de papel y frote con él los bordes de la parrilla Las parrillas se vuelven opacas y difíciles de deslizar cuando se dejan en el horno durante un ciclo de auto limpieza El cajón de calentamiento o el cajón de almacenamiento no se desliza suavemente o se traba El cajón no está correctamente ali...

Page 148: ...persiste desconecte toda alimentación eléctrica a la estufa durante por lo menos 30 segundos y luego reconecte la alimentación eléctrica Si esto no soluciona el problema llame al servicio de reparaciones Consulte las instrucciones debajo de esta tabla Recalentamiento del horno Presione la tecla Clear Off Borrar Apagar y encienda nuevamente el horno Si el problema persiste desconecte toda alimentac...

Page 149: ...de errores de instalación Tampoco están cubiertos los daños a la cubierta causados por el uso de productos y elementos de limpieza distintos de los productos y esponjas recomendadas y daños a la cubierta causados por derrames endurecidos de sustancias azucaradas o plásticos fundidos que no hubiesen sido limpiados de acuerdo con las instrucciones incluidas en la guía de uso y cuidados SAMSUNG no ga...

Page 150: ...ung com ca_fr support French REGISTRO Registre su producto en línea en www samsung com register PREGUNTAS Si tiene preguntas sobre funciones operación rendimiento piezas accesorios o servicio llame al 1 800 726 7864 o visite nuestro sitio Web en www samsung com us support www samsung com ca support English www samsung com ca_fr support French Modelo Serie Adjunte su recibo o una copia a este manua...

Page 151: ...notas NX58F5300SS_AA_DG68 00509A 04_EN MES indb 75 3 30 2016 3 38 10 PM ...

Page 152: ...ra explicar el funcionamiento del producto corregir una instalación inadecuada o realizar tareas de limpieza o mantenimiento TIENE PREGUNTAS O COMENTARIOS PAÍS LLAME AL O VISÍTENOS EN LÍNEA EN U S A Consumer Electronics 1 800 SAMSUNG 726 7864 www samsung com us support CANADA 1 800 SAMSUNG 726 7864 www samsung com ca support English www samsung com ca_fr support French DG68 00509A 04 NX58F5300SS_A...

Reviews: