background image

English  37

Oper

ating the o

v

en

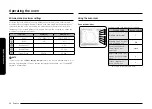
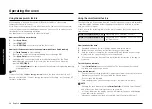
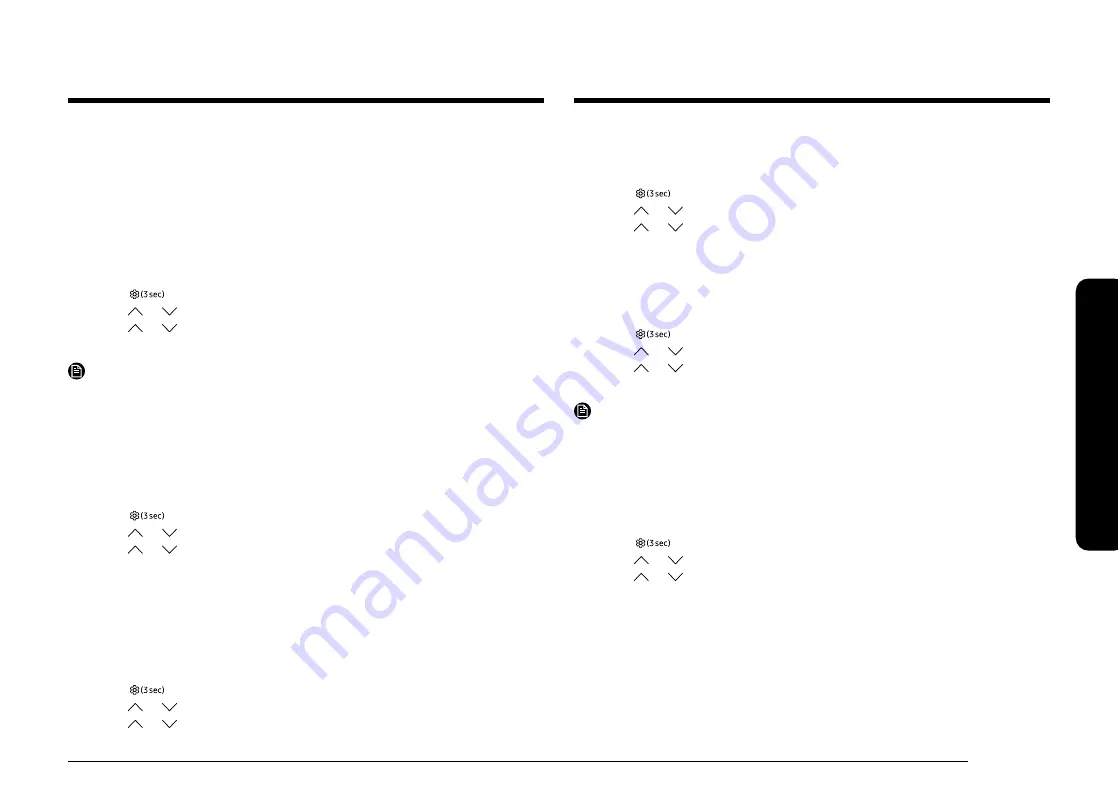
Temp Adjust

The temperature in the oven has been calibrated at the factory. When first using 
the oven, be sure to follow recipe times and temperatures. If you think the oven is 
too hot or too cool, you can correct the temperature in the oven. Before correcting, 
test a recipe by using a temperature setting that is higher or lower than the 
recommended temperature. The baking results should help you to decide how 
much of an adjustment is needed.
The oven temperature can be adjusted ±35 °F (±19 °C ).

How to correct the oven temperature

1. 

Press 


Options

 for 3 seconds.

2. 

Press 

 or 

 to select 

1

, and then press 

START/SET

.

3. 

Press   or 

 to select the desired temperature you want to adjust. (-35~35)

4. 

Press 

START/SET 

to save the changes.

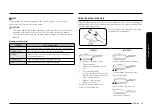
NOTE

This adjustment will not affect the broiling temperatures. The adjustment will be 
retained in memory after a power failure.

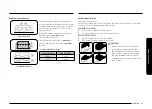
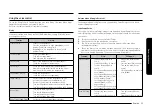
Temp Unit (Fahrenheit or Celsius temperature selection)

You can program the oven control to display the temperature in Fahrenheit or 
Celsius. The oven has been preset at the factory to display in Fahrenheit.

How to change the display from Fahrenheit to Celsius or Celsius to Fahrenheit

1. 

Press 


Options

 for 3 seconds.

2. 

Press 

 or 

 to select 

2

, and then Press 

START/SET

.

3. 

Press   or 

 to select 

F

 (Fahrenheit) or 

(Celsius).

4. 

Press 

START/SET 

to save the changes.

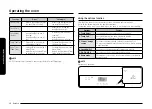
12-hour energy saving

If you accidently leave the oven on, this feature will automatically turn off the 
oven after 12-hours during baking functions or after 3 hours during a broil 
function. (Default setting : on)

How to turn the 12-hour energy saving feature on or off

1. 

Press 


Options

 for 3 seconds.

2. 

Press 

 or 

 to select 

3

, and then press 

START/SET

.

3. 

Press   or 

 to select 

--Hr

 (Off) or 

12Hr

 (On).

4. 

Press 

START/SET 

to save the changes.

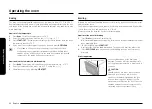
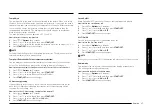
Sound On/Off

Using Sound On/OFF, you can set the oven controls to operate silently.

How to turn the sound on or off

1. 

Press 


Options

 for 3 seconds.

2. 

Press 

 or 

 to select 

4

, and then press 

START/SET

.

3. 

Press   or 

 to select 

ON

 or 

OFF

.

4. 

Press 

START/SET 

to save the changes.

Wi-Fi On/Off

You can turn the range’s Wi-Fi connection on or off.

How to turn the Wi-Fi on or off

1. 

Press 


Options

 for 3 seconds.

2. 

Press 

 or 

 to select 

5

, and then press 

START/SET

.

3. 

Press   or 

 to select 

ON

 or 

OFF

.

4. 

Press 

START/SET

 to save the changes.
NOTE

When you turn the range’s Wi-Fi connection off, users can’t set to easy setup.

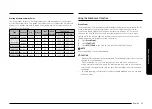
Demo mode

This option is for use by retail establishments for display purposes only.  
(The heating element does not operate.)

How to enable or disable the demo mode

1. 

Press 


Options

 for 3 seconds.

2. 

Press 

 or 

 to select 

0

, and then press 

START/SET

.

3. 

Press   or 

 to select 

ON

 or 

OFF

.

4. 

Press 

START/SET

 to save the changes.
Summary of Contents for NE63A6111SW

Page 1: ...Electric Range User manual NE63 611 S ...

Page 2: ...device in place and engaged e Failure to do so can result in death or serious burns to children or adults WARNING Do not step lean or sit on the doors of the range You can cause the range to tip resulting in burns or serious injuries Confirm that the Anti Tip device is installed properly Then to verify that the Anti Tip device is engaged grasp the top rear edge of the range and carefully attempt t...

Page 3: ...een tested and found to comply with the limits for a Class B digital device pursuant to part 15 of the FCC Rules These limits are designed to provide reasonable protection against harmful interference in a residential installation This equipment generates uses and can radiate radio frequency energy and if not installed and used in accordance with the instructions may cause harmful interference to ...

Page 4: ...his Class B digital apparatus complies with Canadian ICES 003 For products available in the US Canadian markets only channels 1 11 are available You cannot select any other channels IC RADIATION EXPOSURE STATEMENT This equipment complies with IC RSS 102 radiation exposure limits set forth for an uncontrolled environment This equipment should be installed and operated so there is at least 8 inches ...

Page 5: ...g the proper cookware 26 Protecting the cooktop 26 Operating the oven 27 The oven control panel 27 Oven lock 28 Setting the clock 28 Setting the kitchen timer 28 Timed cooking 29 Delay start 29 Turning the oven light on and off 29 Minimum and maximum settings 30 Using the oven racks 30 Baking 32 Broiling 32 Using the bread proof function 33 Using the keep warm feature 34 Using the smart control fe...

Page 6: ...m www P65Warnings ca gov Important safety instructions Read and follow all instructions before using your range to prevent the risk of fire electric shock personal injury or damage when using the range This guide does not cover all possible conditions that may occur Always contact your service agent or the manufacturer about problems that you do not understand WHAT YOU NEED TO KNOW ABOUT SAFETY IN...

Page 7: ...ower to the appliance before servicing by removing the fuse or switching off the circuit breaker Do not enter the oven Do not store items of interest to children in cabinets above the range or on the back guard of the range Children climbing on the range to reach items could be seriously injured Do not leave children alone Never leave children alone or unattended in an area where this appliance is...

Page 8: ...oved from the appliance before operating it Keep plastics clothes and paper away from parts of the appliance that may become hot Wear proper apparel Never wear loose fitting or hanging garments while using the appliance Use only dry potholders Placing moist or damp potholders on hot surfaces may result in burns from steam Do not let the potholder touch hot heating elements Do not use a towel or ot...

Page 9: ...ntainer and bowl in a horizontal position on cooktop surface Be careful when placing spoons or other stirring utensils on the glass cooktop surface when it is in use They may become hot and could cause burns Use proper pan sizes This appliance is equipped with surface units of different size Select pots and pans that have flat bottoms large enough to cover the surface area of the heating element U...

Page 10: ...hould be serviced only by qualified service personnel Repairs carried out by unqualified individuals may cause injury or a serious malfunction If your appliance is in need of repair contact a Samsung authorized service center Failure to follow these instructions may result in damage and void the warranty Flush mounted appliances may be operated only after they have been installed in cabinets and w...

Page 11: ...Accessible parts may become hot during use To avoid burns young children should be kept away OVEN DO NOT TOUCH THE HEATING ELEMENTS OR INTERIOR SURFACES OF THE OVEN Heating elements may be hot even though they are dark in color Interior surfaces of an oven become hot enough to cause burns During and after use do not touch or let clothing or other flammable materials contact the heating elements or...

Page 12: ... rack must be moved while the oven is hot use potholders Do not let the potholders come in contact with the hot heating element in the oven Do not allow aluminum foil or a meat probe to contact the heating elements During use the appliance becomes hot Care should be taken to avoid touching heating elements inside the oven Do not use harsh abrasive cleaners or sharp metal scrapers to clean the oven...

Page 13: ...and any food Before operating the self clean cycle wipe grease and food soils from the oven Excessive amounts of grease may ignite leading to smoke damage to your home Do not use any commercial oven cleaner or oven liner protective coating of any kind in or on the outside of the oven Remove the nickel oven shelves from the oven before you begin the self cleaning cycle or they may discolor If the s...

Page 14: ... be careful to avoid steam burns Some cleaners can produce noxious fumes if applied to a hot surface CRITICAL INSTALLATION WARNINGS WARNING This appliance must be installed by a qualified technician or service company Failing to have a qualified technician install the range may result in electric shock fire an explosion problems with the product or injury Unpack the oven remove all packaging mater...

Page 15: ... pull or excessively bend the power cord Do not twist or tie the power cord Do not hook the power cord over a metal object place a heavy object on the power cord or insert the power cord between objects This may result in electric shock or fire If the power cord is damaged contact your nearest Samsung service center CRITICAL USAGE WARNING CAUTION If the appliance is flooded by any liquid please co...

Page 16: ...ste it may result in a problem with the appliance Take care when removing the wrapping from food taken out of the appliance If the food is hot hot steam may be emitted abruptly when you remove the wrapping and this may result in burns Do not attempt to repair disassemble or modify the appliance yourself Since a high voltage current enters the product chassis it may result in electric shock or fire...

Page 17: ...s contact your product provider or nearest Samsung service center Do not tamper with make any adjustments or repairs to the door Under no circumstances should you remove the door or outer shell of the oven Do not store or use the oven outdoors Never use this appliance for purposes other than cooking Using the appliance for any purpose other than cooking may result in fire Open the cap or stopper o...

Page 18: ...to cause burns after cooking use cooking gloves to protect your hands from burns USAGE CAUTIONS CAUTION If the surface is cracked turn the appliance off Failing to do so may result in electric shock Dishes and containers can become hot Handle with care Hot foods and steam can cause burns Carefully remove container coverings directing the steam away from your hands and face Remove lids from baby fo...

Page 19: ...e As well as being harmful to humans it may also result in electric shock fire or problems with the product Do not put your face or body close to the appliance while cooking or when opening the door just after cooking Take care that children do not come too close to the appliance Failing to do so may result in children burning themselves Do not place food or heavy objects over the edge of the oven...

Page 20: ...eating food may result in fire CRITICAL CLEANING WARNINGS CAUTION Do not clean the appliance by spraying water directly on to it Do not use benzene thinner or alcohol to clean the appliance This may result in discoloration deformation damage electric shock or fire Take care not to hurt yourself when cleaning the appliance externally or internally You may hurt yourself on the sharp edges of the app...

Page 21: ... Samsung Contact Center 1 800 726 7864 Introducing your new range Overview 02 03 04 05 06 07 08 09 01 01 Oven control panel See page 27 for more information 02 Surface control knobs See page 23 for more information 03 Glass surface 04 Oven door 05 Storage drawer 06 Automatic oven light switch 07 Oven light 08 Shelf position 09 Gasket ...

Page 22: ...n one item at a time Surface cooking About surface cooking CAUTION BEFORE COOKING Do not use the glass cooktop surface as a cutting board Do not place or store items that can melt or catch fire on the glass cooktop even when it is not being used Turn the surface units on only after placing cookware on them Do not store heavy items above the cooktop surface They could fall and damage it CAUTION DUR...

Page 23: ... selected setting the element will cycle on and off The heating element retains enough heat to provide a uniform and consistent heat during the off cycle For efficient cooking turn off the element several minutes before cooking is complete This will allow residual heat to complete the cooking process NOTE Radiant elements have a limiter that allows the element to cycle ON and OFF even at the HI se...

Page 24: ...h settings For more information on selecting proper types of cookware refer to the section Using the proper cookware on page 25 How to set the appliance for surface cooking CAUTION The surface elements may be hot even when off and burns can occur Do not touch the surface elements until they have cooled down sufficiently At high or medium high settings never leave food unattended Boilovers cause sm...

Page 25: ...aming vegetables MEDIUM LOW Keeping foods cooking poaching stewing LOW Keeping foods warm melting simmering Using the proper cookware Using the right cookware can prevent many problems such as uneven cooking or extended cooking times Using the proper pots and pans will reduce cooking times and cook food more evenly Check for flatness by rotating a ruler across the bottom of the cookware CORRECT IN...

Page 26: ...result in a permanent stain Preventing other damage Do not allow plastic sugar or foods with high sugar content to melt onto the hot cooktop Should this happen clean immediately Do not let a pan boil dry as this will damage the cooktop and the pan Do not use the cooktop as a work surface or cutting board Do not cook food directly on the cooktop Always use the proper cookware Choosing the proper co...

Page 27: ...erature what mode the oven is operating in and the time set for the timer or automatic oven operations 02 Bake Use to select the bake function of the oven 03 Broil Use to select the broil function of the oven 04 Keep Warm Use to select the keep warm function of the single oven to keep cooked foods warm 05 Bread Proof Use to select the bread proof function of the oven 06 Steam Clean Use to select t...

Page 28: ...tomatic oven timing functions to work properly The time of day cannot be changed during timed cooking delay timed cooking How to set the clock 1 Press Clock 2 Enter the current time using the 3 Press Clock or START SET to save the changes Setting the kitchen timer The kitchen timer serves as an extra timer that will beep when the set time has elapsed It does not start or stop cooking functions You...

Page 29: ... features to cook cured or frozen meats and most fruits and vegetables Foods that can easily spoil such as milk eggs fish meat or poultry should be chilled in the refrigerator first Even when chilled they should not stand in the oven for more than 1 hour before cooking begins and should be removed promptly when cooking is completed Eating spoiled food can result in sickness from food poisoning Del...

Page 30: ...e 175 F 80 C 500 F 260 C Broil LO HI Keep Warm 3 Hr Bread Proof 12 Hrs Steam Clean 20 Min 20 Min NOTE If you turn off the 12 hour energy saving feature the feature marked with a will operate until canceled 12 hour energy saving s default setting on See page 37 for more information Using the oven racks Oven rack positions 1 2 3 4 5 6 7 Recommended rack position for cooking TYPE OF FOOD RACK POSITIO...

Page 31: ... 5 Using Multiple Oven Racks Type of Baking Rack Positions Cookies 2 and 5 Cakes 3 and 5 Before using the racks The oven has two racks Each rack has stops that need to be placed correctly on the supports These stops will keep the rack from coming completely out REMOVING THE RACKS 1 Pull the rack straight out until it stops 2 Lift up the front of the rack and then pull it out REPLACING THE RACKS 1 ...

Page 32: ... e g 425 F using the 3 Complete the entry by pressing START SET Broiling Broiling is a method of cooking tender cuts of meat by direct heat under the broil element of the oven The high heat cooks quickly and gives a rich brown outer appearance Broil mode is best for meats fish and poultry up to 1 thick Always preheat the oven for 4 minutes before broiling How to set the oven for broiling 1 Press B...

Page 33: ...roof The Bread Proof function automatically provides the optimum temperature for the bread proof process and therefore does not have a temperature adjustment If you press Bread Proof when the oven temperature is above 95 F Hot will appear in the display Because these functions produce the best results when started while the oven is cool we recommend that you wait until the oven has cooled down and...

Page 34: ...ated from the SmartThings app may not work smoothly if communication condition becomes poor or the product is installed in a place with a weak Wi Fi signal Please refer to the following table for the main functions that can be operated from the app When the remote control is off Monitoring Oven Cooktop Oven off When the remote control is on Monitoring Oven Cooktop Oven start Oven off Error check H...

Page 35: ...rn off the oven light lamp Turn off the range oven light Oven Timer Cook Time Set the timer on the range oven to 1 hour Amazon Alexa Google Assistant Samsung smart home appliances are supported by SmartThings skill in Alexa action in Google Assistant Installation Guide Here s how to link SmartThings account into Amazon Alexa or Google Assistant SmartThings App and Alexa App or Google Assistant App...

Page 36: ...vice name NOTE On Off spec of smart control is same as guided in SmartThings app Using the options function This function enables you to control various electronic control options Refer to the following table for available options The option menu is only available when the oven is not being used not cooking Options Feature 1 Temp Adjust Lets you correct the temperature in the oven 2 Temp Unit Lets...

Page 37: ...ress START SET 3 Press or to select F Fahrenheit or C Celsius 4 Press START SET to save the changes 12 hour energy saving If you accidently leave the oven on this feature will automatically turn off the oven after 12 hours during baking functions or after 3 hours during a broil function Default setting on How to turn the 12 hour energy saving feature on or off 1 Press Options for 3 seconds 2 Press...

Page 38: ...once the Sabbath feature is engaged 5 You can turn the oven off at any time by pressing OFF CLEAR This will turn only the oven off If you want to deactivate the Sabbath feature hold down Bake and at the same time for 3 seconds Sab will disappear from the display Do not to attempt to activate any other program feature except BAKE while the Sabbath feature is active ONLY the following key pads will ...

Page 39: ...is function produces the best results when started while the oven is cool we recommend that you wait until the oven has cooled down and Hot disappears from the display CAUTION Wear the glove during cleaning After a steam cleaning cycle Take care when opening the door before a steam cleaning procedure has ended The water on the bottom is hot Open the oven door and remove the remaining water with a ...

Page 40: ...leaning use a cloth with hot soapy water For more difficult residue and built up grease apply a liquid detergent directly onto the area and leave for 30 to 60 minutes Wipe with a damp cloth and dry Do not use abrasive cleaners on any of these surfaces They can scratch Cleaning stainless steel surfaces 1 Shake the bottle of STAINLESS STEEL APPLIANCE CLEANER or POLISH well 2 Place a small amount of ...

Page 41: ...e door vents DO NOT use oven cleaners cleaning powders or any harsh abrasive cleaning materials on the outside of the oven door DO NOT clean the oven door gasket The oven door gasket is made of a woven material which is essential for a good seal Care should be taken not to rub damage or remove this gasket Care and cleaning of the glass cooktop CAUTION Do not block the vent and cooling motors or le...

Page 42: ...d a few drops of ceramic cooktop cleaner on the entire burned residue area Use a cleaning pad to remove any remaining residue Do not scrape the seal 4 For additional protection after all residue has been removed polish the entire surface by applying ceramic cooktop cleaner with a paper towel Removing metal marks and scratches 1 Be careful not to slide pots and pans across your cooktop It will leav...

Page 43: ...ge candy syrups or melted plastics can cause pitting of the surface of your cooktop This is not covered under the warranty You should clean the spill while it is still hot Take special care when removing hot substances Refer to the section below When using a scraper be sure it is new and the razor blade is still sharp Do not use a dull or nicked blade Cleaning sugary spills and melted plastic 1 Tu...

Page 44: ... frame of the oven cavity to the locked position 5 Close the oven door Fig 2 Fig 2 5 Lift door up and out until the hinge arm is clear of the slot Fig 2 How to re install the door Hinge arm Hinge arm Bottom Bottom edge of edge of slot slot Indentation Indentation 1 Firmly grasp both sides of the door at the top 2 With the door at the same angle as the removal position slide the indentation of the ...

Page 45: ...to remove it from its socket 5 Insert a new 40 watt appliance bulb and then turn it clockwise to tighten Replace the bulb cover by turning clockwise 6 Plug in the range or reconnect the power CAUTION Before changing your oven light bulb disconnect the electrical power to the range at the main fuse or circuit breaker panel Make sure the oven and the bulb are cool Removing and reinstalling the stora...

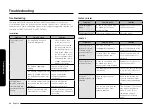
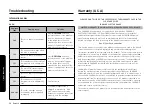
Page 46: ... make the appliance accessible Carpet is interfering with movement of the range Provide sufficient space so the range can be lifted over the carpet CONTROL DISPLAY Problem Possible cause Solution The display goes blank A fuse in your home may be blown or the circuit breaker tripped Replace the fuse or reset the circuit breaker The display flashes There was a power failure Reset the clock COOKTOP P...

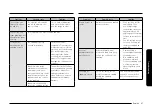
Page 47: ...urface of the cooktop To avoid scratches follow the recommended cleaning procedures Make sure cookware bottoms are clean before use and use cookware with smooth bottoms Cookware has been slid across the cooktop surface Problem Possible cause Solution Brown streaks or specks Boilovers have been cooked onto the surface Wait until the surface cools down Then use a single edge razor blade scraper at a...

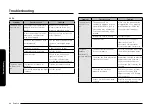
Page 48: ...ce Problem Possible cause Solution The appliance will not turn on The appliance is not completely plugged into the electrical outlet or a fuse in your home may be blown or a circuit breaker may have tripped Make sure the power cord is plugged into a live properly grounded outlet Check the fuse and circuit breakers Incomplete service wiring Call for service Power outage Check to see if the house li...

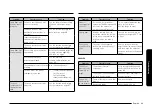
Page 49: ...ven sensor needs to be adjusted See the section on adjusting the thermostat on page 37 Problem Possible cause Solution Steam is coming out of the vent As the number of racks or amount of food being cooked increases the amount of visible steam will increase This is normal operation and not a system failure Use the range as usual Strong odor An odor coming from the insulation around the inside of th...

Page 50: ...SAMSUNG and delivered new in the original carton to the original consumer purchaser is warranted by SAMSUNG against manufacturing defects in materials or workmanship for the limited warranty period starting on the date of delivery to the original consumer purchaser of One 1 Year Parts and Labor This limited warranty is valid only on products purchased and used in the United States that have been i...

Page 51: ... sugary materials or melted plastic that are not cleaned according to the directions in the use and care guide are not covered by this limited warranty The cost of repair or replacement under these excluded circumstances shall be the customer s responsibility Visits by an authorized servicer to explain product functions maintenance or installation are not covered by this limited warranty Please co...

Page 52: ...arranty period specified above All replaced parts and products become the property of SAMSUNG and must be returned to SAMSUNG Replacement parts and products assume the remaining original warranty or ninety 90 days whichever is longer This limited warranty covers manufacturing defects in materials and workmanship encountered in normal noncommercial use of this product and shall not apply to the fol...

Page 53: ...BEEN ADVISED OF THE POSSIBILITY OF SUCH DAMAGES NOR SHALL RECOVERY OF ANY KIND AGAINST SAMSUNG BE GREATER IN AMOUNT THAN THE PURCHASE PRICE OF THE PRODUCT SOLD BY SAMSUNG AND CAUSING THE ALLEGED DAMAGE WITHOUT LIMITING THE FOREGOING PURCHASER ASSUMES ALL RISK AND LIABILITY FOR LOSS DAMAGE OR INJURY TO PURCHASER AND PURCHASER S PROPERTY AND TO OTHERS AND THEIR PROPERTY ARISING OUT OF THE USE MISUSE...

Page 54: ...R COMMENTS COUNTRY CALL OR VISIT US ONLINE AT U S A Consumer Electronics 1 800 SAMSUNG 726 7864 www samsung com us support CANADA 1 800 SAMSUNG 726 7864 www samsung com ca support English www samsung com ca_fr support French NE63A6111S _02 Scan the QR code or visit www samsung com spsn to view our helpful How to Videos and Live Shows Requires reader to be installed on your smartphone ...

Reviews: