background image

11 

Operation

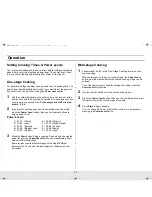
Setting Cooking Times & Power Levels

Your microwave allows you to set up to two different stages of cooking, 
each with its own time length and power level. The power level button 
lets you control the heating intensity from Warm (1) to High (0).

One-stage Cooking 

For simple one-stage cooking, you only need to set a cooking time. The 
power level is automatically set to High. If you want to set the power to 
any other level, you must set it using the Power Level button.

1

Use the number buttons to set a cooking time. You can set a time 
from one second to 99 minutes, 99 seconds. To set a time over one 
minute, enter the seconds too. For example, to set 20 minutes, 
enter 2, 0, 0, 0 .

2

If you want to set the power level to something other than High, 
press the Power Level button, then use the number buttons to 
enter a power level.

Power Levels:

1 = PL:10 (Warm)

6 = PL:60 (Simmer)

2 = PL:20 (Low)

7 = PL:70 (Medium High)

3 = PL:30 (Defrost)

8 = PL:80 (Reheat)

4 = PL:40 (Medium Low)

9 = PL:90 (Sauté)

5 = PL:50 (Medium)

0 = PL:Hi (High)

3

Press the Start button to begin cooking. If you want to change the 
power level, press Pause/Cancel before you press Start, and re-
enter all of the instructions. 

Some recipes require different stages of cooking at different 
temperatures. You can set multiple stages of cooking with your 
microwave.

Multi-stage Cooking 

1

Follow steps 1 and 2 in the “One-Stage Cooking” section on the  
previous page. 

When entering more than one cooking stage, the Power Level 
button must be pressed before the second cooking stage can be 
entered. 

To set the power level at High for a stage of cooking, press the 
Power Level button twice. 

2

Use the number buttons to set a second cooking time. 

3

Press the Power Level button, then use the number buttons to set 
the power level of the second stage of cooking. 

4

Press Start to begin cooking.

You can check the Power Level while cooking is in progress by 
pressing the Power Level button.


Summary of Contents for MW945BB

Page 1: ... the Snack Bar Button 10 Using the One Minute Button 10 Defrosting Automatically 10 Setting Cooking Times Power Levels 11 One stage Cooking 11 Multi stage Cooking 11 Using the More Less Buttons 12 Switching the Beeper On Off 12 Using the Kitchen Timer 12 Demonstration Mode 12 Setting the Child Protection Lock 12 Cooking Instructions 13 Cooking Utensils 13 Testing Utensils 13 Cooking Techniques 14 ...

Page 2: ...ons should be followed including the following WARNING To reduce risk of burns electric shock fire personal injury or exposure to excessive microwave energy Read all safety instructions before using the appliance Read and follow the specific PRECAUTIONS TO AVOID POSSIBLE EXPOSURE TO EXCESSIVE MICROWAVE ENERGY on this page This appliance must be grounded Connect only to properly grounded outlets Se...

Page 3: ...t oven or operate while empty Do not cook without the glass tray in place on the oven floor Food will not cook properly without the tray Do not defrost frozen beverages in narrow necked bottles The containers can break Dishes and containers can become hot Handle with care Carefully remove container coverings directing steam away from hands and face Remove lids from baby food before heating After h...

Page 4: ...ords A short power supply cord is provided to reduce the risk of becoming entangled in or tripping over a longer cord Longer cord sets or extension cords are available and may be used if care is exercised in their use If a long cord or extension cord is used 1 The marked electrical rating of the cord set or extension cord should be at least as great as the electrical rating of the appliance 2 The ...

Page 5: ...D ____________________ PURCHASED FROM ____________________ Warranty service can only be performed by a Samsung Authorized Service Center If you should require warranty service provide the above information with a copy of your sales receipt to the Samsung Authorized Service Center For service assistance and the location of the nearest service center please call 1 800 SAMSUNG 1 800 726 7864 or go on...

Page 6: ...ts cooking times or amounts and power levels other than high 5 More Less p 12 Increase or decrease cooking time 6 Power Level p 11 Press this pad to set a power level other than high 7 Kitchen Timer p 12 Sets kitchen or convenience timer 8 Clock p 7 Sets current time 9 Sound Button p 12 Sets sound on or off 10 Pause Cancel p 7 Press to pause oven or correct a mistake 11 Start Press to start cookin...

Page 7: ... You must press at least three numbers to set the clock If the current time is 5 00 enter 5 0 0 3 When 5 seconds has elapsed ENTER indicator flash and Cloc will be displayed 4 Press Clock again A colon will blink indicating that the time is set If there is a power interruption you will need to reset the clock You can check the current time while cooking is in progress by pressing the Clock button ...

Page 8: ...g at a time Use caution when removing and opening hot bag from oven Potato 1 EA 2 EA 3 EA 4 EA 5 EA 6 EA Prick each potato several times with fork Place on turntable in spoke like fashion Remove from oven wrap in foil and let stand 3 5min Beverage cup 1 cup 2 cups Use measuring cup or mug do not cover Place the beverage in the oven After heating stir well Fresh Vegetables 1 serving 2 servings 3 se...

Page 9: ...rving 3 Press Start button to begin cooking Kids Meals Chart Item Code Weight Remarks Melt Chocolate A 1 1 cup chips Place chocolate chips or square in a microwave safe dish Stir well at half time when the oven beeps and re start the oven Unless stirred the chocolate keeps its shape even when heating time is over Soften Cream Cheese A 2 1 package 8 oz Unwrap cream cheese and place on microwave saf...

Page 10: ... for metric measure ENTER and Lbs will flash 2 To set the weight of your food press the Auto Defrost button repeatedly This increases the weight by 0 5 lb increments up to 6 0 lbs The Auto Defrost button will increase the weight by 0 2Kg up to 2 6kg if you are using metric measurement You can also use the number buttons to enter the weight of the food directly The oven calculates the defrosting ti...

Page 11: ...Warm 6 PL 60 Simmer 2 PL 20 Low 7 PL 70 Medium High 3 PL 30 Defrost 8 PL 80 Reheat 4 PL 40 Medium Low 9 PL 90 Sauté 5 PL 50 Medium 0 PL Hi High 3 Press the Start button to begin cooking If you want to change the power level press Pause Cancel before you press Start and re enter all of the instructions Some recipes require different stages of cooking at different temperatures You can set multiple s...

Page 12: ... display shows OFF START will flash 3 Press Start The display returns to the time of day Using the Kitchen Timer 1 Press the Kitchen Timer button 2 Use the Number buttons to set the length of time you want the timer to run 3 Press Start to begin Kitchen Timer 4 The display counts down and beeps when the time has elapsed Note The microwave does not turn on when the Kitchen timer is used Demonstrati...

Page 13: ... much foil can damage your oven so be careful Ceramic porcelain and stoneware Use these if they are labeled Microwave Safe If they are not labeled test them to make sure they can be used safely Never use dishes with metallic trim Plastic Use only if labeled Microwave Safe Other plastics can melt Straw wicker and wood Use only for short term heating as they can be flammable Not Recommended Glass ja...

Page 14: ...er areas All liquids such as soup or hot chocolate should be shaken or stirred when cooking is complete Let liquids stand a moment before serving When heating baby food stir well and test the temperature before serving Adding Moisture Microwave energy is attracted to water molecules Food that is uneven in moisture content should be covered or allowed to stand so that the heat disperses evenly Add ...

Page 15: ...9 14 min lb for 145 F Well Done Power Level High Hi for first 5 min then Medium 50 Place roast fat side down on roasting rack Cover with wax paper Turn over when cooking time is half up Let stand 10 min Pork Boneless or bone in Up to 4 lbs Cooking Time 11 15 min lb for 160 F Well Done Power Level High Hi for first 5 min then Medium 50 Place roast fat side down on roasting rack Cover with vented pl...

Page 16: ...over the dish with a lid or vented microwavable plastic wrap Whole unpeeled vegetables such as potatoes squash eggplant etc should have their skin pricked in several spots before cooking to prevent them from bursting For more even cooking stir or rearrange whole vegetables halfway through the cooking time Generally the denser the food the longer the standing time Standing time refers to the time n...

Page 17: ...of aluminum foil Steaks Chops Fish 0 5 3 0 lbs After each stage rearrange the food If there are any warm or thawed portions of food shield them with narrow flat pieces of aluminum foil Remove any pieces of food that are nearly defrosted Let stand covered for 5 10 minutes Ground Meat 0 5 3 0 lbs After each stage remove any pieces of food that are nearly defrosted Let stand covered with foil for 5 1...

Page 18: ...10 minutes Let stand for 10 minutes Remove bay leaf before serving Makes 6 servings Broccoli and Cheese Casserole cup butter or margarine cup chopped onion 1 Tbs flour tsp salt tsp dry mustard 1 8 tsp pepper 1 cups milk cup chopped red pepper 8 oz 2 cups cheddar cheese shredded 1 pkg 9 10 oz frozen chopped broccoli thawed 4 cups cooked spiral shaped pasta 8 oz dry 1 In a 2 quart casserole cook but...

Page 19: ...ir once 4 Stir in sugar salt flour celery seed and pepper Cook at High until mixture boils 30 40 sec Stir in vinegar and cup water Cook at High until liquid boils and thickens slightly 1 2 min stir once Add bacon to dressing Pour dressing over potatoes Stir well Makes 6 servings Black Bean Soup 1 cup chopped onion 1 clove garlic minced 2 cans 15 oz each black beans drained 1 can 14 16 oz stewed to...

Page 20: ...ble and roller ring are positioned correctly Using your microwave causes TV or radio interference This is similar to the interference caused by other small appliances such as hair dryers Move your microwave further away from other appliances like your TV or radio Care and Cleaning Follow these instructions to clean and care for your oven Keep the inside of the oven clean Food particles and spilled...

Page 21: ...ing defrost Timer 99 minutes 99 seconds Power Source 120 VAC 60 Hz Power Output 1000 Watts Power Consumption 1400 Watts Outside Dimensions 2011 32 W X 1111 16 H X 1429 32 D Oven Cavity Dimensions 137 32 W X 91 8 H X 1311 16 D Shipping Dimensions 2223 32 W X 1419 32 H X 1631 32 D Net Gross Weight 35 3 38 6 lbs ...

Page 22: ...low operating instructions cleaning maintenance and environmental instructions that are covered and prescribed in the instruction book product removal and reinstallation problems caused by pest infestations and overheating or overcooking by user glass tray or turntable reduced magnetron power output related to normal aging SAMSUNG does not warrant uninterrupted or error free operation of the produ...

Page 23: ... Service Center in the United States and Canada please contact SAMSUNG at 1 800 SAMSUNG 1 800 726 7864 Or on line at WWW SAMSUNGUSA COM and WWW SAMSUNGCANADA COM Guía Rápida Spanish Función Operación Ajuste de Reloj 1 Presione CLOCK 2 Use botones numéricos para seleccionar hora 3 Presiones CLOCK de nuevo Cocinado Fase simple 1 Use botones numéricos para seleccionar tiempo 2 Seleccione nivel de pod...

Page 24: ...od by pressing AUTO DEFROST button repeatedly or using the number buttons 3 When the oven beeps press PAUSE CANCEL button and turn food over Press START to resume defrosting cycle Set Cooking Time and Power Levels 1 Use number buttons to set cooking time 2 To set power level at other than HIGH press POWER LEVEL and use the number buttons to enter the power level 3 Press START to begin cooking Hand...

Reviews: