background image

105

105

ENGLISH

保護

護多

多個

個視

視圖

圖中

中的

的影

影片

1

1..


將模

模式

式轉

轉盤

盤轉

轉到

M

Mo

ov

viie

e

模式

0


2

2..


按下

[[P

PO

OW

WE

ER

R]]

以開

開啓

M

Miin

niik

ke

ett


P

Ph

ho

otto

o

0


3

3..


按下

[[S

Sh

ho

orrttccu

utt


1

1]]

0


將會切換到播放影片模式

4

4..


[[W

W//T

T]]


縮放

放切

切換

換移

移到

W

W

(廣

廣角

角)

0


螢幕將切換到多個視圖

在單一視圖中檢視的影片將會選取

5

5..


按下

[[S

Sh

ho

orrttccu

utt


3

3]]

,向

向上

上或

或向

向下

下移

移動

動搖

搖桿

以選

選取

取選

選項

項,

,然

然後

後按

按下

下搖

搖桿

((O

OK

K))


0


<

<S

Se

elle

ecctt>

>

: 選取的

案將會受到保護

<

<A

Allll>

>

<Protect All?>

訊息將會顯示

0

向左或向右移動搖桿選取所要的選項,然後按
下搖桿

(OK)

以確認

<

<C

Ca

an

ncce

ell>

>

: 取消保護

6

6..


如果

果選

選取

<

<S

Se

elle

ecctt>

>

,向

向左

//

//

//

下移

移動

動搖

搖桿

桿以

選取

取要

要保

保護

護的

的影

影片

案,

,然

然後

後按

按下

下搖

搖桿

((O

OK

K))


0


可以使用搖桿

(OK)

選擇多個影片

<

>

指示器將會出現在受保護的

7

7..

按下

[[S

Sh

ho

orrttccu

utt


3

3]]

0


Confirm?

”訊息將會顯示

向左或向右移

動搖桿選取所要的選項,然後按下搖桿

(OK)

以確認

8

8..


選取

取的

的影

影片

片將

將會

會受

受到

到保

保護

護以

以防

防止

止意

意外

外刪

刪除

0


M

Mo

ov

viie

e

模式

式:

: 設

設定

定檢

檢視

視選

選項

使

使用

用捷

捷徑

徑按

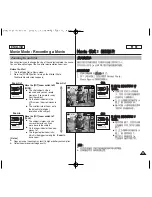
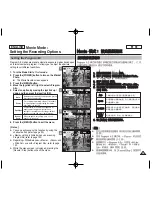
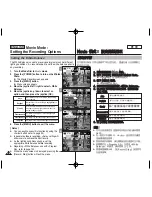
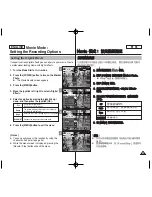
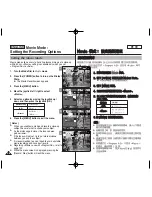
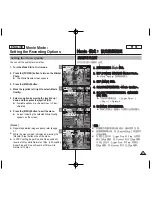
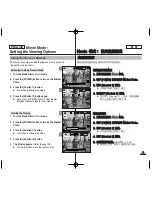
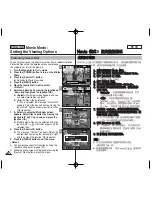
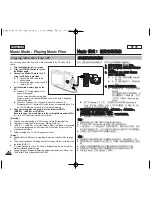
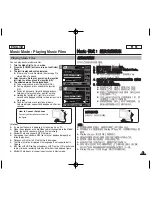
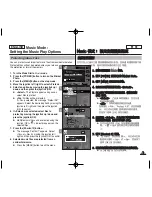
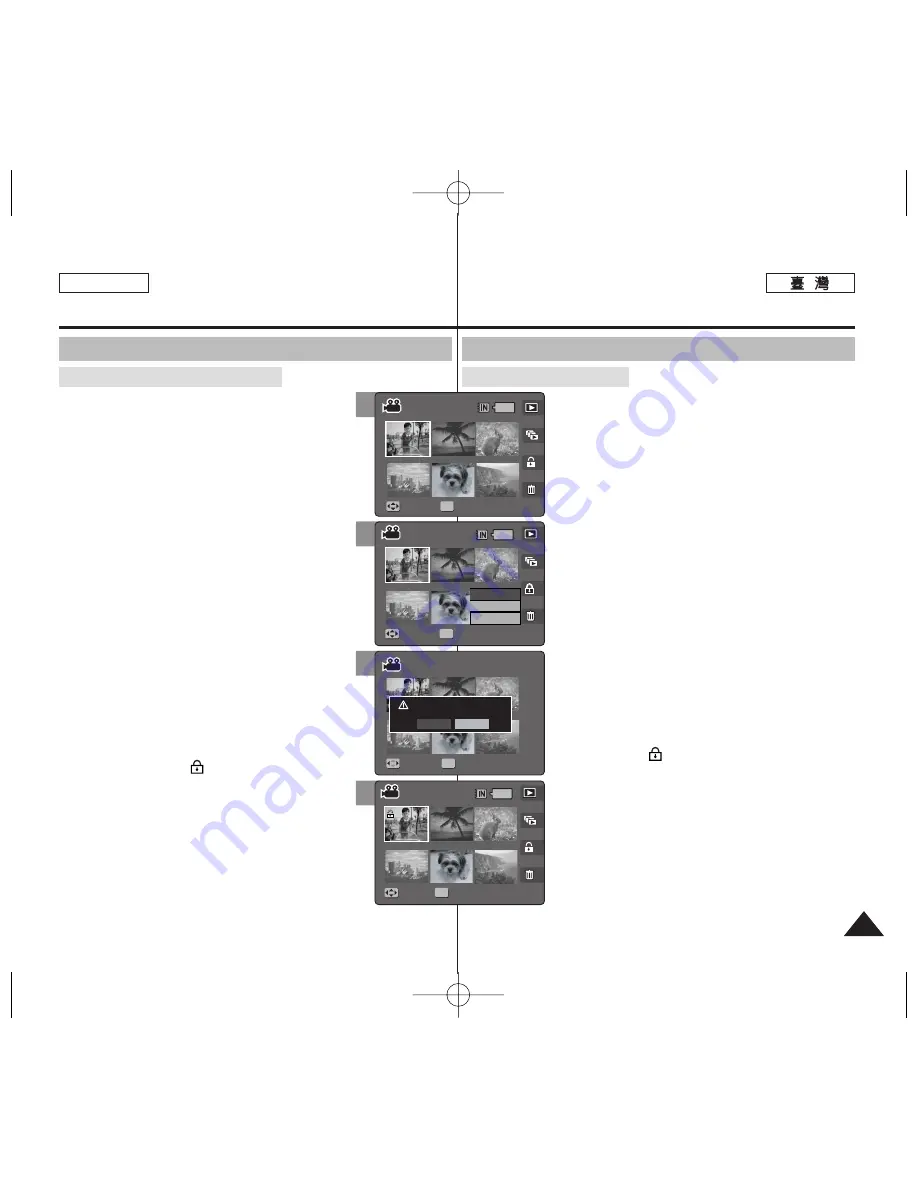
Protecting Movie files in Multi-View

1. Turn the Mode Dial to 

Movie

mode.

2. Press the [POWER] button to turn on the

Miniket Photo.

3. Press the [Shortcut 1] button.

It switches to the Movie play mode.

4. Move the [W/T] zoom switch to W (WIDE).

The screen switches to multi-view.

The movie you were viewing in the single
view is selected.

5. Press the [Shortcut 3] button and then select

an option by moving the joystick up / down and
then press the joystick (OK).

<Select>

: Selected files will be protected.

<All>

: The message <Protect All?> appears.

Select the desired option by moving the joystick
left / right and then press the joystick (OK) to
confirm.

<Cancel>

: Cancels protection.

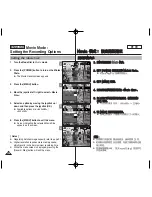
6. If <Select> was selected, select movie files to

protect by moving the joystick left / right / up /
down and press the joystick (OK).

Multiple movie files can be selected using the
joystick (OK). <

> indicator appears on the

protected files.

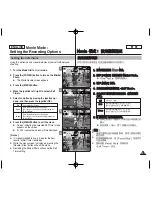
7. Press the [Shortcut 3] button.

The message ”Confirm?” appears. Select the
desired item by moving the joystick left / right
and then press the joystick (OK) to confirm.

8. Selected movies are protected from an

accidental erasure.

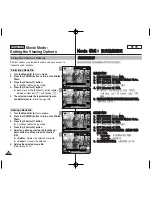
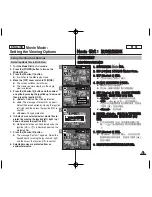
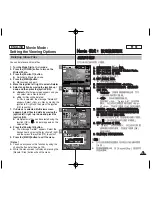
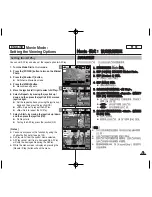
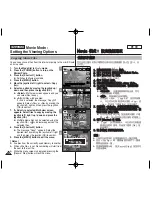
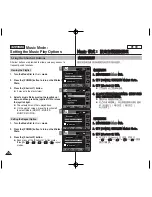
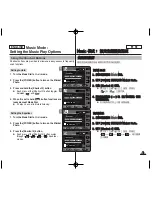
Movie Mode : 

Setting the Viewing Options

Using the Shortcut Buttons

5

7

6/6

1/6

1/6

1/6

Move

Full View

OK

Move

Move

Full View

Full View

Full View

Select

All

Cancel

Move

Move

Select

6/6

1/6

1/6

Move

Full View

Move

Full View

Full View

Move

Confirm?

Move

Move

Select

Select

Yes

No

OK

8

6/6

1/6

1/6

1/6

Move

Full View

Move

Full View

OK

Full View

Full View

Move

Move

Move

Select

4

6/6

6/6

1/6

1/6

OK

Move

Move

Full View

Full View

Move

Full View

Full View

Move

Move

Select

Summary of Contents for MS11

Page 1: ...ce AF Auto Focus CCD Charge Coupled Device LCD Liquid Crystal Display SC MS10 S BL R MS11 S BL R MS15 S BL R AD68 00934F Use only approved battery packs Otherwise there is a danger of overheating fire...

Page 2: ...ions Regarding Service 11 Precautions Regarding Replacement Parts 11 Features 12 Accessories Supplied with the Miniket Photo 13 Rear Left View 14 Front Bottom View 15 LCD Display 16 OSD On Screen Disp...

Page 3: ...card Optional Accessory 32 Inserting Ejecting a mini SD card Optional Accessory 33 Selecting the Memory Type 34 Before You Start Operating the Miniket Photo 35 Setting Memory 37 Selecting the Memory T...

Page 4: ...rtcut Buttons 58 Using the Scene Modes 60 Setting the Photo Size 61 Setting the Photo Quality 62 Setting the Metering Method 63 Setting the Self Timer 64 Setting the Multi Shot 65 Setting Digital Effe...

Page 5: ...ng a Movie on the LCD Monitor 92 Setting the Recording Options 93 Using the Shortcut Buttons 93 Setting the Program AE 95 Setting the White Balance 96 Setting the Digital Effects 97 Setting the Macro...

Page 6: ...e Files 121 Playing Voice Files 122 Playing Voice Files 122 Setting the Voice Play Options 123 Using the Shortcut Buttons 123 Setting the Repeated Play 125 Deleting Voice Files 126 Protecting Voice Fi...

Page 7: ...DV Media Pro 1 0 Video Studio 7 0 138 Connecting To Other Devices 139 Connecting to a PC Using USB Cable 139 Connecting to a TV Monitor 140 Connecting to a VCR 141 Printing Photos 142 Printing with D...

Page 8: ...be observed if photographing infants when the flash should be no less than 3 feet from your subject If the Miniket Photo is not working properly please consult your nearest dealer or authorised SAMSU...

Page 9: ...ual or other documentation provided with your Samsung product are trademarks or registered trademarks of their respective holders Notes Regarding the Miniket Photo Notes Regarding COPYRIGHT Notes Rega...

Page 10: ...inserted firmly in place The new Battery Pack provided with the product is not charged Before using the Battery Pack you need to fully charge it Do not drop the Battery Pack Dropping the Battery Pack...

Page 11: ...light can damage the CCD Charge Coupled Device the imaging sensor Note Regarding the Lens Notes Regarding the LCD Display Do not attempt to service the Miniket Photo yourself Opening or removing cover...

Page 12: ...ntertaining You can use the Miniket Photo as a Pc Cam for video chatting and other Pc Cam applications Voice Record Playback with vast memory You can record voices and store it in the internal memory...

Page 13: ...ou can download programs the latest driver software and CODECs from the Samsung Electronics webpage Getting to know your Miniket Photo 13 13 ENGLISH Accessories Supplied with the Miniket Photo Basic A...

Page 14: ...ng Indicator 9 Built in Speaker 10 Display Button 11 LCD Monitor ENGLISH 14 14 Name of Each Part 1 1 2 2 M ME EN NU U 3 3 U Up p D Do ow wn n L Le ef ft t R Ri ig gh ht t O OK K 4 4 A AV V 5 5 U US SB...

Page 15: ...attery mini SD card Slot 11 Battery Slot 12 Mini SD card slot 13 Battery Lock Switch 15 15 ENGLISH Usable mini SD card 1 1 0 0 2 2 W W T T 3 3 4 4 5 5 6 6 7 7 8 8 9 9 1 10 0 O OP PE EN N S SD D 1 11 1...

Page 16: ...r 2 Image Size Indicator 3 DPOF Indicator 4 Image Number 5 Delete Shortcut Button 6 Protection Shortcut Button 7 Slide Shortcut Button 8 Record Play Shortcut Button 9 Battery Life Indicator 10 Memory...

Page 17: ...Counter Elapsed Time 6 Volume Indicator 7 Delete Shortcut Button 8 Protection Shortcut Button 9 All Play Shortcut Button 10 Record Play Shortcut Button 11 Battery Life Indicator 12 Memory Type Indicat...

Page 18: ...icator 13 Move Help Key 14 Folder Help Key 15 Play Help Key 16 Delete Shortcut Button 17 Hold Shortcut Button 18 Repeat Shortcut Button 19 File List Display Shortcut Button 20 Battery Life Indicator 2...

Page 19: ...Button 10 File List Display Shortcut Button 11 Record Play Shortcut Button 12 Protection Indicator Settings Mode 1 Mode Indicator 2 Menu Tab 3 Setup Items 4 Move Help Key 5 Select Help Key V Vo oi ic...

Page 20: ...to pop the Battery Pack out 2 Pull the ejected Battery Pack out in the direction as shown in the diagram Notes Clean the terminals to remove any foreign substances before inserting the Battery Pack I...

Page 21: ...Battery Pack near any heat sources fire or flames for example Do not disassemble process press or heat the Battery Pack Do not allow the and terminals of the Battery Pack to be short circuited It may...

Page 22: ...tured at 20 sec interval zoom in or out after each capturing Poweroffandonaftereach8captures DefaultLCD brightness 14 3non flashuse 1flashusecapturing Fullychargedbattery Roomtemperature Normal 320x24...

Page 23: ...hoto will soon turn off Change the Battery Pack as soon as possible flickers The Miniket Photo will be forced to turn off soon Low battery SB LH82 820 mAh Approx 1 hr 40 min Approx 3 hr Battery Using...

Page 24: ...s You may use the Miniket Photo powered by the AC Power Adapter indoors where available Warning It is recommended to fully charge the Battery Pack before use You should only charge the battery in an e...

Page 25: ...tor LED 0 L LE ED D L LE ED D Recording Charging Indicator Power Indicator The color of the LED indicates the state of power or charging LED Color Blue Power On LED Color Red Orange Green During Recor...

Page 26: ...l Within 1 2 seconds the Miniket Photo switches to the designated mode Functions of Each Mode Photo Mode You can take view photos Movie Mode You can record play back video Music Mode You can play back...

Page 27: ...on the screen 3 If you press the DISPLAY button 3 times it switches to the initial normal display screen Notes Above description applies to the Photo and Movie mode In Music and Voice modes the DISPL...

Page 28: ...ng to the selected mode are displayed on the LCD monitor to allow easier access Using these buttons you may directly access the functions 1 Turn the Mode Dial to set the desired mode 2 Press the POWER...

Page 29: ...rsor select functions and exit from the menu 1 Move the cursor left right by pressing the joystick 2 Move the cursor up down by pressing the joystick You can adjust the volume by moving the joystick u...

Page 30: ...tem folders created when manufacturing Do not change or delete MUSIC1 4 folders Changing or deleting MUSIC1 4 folder names will disable music playback Only mp3 files are recognised under the system fo...

Page 31: ...2M 23 47 190 30 61 244 37 75 303 60 120 481 136 273 1092 292 585 2340 51 102 409 66 132 528 81 163 655 128 256 1024 292 585 2340 512 1024 4096 97 195 780 128 256 1024 157 315 1260 227 455 1820 512 102...

Page 32: ...ta In this case you have to purchase a new mini SD card A mini SD card is a precision electronic equipment Do not bend it drop it or cause it to suffer a strong impact Do not use or store in a place t...

Page 33: ...1 Open Cover by sliding the OPEN switch on the bottom side Slide the OPEN switch in the direction of 1 as shown in the diagram until it stops Then open the lid 2 2 Insert a mini SD card into the slot...

Page 34: ...card into the slot refer to page 33 The message Memory Card inserted Change into the card appears on the screen 4 Select the desired setting by moving the joystick left right and press the joystick O...

Page 35: ...oto read this page thoroughly for easy operation A mini SD card is an optional accessory and not included in the package 1 Insert the Battery Pack and insert a mini SD card into the mini SD card slot...

Page 36: ...tion 38 Formatting the Memory 39 Viewing Memory Space 40 Adjusting the LCD Monitor 41 Adjusting the LCD Brightness 41 Setting Date Time 42 Setting Date Time 42 Setting Date Format 43 Setting Date Time...

Page 37: ...e files are stored in the external memory mini SD card 5 After you finish setting turn the Mode Dial to the desired mode Notes If you insert a mini SD card when the Miniket Photo is on the pop up mess...

Page 38: ...tick OK Reset When the storage memory is formatted the file number goes back to its default value 100 0001 Series Numbering is continuous between the mini SD cards so that the first file number assign...

Page 39: ...he joystick OK is pressed the message All files will be deleted Do you want to format appears Select Yes or No by moving the joystick left right and then press the joystick OK 5 After you finish forma...

Page 40: ...Settings mode 2 Press the POWER button to turn on the Miniket Photo 3 Select Memory Space by moving the joystick left right 4 The used memory space and total memory space are displayed 5 After you fin...

Page 41: ...ick left right 4 Adjust the brightness by moving the joystick up down then press the joystick OK Moving the joystick up will brighten the screen whereas moving it down will darken the screen Brightnes...

Page 42: ...stick OK 4 Set the desired value by moving the joystick up down 5 Move to the next item by moving the joystick left right and then set values by moving the joystick up down Items are displayed in the...

Page 43: ...he Miniket Photo 3 Select Date Format by moving the joystick left right 4 Select the format by moving the joystick up down and then press the joystick OK YYYY MM DD The date is displayed in the order...

Page 44: ...e The time is displayed Date Time The date and time are displayed 5 After you finish setting turn the Mode Dial to the desired mode The selected Date Time is displayed in Movie Record or Photo Capture...

Page 45: ...n by moving the joystick up down and then press the joystick OK NTSC Sets to NTSC standard PAL Sets to PAL standard Refer to page 146 5 After you finish setting turn the Mode Dial to the desired mode...

Page 46: ...t Beep Sound by moving the joystick left right 4 Select the desired option by moving the joystick up down and then press the joystick OK Off Turn the beep sound off On Turn the beep sound on 5 After y...

Page 47: ...3 Select Shutter Sound by moving the joystick left right 4 Select the desired option by moving the joystick up down and then press the joystick OK Off Turn the shutter sound off On Turn the shutter s...

Page 48: ...n select the desired language of the Miniket Photo 1 Turn the Mode Dial to the Settings mode 2 Press the POWER button to turn on the Miniket Photo 3 Select Language by moving the joystick left right 4...

Page 49: ...play by moving the joystick left right 4 Select the desired option by moving the joystick up down and then press the joystick OK Off Turns the Mode Display off On Turns the Mode Display on 5 After you...

Page 50: ...n press the joystick OK Off Cancel the Auto Shut Off function 3min Automatically turns off after 3 minutes 5min Automatically turns off after 5 minutes 5 After you finish setting turn the Mode Dial to...

Page 51: ...Reset by moving the joystick left right 4 Press the joystick OK Select an option by moving the joystick left right and then press the joystick OK Yes Starts the reset function No Cancel the reset fun...

Page 52: ...Anti Shake Function Image Stabilisation 75 Setting the Digital Zoom 76 Setting the Imprint Option 77 Setting the Viewing Options 78 Using the Shortcut Buttons 78 Deleting Photo Files 82 Protecting Pho...

Page 53: ...ure screen appears 3 Press the Record Stop button halfway down to set the focus and exposure The focus indicator appears in green when the focus is set If the focus indicator appears in red try to set...

Page 54: ...subject s size is reduced and you can take a picture as if you were far away from the subject On the zoom indicator in the LCD screen the arrow moves to W The smallest rate of zoom out is the default...

Page 55: ...o Photo mode 2 Press the POWER button to turn on the Miniket Photo 3 Press the Shortcut 1 button to switch to Photo View mode 4 Move the joystick left right to find the photo you want to view Each mov...

Page 56: ...n the Miniket Photo 3 Press the Shortcut 1 button to switch to Photo View mode Move the W T zoom switch to W WIDE The screen switches to multi view The photo you were viewing in the single view previo...

Page 57: ...screen If there is not enough space to save the cropped image a message Memory Full is displayed 7 Select an option by moving the joystick left right and then press the joystick OK Yes Crops the image...

Page 58: ...w users easy access to frequently used functions 1 Turn the Mode Dial to Photo mode 2 Press the POWER button to turn on the Miniket Photo 3 Press the Shortcut 1 button Each press of the Shortcut 1 but...

Page 59: ...allow users easy access to frequently used functions 1 Turn the Mode Dial to Photo mode 2 Press the POWER button to turn on the Miniket Photo 3 Press the Shortcut 3 button Each press of the Shortcut...

Page 60: ...d Focus While the menu screen is displayed pressing the Record Stop button will exit the menu Using the Scene Modes Auto Manual Night Portrait Children Landscape For automatic balancing exposure and s...

Page 61: ...M 3M 2M 1M VGA 6 Press the MENU button to exit the menu An icon indicating the selected size appears on the screen Notes Regarding detailed image capacity refer to page 31 The photo capacity is an app...

Page 62: ...ress the MENU button to exit the menu An icon indicating the selected quality appears on the screen Notes Regarding detailed image capacity refer to page 31 The photo capacity is an approximation and...

Page 63: ...ding metering with Scene modes refer to page 72 While the menu screen is displayed pressing the Record Stop button will exit the menu Multi Center Spot It splits the screen into many areas and adjusts...

Page 64: ...e menu Notes You can easily access this function by using the shortcut button refer to page 59 It is recommended to use a tripod for best results on Self Timer pictures Restarting the Miniket Photo wi...

Page 65: ...ode appears on the screen If Off is selected no icon will be displayed Notes When you set the Multi Shot enabled you cannot use the flash Anti Shake is not available when you set the Multi Shot enable...

Page 66: ...ck OK 6 Press the MENU button to exit the menu The selected Digital Effect and icon appear on the screen If Off is selected no icon will be displayed Note While the menu screen is displayed pressing t...

Page 67: ...ion by moving the joystick up down and then press the joystick OK 2 0 1 6 1 3 1 0 0 6 0 3 0 0 3 0 6 1 0 1 3 1 6 2 0 The screen brightness gets darker when the EV settings goes to a negative setting an...

Page 68: ...Notes The higher the ISO Speed number the higher sensitivity to light It results in brighter imaging under darker lighting High ISO Speed setting may result in picture noise Regarding ISO setting in S...

Page 69: ...ance appears on the screen If Auto is selected no icon will be displayed Notes In general outdoors picture taking Auto setting will allow users to have best results As the lighting condition changes s...

Page 70: ...when you set the Macro mode to Super Macro Super Macro is only available when the zoom is positioned to W end When you use Macro mode and record a close up subject be careful not to shade your subjec...

Page 71: ...function by using the shortcut button refer to page 58 Regarding Flash setting in Scene modes refer to page 72 While the menu screen is displayed pressing the Record Stop button will exit the menu Fl...

Page 72: ...to set Miniket Photo according to each mode allowing users to have the best results under various conditions Pan Pan Focus that adjusts the focus to entire screen has focused Focuses on the deepest DO...

Page 73: ...it the menu An icon indicating the selected sharpness appears on the screen No icon will be displayed when it is set to Normal Note While the menu screen is displayed pressing the Record Stop button w...

Page 74: ...ing mode appears on the screen Notes Regarding Focus Method setting in Scene modes refer to page 72 While the menu screen is displayed pressing the Record Stop button will exit the menu Photo Mode Set...

Page 75: ...stabilisation range is up to 2 in all 4 directions up down left right For example a rectangle subject of 100mm width and height can be stabilised up to 2mm movement in vertical horizontal direction Th...

Page 76: ...n appears 4 Move the joystick left right to select Digital Zoom 5 Select an option by moving the joystick up down and then press the joystick OK Off Disables digital zoom Only optical zoom 3x will be...

Page 77: ...OK Off Cancels imprinting Date Imprints Date only Date Time Imprints Date and Time 6 Press the MENU button to exit the menu After taking a picture you can check the imprinted date time information in...

Page 78: ...he Shortcut Buttons 1 Turn the Mode Dial to Photo mode 2 Press the POWER button to turn on the Miniket Photo 3 Press the Shortcut 1 button in Photo Capture mode Switches to Photo view mode 4 Press the...

Page 79: ...to mode 2 Press the POWER button to turn on the Miniket Photo 3 Press the Shortcut 1 button in Photo Capture mode Switches to Photo view mode 4 Press the Shortcut 3 button Each press of the Shortcut 3...

Page 80: ...will be protected All All photo files will be protected A message Protect All appears Select an option by moving the joystick left right Cancel Cancels protection 6 If Select was selected select photo...

Page 81: ...ystick OK Select Selected photo files will be deleted All All photo files will be deleted A message Delete All appears Select an option by moving the joystick left right Cancel Cancels deletion 6 If S...

Page 82: ...If All is selected the message Delete All appears Select Yes or No by moving the joystick left right and then press the joystick OK to confirm 7 If Select is selected Multi view screen appears Select...

Page 83: ...protected If All is selected the message Protect All appears Select the desired option by moving the joystick left right and then press the joystick OK to confirm 7 If Select is selected Multi view s...

Page 84: ...h to Photo View mode 4 Move the joystick left right to select a photo file to rotate 5 Press the MENU button Menu screen appears 6 Move the joystick left right to select Rotate 7 Select an option by m...

Page 85: ...6 Move the joystick left right to select Resize 7 Select an option by moving the joystick up down and then press the joystick OK 4M 3M 2M 1M VGA You can only resize a saved photo to be smaller than t...

Page 86: ...joystick right 9 Set the repeat option by moving the joystick up down and then press the joystick OK Off Sets not to repeat the slideshow On Sets to repeat the slideshow 10 Select Start by moving the...

Page 87: ...marked with DPOF printing If All is selected the message DPOF All appears Select the desired option by moving the joystick left right and then press the joystick OK to confirm 7 If Select is selected...

Page 88: ...ssage Copy All appears Select Yes or No by moving the joystick left right and then press the joystick OK to confirm 7 If Select is selected Multi view screen appears Select photo files to copy by movi...

Page 89: ...g Options 103 Using the Shortcut Buttons 103 Deleting Movie Files 107 Protecting Movie Files 108 Setting the All Play 109 Copying Movie Files 110 Save important data recordings separately on other med...

Page 90: ...tton It starts to record 4 To stop recording press the Record Stop button again It stops recording and stands by 5 After recording press the POWER button to turn off the Miniket Photo to prevent batte...

Page 91: ...W T Move the W T zoom switch to W WIDE The shot subject s size is reduced and you can record movies as if you were far away from the subject On the zoom indicator in the LCD screen the arrow moves to...

Page 92: ...r a while 5 To adjust volume move the joystick up down The volume indicator appears and disappears after a few seconds Notes If there is no file stored to view the message No stored Movie appears When...

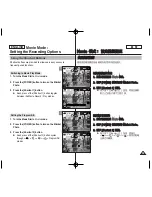
Page 93: ...e Mode Dial to Movie mode 2 Press the POWER button to turn on the Miniket Photo 3 Press the Shortcut 1 button Each press of the Shortcut 1 button toggles between the Movie Record Play modes Setting th...

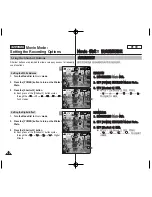
Page 94: ...rn the Mode Dial to Movie mode 2 Press the POWER button to turn on the Miniket Photo 3 Press the Shortcut 3 button Each press of the Shortcut 3 button cycles through the flash modes Setting the Digita...

Page 95: ...Focus and Wind Cut use with Program AE refer to page 102 While the menu screen is displayed pressing the Record Stop button will exit the menu Movie Mode Setting the Recording Options Auto Balances e...

Page 96: ...the appropriate white balance before recording Regarding White Balance use with Program AE refer to page 102 While the menu screen is displayed pressing the Record Stop button will exit the menu Movie...

Page 97: ...by using the shortcut button refer to page 94 While the menu screen is displayed pressing the Record Stop button will exit the menu Off Sepia Nega BLK WHT Cancel the Digital Effect Takes movie in norm...

Page 98: ...o shade your subject As the distance gets closer the focused area gets narrower If the focus will not set try to put more distance between you and the subject It is recommended to use a tripod to avoi...

Page 99: ...r to page 31 While the menu screen is displayed pressing the Record Stop button will exit the menu In NTSC setting Super Fine and Fine quality will record at 30fps while Normal at 15fps In PALsetting...

Page 100: ...Regarding detailed image capacity refer to page 31 Higher resolution requires more memory space which results in shorter maximum recording time While the menu screen is displayed pressing the Record S...

Page 101: ...od for the best results for Self Timer recordings While the menu screen is displayed pressing the Record Stop button will exit the menu Restarting the Miniket Photo will cancel the Self Timer setting...

Page 102: ...lt In Sports and Beach Snow it is set to Pan Focus Pan Pan Focus that adjusts the focus to entire screen has focused Focuses on the deepest DOF Depth of Field position which makes the both near and di...

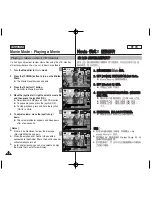
Page 103: ...Miniket Photo 3 Press the Shortcut 1 button It switches to Movie play mode 4 Press the Shortcut 1 button again Each press of the Shortcut 1 button toggles between the Movie record play modes Viewing t...

Page 104: ...f the Shortcut 3 button toggles between Unlocked and Locked 5 The selected movie file is protected from an accidental erasure Refer to page 108 Deleting a Movie File 1 Turn the Mode Dial to Movie mode...

Page 105: ...ed All The message Protect All appears Select the desired option by moving the joystick left right and then press the joystick OK to confirm Cancel Cancels protection 6 If Select was selected select m...

Page 106: ...press the joystick OK Select Selected movie files will be deleted All The message Delete All appears Select Yes or No by moving the joystick left right and then press the joystick OK to confirm Cancel...

Page 107: ...eft right and then press the joystick OK to confirm 7 If Select is selected Multi view screen appears Select files to delete by moving the joystick left right up down and press the joystick OK Multipl...

Page 108: ...n option by by moving the joystick up down and then press the joystick OK Select Multi view screen appears and you can select movie files to protect All All files will be protected If All is selected...

Page 109: ...ick OK All Play starts To stop the All Play press the joystick OK Notes You can easily access this function by using the shortcut button refer to page 103 All Play starts from the current movie select...

Page 110: ...Select Yes or No by moving the joystick left right and then press the joystick OK to confirm 7 If Select is selected Multi view screen appears Select files to copy by moving the joystick left right up...

Page 111: ...iles 119 Save important data recordings separately on other media to avoid accidental loss due to a system failure or other reasons 4 4 POWER W T 1 Turn the Mode Dial to Music mode 2 Press the POWER b...

Page 112: ...Internal memory is displayed Miniket and mini SD card is displayed Removable Disk Other than Windows XP It appears to have two instances of Removable Disk If it displays D and E drives as removable di...

Page 113: ...re than 1 second while stopped will skip to the previous next file rapidly To adjust volume move joystick up down Volume indicator appears and disappears after few seconds Notes If a broken file name...

Page 114: ...n and then press the joystick OK or move the joystick right The selected music file is played back On the playlist screen move the joystick left to select folders MUSIC1 MUSIC2 MUSIC3 MUSIC4 Setting t...

Page 115: ...to disturb listening Setting the Equaliser 1 Turn the Mode Dial to Music mode 2 Press the POWER button to turn on the Miniket Photo 3 Press the Shortcut 4 button Each press of the Shortcut 4 button cy...

Page 116: ...ll music files will play in random order once 6 Press the MENU button to exit the menu Notes You can easily access this function by using the shortcut button refer to page 114 When the earphones or Au...

Page 117: ...refer to page 115 Music Mode Setting the Music Play Options Setting the Equaliser 4 5 6 TYPE MENU 1 6 00 00 03 00 Search Play 1 6 00 00 03 00 Search Play Music Music Equalizer Equalizer Normal Pop Ja...

Page 118: ...Select was selected select files to delete by moving the joystick up down and press the joystick OK Multiple Music files can be selected using the joystick OK indicator appears on the selected files 7...

Page 119: ...ng the joystick left right and then press the joystick OK to confirm 6 If Select was selected select files to protect by moving the joystick up down and press the joystick OK Multiple music files can...

Page 120: ...oice Files 128 Save important data recordings separately on other media to avoid accidental loss due to a system failure or other reasons 5 5 POWER W T 1 Turn the Mode Dial to Voice mode 2 Press the P...

Page 121: ...Recorded voice files are saved in the list automatically During voice recording or in the voice recording mode the menu is not accessed During voice recording if the Mode Dial is changed and the reco...

Page 122: ...will not operate Voice Mode Playing Voice Files Playing Voice Files 4 5 6 SWAV0001 WAV 00 00 16 0000 20 00 00 16 0000 20 SWAV0001 WAV SWAV0001 WAV 00 00 00 00 00 10 SWAV0001 WAV SWAV0002 WAV Mono 64Kb...

Page 123: ...the Miniket Photo 3 Press the Shortcut 1 button The Voice Play screen appears 4 Press the Shortcut 2 button Stored voice files are listed 5 Select a voice file to play by moving the joystick up down a...

Page 124: ...he Shortcut 1 button The Voice Play screen appears 4 Press the Shortcut 4 button Delete Deletes the selected file Cancel Cancels the deletion Voice Mode Setting the Voice Play Options Using the Shortc...

Page 125: ...button refer to page 124 When the earphones or Audio Video is connected to the Miniket Photo the built in speaker will not operate You can access the menu only when the recorded voice file playback i...

Page 126: ...on the selected files 8 Press the Shortcut 4 button The message Delete appears Select Yes or No by moving the joystick left right and then press the joystick OK to confirm 9 Press the MENU button to...

Page 127: ...own and press the joystick OK Multiple voice files can be selected using the joystick OK indicator appears on the selected files 8 Press the Shortcut 3 button The message Confirm appears Select Yes or...

Page 128: ...n icon indicating selected file is to be copied appears 8 Press the Shortcut 4 button The message Copy appears Select Yes or No by moving the joystick left right and then press the joystick OK to conf...

Page 129: ...WER W T 1 Turn the Mode Dial to PC Cam mode 2 Press the POWER button to turn on the Miniket Photo Power Button How to set to PC Cam mode P PC C C Ca am m 130 130 POWER W T 1 1 P PC C C Ca am m 0 0 2 2...

Page 130: ...ess the POWER button to turn on the Miniket Photo Run a video chatting application such as Windows Messenger and enjoy the video utilisation Various applications take advantage of the PC Cam function...

Page 131: ...Press the POWER button to turn on the Miniket Photo Power Button How to set to PictBridge mode 7 7 ENGLISH P Pi ic ct tB Br ri id dg ge e P Pi ic ct tB Br ri id dg ge e 132 PictBridge 132 POWER W T 1...

Page 132: ...ton to turn on the Miniket Photo If the USB connection is not made the message Connect USB Cable appears 5 Press the Shortcut 2 button to set the date time imprint option Each press of the Shortcut 2...

Page 133: ...s due to a system failure or other reasons 8 8 POWER W T 1 Turn the Mode Dial to Storage mode 2 Press the POWER button to turn on the Miniket Photo Power Button How to set to Storage Mode S St to or r...

Page 134: ...l memory is displayed Miniket and mini SD card is displayed Removable Disk Other than Windows XP It appears to have two instances of Removable Disk If it displays D and E drives as removable disks D i...

Page 135: ...Other Devices 139 Connecting to a PC Using USB Cable 139 Connecting to a TV Monitor 140 Connecting to a VCR 141 Printing Photos 142 Printing with DPOF 142 Cleaning and Maintenance 143 After using the...

Page 136: ...nstalled Windows XP High Speed USB only with the Service Pack 1 Installed Mac OS X High Speed USB on 10 3 or higher Miscellaneous Information Connecting to a PC Notes Movie playback or movie editing m...

Page 137: ...ear click on the Start on the bottom left corner and select Run to display a dialog Type D autorun exe and then press ENTER if your CD ROM drive is mapped to D Drive Installing Driver DV Driver and Di...

Page 138: ...n QuickTime is Apple s technology for handling movie sound animation graphics text music and even 360 degree virtual reality VR scenes Installing Video Studio 7 0 After inserting the CD the setup scre...

Page 139: ...er performance 6 Double click on the copied movie file name It starts to play back Disconnecting from a PC 1 Click on the Safely remove hardware tray icon on the bottom right side of the desktop Selec...

Page 140: ...to the TV set by matching the colors of the terminals 3 Turn on the TV and set the Source to the external input source you connected the cable Source may be represented as Line In Input A V Input etc...

Page 141: ...our Miniket Photo to a TV set through a VCR 1 Connect the provided AV cable to the Earphones and AV jack of the Miniket Photo 2 Connect the other end of the cable to the VCR set by matching the colors...

Page 142: ...e printer or order copies from commercial digital image developers Printing DPOF files in the mini SD card 1 Set the DPOF information for the photo you want to print Refer to page 87 2 Insert a mini S...

Page 143: ...Strong electromagnetic fields Direct sunlight or in a closed car on a hot day For the safe use of the battery pack follow these guidelines To conserve battery power be sure to turn off the Miniket Ph...

Page 144: ...CD monitor surface should not be pressed Use a soft dry cloth to clean the surface To clean the lens use an optional air blower to blow out dirt and other small objects Do not wipe the lens with a clo...

Page 145: ...efore make the actual recording Do not expose the battery pack to water The battery pack is not water resistant Keep the battery out of reach of children If it is swallowed seek medical assistance imm...

Page 146: ...rds You can view your movie files using the built in LCD monitor However to view your recordings on a television set or to copy it to a video cassette recorder VCR the television set or the VCR must c...

Page 147: ...is no paper insert paper Check the printer message Refer to the printer manual for details Replace ink or toner Check the USB connection Disconnect and try to connect again Charge the Battery Pack or...

Page 148: ...aged data file Photo viewing does not support audio Subject is moving fast By the nature of MPEG4 playback Data file does not comply with the supported file format Required driver application software...

Page 149: ...Interval Repeat DPOF Select All Memory Type Int Memory Memory Card Copy to Select All 2 View Using the Menu Settings Photo 1 Memory Memory Type Int Memory Memory Card File No Reset Series Format Int...

Page 150: ...te Select All Protect Select All Memory Type Int Memory Memory Card Copy to Select All Using the Menu Voice Recorder Music Movie 1 Record Program AE Auto Sports Spotlight Beach Snow White Balance Auto...

Page 151: ...er Speed Metering Method Electric Exposure Compensation ISO White Balance Self Timer Multi Shot Macro Scene Modes Photo Size Flash Focus Method SC MS10 S BL R MS11 S BL R MS15 S BL R MPEG4 AVI Format...

Page 152: ...rphones AV Input Output General Operating Temperature Operating Humidity Power Source Dimensions WxHxD Weight Built in Microphone AC Power Adapter Input Voltage Output Voltage Operating Temperature Op...

Page 153: ...i Shake 75 B Battery Pack 20 Beep Sound 46 C Charging the Battery 24 Capturing 53 Copy to 88 110 128 Cleaning and Maintenance 143 146 D Date Time Set 42 44 Digital Effect 66 97 Digital Zoom 76 DPOF 87...

Page 154: ...PC Cam 130 PictBridge 132 Protection 83 108 119 Play 55 92 113 122 PAL 146 Q Quality 62 99 R Resetting 51 Record 121 S Shutter Sound 47 Sepia 66 97 Self Timer 64 101 Slideshow 86 Shortcut Button 28 Sa...

Page 155: ...w samsung com vn SOUTH AFRICA 0860 7267864 SAMSUNG www samsung com za U A E 800SAMSUNG 7267864 www samsung com mea Region Country Customer Care Center Web Site SAMSUNG Samsung Samsung 0 North America...

Page 156: ...ENGLISH THE MINIKET PHOTO IS MANUFACTURED BY M MI IN NI IK KE ET T P PH HO OT TO O...

Reviews: