background image

12

11

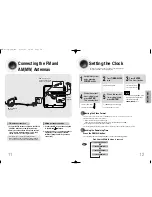
Connecting the FM and
AM

(

MW

)

Antennas

FM antenna connection

AM

(MW)

antenna connection

1. Connect the FM antenna supplied to the FM 75

COAXIAL terminal as a temporary measure.

2. Slowly move the antenna wire around until you

find a location where reception is good, then
fasten it to a wall or other rigid surface.

• If reception is poor, connect an outdoor antenna. 

Before attaching a 75

coaxial cable (with a standard

type connector), disconnect the supplied FM antenna.

1. Connect the AM loop antenna supplied

to the AM and       terminals.

2. If reception is poor, connect an outdoor

single vinyl-covered wire to the AM 
terminal. (Keep the AM loop antenna
connected).

If FM reception is poor, 
connect an outdoor FM

antenna  (not supplied).

FM
Antenna
(supplied)

AM Loop Antenna 
(supplied)

Setting the Clock

For each step, you have a few seconds to set the required options. 
If you exceed this time, you must start again.

You can display the time, even
when you are using another
function, by pressing

TIMER/CLOCK

once. 

CLOCK

is displayed.

2

Press 

TIMER/CLOCK

twice.

1

Switch the system
on by pressing

POWER

button.

"

TIMER

" appears in the display.

The current time is now set.

5

When the correct
time is displayed,
press 

ENTER

.

Increase the minutes : 

Decrease the minutes :

4

When the correct
hour is displayed,
press 

ENTER

.

The minutes flash.

Increase the hours : 

Decrease the hours :

3

Press 

ENTER

The hour flashes.

Note

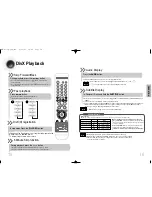
Checking the Remaining Time

TRACK REMAIN

TOTAL ELAPSED

TOTAL REMAIN

TRACK ELAPSED

Each time the REMAIN button is pressed 

Press the REMAIN button.

For checking the total and remaining time of a title or chapter being played.

CD

By default, the video format is set to "PAL".

"NTSC" and "PAL" will appear in the display.

At this time,press the NT/PAL button shortly to select between “

NTSC

” and “

PAL

”.

Each country has a different video format standard. 

For normal playback, the video format of the disc must be the same as the video format of your TV. 

Turn off the main unit and then press and hold  

NT/PAL 

button on the remote controller for over 5 seconds

.

Selecting the Video Format

OPERA

TION

MM-X7(1p~30p)-NO    8/11/07    10:42    Page  14

Summary of Contents for MM-X7

Page 1: ...MICRO COMPONENT SYSTEM MM X7 COMPACT DIGITAL AUDIO Instruction Manual AH68 01953B THIS APPLIANCE IS MANUFACTURED BY MM X7 1p 30p NO 8 11 07 10 42 Page 2 ...

Page 2: ...he wall outlet Voltage peaks due to lightning could damage the unit Do not expose the unit to direct sunlight or other heat sources This could lead to overheating and malfunction of the unit The battery used with this product contain chemicals that are harmful to the environment Do not dispose of batteries in the general household trash PREPARATION Use of controls adjustments or performance of pro...

Page 3: ... 30 Tape Counter Function 30 MISCELLANEOUS Timer Function 31 Cancelling the Timer 32 Recording a Compact Disc 33 Recording a Radio Program 35 EQ Sound Mode Treble Bass Function 36 Sleep Timer Function Mute Function 37 DEMO COLOR Function 38 Connecting Headphones Microphone option 39 Key Control Function 39 Cautions on Handling and Storing Discs 40 Notes on Discs 41 Before Calling for Service 42 Sp...

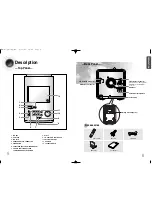
Page 4: ...APE 7 SEARCH FUNCTION BUTTONS TUNING MODE OR STOP BUTTON 8 EJECT 9 CD SYNCHRO REC PAUSE 10 VOLUME CONTROL 11 AUX USB 12 CASSETTE DECK 1 2 3 4 5 6 7 8 9 11 10 12 Rear Panel Speaker Output Terminals AUX Input Video Output Connector Connect the TV s video input jacks VIDEO IN to the VIDEO OUT connector FM Antenna Connector AM Antenna Connector Voltage Selector Option Cable Clamp MM X7 1p 30p NO 8 11 ...

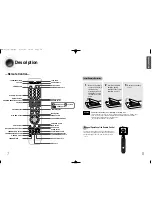
Page 5: ...ct type of batteries Batteries that look similar may differ in voltage Always replace both batteries at the same time Do not expose batteries to heat or flame 7 Description Caution PREPARATION Remote Control POWER button EJECT button DEMO COLOR button REMAIN button COUNTER RESET STEP button CANCEL button REPEAT button CD button TAPE button AUX USB button TUNER BAND button Number 0 9 buttons KEY CO...

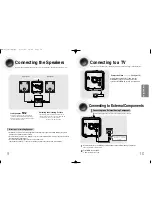
Page 6: ... For 32 TVs 2 2 4m 6 8feet For 55 TVs 3 5 4m 11 13feet 9 Connecting the Speakers Before moving or installing the product be sure to turn off the power and disconnect the power cord R L Directions in Installing Speaker Right Speaker Left Speaker CONNECTIONS Please be sure to turn off the power and unplug the power cord before moving or installing this unit Connecting to a TV Composite Video Good Qu...

Page 7: ... another function by pressing TIMER CLOCK once CLOCK is displayed 2 Press TIMER CLOCK twice 1 Switch the system on by pressing POWER button TIMER appears in the display The current time is now set 5 When the correct time is displayed press ENTER Increase the minutes Decrease the minutes 4 When the correct hour is displayed press ENTER The minutes flash Increase the hours Decrease the hours 3 Press...

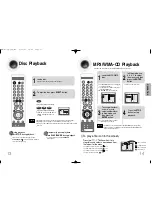
Page 8: ...TER button The MP3 WMA menu screen will appear and playback will start The appearance of the menu depends on the MP3 WMA disc WMA DRM files cannot be played Use to select the track 1 Load the MP3 WMA disc 4 Press the STOP button to stop playback To select another album and track repeat Steps 2 and 3 above 3 To change the album use to select another album in Stop mode and then press the ENTER butto...

Page 9: ...ted In addition XviD is supported But can not supporte XviD Gmc Audio compatibility MP3s encoded at bitrates from 80kbps to 320kbps AC3s from 128kbps to 448kbps are supported In addition for subtitles this unit will support Text format SMI SPEC VIDEO Compatibility DivX3 11 Up to the latest VERSION AUDIO Compatibility MP3 CBR 80kbps 320kbps AC3 CBR 128kbps 448kbps WMA CBR 56kbps 160kbps Each time y...

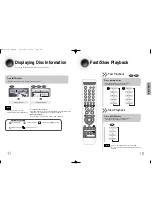
Page 10: ... A section of video or a music file recorded on a CD or MP3 CD Screen Display CD display TRACK FILE display REPEAT PLAYBACK display ELAPSED TIME display STEREO L R display SUBTITLE display Depending on the disc the disc information display may appear different Note Fast Slow Playback Fast Playback CD MP3 Press button Each time the button is pressed during playback the playback speed changes as fol...

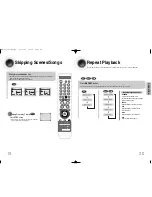
Page 11: ... I need you My love Uptown girl SMARTNAVI Something like you Back for good Love of my life More than words I need you My love Uptown girl SMARTNAVI OPERATION Repeat Playback Repeat playback allows you to repeatedly play a chapter title track song or directory MP3 file Press REPEAT button Each time the button is pressed during playback the repeat playback mode changes as follows MP3 JPEG CD RANDOM ...

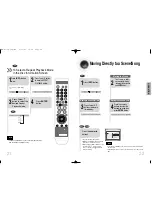
Page 12: ...cannot use to move a folder To move a folder press Stop and then press CD MP3 JPEG 2 Press Cursor buttons or numeric buttons to select the desired title track and then press ENTER button 1Press INFO button Moving to a Track 4 Press the numeric buttons to select the desired time and then press ENTER button Moving to a Specific Time 3 Press Cursor buttons to move to time display Moving to a Specific...

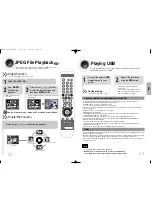
Page 13: ...be several minutes Even with the external USB storage devices of same capacity depending on the speed of each product the amount of operating time can vary Delay Depending on the type of external USB storage device it may not work even if it s connected to the player With external HDD FAT format can be played but not NTFS format With USB 2 0 HDD connect to a separate power source If it s not conne...

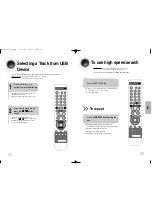
Page 14: ...ton more times than the number of the files in the directory it will move over to the next directory To use high speed search Before you begin Connect the external USB storage device to your player Select USB function by using the USB button You can search the part you want quickly during the play Press the button Whenever you press the button you can search backward or forward 2X 4X 8X 32X OFF ti...

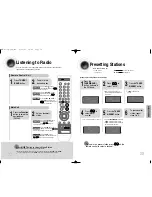
Page 15: ...tion AutomaticTuning1 Remote Control Unit Main Unit TUNING Manual Tuning Press the STOP to select AUTO and then press button to automatically search the band Press the STOP button to select MANUAL Briefly press to increase or decrease the frequency incrementally TUNING TUNING AutomaticTuning2 To tune in to a preset station press on the remote control to select a channel Refer to Step 2 on page 27 ...

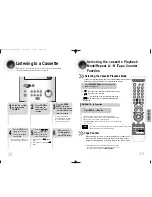
Page 16: ...mes This is a useful when learning a foreign language The TAPE REPEAT function can be used only on sections that are longer than 7 seconds Press REP A B button You cannot set the end point B within 7 seconds after setting the start point A Repeat A B Function is available for TAPE only Note REPEAT A B Function Press REVERSE MODE until the appropriate symbol is displayed One side of the selected ca...

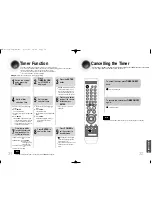
Page 17: ... b Press ENTER The minutes flash c Set the minutes by pressing or button d Press ENTER OFF TIME is displayed instead of the equalizer symbols for a few seconds followed by any switch off time already set you can now set the timer switch off time TAPE cassette Insert a cassette tape TUNER radio a Press ENTER b Select a preset station by pressing Tuning or CD compact disc Load a compact disc USB Con...

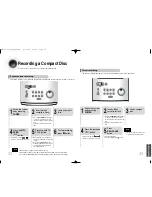
Page 18: ... To stop recording press button Press the MP3 CD CD button Synchronized recording 34 MISCELLANEOUS Note The direct recording mode enables you to start recording with any track on the compact disc Press the PUSH EJECT button to open the cassette door insert a cassette and then close the cassette door Insert the cassette with the safety tabs 2 1 3 Insert a blank cassette in Deck Switch the system on...

Page 19: ...dly to select PASS POP ROCK CLASS JAZZ S BASS Press EQ control until the required option is selected Press the button repeatedly to select P SOUND OFF P SOUND Function You can experience the powerful and realistic sound by amplifying bass and improving the sound quality of high and low pitched sounds by two fold Press P SOUND button until the required option is selected EQ Function Selecting SOUND...

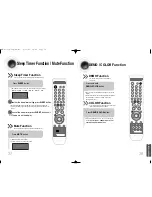
Page 20: ...off mute press the button again Mute Function This is useful when answering a doorbell or telephone call Press MUTE button MHz SLEEP 38 MISCELLANEOUS The various functions available are listed in turn on the display All these functions are described in detail in this booklet For instructions on how to use them refer to the appropriate sections DEMO Function You can view the various functions avail...

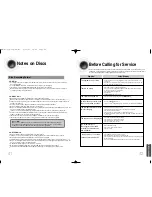
Page 21: ...amage your hearing Note Do not touch the playback side of the disc Hold the disc by the edges so that fingerprints will not get on the surface Do not stick paper or tape on the disc When you get fingerprints or dirt on the disc clean it with a mild detergent diluted in water and wipe with a soft cloth When cleaning wipe gently from the inside to the outside of the disc Handling discs Handling and ...

Page 22: ...recorded on a single CD a maximum of 300 folders can be played What is MP3 MP3 is short for MPEG 1 Audio Layer 3 and MPEG is an acronym for Moving Pictures Experts Group MP3 is a file format with compression ratio of 1 12 128 Kbps That is you can use MP3 format to record about 12 times the usual amount of data on a regular CD Notes on Discs Before Calling for Service Refer to the chart below when ...

Page 23: ...3 Player H10 Iriver MP3 Player YP T5 VB Samsung MP3 Player YP 53 Samsung 256MB MP3 Player Product Company Type MP3 Player MOMOBAY UX 2 Dvico USB 2 0 Product Company Type USB External HDD Finepix A340 Fuji Digital Camera Finepix F810 Fuji Digital Camera Finepix F610 Fuji Digital Camera Finepix f450 Fuji Digital Camera Finepix S7000 Fuji Digital Camera Finepix A310 Fuji Digital Camera KD 310Z Konica...

Page 24: ...Contact SAMSUNG WORLD WIDE If you have any questions or comments relating to Samsung products please contact the SAMSUNG customer care center MM X7 31p 64p GB NO 8 11 07 10 43 Page 46 ...

Reviews: