GB
Press
Push
Important
Note
Symbols
3
GB
2
Safety Warnings
Contents
Thank you for buying this
SAMSUNG micro component system.
Please take time to read these instructions.
They will allow you to operate your
system with ease and take full advantage
of its features.
CLASS 1 LASER PRODUCT
This Compact Disc player is classified as a CLASS 1
LASER product.
Use of controls adjustments or performance of procedures
other than those specified herein may result in hazardous
radiation exposure.
CAUTION-INVISIBLE LASER RADIATION WHEN OPEN
AND INTER LOCKS DEFEATED, AVOID EXPOSURE TO
BEAM.
WARNING: TO REDUCE THE RISK OF FIRE OR
ELECTRIC SHOCK, DO NOT EXPOSE
THIS APPLIANCE TO RAIN OR MOISTURE.
CAUTION: TO PREVENT ELECTRIC SHOCK, MATCH
WIDE BLADE OF PLUG TO WIDE SLOT,
FULLY INSERT.
CAUTION:
TO REDUCE THE RISK OF ELECTRIC SHOCK,
DO NOT REMOVE REAR COVER, NO USER
SERVICEABLE PARTS INSIDE, REFER SER-
VICING TO QUALIFIED SERVICE
PERSONNEL.
RISK OF ELECTRIC SHOCK.
DO NOT OPEN
CAUTION
CLASS 1 LASER PRODUCT
KLASSE 1 LASER PRODUKT
LUOKAN 1 LASER LAITE
KLASS 1 LASER APPARAT
PRODUCTO LASER CLASE 1
This symbol indicates that dangerous voltage constituting of a risk of electric shock is present within
this unit.
This symbol indicates that there are important operating and maintenance instructions in the owners
manual accompanying this unit.
S
AFETY
W
ARNINGS
...................................................................................................................................................................................................... 2
I
NSTALLING
Y
OUR
M
ICRO
C
OMPONENT
S
YSTEM
Front Panel View ........................................................................................................................................................................................................4
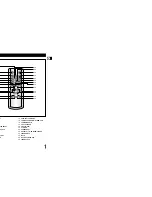
Remote Control ..........................................................................................................................................................................................................5
Rear Panel View ........................................................................................................................................................................................................6
Where to Install Your Micro Component System ......................................................................................................................................................7
Connecting your System to the Power Supply ..........................................................................................................................................................7
Inserting Remote Control Batteries ............................................................................................................................................................................7
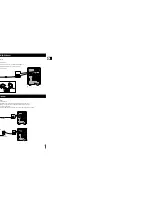
Connecting to an External Source ............................................................................................................................................................................8
CD Digital Out Jack ....................................................................................................................................................................................................8
Speaker Connection ..................................................................................................................................................................................................8
Connecting the AM(MW)Aerial ..................................................................................................................................................................................9
Connecting the FM Aerial ..........................................................................................................................................................................................9
DEMO Function ........................................................................................................................................................................................................10
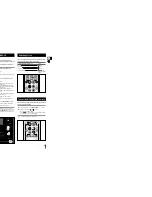
DIMMER Function ....................................................................................................................................................................................................10
Setting the Clock ......................................................................................................................................................................................................10
MP3-CD/CD-P
LAYER
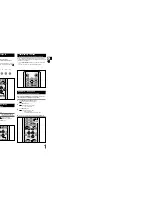
To replay the CD/MP3-CD ......................................................................................................................................................................................11
Selecting a Track......................................................................................................................................................................................................11
To select the MP3-CD album and track ..................................................................................................................................................................11
Searching for a Specific Music Passage on a CD ..................................................................................................................................................12
Function to skip through 10 tracks at a time ............................................................................................................................................................13
Repeating One or All Tracks on the Compact Discs ..............................................................................................................................................13
Last Memory Function..............................................................................................................................................................................................13
Repeat A
↔
B Function..............................................................................................................................................................................................13
Programming the Order of Playback ........................................................................................................................................................................14
Checking or Changing Programmed Tracks ............................................................................................................................................................14
U
SING
USB
Playing USB ............................................................................................................................................................................................................15
Selecting a Track from USB Device ........................................................................................................................................................................16
To skip next 10 tracks ..............................................................................................................................................................................................16
To use high speed search........................................................................................................................................................................................16
To adjust the play speed ..........................................................................................................................................................................................17
To repeat ..................................................................................................................................................................................................................17
To repeat section......................................................................................................................................................................................................17
To use Last Memory function ..................................................................................................................................................................................18
Recoding USB (Encoding) ......................................................................................................................................................................................18
T
UNER
Searching for and Storing the Radio Stations ........................................................................................................................................................19
Selecting a Stored Station........................................................................................................................................................................................19
Improving Radio Reception ......................................................................................................................................................................................19
About RDS broadcasting..........................................................................................................................................................................................20
About RDS DISPLAY function..................................................................................................................................................................................20
PTY(Program Type) indication and PTY-SEARCH function ..................................................................................................................................21
T
APE
D
ECK
Listening to a Cassette ............................................................................................................................................................................................22
Selecting the Cassette Playback Mode....................................................................................................................................................................22
Tape Counter............................................................................................................................................................................................................22
Recording a Compact Disc ......................................................................................................................................................................................23
Recording a Radio Program ....................................................................................................................................................................................23
O
THER
F
UNCTIONS
Timer Function..........................................................................................................................................................................................................24
Canceling the Timer ................................................................................................................................................................................................24
EQ/S.BASS Function ..............................................................................................................................................................................................25
Selecting Sound Mode ............................................................................................................................................................................................25
Treble Level Function ..............................................................................................................................................................................................25
Bass Level Function ................................................................................................................................................................................................25
MUTE Function ........................................................................................................................................................................................................26
Setting the System to Switch off Automatically........................................................................................................................................................26
Connecting Headphones ..........................................................................................................................................................................................26
R
ECOMMENDATIONS FOR
U
SE
Safety Precautions ..................................................................................................................................................................................................27
Cleaning Your Micro Component System ................................................................................................................................................................27
Precautions When Using Compact Discs ................................................................................................................................................................28
Precautions When Using Audio Cassettes ..............................................................................................................................................................28
Before Contacting the After-Sales Service ..............................................................................................................................................................28
Technical Specifications ..........................................................................................................................................................................................29
Wiring the Mains Power Supply Plug(UK Only)
IMPORTANT NOTICE
The mains lead on this equipment is supplied with a moulded plug incorporating a fuse. The value of the fuse is indicated on the pin face
of the plug and, if it requires replacing, a fuse approved to BS1362 of the same rating must be used.
Never use the plug with the fuse cover omitted. If the cover is detachable. If a replacement fuse cover is required, it must be of the same
colour as the pin face of the plug. Replacement covers are available from your dealer.
If the fitted plug is not suitable for the power points in your house or the cable is not long enough to reach a power point, you should obtain
a suitable safety approved extension lead or consult your dealer for assistance.
However, if there is no alternative to cutting off the plug, remove the fuse and then safely dispose of the plug. Do NOT connect the plug to
a mains socket as there is a risk of shock hazard from the bared flexible cord.
IMPORTANT
The wires in the mains lead are coloured in accordance with the following code:–
BLUE = NEUTRAL BROWN = LIVE
As these colours may not correspond to the coloured markings identifying the terminals in your plug, proceed as follows:–
The wire coloured BLUE must be connected to the terminal marked with the letter N or coloured BLUE or BLACK. The wire coloured
BROWN must be connected to the terminal marked with the letter L or coloured BROWN or RED.
WARNING:
DO NOT CONNECT EITHER WIRE TO THE EARTH TERMINAL WHICH IS MARKED WITH THE LETTER E OR BY
THE EARTH SYMBOL , OR COLOURED GREEN OR GREEN AND YELLOW.


