background image

English  17

Using y

our micr

o

w

av
e o
v

en

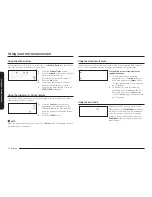
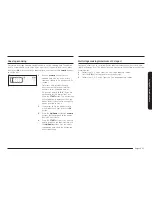
Using the 1 pound defrost button

To thaw 1.0 lbs of frozen food, press this button, and the microwave automatically 
sets the defrosting time, power level, and standing time.

1

1. 

Press the 

1 Pound Defrost

 button. The 

display shows: 

1.0 LB

.

3

2

4

2. 

Press the 

START

 button to start 

defrosting.

3. 

The oven will beep and the display will 
read 

TURN THE FOOD OVER

 during 

the defrosting process. Open the oven 
door, and turn the food over. Press the 

START

 button to resume the defrosting 

process.

4. 

If you do not turn the food over when 

TURN THE FOOD OVER

 is displayed, 

press the 

START

 button to continue the 

defrosting process. The microwave will 
not continue until you press 

START

.

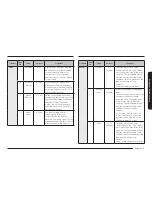
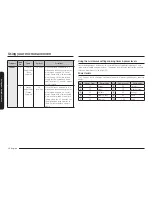
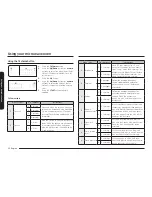
Follow the instructions below when defrosting different types of food.

Food

Amount

Procedure

Roast Beef, 
Pork

2.5-6.0 lbs.

Start with the food placed fat side down. After 
each stage, turn the food over and shield any 
warm portions with narrow strips of aluminum foil. 
Let stand, covered for 10-20 minutes.

Steaks, 
Chops, Fish

0.5-3.0 lbs.

After each stage, rearrange the food. If there are 
any warm or thawed portions of food, shield them 
with narrow, flat pieces of aluminum foil. Remove 
any pieces of food that are nearly defrosted. Let 
stand, covered for 5-10 minutes.

Ground 
Meat

0.5-3.0 lbs.

After each stage, remove any pieces of food that 
are nearly defrosted. Let stand, covered with foil 
for 5-10 minutes.

Whole 
Chicken

2.5-6.0 lbs.

Before freezing the poultry, remove the giblets. 
When you defrost the poultry, start defrosting with 
the breast side down. After the first stage, turn the 
chicken over and shield any warm portions with 
narrow strips of aluminum foil. After the second 
stage, again shield any warm portions with narrow 
strips of aluminum foil. Let stand, covered for 30-
60 minutes in the refrigerator.

Chicken 
Pieces

0.5-3.0 lbs.

After each stage, rearrange or remove any pieces 
of food that are nearly defrosted. Let stand for 
10-20 minutes.

NOTE

Check the food when you hear the oven signal. After the final stage, small sections 
may still be icy; let them stand to continue the thawing process. The food is not 
defrosted until all ice crystals have melted. Shielding roasts and pieces of steak 
using small pieces of foil prevents the edges from being cooked before the center 
of the food has defrosted. Use narrow, flat, smooth strips of aluminum foil to cover 
edges and thinner sections of the food.

Summary of Contents for ME21M706BA Series

Page 1: ...Microwave Oven User manual ME21M706BA ...

Page 2: ... Using the fit choice button 22 Using the kids meals button 23 Using the snacks button 24 Using the soften melt button 25 Cookware guide 26 Recommended cooking utensils 26 Limited use items 26 Not recommended 26 Testing utensils 26 Cooking guide 27 Cooking techniques 27 General cooking recommendations 28 Guide for cooking eggs in your microwave 28 Guide for cooking vegetables in your microwave 28 ...

Page 3: ...w soil or cleaner residue to accumulate on the sealing surface C Do not operate the oven if it is damaged It is particularly important that the oven door close properly and that there is no damage to the 1 Door bent 2 Hinges and latches broken or loosened 3 Door seals and sealing surface D The oven should not be adjusted or repaired by anyone except properly qualified service personnel IMPORTANT S...

Page 4: ...s removed from the microwave oven is not always present THIS COULD RESULT IN VERY HOT LIQUIDS SUDDENLY BOILING OVER WHEN THE CONTAINER IS DISTURBED OR A SPOON OR OTHER UTENSIL IS INSERTED INTO THE LIQUID To reduce the risk of injury a Do not overheat liquid b Stir liquid both before and halfway through heating it c Do not use straight sided containers with narrow necks STATE OF CALIFORNIA PROPOSIT...

Page 5: ...er accidentally If you use an extension cord the interior light may flicker and the speed of the blower may vary when the microwave oven is on Cooking times may be longer too d After heating allow the container to stand in the microwave oven for a short time before removing the container e Use extreme care when inserting a spoon or other utensil into the container 19 Oversized foods or oversized m...

Page 6: ...ug the oven Unplug the oven by pulling the plug only Failing to do so may result in electric shock or fire If the power plug or power cord is damaged contact your nearest service center for a replacement or repair CRITICAL INSTALLATION WARNINGS This appliance must be installed by a qualified technician or service company Failing to have a qualified technician install the oven may result in electri...

Page 7: ...f your microwave oven requires repair contact your nearest Samsung service center If any foreign substance such as water enters the microwave unplug it and then contact your nearest service center Failing to do so may result in electric shock or fire INSTALLATION CAUTIONS Position the oven so that the plug is easily accessible Failing to do so may result in electric shock or fire due to electric l...

Page 8: ...blems with the product Do not place the appliance over a fragile object such as a sink or glass object This may result in damage to the sink or glass object Do not touch the power plug with wet hands This may result in electric shock Do not turn the appliance off by unplugging the power plug while the appliance is in operation Plugging the power plug into the wall socket again may cause a spark an...

Page 9: ... the appliance while it is cooking or when opening the door just after cooking Take care that children do not come too close to the appliance Failing to do so may result in children burning themselves Do not place food or heavy objects over the door When you open the door the food or object may fall and this may result in burns or injury Do not abruptly cool the door the inside of the appliance or...

Page 10: ...arts web site at www samsungparts com Setting up your new microwave oven Be sure to follow these instructions closely so that your new microwave oven works properly Checking the parts Carefully unpack your microwave oven and make sure you ve received all the parts shown below If your microwave oven was damaged during shipping or if you do not have all the parts contact the Samsung Call Center Refe...

Page 11: ... 19 START Button 20 STOP CLEAR Button Setting up your microwave oven damp cloth 1 Open the door by pulling the handle on the right side of the door 2 Wipe the inside of your microwave oven with a damp cloth indentation pre assembled roller ring 3 Install the pre assembled ring into the indentation at the center of the microwave oven glass tray 4 Place the glass tray securely in the center of the p...

Page 12: ...nd Fast The default is Normal speed 1 Slow speed 2 Normal speed 3 Fast speed 9 Clock The clock can be adjusted Press the numeric buttons to enter the current time First 2 digits are for hours last 2 digits are for minutes Setting the time Your microwave oven is equipped with a built in clock Set the clock when first installing your microwave oven and after a power failure The time is displayed whe...

Page 13: ...ess the START button for 3 seconds The display will show CHILD LOCK ON or CHILD LOCK OFF when the oven is locked or unlocked and then redisplay the time NOTE If you change your mind while adjusting a setting press the STOP CLEAR button to cancel and then adjust the setting again NOTE If there is a power interruption you will need to reset these options NOTE If the clock is set for standard time th...

Page 14: ... power usage To cancel the Eco Mode press the Eco Mode button once again or press any other button Using the kitchen timer Your microwave has a built in timer function the Kitchen Timer Use the Kitchen Timer for timing up to 99 minutes 99 seconds 1 2 5 3 1 Press the Kitchen Timer button 2 Use the numeric buttons to set the time you want the timer to run Max time 99 minutes 99 seconds 3 Press the O...

Page 15: ...urn it off The fan will automatically turn off when the internal parts are cool It may stay on for 30 minutes or more after the cooktop and microwave controls are turned off Turntable on off feature For best cooking results leave the turntable on However for large dishes it can be turned off Press the Turntable On Off button to turn the turntable on or off NOTE You can use this feature in the foll...

Page 16: ...over If you do not turn the food over when TURN THE FOOD OVER is displayed the microwave will continue until the end of cooking time Using the keep warm feature You can keep cooked food warm in your microwave oven for up to 99 minutes and 99 seconds 1 1 Press the Keep Warm button 2 3 2 Enter the warm hold time by pressing the numeric buttons If you don t set the time your oven will maintain the Wa...

Page 17: ...hawed portions of food shield them with narrow flat pieces of aluminum foil Remove any pieces of food that are nearly defrosted Let stand covered for 5 10 minutes Ground Meat 0 5 3 0 lbs After each stage remove any pieces of food that are nearly defrosted Let stand covered with foil for 5 10 minutes Whole Chicken 2 5 6 0 lbs Before freezing the poultry remove the giblets When you defrost the poult...

Page 18: ...ate Do not let the slices overlap Do not cover Let the microwave oven cool for at least 5 minutes before using it again Using the sensor cooking buttons The Sensor Cooking buttons let you cook favorite foods using preset power levels and times at the touch of a button If the food is not thoroughly cooked or reheated when you use the auto cook feature complete the cooking process by selecting a pow...

Page 19: ...od is not as hot as you would like after using the Sensor Cooking Reheat function continue heating using additional time and power Stir the food once before serving Contents Pasta canned spaghetti and ravioli Category Cook No Food Amount Directions Cook 1 Beverage 8 oz Use a measuring cup or mug and do not cover Place the beverage in the microwave oven After heating stir well Let the oven cool for...

Page 20: ... Defrost 8 80 Reheat 4 40 Medium low 9 90 Sauté 5 50 Medium 10 100 High Category Cook No Food Amount Directions Veggies 1 Fresh Vegetables Fresh Veggies 1 4 cups Place the fresh vegetables in a microwave safe ceramic glass or plastic dish and add 2 4 tbs of water Cover with a lid or vented plastic wrap Stir before letting stand Let the microwave oven cool for at least 5 minutes before using it aga...

Page 21: ...g time and then use the numeric buttons to set the level 1 4 2 4 3 1 3 1 Use the numeric buttons to set a cooking time You can enter a time from one second to 99 minutes and 99 seconds To select a time greater than one minute enter the seconds too For example to set a cooking time of 20 minutes enter 2 0 0 0 If you do not need to set the power level just press the START button The microwave will a...

Page 22: ...tic wrap Place the dish on the center of the turntable 2 2 servings 8 Fresh salmon fillet 1 1 serving Put the salmon fillets in a dish and then cover with plastic wrap Place the dish on the center of the turntable 2 2 servings 9 Fresh prawns 1 2 servings Put the prawns in a dish and then cover with plastic wrap Place the dish on the center of the turntable 2 4 servings Using the fit choice button ...

Page 23: ...od 2 2 servings Menu Item No Amount Instructions 2 French fries frozen 1 1 serving Place two paper towels on a microwave safe plate and arrange the French fries on the towels without letting them overlap Blot the fries with additional paper towels after removing from the oven Let stand for 1 minute NOTE Refer to the directions on the packaging for the serving size and the amount of food 2 2 servin...

Page 24: ...e cheese evenly over them Contents 2 cups tortilla chips cup grated cheese 4 Potato skins 1 1 cooked potato Cut the cooked potato into 4 even wedges Scoop or cut out the potato flesh leaving about a in of skin Place the skins in a spoke like fashion around the plate Sprinkle with bacon onions and cheese Do not cover Let stand 1 to 2 minutes 2 2 cooked potatoes Using the snacks button 1 2 3 1 2 3 1...

Page 25: ...move wrapping and cut butter in half vertically Place butter in dish cover with wax paper 4 Soften cream cheese 1 1 package 8 oz Unwrap the cream cheese and place on a microwave safe container Cut in half vertically Let stand for 2 minutes Using the soften melt button 1 2 3 1 2 3 1 Press the Soften Melt button 2 Press the Up Down buttons or numeric buttons to select the item Refer to the Soften Me...

Page 26: ...netrate food and is microwave safe The following lists contain various types of cookware and indicate if and how the cookware should be used in a microwave oven Recommended cooking utensils Glass and glass ceramic bowls and dishes Use for heating or cooking Microwavable plastic wrap Use to cover Leave a small opening for steam to escape and avoid placing it directly on the food Wax paper Use as a ...

Page 27: ...the water fat and sugar molecules in the food The microwaves cause the molecules in the food to move rapidly The rapid movement of these molecules creates friction and the resulting heat cooks the food Cooking techniques Stirring Stir foods such as casseroles and vegetables while cooking to distribute heat evenly Food at the outside of the dish absorbs more energy and heats more quickly so stir fr...

Page 28: ...g is completed while a dish of peas can be served immediately General cooking recommendations Dense foods such as potatoes take longer to heat than lighter foods Food with a delicate texture should be heated at a low power level to prevent it from becoming tough Altitude and the type of cookware you are using can affect cooking time When trying a new recipe use the minimum cooking time and check t...

Page 29: ... the tray carefully in warm sudsy water or in the dishwasher Cleaning the turntable and roller rings Clean the roller rings periodically and wash the turntable as required The turntable can be washed safely in your dishwasher Cleaning and maintaining your microwave oven Keeping your microwave oven clean improves its performance wards off unnecessary repairs and lengthens its life Cleaning the exte...

Page 30: ...ve oven If you need to store your microwave oven for a short or extended period of time choose a dust free dry location Dust and dampness may adversely affect the functionality of the microwave parts WARNING Do not repair replace or service any part of your microwave oven yourself Allow only a qualified service technician to perform repairs If the oven is faulty and needs servicing or you are in d...

Page 31: ...e where it says PUSH Pull out 2 Pull the filter case out of the microwave oven Replacing the oven light When replacing the oven light make sure that you are wearing gloves to avoid injury from the heat of the lamp 1 Unplug the oven or turn off the power at the main power supply 2 Open the door 3 Remove the vent cover mounting screws 2 middle screws 4 Slide the vent grille to the left then pull it ...

Page 32: ...acing the charcoal filter If your oven is vented to the inside the charcoal filter should be replaced every 6 to 12 months and more often if necessary The charcoal filter cannot be cleaned To order a new charcoal filter contact the Samsung Parts at 1 800 627 4368 or your Samsung dealer You can also order online at www samsungparts com The filter angle The filter angle 1 Unplug the oven or turn off...

Page 33: ...crowave is plugged in Check your fuses or circuit breakers The door is open Close the door and try again The door open safety mechanisms are covered by foreign matter Remove the foreign matter and try again Problem Cause Action The oven stops while in operation The user has opened the door to turn food over After turning over the food press the START button again to start operation The power turns...

Page 34: ...on Objects are on top of the oven Remove all objects on the top of the oven The door cannot be opened properly Food residue is stuck between the door and oven interior Clean the oven the door Problem Cause Action The oven does not heat The oven may not work if too much food is being cooked or improper cookware is being used To test the oven put one cup of water in a microwave safe container put th...

Page 35: ...at bottom Problem Cause Action The interior light is dim or does not turn on The door has been left open for a long time The interior light may automatically turn off when the Eco function operates Close and reopen the door or press the STOP CLEAR button The interior light is covered by foreign matter Clean the inside of the oven and check again A beeping sound occurs during cooking If the Auto Co...

Page 36: ...hanges during cooking are not malfunctions Cooking is finished but the cooling fan is still running To ventilate the oven the cooling fan continues to run for about 3 minutes after cooking is complete This is not an oven malfunction Problem Cause Action Pressing the START button operates the oven This happens when the oven is not operating The microwave oven is designed to start operating when you...

Page 37: ...ung service center C F2 A touch button has malfunctioned Press STOP CLEAR and then try the button again Appendix Specifications Model ME21M706BA AA ME21M706BA AC Oven Cavity 2 1 cu ft Controls 10 power level including Defrost Timer 99 minutes 99 seconds Power Source 120 VAC 60 Hz Power Consumption 1700 Watt Microwave 1500 Watt Microwave Microwave Power Output 1000 Watts 950 Watts Cook Top Light LE...

Page 38: ...related to normal aging SAMSUNG does not warrant uninterrupted or error free operation of the product Warranty USA Samsung over the range otr microwave oven Limited warranty to original purchaser This SAMSUNG brand product as supplied and distributed by Samsung Electronics AMERICA Inc SAMSUNG and delivered new in the original carton to the original consumer purchaser is warranted by SAMSUNG agains...

Page 39: ...y service please contact SAMSUNG at 1 800 SAMSUNG 726 7864 or www samsung com us support Warranty CANADA Samsung over the range otr microwave oven Limited warranty to original purchaser This SAMSUNG brand product as supplied and distributed by Samsung Electronics Canada Inc SAMSUNG and delivered new in the original carton to the original consumer purchaser is warranted by SAMSUNG against manufactu...

Page 40: ...y service please contact SAMSUNG at 1 800 SAMSUNG 726 7864 or www samsung com ca support English www samsung com ca_fr support French In home service will be provided during the warranty labor period subject to availability within the contiguous United States In home service is not available in all areas To receive in home service the product must be unobstructed and accessible to service personne...

Page 41: ...English 41 Memo ...

Page 42: ...42 English Memo ...

Page 43: ...English 43 Memo ...

Page 44: ... OR COMMENTS COUNTRY CALL OR VISIT US ONLINE AT U S A Consumer Electronics 1 800 SAMSUNG 726 7864 www samsung com us support CANADA 1 800 SAMSUNG 726 7864 www samsung com ca support English www samsung com ca_fr support French ME21M706BA Scan the QR code or visit www samsung com spsn to view our helpful How to Videos and Live Shows Requires reader to be installed on your smartphone ...

Page 45: ...Horno de microondas Manual del usuario ME21M706BA ...

Page 46: ...botón para ajustar elección 22 Uso del botón de comidas para niños 23 Uso del botón de botanas 24 Uso del botón derretir ablandar 25 Guía de utensilios de cocina 26 Utensilios de cocción recomendados 26 Elementos de uso limitado 26 No recomendado 26 Utensilios de prueba 26 Guía de cocción 27 Técnicas de cocción 27 Recomendaciones generales de cocción 28 Guía para cocinar huevos en el microondas 28...

Page 47: ...ie de sellado C No haga funcionar el horno si está dañado Es de especial importancia que la puerta del horno cierre correctamente y que no haya daños en 1 La puerta doblada 2 Las bisagras y los pestillos rotos o sueltos 3 Las juntas de la puerta y la superficie de sellado D Este horno no debe ser ajustado ni reparado por nadie excepto por personal del servicio técnico adecuadamente calificado SÍMB...

Page 48: ...á del punto de ebullición sin que se note que están hirviendo No siempre se verán las burbujas o el hervor cuando se retira el recipiente del horno de microondas ESTO PUEDE HACER QUE LOS LÍQUIDOS MUY CALIENTES SE DERRAMEN REPENTINAMENTE CUANDO SE MUEVE EL RECIPIENTE O SE COLOCA UNA CUCHARA U OTRO UTENSILIO EN EL LÍQUIDO Para reducir el riesgo de lesiones a No caliente demasiado los líquidos b Revu...

Page 49: ...mente Si utiliza un cable prolongador la luz interior puede parpadear y la velocidad del ventilador puede variar cuando el horno de microondas está encendido Los tiempos de cocción también pueden ser más largos c No utilice recipientes con lados rectos y cuellos estrechos d Después de calentar deje reposar el recipiente en el horno de microondas durante un tiempo breve antes de sacarlo e Tenga sum...

Page 50: ... tirando únicamente del enchufe No hacerlo puede provocar una descarga eléctrica o un incendio Si se daña el enchufe o el cable de alimentación comuníquese con el centro de servicio técnico más cercano para solicitar un repuesto o una reparación ADVERTENCIAS FUNDAMENTALES PARA LA INSTALACIÓN La instalación de este electrodoméstico debe estar a cargo de un técnico o una compañía de servicio calific...

Page 51: ...a estar expuesto a ondas electromagnéticas Si es necesario reparar el horno de microondas comuníquese con el centro de servicio técnico Samsung más cercano Si alguna sustancia extraña por ejemplo agua ingresa en el horno desenchúfelo y comuníquese con el centro de servicio técnico más cercano No hacerlo puede provocar una descarga eléctrica o un incendio PRECAUCIONES PARA LA INSTALACIÓN Coloque el...

Page 52: ...onas pueden producirse descargas eléctricas un incendio o problemas en el producto No coloque el electrodoméstico sobre un objeto frágil como un fregadero o un objeto de vidrio Hacerlo puede provocar daños al fregadero o al objeto de vidrio No toque el enchufe de alimentación con las manos húmedas Se puede producir una descarga eléctrica No desenchufe la alimentación para apagar el electrodoméstic...

Page 53: ...l electrodoméstico mientras está cocinando o al abrir la puerta inmediatamente después de la cocción Asegúrese de que los niños no se acerquen demasiado al electrodoméstico No hacerlo puede provocar quemaduras en los niños No coloque alimentos ni ningún objeto pesado sobre la puerta Al abrir la puerta los alimentos o el objeto podrían caerse y provocar quemaduras o lesiones No enfríe abruptamente ...

Page 54: ... com Configuración de su nuevo horno de microondas Asegúrese de seguir estas instrucciones atentamente para que su nuevo horno de microondas funcione de manera adecuada Control de las piezas Desembale su horno de microondas con cuidado y asegúrese de haber recibido todas las piezas que se indican a continuación Si su horno de microondas ha sido dañado durante el envío o si no ha recibido todas las...

Page 55: ...otón Eco Mode Modo Eco 18 Botón 30 sec 30 s 19 Botón START INICIO 20 Botón STOP CLEAR DETENER ELIMINAR Instalación de su horno de microondas paño húmedo 1 Abra la puerta del horno tirando de la manija en el lado derecho de la puerta 2 Limpie el interior del horno de microondas con un paño húmedo muesca anillo giratorio premontado 3 Instale el anillo premontado en la muesca del centro del horno de ...

Page 56: ...enta Normal y Rápida El valor predeterminado es Normal 1 Velocidad lenta 2 Velocidad normal 3 Velocidad rápida 9 Reloj El reloj puede ajustarse Presionar los botones Numéricos para ingresar la hora actual Los primeros 2 dígitos para las horas los últimos 2 dígitos para los minutos Configuración de la hora Su horno de microondas cuenta con un reloj incorporado Configure el reloj al instalar su horn...

Page 57: ...START INICIO durante 3 segundos La pantalla mostrará CHILD LOCK ON SEGURO PARA NIÑOS ACTIVADO o CHILD LOCK OFF SEGURO PARA NIÑOS DESACTIVADO cuando el horno se encuentre bloqueado o desbloqueado y luego volverá a mostrar la hora NOTA Si cambia de opinión al ajustar un parámetro presione el botón STOP CLEAR DETENER ELIMINAR para cancelar y luego ajuste el parámetro nuevamente NOTA Si hay una interr...

Page 58: ...do Eco o presione cualquier otro botón Uso del cronómetro Su horno de microondas cuenta con una función de temporizador incorporada el Kitchen Timer Cronómetro Utilice el cronómetro para programar hasta 99 minutos 99 segundos 1 2 5 3 1 Presione el botón Kitchen Timer Cronómetro 2 Use los botones Numéricos para programar la cantidad de tiempo que quiere que el temporizador corra El tiempo máximo es...

Page 59: ...te cuando las partes internas estén frías El ventilador puede permanecer encendido durante 30 minutos o más después de haber apagado los controles de la cubierta y el microondas Función de activación desactivación del plato giratorio Para obtener mejores resultados de cocción deje el plato giratorio activado No obstante puede desactivarse para cocinar grandes platos Presione el botón Turntable On ...

Page 60: ...a el alimento Si no gira los alimentos cuando aparece TURN THE FOOD OVER DÉ VUELTA EL ALIMENTO el horno de microondas continuará hasta el final del tiempo de cocción Cómo usar la función de mantener temperatura Puede mantener calientes los alimentos cocinados en el horno microondas hasta 99 minutos y 99 segundos 1 1 Presione el botón Keep Warm Mantener caliente 2 3 2 Ingrese el tiempo de mantenimi...

Page 61: ...rte caliente o descongelada cubrir con pedacitos finos de papel de aluminio Retirar cualquier parte del alimento que esté casi descongelada Dejar reposar cubiertos durante 5 10 minutos Carne molida 0 5 3 0 lbs Después de cada etapa retirar cualquier parte del alimento que esté casi descongelada Dejar reposar la carne cubierta con papel de aluminio durante 5 10 minutos Pollo entero 2 5 6 0 lbs Ante...

Page 62: ...e superpongan No cubrir Dejar que el horno de microondas se enfríe por al menos 5 minutos antes de volver a usarlo Uso de los botones de cocción con sensor Los botones Cocción con sensor le permiten cocinar sus comidas favoritas usando tiempos de cocción y niveles de potencia predeterminados con solo presionar un botón Si los alimentos no se cocinan o se recalientan bien cuando usa los botones de ...

Page 63: ...nte como quisiera después de usar la función Recalentamiento con sensor continuar calentándola con más tiempo y potencia Revolver una vez antes de servir Contenido Pastas espaguetis y ravioles enlatados Categoría Nro de cocción Alimento Cantidad Instrucciones Cook Cocinar 1 Bebidas 8 oz Utilizar una taza o un jarro para medir y no cubrir Colocar la bebida en el horno de microondas Después de calen...

Page 64: ...0 Recalentar 4 40 Medio bajo 9 90 Saltear 5 50 Medio 10 100 Alto Categoría Nro de cocción Alimento Cantidad Instrucciones Veggies Verduras 1 Verduras frescas 1 4 tazas Colocar las verduras frescas en un recipiente de cerámica vidrio o plástico para microondas y agregar 2 a 4 cucharadas de agua Cubrir con una tapa o un envoltorio plástico con ventilación Mezclar antes de dejar reposar Dejar que el ...

Page 65: ... botones Numéricos para definir el nivel 1 4 2 4 3 1 3 1 Utilice los botones Numéricos para programar el tiempo de cocción Puede ingresar el tiempo desde un segundo hasta 99 minutos con 99 segundos Para seleccionar un tiempo mayor a 1 minuto ingrese los segundos también Por ejemplo para programar un tiempo de cocción de 20 minutos ingrese 2 0 0 0 Si no necesita establecer el nivel de potencia pres...

Page 66: ... porción Colocar los filetes de salmón en un plato y cubrir con un envoltorio de plástico Colocar el plato en el centro del plato giratorio 2 2 porciones 9 Langostinos frescos 1 2 porciones Colocar los langostinos en un plato y cubrir con un envoltorio de plástico Colocar el plato en el centro del plato giratorio 2 4 porciones Uso del botón para ajustar elección 1 2 3 2 3 1 Presione el botón Fit C...

Page 67: ...imento en cada una de ellas 2 2 porciones Menú Alimento N º Cantidad Instrucciones 2 Papas fritas congeladas 1 1 porción Colocar dos toallas de papel sobre un plato apto para microondas y acomodar las papas fritas sobre las toallas sin que se superpongan Tapar las papas fritas con otra toalla de papel después de retirarlas del horno Dejar reposar durante 1 minuto NOTA Consultar las instrucciones d...

Page 68: ... tortillas de maíz taza de queso rallado 4 Papas rellenas 1 1 papa cocida Cortar la papa cocida en 4 rebanadas parejas Quitar la pulpa de la papa dejando aproximadamente pulg de piel Colocar las cáscaras al estilo de los rayos de una rueda alrededor del plato Espolvorear con tocino cebollas y queso No cubrir Dejar reposar de 1 a 2 minutos 2 2 papas cocidas Uso del botón de botanas 1 2 3 1 2 3 1 Pr...

Page 69: ...tad en forma vertical Colocar la mantequilla en el recipiente cubrir con papel encerado 4 Ablandar queso crema 1 1 paquete 8 oz Desenvolver el queso crema y colocar en un recipiente apto para microondas Cortar por la mitad en forma vertical Dejar reposar durante 2 minutos Uso del botón derretir ablandar 1 2 3 1 2 3 1 Presione el botón Soften Melt Derretir Ablandar 2 Presione el botón Arriba Abajo ...

Page 70: ...ean seguros La siguiente tabla enumera diversos tipos de recipientes e indica si pueden utilizarse en un horno de microondas y cómo Utensilios de cocción recomendados Boles y platos de vidrio y vidrio cerámica Use para calentar o cocinar Envoltorio de plástico para microondas Use para cubrir Deje una pequeña abertura para que salga algo de vapor y evite colocarlo directamente sobre los alimentos P...

Page 71: ...os contenidos de grasa y azúcar de los alimentos Las microondas provocan que las moléculas de los alimentos se muevan con rapidez El movimiento veloz de estas moléculas crea fricción y el calor resultante cocina los alimentos Técnicas de cocción Revolver Revuelva alimentos como por ejemplo cazuelas y vegetales mientras los cocina para distribuir el calor uniformemente Los alimentos en la parte ext...

Page 72: ...ras que una fuente de arvejas puede servirse de inmediato Recomendaciones generales de cocción Los alimentos densos como las papas demoran más tiempo en calentarse que los alimentos más livianos Los alimentos con una textura delicada deben calentarse a un nivel de potencia bajo para evitar que se endurezcan El alto y el tipo de recipiente de cocción que utiliza puede afectar el tiempo de cocción C...

Page 73: ...idado en agua jabonosa tibia o en el lavavajillas Limpieza del anillo y el plato giratorio Limpie los anillos giratorios periódicamente y lave el plato giratorio tanto como sea necesario El plato giratorio puede lavarse perfectamente en el lavavajillas Limpieza y mantenimiento de su horno de microondas Mantener limpio su horno de microondas mejora su desempeño previene reparaciones innecesarias y ...

Page 74: ...e guardar su horno de microondas durante un período corto o prolongado escoja un lugar seco y sin polvo El polvo y la humedad pueden afectar el funcionamiento de las piezas del microondas ADVERTENCIA No repare reemplace ni realice el mantenimiento de ninguna pieza de su microondas sin asistencia profesional Llame únicamente a un técnico calificado para realizar reparaciones Si el horno presenta fa...

Page 75: ...de dice PUSH Jalar 2 Saque la caja del filtro del horno de microondas Reemplazo de la luz del horno Al reemplazar la luz del horno asegúrese de usar guantes para evitar lesiones por el calor del foco 1 Desenchufe el horno o corte la electricidad de la fuente de alimentación principal 2 Abra la puerta 3 Retire los tornillos de montaje de la cubierta de ventilación 2 tornillos del medio 4 Corra la r...

Page 76: ...e ventilación hacia el interior el filtro de carbón debe reemplazarse cada 6 a 12 meses y más a menudo si es necesario El filtro de carbón no puede limpiarse Para solicitar un nuevo filtro de carbón comuníquese con el Departamento de piezas de Samsung en el 1 800 627 4368 o el distribuidor Samsung más cercano También puede solicitar en línea en www samsungparts com Ángulo del filtro Ángulo del fil...

Page 77: ...rlo Los mecanismos de seguridad de puerta abierta están cubiertos de alguna sustancia extraña Retire la sustancia extraña y vuelva a intentarlo Problema Causa Acción El horno se detiene cuando está en funcionamiento El usuario abrió la puerta para dar la vuelta al alimento Luego de dar vuelta el alimento vuelva a presionar el botón START INICIO nuevamente para iniciar el funcionamiento La alimenta...

Page 78: ... del horno La puerta no se puede abrir fácilmente Hay restos de comida adheridos entre la puerta y el interior del horno Limpie la puerta del horno Problema Causa Acción El horno no calienta El horno no funciona se están cocinando demasiados alimentos o el recipiente es inadecuado Para hacer una verificación del horno coloque una taza de agua en un recipiente apto para microondas y haga funcionar ...

Page 79: ...l o no se enciende La puerta quedó abierta demasiado tiempo La luz interior puede apagarse automáticamente con la función Eco activada Cierre y vuelva a abrir la puerta o presione el botón STOP CLEAR DETENER ELIMINAR La luz interior está cubierta de alguna sustancia extraña Limpie el interior del horno y vuelva a verificarlo Se emite una señal sonora durante la cocción Si se está utilizado la func...

Page 80: ...ndica un mal funcionamiento Cuando termina la cocción el ventilador de enfriamiento sigue funcionando Después de la cocción el ventilador de enfriamiento continúa funcionando durante unos 3 minutos para ventilar el horno No es un defecto del horno Problema Causa Acción Al presionar el botón START INICIO se activa el horno Esto ocurre cuando el horno no estaba funcionando El horno de microondas est...

Page 81: ...ctil funciona mal Presione STOP CLEAR DETENER ELIMINAR y vuelva a presionar el botón Apéndice Especificaciones Modelo ME21M706BA AA ME21M706BA AC Cavidad del horno 2 1 pies cúbicos Controles 10 niveles de potencia e incluye descongelado Temporizador 99 minutos 99 segundos Fuente de alimentación 120 VCA 60 Hz Consumo de potencia 1700 vatios el microondas 1500 vatios el microondas Salida de potencia...

Page 82: ...NG que dañen este producto o que acarreen problemas en el servicio tensión de la línea eléctrica incorrecta fluctuaciones y sobretensión ajustes del cliente e incumplimiento de lo establecido en el manual de instrucciones las instrucciones de limpieza mantenimiento y ambientales cubiertas y recomendadas en el manual de instrucciones problemas causados por plagas recalentamiento o exceso de cocción...

Page 83: ... o exclusiones antedichas pueden no aplicarse en su caso Esta garantía le otorga derechos legales específicos y además puede tener otros derechos que varían según el Estado en el que se encuentre Para recibir un servicio técnico de garantía comuníquese con SAMSUNG a 1 800 SAMSUNG 726 7864 o www samsung com us support Garantía CANADÁ Horno de microondas samsung para instalar sobre la estufa Garantí...

Page 84: ...iezas o productos nuevos o reacondicionados si se comprueba que es defectuoso durante el período limitado de la garantía especificado anteriormente Todas las piezas y los productos reemplazados pasan a ser propiedad de SAMSUNG y deben ser devueltos a SAMSUNG Las piezas y los productos reemplazados asumen la garantía original que resta o noventa 90 días el período que sea el más prolongado Se brind...

Page 85: ...Español 41 Notas ...

Page 86: ...42 Español Notas ...

Page 87: ...Español 43 Notas ...

Page 88: ...O COMENTARIOS PAÍS LLAME AL O VISÍTENOS EN LÍNEA EN U S A Consumer Electronics 1 800 SAMSUNG 726 7864 www samsung com us support CANADA 1 800 SAMSUNG 726 7864 www samsung com ca support English www samsung com ca_fr support French ME21M706BA Escanee el código QR o visite www samsung com spsn para ver nuestros útiles videos instructivos y programas en vivo Requiere la instalación de un lector en su...

Page 89: ...Four à micro ondes Manuel d utilisation ME21M706BA ...

Page 90: ...uisson en plusieurs étapes 2 étapes maximum 21 Utilisation du bouton réglages adaptés 22 Utilisation du bouton repas pour enfants 23 Utilisation du bouton collations 24 Utilisation du bouton ramollir faire fondre 25 Guide des récipients 26 Ustensiles de cuisine recommandés 26 Éléments à utilisation limitée 26 Non recommandé 26 Essai des ustensiles 26 Guide de cuisson 27 Techniques de cuisson 27 Re...

Page 91: ... assurant l étanchéité C N utilisez pas le four si celui ci est endommagé Veillez toujours à ce que la porte soit fermée hermétiquement et que les composants suivants ne soient pas endommagés 1 Porte risque de déformation 2 Charnières et loquets cassés ou desserrés 3 Joints de la porte et surfaces d étanchéité D Confiez toutes les réparations et opérations de réglage à une main d œuvre qualifiée S...

Page 92: ...quide ex eau lait café ou thé est susceptible de dépasser le point d ébullition sans que le phénomène soit pour autant visible Un bouillonnement n est par conséquent pas toujours visible lorsque vous retirez le récipient du four EN CAS DE MOUVEMENT BRUSQUE OU DE CONTACT AVEC UNE CUILLÈRE OU UN AUTRE USTENSILE DE L EAU BOUILLANTE RISQUE DE SOUDAIN DÉBORDER DU RÉCIPIENT Consignes pour réduire les ri...

Page 93: ...rage intérieur peut vaciller et la ventilation subir des variations lorsque le four à micro ondes fonctionne Les temps de cuisson peuvent également être plus longs a Ne faites pas surchauffer les liquides b Remuez le liquide avant et à la moitié du temps de chauffe c N utilisez pas de récipients à col étroit d Une fois le temps de chauffe écoulé laissez le récipient dans le micro ondes pendant que...

Page 94: ... fiche ne tirez pas sur le cordon Débranchez le four en tirant sur la fiche uniquement Le non respect de cette consigne peut entraîner un risque d électrocution ou d incendie Si la prise ou le cordon d alimentation est endommagé e contactez le centre de dépannage le plus proche pour demander à ce qu elle soit remplacée AVERTISSEMENTS IMPORTANTS RELATIFS À L INSTALLATION Cet appareil doit être inst...

Page 95: ...nage Samsung le plus proche de chez vous Si une substance étrangère telle que de l eau pénètre dans l appareil débranchez le puis contactez votre centre de dépannage le plus proche Le non respect de cette consigne peut entraîner un risque d électrocution ou d incendie SYMBOLES D AVERTISSEMENT RELATIFS À L INSTALLATION Installez le four de telle façon que la fiche reste facilement accessible Le non...

Page 96: ...eil Ces substances sont non seulement nocives pour la santé mais elles peuvent également entraîner une électrocution un incendie ou une défaillance de l appareil Ne placez pas l appareil sur un support fragile comme un évier ou un objet en verre L évier ou l objet en verre pourrait être endommagé Ne touchez pas la fiche d alimentation si vous avez les mains mouillées Cela pourrait entraîner un ris...

Page 97: ...lors de l ouverture de la porte juste après la cuisson Veillez à ce que les enfants ne s approchent pas trop près de l appareil Le non respect de cette consigne risque d entraîner des brûlures pour les enfants Ne placez pas de nourriture ou d objets lourds sur la porte Lorsque vous ouvrez la porte vous risqueriez de vous brûler ou de vous blesser si les objets chutaient Ne créez pas de choc thermi...

Page 98: ...www samsungparts com Préparation de votre nouveau four micro ondes Respectez scrupuleusement les instructions suivantes afin d assurer le fonctionnement correct de votre nouveau four micro ondes Contrôle du contenu Sortez le four micro ondes de son emballage avec précaution et vérifiez que vous disposez bien de toutes les pièces mentionnées ci dessous Si votre four a été endommagé durant le transp...

Page 99: ...on Eco Mode Mode Éco 18 Bouton 30 sec 30 s 19 Bouton START DÉMARRER 20 Bouton STOP CLEAR ARRÊT SUPPRESSION Préparation de votre four micro ondes chiffon humide 1 Ouvrez la porte du four en tirant sur la poignée située sur le côté droit de la porte 2 Essuyez les parois internes de votre four micro ondes à l aide d un chiffon humide mise en retrait anneau de guidage préalablement assemblé 3 Insérez ...

Page 100: ...st la vitesse normale 1 Vitesse lente 2 Vitesse normale 3 Vitesse rapide 9 Horloge L horloge peut être réglée Appuyez sur les touches du pavé Numériques pour régler l heure actuelle Les 2 premiers chiffres sont pour les heures les 2 derniers pour les minutes Réglage de l horloge Votre four micro ondes est équipé d une horloge intégrée L horloge doit être réglée lors de l installation initiale du f...

Page 101: ...er ou désactiver la sécurité enfants appuyez pendant 3 secondes sur le bouton START DÉPART L écran affiche CHILD LOCK ON SÉCURITÉ ENFANTS ACTIVÉE ou CHILD LOCK OFF SÉCURITÉ ENFANTS DÉSACTIVÉE lorsque le four est verrouillé ou déverrouillé puis l heure est réaffichée REMARQUE Si vous changez d avis pendant le réglage d un paramètre appuyez sur le bouton STOP CLEAR ARRÊT SUPPRESSION pour annuler pui...

Page 102: ...ne fois sur le bouton Eco Mode Mode Éco ou appuyez sur n importe quel autre bouton Utilisation de la minuterie Votre micro ondes intègre une fonction de minuterie Kitchen Timer Minuterie Vous pouvez régler la minuterie sur 99 minutes et 99 secondes au maximum 1 2 5 3 1 Appuyez sur le bouton Kitchen Timer Minuterie 2 Utilisez les touches du pavé Numériques pour définir la durée de fonctionnement de...

Page 103: ...ne fois que tous les composants internes auront refroidi Il peut ainsi continuer de fonctionner pendant 30 minutes ou plus après que vous avez éteint le micro ondes Fonctionnalité marche arrêt du plateau tournant Pour de meilleurs résultats de cuisson laissez le plateau tournant activé En revanche désactivez le pour les plats de grande taille Appuyez sur le bouton Turntable On Off Marche Arrêt du ...

Page 104: ...ro ondes continue de fonctionner jusqu à ce que le temps de cuisson soit écoulé Utilisation de la fonction maintien au chaud Vous pouvez maintenir les aliments au chaud dans votre four pendant une période pouvant aller jusqu à 99 minutes et 99 secondes 1 1 Appuyez sur le bouton Keep Warm Maintien au chaud 2 3 2 Saisissez la durée de maintien au chaud en appuyant sur les touches du pavé Numériques ...

Page 105: ...près chaque phase de décongélation changez la disposition des aliments sur le plat Dès que certains morceaux sont chauds ou décongelés recouvrez les de fines bandelettes d aluminium Retirez tous les morceaux presque décongelés Couvrez et laissez reposer pendant 5 à 10 minutes Viande hachée 0 5 à 3 0 lb Après chaque phase de décongélation retirez tous les morceaux presque décongelés Couvrez d une f...

Page 106: ...nt pas Ne couvrez pas Laissez le four micro ondes refroidir pendant au moins 5 minutes avant toute nouvelle utilisation Utilisation des boutons de cuisson avec capteur Les boutons Cuisson avec capteur vous permettent de faire cuire vos plats préférés en une seule pression en utilisant des puissances et des durées prédéfinies Si les aliments ne sont pas assez cuits ou pas assez chauds après un prog...

Page 107: ...l utilisation de la fonction Réchauffage cuisson avec capteur ajoutez du temps et augmentez la puissance Remuez avant de servir Contenu Pâtes spaghetti et ravioli en conserve Catégorie Nº cuisson Aliment Quantité Instructions Cook Cuisson 1 Boisson 8 oz Versez le liquide dans une tasse graduée ou un verre mesureur Ne couvrez pas le récipient Placez la boisson dans le four micro ondes Une fois le t...

Page 108: ...0 Sauté 5 50 Modérée 10 100 Élevé Catégorie Nº cuisson Aliment Quantité Instructions Veggies Légumes 1 Légumes frais Fresh Veggies 1 à 4 tasses Placez les légumes frais dans un plat adapté aux micro ondes en céramique en verre ou en plastique et ajoutez 2 à 4 cuillères à soupe d eau Couvrez d un couvercle ou d un film plastique perforé Remuez avant de laisser reposer Laissez le four micro ondes re...

Page 109: ...s pour régler la puissance 1 4 2 4 3 1 3 1 Utilisez les touches du pavé Numériques pour définir un temps de cuisson Vous pouvez saisir un temps de cuisson compris entre 1 seconde et 99 minutes et 99 secondes Pour régler une durée supérieure à une minute saisissez également les secondes Par exemple pour régler 20 minutes saisissez 2 0 0 0 Si vous n avez pas besoin de régler la puissance il vous suf...

Page 110: ...on frais 1 1 portion Placez les filets de saumon dans un plat puis couvrez le tout d un film plastique Placez le plat au centre du plateau tournant 2 2 portions 9 Crevettes fraîches 1 2 portions Placez les crevettes dans un plat puis couvrez le tout d un film plastique Placez le plat au centre du plateau tournant 2 4 portions Utilisation du bouton réglages adaptés 1 2 3 2 3 1 Appuyez sur le bouton...

Page 111: ...pour la taille des portions et les quantités 2 2 portions Menu Élément N Quantité Consignes 2 Frites surgelées 1 1 portion Placez deux feuilles de papier absorbant sur une assiette adaptée aux micro ondes puis étalez les frites sans qu elles ne se chevauchent Après avoir retiré les frites du four épongez les avec une autre feuille de papier absorbant Laissez reposer pendant 1 minute REMARQUE Consu...

Page 112: ...Pelures de pommes de terre 1 1 pomme de terre cuite Coupez la pomme de terre cuite en 4 morceaux de taille égale Évidez la pomme de terre en laissant une épaisseur d environ de pouce Placez les pommes de terre en étoile sur l assiette Saupoudrez de lard d oignon et de fromage Ne couvrez pas Laissez reposer pendant 1 à 2 minutes 2 2 pommes de terre cuites Utilisation du bouton collations 1 2 3 1 2 ...

Page 113: ...ouvrez le tout de papier sulfurisé 4 Faire ramollir du fromage à la crème 1 1 boîte 8 oz Retirez le fromage à la crème de son emballage et placez le dans un récipient adapté aux micro ondes Coupez en deux dans le sens vertical Laissez reposer pendant 2 minutes Utilisation du bouton ramollir faire fondre 1 2 3 1 2 3 1 Appuyez sur le bouton Soften Melt Ramollir Faire fondre 2 Appuyez sur le bouton H...

Page 114: ...dés Bols et plats en verre et en vitrocéramique Utilisez les pour le chauffage ou la cuisson Film plastique adapté aux micro ondes Utilisez le pour couvrir les aliments Ménagez une petite cheminée pour permettre à la vapeur de s échapper légèrement évitez d appliquer le film directement sur les aliments Papier sulfurisé Utilisez le comme couvercle pour éviter les éclaboussures Serviettes en papier...

Page 115: ...nts les micro ondes provoquent une excitation des molécules Cette agitation crée des mouvements de friction qui génèrent la chaleur nécessaire à la cuisson des aliments Techniques de cuisson Mélange Remuez les aliments tels que les plats mijotés et les légumes pendant la cuisson pour répartir la chaleur de manière homogène La nourriture située en périphérie du plat absorbe plus d énergie et chauff...

Page 116: ... autres aliments Les aliments délicats doivent être réchauffés à une puissance moins élevée afin d éviter qu ils ne durcissent L altitude et le type d ustensile utilisé peuvent influer sur le temps de cuisson Lorsque vous testez une nouvelle recette sélectionnez le temps de cuisson minimal et vérifiez occasionnellement les aliments pour éviter qu ils ne soient trop cuits Les aliments dont la peau ...

Page 117: ...e l eau chaude savonneuse ou au lave vaisselle Nettoyage du plateau tournant et de l anneau de guidage Nettoyez régulièrement l anneau de guidage et lavez le plateau tournant dès que nécessaire Le plateau tournant peut être lavé en toute sécurité au lave vaisselle Nettoyage et entretien de votre four micro ondes Garder votre four micro ondes propre permet d améliorer ses performances d éviter les ...

Page 118: ...et entretien du four à micro ondes Si vous devez entreposer votre four à micro ondes pour une période courte ou prolongée choisissez un endroit sec et non poussiéreux La poussière et l humidité risquent de détériorer la fonctionnalité de certains éléments du four AVERTISSEMENT Ne réparez pas et ne remplacez pas vous même les éléments du four Seul un technicien qualifié peut effectuer les réparatio...

Page 119: ...r l emplacement où il est écrit PUSH Tirer 2 Tirez le boîtier du filtre hors du four à micro ondes Remplacement de l ampoule du four Lors de l opération de remplacement de l ampoule du four portez des gants afin d éviter toute brûlure 1 Débranchez le four ou coupez l alimentation au niveau de la prise d alimentation secteur 2 Ouvrez la porte 3 Retirez les vis de montage de la protection du ventila...

Page 120: ...rieur du four le filtre à charbon doit être remplacé tous les 6 à 12 mois ou plus si nécessaire Le filtre à charbon ne doit pas être nettoyé Pour commander un nouveau filtre à charbon contactez le Service des pièces détachées Samsung au 1 800 627 4368 ou votre revendeur Samsung Vous pouvez également commander en ligne sur www samsungparts com L angle du filtre L angle du filtre 1 Débranchez le fou...

Page 121: ...es de sécurité d ouverture de la porte sont recouverts de corps étrangers Retirez les corps étrangers et réessayez Problème Cause Action Le four s arrête en cours de fonctionnement L utilisateur a ouvert la porte pour retourner les aliments Après avoir retourné les aliments appuyez de nouveau sur le bouton START DÉPART pour démarrer le fonctionnement L appareil s éteint lors du fonctionnement Le f...

Page 122: ...ut ne pas fonctionner si trop d aliments ont été mis à cuire ou si un ustensile inapproprié est utilisé Pour tester le four placez une tasse d eau dans un récipient adapté aux micro ondes Mettez le récipient dans le four et mettez le en marche durant 1 à 2 minutes pour vérifier si l eau chauffe Si l eau est chaude réduire la quantité d aliments et démarrez à nouveau la fonction Utilisez un récipie...

Page 123: ...uyez de nouveau sur le bouton START DÉMARRER pour redémarrer le fonctionnement Le four n est pas de niveau Le four est installé sur une surface irrégulière Assurez vous que le four est installé sur une surface plane et stable Problème Cause Action Des étincelles apparaissent durant la cuisson Les récipients métalliques sont utilisés pendant une cuisson ou une décongélation N utilisez pas de récipi...

Page 124: ...tionnement du four Appuyer sur le bouton START DÉPART permet de mettre le four en marche Cela se produit lorsque le four n est pas en fonctionnement Le four à micro ondes est conçu pour commencer à fonctionner en appuyant sur le bouton START DÉPART lorsqu il est à l arrêt Problème Cause Action Plateau tournant Lorsqu il tourne le plateau tournant se déplace ou il cesse de tourner Il n y a pas l an...

Page 125: ...e a connu un dysfonctionnement Appuyez sur STOP CLEAR ARRÊT SUPPRESSION puis réessayez d utiliser le bouton Annexe Caractéristiques techniques Modèle ME21M706BA AA ME21M706BA AC Dimensions intérieures du four 2 1 pied cube Commandes 10 niveaux de puissance décongélation incluse Minuterie 99 minutes 99 secondes Alimentation 120 V CA 60 Hz Consommation électrique Micro ondes de 1700 W Micro ondes de...

Page 126: ...d endommager ledit appareil ou de nuire à son fonctionnement toute surtension fluctuation ou tension de ligne électrique incorrecte tout réglage effectué par l acquéreur et non respect des instructions de fonctionnement de nettoyage d entretien et de respect de l environnement couvertes et prescrites dans le carnet d instructions tout problème résultant d une prolifération d insectes nuisibles d u...

Page 127: ...AMSUNG à l adresse suivante 1 800 SAMSUNG 726 7864 ou www samsung com us support Garantie CANADA Four micro ondes à hotte intégrée de samsung Garantie limitée à l acquéreur d origine Ce produit de la marque SAMSUNG fourni et distribué par Samsung Electronics Canada Inc SAMSUNG et livré neuf s accompagne d une garantie de SAMSUNG contre tout vice de fabrication au niveau des pièces et de la main d ...

Page 128: ...e garantie contactez SAMSUNG à l adresse suivante 1 800 SAMSUNG 726 7864 ou www samsung com ca support English www samsung com ca_fr support French En fonction des disponibilités sur le territoire des États Unis contigus un service à domicile est proposé dans la limite de la période de garantie Le service à domicile n est pas disponible pour toutes les zones Pour bénéficier du service à domicile l...

Page 129: ...Français 41 Notes ...

Page 130: ...42 Français Notes ...

Page 131: ...Français 43 Notes ...

Page 132: ... UNE QUESTION UN COMMENTAIRE PAYS N DE TÉLÉPHONE SITE INTERNET U S A Consumer Electronics 1 800 SAMSUNG 726 7864 www samsung com us support CANADA 1 800 SAMSUNG 726 7864 www samsung com ca support English www samsung com ca_fr support French ME21M706BA Scannez le code QR ou rendez vous sur le site www samsung com spsn pour voir nos vidéos et démonstrations en direct d utilisation Requiert l instal...

Reviews: