background image

Español  39

Gar
antía

NO EXISTEN GARANTÍAS EXPRESAS, SALVO AQUELLAS ENUMERADAS Y 
DESCRITAS ANTERIORMENTE, Y NINGUNA GARANTÍA YA SEA EXPRESA O TÁCITA, 
INCLUIDA, AUNQUE NO EN CARÁCTER TAXATIVO, TODA GARANTÍA TÁCITA DE 
COMERCIABILIDAD O APTITUD PARA UN PROPÓSITO ESPECIAL, SE APLICARÁ 
DESPUÉS DE LOS PERÍODOS DE GARANTÍA ESTABLECIDOS MÁS ARRIBA, Y 
NINGUNA OTRA GARANTÍA EXPRESA O GARANTÍA OTORGADA POR PERSONA, 
COMPAÑÍA O CORPORACIÓN ALGUNA CON RESPECTO AL PRESENTE PRODUCTO 
REVESTIRÁ CARÁCTER VINCULANTE PARA SAMSUNG. SAMSUNG NO SERÁ 
RESPONSABLE POR PÉRDIDA DE INGRESOS O LUCRO CESANTE, IMPOSIBILIDAD 
DE GENERAR AHORROS U OBTENER OTROS BENEFICIOS, O CUALQUIER DAÑO 
DERIVADO DE CIRCUNSTANCIAS ESPECIALES, DAÑO IMPREVISTO O DERIVADO 
CAUSADO POR EL USO, USO INCORRECTO, O INCAPACIDAD PARA USAR EL 
PRESENTE PRODUCTO, INDEPENDIENTEMENTE DE LA TEORÍA LEGAL EN QUE 
SE FUNDE EL RECLAMO Y AUN CUANDO SE LE HAYA NOTIFICADO A SAMSUNG 
DE LA POSIBILIDAD DE TALES DAÑOS. NINGÚN RESARCIMIENTO DE NINGUNA 
ÍNDOLE CONTRA SAMSUNG SUPERARÁ EL MONTO DEL PRECIO DE COMPRA 
DEL PRODUCTO VENDIDO POR SAMSUNG Y CAUSANTE DEL PRESUNTO DAÑO. 
SIN LIMITAR LO PRECEDENTE, EL COMPRADOR ASUME TODO EL RIESGO Y LA 
RESPONSABILIDAD POR PÉRDIDA, DAÑO O LESIÓN AL COMPRADOR Y A LOS 
BIENES DEL COMPRADOR Y A TERCEROS Y A SUS BIENES DERIVADOS DEL 
USO, USO INCORRECTO O INCAPACIDAD PARA USAR EL PRESENTE PRODUCTO 
VENDIDO POR SAMSUNG, QUE NO HAYA SIDO OCASIONADO DIRECTAMENTE 
POR NEGLIGENCIA DE SAMSUNG. LA PRESENTE GARANTÍA LIMITADA NO SE 
EXTENDERÁ A NINGUNA PERSONA DISTINTA DEL COMPRADOR ORIGINAL 
DEL PRESENTE PRODUCTO, ES INTRANSFERIBLE Y ESTABLECE SU EXCLUSIVA 
REPARACIÓN.
Algunos Estados no permiten limitaciones en cuanto al plazo de una garantía 
implícita, o la exclusión o limitación de daños imprevistos o derivados, por lo 
tanto las limitaciones o exclusiones antedichas pueden no aplicarse en su caso. 
Esta garantía le otorga derechos legales específicos, y además puede tener otros 
derechos que varían según el Estado en el que se encuentre.
Para recibir un servicio técnico de garantía, comuníquese con SAMSUNG a:

1-800-SAMSUNG (726-7864) o www.samsung.com/us/support

Garantía (CANADÁ)

Horno de microondas samsung para instalar sobre la estufa

Garantía limitada al comprador original

El presente producto de la marca SAMSUNG, tal como lo provee y distribuye 
Samsung Electronics
Canada, Inc. (SAMSUNG) y lo entrega como nuevo, en su empaque de cartón 
original al comprador o consumidor
original, está garantizado por SAMSUNG contra defectos de fabricación de 
los materiales y la mano de obra durante el período limitado de la garantía de:

UN (1) AÑO PARA LAS PIEZAS Y LA MANO DE OBRA, CINCO (5) AÑOS PARA LAS 
PIEZAS DE LA GARANTÍA DEL MAGNETRÓN

Samsung le aplicará un cargo por reemplazar un accesorio o por reparar un 
defecto cosmético si el daño de la unidad o el daño/pérdida del accesorio es 
causado por el cliente. En esta cláusula se incluyen:

• 

Puerta, manija, panel exterior o panel de control abollados, rayados o rotos

• 

Bandeja, anillo giratorio, manguito de acoplamiento, filtro o rejilla de alambre 
rotos o perdidos

Las piezas sustituibles por el usuario se pueden enviar al cliente para la 
reparación de la unidad. Si es necesario, se puede enviar a un técnico para que 
efectúe el servicio.
La presente garantía limitada comienza en la fecha original de compra y es 
válida únicamente para productos comprados y usados en los Estados Unidos. 
Para recibir el servicio técnico de la garantía, el comprador debe comunicarse 
con SAMSUNG a fin de que se determine el problema y los procedimientos del 
servicio. El servicio técnico de la garantía solo puede ser prestado por un centro 
de servicio técnico autorizado de SAMSUNG. Se debe presentar la factura de 
compra original como prueba de compra a SAMSUNG o al centro de servicio 
técnico autorizado de SAMSUNG.

Summary of Contents for ME21M706BA*/AA

Page 1: ...Microwave Oven User manual ME21M706BA...

Page 2: ...Using the fit choice button 22 Using the kids meals button 23 Using the snacks button 24 Using the soften melt button 25 Cookware guide 26 Recommended cooking utensils 26 Limited use items 26 Not reco...

Page 3: ...soil or cleaner residue to accumulate on the sealing surface C Do not operate the oven if it is damaged It is particularly important that the oven door close properly and that there is no damage to t...

Page 4: ...removed from the microwave oven is not always present THIS COULD RESULT IN VERY HOT LIQUIDS SUDDENLY BOILING OVER WHEN THE CONTAINER IS DISTURBED OR A SPOON OR OTHER UTENSIL IS INSERTED INTO THE LIQU...

Page 5: ...r accidentally If you use an extension cord the interior light may flicker and the speed of the blower may vary when the microwave oven is on Cooking times may be longer too d After heating allow the...

Page 6: ...g the oven Unplug the oven by pulling the plug only Failing to do so may result in electric shock or fire If the power plug or power cord is damaged contact your nearest service center for a replaceme...

Page 7: ...your microwave oven requires repair contact your nearest Samsung service center If any foreign substance such as water enters the microwave unplug it and then contact your nearest service center Fail...

Page 8: ...lems with the product Do not place the appliance over a fragile object such as a sink or glass object This may result in damage to the sink or glass object Do not touch the power plug with wet hands T...

Page 9: ...the appliance while it is cooking or when opening the door just after cooking Take care that children do not come too close to the appliance Failing to do so may result in children burning themselves...

Page 10: ...rts web site at www samsungparts com Setting up your new microwave oven Be sure to follow these instructions closely so that your new microwave oven works properly Checking the parts Carefully unpack...

Page 11: ...19 START Button 20 STOP CLEAR Button Setting up your microwave oven damp cloth 1 Open the door by pulling the handle on the right side of the door 2 Wipe the inside of your microwave oven with a damp...

Page 12: ...d Fast The default is Normal speed 1 Slow speed 2 Normal speed 3 Fast speed 9 Clock The clock can be adjusted Press the numeric buttons to enter the current time First 2 digits are for hours last 2 di...

Page 13: ...ss the START button for 3 seconds The display will show CHILD LOCK ON or CHILD LOCK OFF when the oven is locked or unlocked and then redisplay the time NOTE If you change your mind while adjusting a s...

Page 14: ...power usage To cancel the Eco Mode press the Eco Mode button once again or press any other button Using the kitchen timer Your microwave has a built in timer function the Kitchen Timer Use the Kitchen...

Page 15: ...rn it off The fan will automatically turn off when the internal parts are cool It may stay on for 30 minutes or more after the cooktop and microwave controls are turned off Turntable on off feature Fo...

Page 16: ...ver If you do not turn the food over when TURN THE FOOD OVER is displayed the microwave will continue until the end of cooking time Using the keep warm feature You can keep cooked food warm in your mi...

Page 17: ...awed portions of food shield them with narrow flat pieces of aluminum foil Remove any pieces of food that are nearly defrosted Let stand covered for 5 10 minutes Ground Meat 0 5 3 0 lbs After each sta...

Page 18: ...te Do not let the slices overlap Do not cover Let the microwave oven cool for at least 5 minutes before using it again Using the sensor cooking buttons The Sensor Cooking buttons let you cook favorite...

Page 19: ...d is not as hot as you would like after using the Sensor Cooking Reheat function continue heating using additional time and power Stir the food once before serving Contents Pasta canned spaghetti and...

Page 20: ...Defrost 8 80 Reheat 4 40 Medium low 9 90 Saut 5 50 Medium 10 100 High Category Cook No Food Amount Directions Veggies 1 Fresh Vegetables Fresh Veggies 1 4 cups Place the fresh vegetables in a microwa...

Page 21: ...time and then use the numeric buttons to set the level 1 4 2 4 3 1 3 1 Use the numeric buttons to set a cooking time You can enter a time from one second to 99 minutes and 99 seconds To select a time...

Page 22: ...ic wrap Place the dish on the center of the turntable 2 2 servings 8 Fresh salmon fillet 1 1 serving Put the salmon fillets in a dish and then cover with plastic wrap Place the dish on the center of t...

Page 23: ...d 2 2 servings Menu Item No Amount Instructions 2 French fries frozen 1 1 serving Place two paper towels on a microwave safe plate and arrange the French fries on the towels without letting them overl...

Page 24: ...cheese evenly over them Contents 2 cups tortilla chips cup grated cheese 4 Potato skins 1 1 cooked potato Cut the cooked potato into 4 even wedges Scoop or cut out the potato flesh leaving about a in...

Page 25: ...ove wrapping and cut butter in half vertically Place butter in dish cover with wax paper 4 Soften cream cheese 1 1 package 8 oz Unwrap the cream cheese and place on a microwave safe container Cut in h...

Page 26: ...etrate food and is microwave safe The following lists contain various types of cookware and indicate if and how the cookware should be used in a microwave oven Recommended cooking utensils Glass and g...

Page 27: ...he water fat and sugar molecules in the food The microwaves cause the molecules in the food to move rapidly The rapid movement of these molecules creates friction and the resulting heat cooks the food...

Page 28: ...is completed while a dish of peas can be served immediately General cooking recommendations Dense foods such as potatoes take longer to heat than lighter foods Food with a delicate texture should be...

Page 29: ...the tray carefully in warm sudsy water or in the dishwasher Cleaning the turntable and roller rings Clean the roller rings periodically and wash the turntable as required The turntable can be washed s...

Page 30: ...e oven If you need to store your microwave oven for a short or extended period of time choose a dust free dry location Dust and dampness may adversely affect the functionality of the microwave parts W...

Page 31: ...where it says PUSH Pull out 2 Pull the filter case out of the microwave oven Replacing the oven light When replacing the oven light make sure that you are wearing gloves to avoid injury from the heat...

Page 32: ...cing the charcoal filter If your oven is vented to the inside the charcoal filter should be replaced every 6 to 12 months and more often if necessary The charcoal filter cannot be cleaned To order a n...

Page 33: ...rowave is plugged in Check your fuses or circuit breakers The door is open Close the door and try again The door open safety mechanisms are covered by foreign matter Remove the foreign matter and try...

Page 34: ...n Objects are on top of the oven Remove all objects on the top of the oven The door cannot be opened properly Food residue is stuck between the door and oven interior Clean the oven the door Problem C...

Page 35: ...t bottom Problem Cause Action The interior light is dim or does not turn on The door has been left open for a long time The interior light may automatically turn off when the Eco function operates Clo...

Page 36: ...anges during cooking are not malfunctions Cooking is finished but the cooling fan is still running To ventilate the oven the cooling fan continues to run for about 3 minutes after cooking is complete...

Page 37: ...ng service center C F2 A touch button has malfunctioned Press STOP CLEAR and then try the button again Appendix Specifications Model ME21M706BA AA ME21M706BA AC Oven Cavity 2 1 cu ft Controls 10 power...

Page 38: ...elated to normal aging SAMSUNG does not warrant uninterrupted or error free operation of the product Warranty USA Samsung over the range otr microwave oven Limited warranty to original purchaser This...

Page 39: ...service please contact SAMSUNG at 1 800 SAMSUNG 726 7864 or www samsung com us support Warranty CANADA Samsung over the range otr microwave oven Limited warranty to original purchaser This SAMSUNG br...

Page 40: ...service please contact SAMSUNG at 1 800 SAMSUNG 726 7864 or www samsung com ca support English www samsung com ca_fr support French In home service will be provided during the warranty labor period s...

Page 41: ...English 41 Memo...

Page 42: ...42 English Memo...

Page 43: ...English 43 Memo...

Page 44: ...OR COMMENTS COUNTRY CALL OR VISIT US ONLINE AT U S A Consumer Electronics 1 800 SAMSUNG 726 7864 www samsung com us support CANADA 1 800 SAMSUNG 726 7864 www samsung com ca support English www samsung...

Page 45: ...Horno de microondas Manual del usuario ME21M706BA...

Page 46: ...bot n para ajustar elecci n 22 Uso del bot n de comidas para ni os 23 Uso del bot n de botanas 24 Uso del bot n derretir ablandar 25 Gu a de utensilios de cocina 26 Utensilios de cocci n recomendados...

Page 47: ...de sellado C No haga funcionar el horno si est da ado Es de especial importancia que la puerta del horno cierre correctamente y que no haya da os en 1 La puerta doblada 2 Las bisagras y los pestillos...

Page 48: ...del punto de ebullici n sin que se note que est n hirviendo No siempre se ver n las burbujas o el hervor cuando se retira el recipiente del horno de microondas ESTO PUEDE HACER QUE LOS L QUIDOS MUY CA...

Page 49: ...nte Si utiliza un cable prolongador la luz interior puede parpadear y la velocidad del ventilador puede variar cuando el horno de microondas est encendido Los tiempos de cocci n tambi n pueden ser m s...

Page 50: ...o tirando nicamente del enchufe No hacerlo puede provocar una descarga el ctrica o un incendio Si se da a el enchufe o el cable de alimentaci n comun quese con el centro de servicio t cnico m s cercan...

Page 51: ...estar expuesto a ondas electromagn ticas Si es necesario reparar el horno de microondas comun quese con el centro de servicio t cnico Samsung m s cercano Si alguna sustancia extra a por ejemplo agua...

Page 52: ...nas pueden producirse descargas el ctricas un incendio o problemas en el producto No coloque el electrodom stico sobre un objeto fr gil como un fregadero o un objeto de vidrio Hacerlo puede provocar d...

Page 53: ...l electrodom stico mientras est cocinando o al abrir la puerta inmediatamente despu s de la cocci n Aseg rese de que los ni os no se acerquen demasiado al electrodom stico No hacerlo puede provocar qu...

Page 54: ...com Configuraci n de su nuevo horno de microondas Aseg rese de seguir estas instrucciones atentamente para que su nuevo horno de microondas funcione de manera adecuada Control de las piezas Desembale...

Page 55: ...t n Eco Mode Modo Eco 18 Bot n 30 sec 30 s 19 Bot n START INICIO 20 Bot n STOP CLEAR DETENER ELIMINAR Instalaci n de su horno de microondas pa o h medo 1 Abra la puerta del horno tirando de la manija...

Page 56: ...enta Normal y R pida El valor predeterminado es Normal 1 Velocidad lenta 2 Velocidad normal 3 Velocidad r pida 9 Reloj El reloj puede ajustarse Presionar los botones Num ricos para ingresar la hora ac...

Page 57: ...n START INICIO durante 3 segundos La pantalla mostrar CHILD LOCK ON SEGURO PARA NI OS ACTIVADO o CHILD LOCK OFF SEGURO PARA NI OS DESACTIVADO cuando el horno se encuentre bloqueado o desbloqueado y l...

Page 58: ...o Eco o presione cualquier otro bot n Uso del cron metro Su horno de microondas cuenta con una funci n de temporizador incorporada el Kitchen Timer Cron metro Utilice el cron metro para programar hast...

Page 59: ...cuando las partes internas est n fr as El ventilador puede permanecer encendido durante 30 minutos o m s despu s de haber apagado los controles de la cubierta y el microondas Funci n de activaci n des...

Page 60: ...el alimento Si no gira los alimentos cuando aparece TURN THE FOOD OVER D VUELTA EL ALIMENTO el horno de microondas continuar hasta el final del tiempo de cocci n C mo usar la funci n de mantener temp...

Page 61: ...caliente o descongelada cubrir con pedacitos finos de papel de aluminio Retirar cualquier parte del alimento que est casi descongelada Dejar reposar cubiertos durante 5 10 minutos Carne molida 0 5 3...

Page 62: ...superpongan No cubrir Dejar que el horno de microondas se enfr e por al menos 5 minutos antes de volver a usarlo Uso de los botones de cocci n con sensor Los botones Cocci n con sensor le permiten co...

Page 63: ...como quisiera despu s de usar la funci n Recalentamiento con sensor continuar calent ndola con m s tiempo y potencia Revolver una vez antes de servir Contenido Pastas espaguetis y ravioles enlatados...

Page 64: ...Recalentar 4 40 Medio bajo 9 90 Saltear 5 50 Medio 10 100 Alto Categor a Nro de cocci n Alimento Cantidad Instrucciones Veggies Verduras 1 Verduras frescas 1 4 tazas Colocar las verduras frescas en u...

Page 65: ...botones Num ricos para definir el nivel 1 4 2 4 3 1 3 1 Utilice los botones Num ricos para programar el tiempo de cocci n Puede ingresar el tiempo desde un segundo hasta 99 minutos con 99 segundos Pa...

Page 66: ...porci n Colocar los filetes de salm n en un plato y cubrir con un envoltorio de pl stico Colocar el plato en el centro del plato giratorio 2 2 porciones 9 Langostinos frescos 1 2 porciones Colocar los...

Page 67: ...mento en cada una de ellas 2 2 porciones Men Alimento N Cantidad Instrucciones 2 Papas fritas congeladas 1 1 porci n Colocar dos toallas de papel sobre un plato apto para microondas y acomodar las pap...

Page 68: ...ortillas de ma z taza de queso rallado 4 Papas rellenas 1 1 papa cocida Cortar la papa cocida en 4 rebanadas parejas Quitar la pulpa de la papa dejando aproximadamente pulg de piel Colocar las c scara...

Page 69: ...d en forma vertical Colocar la mantequilla en el recipiente cubrir con papel encerado 4 Ablandar queso crema 1 1 paquete 8 oz Desenvolver el queso crema y colocar en un recipiente apto para microondas...

Page 70: ...an seguros La siguiente tabla enumera diversos tipos de recipientes e indica si pueden utilizarse en un horno de microondas y c mo Utensilios de cocci n recomendados Boles y platos de vidrio y vidrio...

Page 71: ...os contenidos de grasa y az car de los alimentos Las microondas provocan que las mol culas de los alimentos se muevan con rapidez El movimiento veloz de estas mol culas crea fricci n y el calor result...

Page 72: ...ras que una fuente de arvejas puede servirse de inmediato Recomendaciones generales de cocci n Los alimentos densos como las papas demoran m s tiempo en calentarse que los alimentos m s livianos Los a...

Page 73: ...idado en agua jabonosa tibia o en el lavavajillas Limpieza del anillo y el plato giratorio Limpie los anillos giratorios peri dicamente y lave el plato giratorio tanto como sea necesario El plato gira...

Page 74: ...e guardar su horno de microondas durante un per odo corto o prolongado escoja un lugar seco y sin polvo El polvo y la humedad pueden afectar el funcionamiento de las piezas del microondas ADVERTENCIA...

Page 75: ...e dice PUSH Jalar 2 Saque la caja del filtro del horno de microondas Reemplazo de la luz del horno Al reemplazar la luz del horno aseg rese de usar guantes para evitar lesiones por el calor del foco 1...

Page 76: ...ventilaci n hacia el interior el filtro de carb n debe reemplazarse cada 6 a 12 meses y m s a menudo si es necesario El filtro de carb n no puede limpiarse Para solicitar un nuevo filtro de carb n co...

Page 77: ...lo Los mecanismos de seguridad de puerta abierta est n cubiertos de alguna sustancia extra a Retire la sustancia extra a y vuelva a intentarlo Problema Causa Acci n El horno se detiene cuando est en f...

Page 78: ...del horno La puerta no se puede abrir f cilmente Hay restos de comida adheridos entre la puerta y el interior del horno Limpie la puerta del horno Problema Causa Acci n El horno no calienta El horno n...

Page 79: ...bil o no se enciende La puerta qued abierta demasiado tiempo La luz interior puede apagarse autom ticamente con la funci n Eco activada Cierre y vuelva a abrir la puerta o presione el bot n STOP CLEAR...

Page 80: ...indica un mal funcionamiento Cuando termina la cocci n el ventilador de enfriamiento sigue funcionando Despu s de la cocci n el ventilador de enfriamiento contin a funcionando durante unos 3 minutos p...

Page 81: ...il funciona mal Presione STOP CLEAR DETENER ELIMINAR y vuelva a presionar el bot n Ap ndice Especificaciones Modelo ME21M706BA AA ME21M706BA AC Cavidad del horno 2 1 pies c bicos Controles 10 niveles...

Page 82: ...que da en este producto o que acarreen problemas en el servicio tensi n de la l nea el ctrica incorrecta fluctuaciones y sobretensi n ajustes del cliente e incumplimiento de lo establecido en el manua...

Page 83: ...exclusiones antedichas pueden no aplicarse en su caso Esta garant a le otorga derechos legales espec ficos y adem s puede tener otros derechos que var an seg n el Estado en el que se encuentre Para r...

Page 84: ...s o productos nuevos o reacondicionados si se comprueba que es defectuoso durante el per odo limitado de la garant a especificado anteriormente Todas las piezas y los productos reemplazados pasan a se...

Page 85: ...Espa ol 41 Notas...

Page 86: ...42 Espa ol Notas...

Page 87: ...Espa ol 43 Notas...

Page 88: ...O COMENTARIOS PA S LLAME AL O VIS TENOS EN L NEA EN U S A Consumer Electronics 1 800 SAMSUNG 726 7864 www samsung com us support CANADA 1 800 SAMSUNG 726 7864 www samsung com ca support English www sa...

Page 89: ...Four micro ondes Manuel d utilisation ME21M706BA...

Page 90: ...1 Cuisson en plusieurs tapes 2 tapes maximum 21 Utilisation du bouton r glages adapt s 22 Utilisation du bouton repas pour enfants 23 Utilisation du bouton collations 24 Utilisation du bouton ramollir...

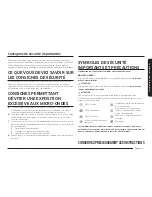
Page 91: ...s assurant l tanch it C N utilisez pas le four si celui ci est endommag Veillez toujours ce que la porte soit ferm e herm tiquement et que les composants suivants ne soient pas endommag s 1 Porte risq...

Page 92: ...iquide ex eau lait caf ou th est susceptible de d passer le point d bullition sans que le ph nom ne soit pour autant visible Un bouillonnement n est par cons quent pas toujours visible lorsque vous re...

Page 93: ...rage int rieur peut vaciller et la ventilation subir des variations lorsque le four micro ondes fonctionne Les temps de cuisson peuvent galement tre plus longs a Ne faites pas surchauffer les liquides...

Page 94: ...fiche ne tirez pas sur le cordon D branchez le four en tirant sur la fiche uniquement Le non respect de cette consigne peut entra ner un risque d lectrocution ou d incendie Si la prise ou le cordon d...

Page 95: ...e Samsung le plus proche de chez vous Si une substance trang re telle que de l eau p n tre dans l appareil d branchez le puis contactez votre centre de d pannage le plus proche Le non respect de cette...

Page 96: ...eil Ces substances sont non seulement nocives pour la sant mais elles peuvent galement entra ner une lectrocution un incendie ou une d faillance de l appareil Ne placez pas l appareil sur un support f...

Page 97: ...lors de l ouverture de la porte juste apr s la cuisson Veillez ce que les enfants ne s approchent pas trop pr s de l appareil Le non respect de cette consigne risque d entra ner des br lures pour les...

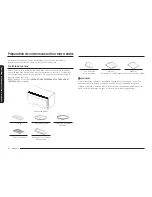
Page 98: ...www samsungparts com Pr paration de votre nouveau four micro ondes Respectez scrupuleusement les instructions suivantes afin d assurer le fonctionnement correct de votre nouveau four micro ondes Contr...

Page 99: ...Bouton Eco Mode Mode co 18 Bouton 30 sec 30 s 19 Bouton START D MARRER 20 Bouton STOP CLEAR ARR T SUPPRESSION Pr paration de votre four micro ondes chiffon humide 1 Ouvrez la porte du four en tirant...

Page 100: ...se normale 1 Vitesse lente 2 Vitesse normale 3 Vitesse rapide 9 Horloge L horloge peut tre r gl e Appuyez sur les touches du pav Num riques pour r gler l heure actuelle Les 2 premiers chiffres sont po...

Page 101: ...activer ou d sactiver la s curit enfants appuyez pendant 3 secondes sur le bouton START D PART L cran affiche CHILD LOCK ON S CURIT ENFANTS ACTIV E ou CHILD LOCK OFF S CURIT ENFANTS D SACTIV E lorsqu...

Page 102: ...ois sur le bouton Eco Mode Mode co ou appuyez sur n importe quel autre bouton Utilisation de la minuterie Votre micro ondes int gre une fonction de minuterie Kitchen Timer Minuterie Vous pouvez r gler...

Page 103: ...une fois que tous les composants internes auront refroidi Il peut ainsi continuer de fonctionner pendant 30 minutes ou plus apr s que vous avez teint le micro ondes Fonctionnalit marche arr t du plat...

Page 104: ...ondes continue de fonctionner jusqu ce que le temps de cuisson soit coul Utilisation de la fonction maintien au chaud Vous pouvez maintenir les aliments au chaud dans votre four pendant une p riode p...

Page 105: ...Apr s chaque phase de d cong lation changez la disposition des aliments sur le plat D s que certains morceaux sont chauds ou d congel s recouvrez les de fines bandelettes d aluminium Retirez tous les...

Page 106: ...e couvrez pas Laissez le four micro ondes refroidir pendant au moins 5 minutes avant toute nouvelle utilisation Utilisation des boutons de cuisson avec capteur Les boutons Cuisson avec capteur vous pe...

Page 107: ...tilisation de la fonction R chauffage cuisson avec capteur ajoutez du temps et augmentez la puissance Remuez avant de servir Contenu P tes spaghetti et ravioli en conserve Cat gorie N cuisson Aliment...

Page 108: ...ble 9 90 Saut 5 50 Mod r e 10 100 lev Cat gorie N cuisson Aliment Quantit Instructions Veggies L gumes 1 L gumes frais Fresh Veggies 1 4 tasses Placez les l gumes frais dans un plat adapt aux micro on...

Page 109: ...our r gler la puissance 1 4 2 4 3 1 3 1 Utilisez les touches du pav Num riques pour d finir un temps de cuisson Vous pouvez saisir un temps de cuisson compris entre 1 seconde et 99 minutes et 99 secon...

Page 110: ...aumon frais 1 1 portion Placez les filets de saumon dans un plat puis couvrez le tout d un film plastique Placez le plat au centre du plateau tournant 2 2 portions 9 Crevettes fra ches 1 2 portions Pl...

Page 111: ...our la taille des portions et les quantit s 2 2 portions Menu l ment N Quantit Consignes 2 Frites surgel es 1 1 portion Placez deux feuilles de papier absorbant sur une assiette adapt e aux micro onde...

Page 112: ...s de pommes de terre 1 1 pomme de terre cuite Coupez la pomme de terre cuite en 4 morceaux de taille gale videz la pomme de terre en laissant une paisseur d environ de pouce Placez les pommes de terre...

Page 113: ...uvrez le tout de papier sulfuris 4 Faire ramollir du fromage la cr me 1 1 bo te 8 oz Retirez le fromage la cr me de son emballage et placez le dans un r cipient adapt aux micro ondes Coupez en deux da...

Page 114: ...mand s Bols et plats en verre et en vitroc ramique Utilisez les pour le chauffage ou la cuisson Film plastique adapt aux micro ondes Utilisez le pour couvrir les aliments M nagez une petite chemin e p...

Page 115: ...ts les micro ondes provoquent une excitation des mol cules Cette agitation cr e des mouvements de friction qui g n rent la chaleur n cessaire la cuisson des aliments Techniques de cuisson M lange Remu...

Page 116: ...les autres aliments Les aliments d licats doivent tre r chauff s une puissance moins lev e afin d viter qu ils ne durcissent L altitude et le type d ustensile utilis peuvent influer sur le temps de c...

Page 117: ...chaude savonneuse ou au lave vaisselle Nettoyage du plateau tournant et de l anneau de guidage Nettoyez r guli rement l anneau de guidage et lavez le plateau tournant d s que n cessaire Le plateau to...

Page 118: ...ment et entretien du four micro ondes Si vous devez entreposer votre four micro ondes pour une p riode courte ou prolong e choisissez un endroit sec et non poussi reux La poussi re et l humidit risque...

Page 119: ...mplacement o il est crit PUSH Tirer 2 Tirez le bo tier du filtre hors du four micro ondes Remplacement de l ampoule du four Lors de l op ration de remplacement de l ampoule du four portez des gants af...

Page 120: ...nt rieur du four le filtre charbon doit tre remplac tous les 6 12 mois ou plus si n cessaire Le filtre charbon ne doit pas tre nettoy Pour commander un nouveau filtre charbon contactez le Service des...

Page 121: ...s de s curit d ouverture de la porte sont recouverts de corps trangers Retirez les corps trangers et r essayez Probl me Cause Action Le four s arr te en cours de fonctionnement L utilisateur a ouvert...

Page 122: ...pas Le four peut ne pas fonctionner si trop d aliments ont t mis cuire ou si un ustensile inappropri est utilis Pour tester le four placez une tasse d eau dans un r cipient adapt aux micro ondes Mette...

Page 123: ...e nouveau sur le bouton START D MARRER pour red marrer le fonctionnement Le four n est pas de niveau Le four est install sur une surface irr guli re Assurez vous que le four est install sur une surfac...

Page 124: ...ctionnement du four Appuyer sur le bouton START D PART permet de mettre le four en marche Cela se produit lorsque le four n est pas en fonctionnement Le four micro ondes est con u pour commencer fonct...

Page 125: ...a connu un dysfonctionnement Appuyez sur STOP CLEAR ARR T SUPPRESSION puis r essayez d utiliser le bouton Annexe Caract ristiques techniques Mod le ME21M706BA AA ME21M706BA AC Dimensions int rieures d...

Page 126: ...d endommager ledit appareil ou de nuire son fonctionnement toute surtension fluctuation ou tension de ligne lectrique incorrecte tout r glage effectu par l acqu reur et non respect des instructions de...

Page 127: ...tactez SAMSUNG l adresse suivante 1 800 SAMSUNG 726 7864 ou www samsung com us support Garantie CANADA Four micro ondes hotte int gr e de samsung Garantie limit e l acqu reur d origine Ce produit de l...

Page 128: ...re garantie contactez SAMSUNG l adresse suivante 1 800 SAMSUNG 726 7864 ou www samsung com ca support English www samsung com ca_fr support French En fonction des disponibilit s sur le territoire des...

Page 129: ...Fran ais 41 Notes...

Page 130: ...42 Fran ais Notes...

Page 131: ...Fran ais 43 Notes...

Page 132: ...UNE QUESTION UN COMMENTAIRE PAYS N DE T L PHONE SITE INTERNET U S A Consumer Electronics 1 800 SAMSUNG 726 7864 www samsung com us support CANADA 1 800 SAMSUNG 726 7864 www samsung com ca support Engl...

Reviews: