


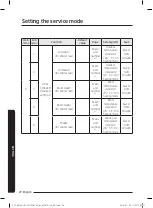
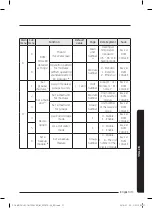
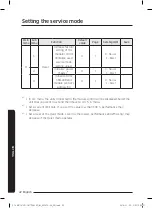

7
English
INS
TALLA
TION
3
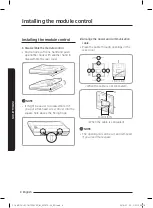
Fix the rear cover.
y
y
Before fixing the rear cover, allow
10 mm(0.4 inch) or more space for upper,
left, and right sides and 50 mm(2 inch)
space for bottom side.
10 mm(0.4 inch) or
more
50 mm(2 inch) or
more
Rear cover
10 mm(0.4 inch)
or more
Screw holes
10 mm(0.4
inch) or more
y
y
Make sure to fit the screws into the
provided screw holes.
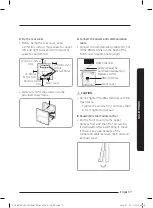
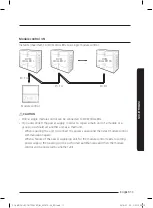
4
Connect the power and communication
cable.
y
y
Connect the communication cable (F3, F4)
to the PBA terminal on the back of the
front cover in appropriate length.
DVM CHILLER
Module control
Cable (should be
purchased separately)
PBA terminal
Front cover
CAUTION
• Do not tighten the PBA terminal with too
much force.
– Tighten the screws for it with less than
6 N·cm tightening torque.
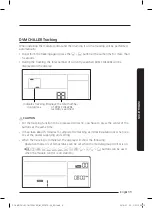
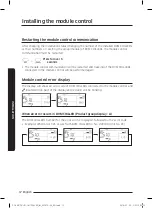
5
Reassemble the module control.
y
y
Put the front cover into the upper
grooves first, and then fit it by turning
it downward. After assembling it, check
if there is any gap because of the
connection cable between the front cover
and rear cover.
SOL MODULE CONTROLLER_IM_05747A-00_EN.indd 7
2016-01-20 오후 12:00:18


