background image

S

AVE

 T

HESE

 I

NSTRUCTIONS

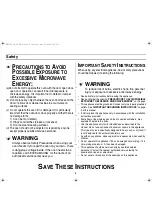
Safety

P

RECAUTIONS TO

 A

VOID


P

OSSIBLE

 E

XPOSURE TO


E

XCESSIVE

 M

ICROWAVE


E

NERGY

:

(a)Do not attempt to operate this oven with the door open since 

open-door operation can result in harmful exposure to 
microwave energy. It is important not to defeat or tamper 
with the safety interlocks.

(b) Do not place any object between the oven front face and the 

door or allow soil or cleaner residue to accumulate on 
sealing surfaces.

(c) Do not operate the oven if it is damaged. It is particularly 

important that the oven door close properly and that there is 
no damage to the 
1) Door (bent or dented), 
2) Hinges and latches (broken or loosened), 
3) Door seals and sealing surfaces.

(d) The oven should not be adjusted or repaired by anyone 

except properly qualified service personnel.

WARNING

Always observe Safety Precautions when using your 
oven. Never try to repair the oven on your own – there 
is dangerous voltage inside. If the oven needs to be 
repaired, call 1-800-SAMSUNG  for the name of an 
authorized service center near you.

I

MPORTANT


S

AFETY

 I

NSTRUCTIONS

When using any electrical appliance, basic safety precautions 
should be followed, including the following:

WARNING

To reduce risk of burns, electric shock, fire, personal 
injury or exposure to excessive microwave energy:

• Read all safety instructions before using the appliance.
• Read and follow the specific “

PRECAUTIONS TO AVOID POSSIBLE 

EXPOSURE TO EXCESSIVE MICROWAVE ENERGY

” on this page.

• This appliance must be grounded. Connect only to properly grounded 

outlets. See “

IMPORTANT GROUNDING INSTRUCTIONS

” on page 

3 of this manual. 

• Install or place this appliance only in accordance with the installation 

instructions provided.

• Some items, like whole eggs and food in sealed containers, may 

explode if heated in this oven.

• Use this appliance only for its intended use as described in the 

manual. Do not use corrosive chemicals or vapors in this appliance. 
This type of oven is specifically designed to heat, cook, or dry food. It 
is not designed for industrial or laboratory use.

• As with any appliance, close supervision is necessary when used by 

children.

• Do not operate this appliance if it has a damaged cord or plug, if it is 

not working properly, or if it has been damaged.

• This appliance should be serviced only by qualified service 

personnel. Contact the nearest authorized service facility for 
examination, repair, or adjustment.

• Do not cover or block any of the openings on this appliance.

tjXWX\†hhG{zlU”GGwˆŽŒGYGG{œ™š‹ˆ SGqœ•ŒGY[SGYWW[GG\aZWGwt

Summary of Contents for MC1015

Page 1: ...Code No DE68 02201A 02 Microwave Oven Owner s Manual MC1015 tjXWX hhG zlU GGw GXGG SGq GY SGYWW GG aZWGwt ...

Page 2: ...including the following WARNING To reduce risk of burns electric shock fire personal injury or exposure to excessive microwave energy Read all safety instructions before using the appliance Read and follow the specific PRECAUTIONS TO AVOID POSSIBLE EXPOSURE TO EXCESSIVE MICROWAVE ENERGY on this page This appliance must be grounded Connect only to properly grounded outlets See IMPORTANT GROUNDING I...

Page 3: ...rrow necked bottles The containers can break Dishes and containers can become hot Handle with care Carefully remove container coverings directing steam away from hands and face Remove lids from baby food before heating After heating baby food stir well and test temperature by tasting before serving A short power supply cord is provided to reduce the risk of becoming entangled in or tripping over a...

Page 4: ...u use an extension cord the interior light may flicker and the blower may vary when the microwave oven is on Cooking times may be longer too WARNING Do not cut or remove the third ground prong from the power cord under any circumstances Note Connect the oven to a 20A circuit When connecting the oven to a 15A circuit make sure that circuit breaker is operable Liquids such as water coffee or tea are...

Page 5: ... Button 17 Adjusting the Volume 18 Using the Kitchen Timer 18 Setting the Child Protection Lock 18 Demonstration Mode 19 Setting the Remind End Signal 19 Setting the Word Prompting Speed 19 Cooking Utensils 20 Cooking Techniques 21 Cooking Instructions 22 Guide for Cooking Meat in Your Microwave 22 Guide for Cooking Poultry in Your Microwave 22 Guide for Cooking Seafood in Your Microwave 23 Guide ...

Page 6: ... ____________________ Warranty service can only be performed by a Samsung Authorized Service Center If you should require warranty service provide the above information with a copy of your sales receipt to the Samsung Authorized Service Center For service assistance and the location of the nearest service center please call 1 800 SAMSUNG 1 800 726 7864 or go on line to WWW SAMSUNGSUPPORT COM Setti...

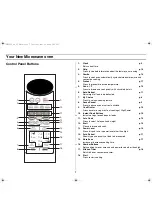
Page 7: ...oven or correct a mistake 9 One Minute p 10 Press once for every minute of cooking at High Power 10 Instant Cook Buttons p 10 Instant settings to cook popular foods 11 Auto Cook p 12 Press to select Auto cook and weight 12 Broil p 15 Please to brown and cook 13 Power Level p 14 Press this pad to set a power level other than high 14 Auto Reheat p 11 Shows type and quantity of food to be reheated 15...

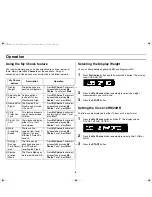
Page 8: ...Adjusting the Volume Volume options include Off Low Medium and High Press My Choice 2 and select by repeatedly pressing My Choice To set press Start 3 Remind End Signal The Remind End Signal can be turned On and Off Press My Choice 3 and select by repeatedly pressing My Choice To set press Start 4 Child Protection Lock This feature prevents use by unsupervised children Press My Choice 4 and select...

Page 9: ... If OFF is selected time will go back one hour If the clock is set for standard time this function allows convenient time changes without needing to reset the clock Daylight Saving Time begins for most of the United States at 2 a m on the first Sunday of April and reverts to Standard time at 2 a m on the last Sunday of October Using the Pause Cancel Button The Pause Cancel button allows you to cle...

Page 10: ...vel 1 Press the One Minute button once for each minute you wish to cook the food For example press it twice for two minutes The time will display and the oven starts automatically Add minutes to a program in progress by pressing the One Minute button for each minute you want to add Item Weight Remarks Popcorn 3 0 3 5 oz 3 5 oz Use one microwave only bag of popcorn Use caution when removing and ope...

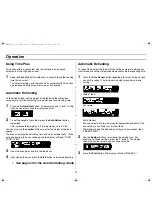
Page 11: ...nd starts automatically Twice during defrosting the oven will beep and the display will read TURN FOOD OVER 3 Open the oven door and turn the food over 4 After closing the door press the Start button to resume defrosting See page 24 for the Auto Defrosting Guide Automatic Reheating To reheat food select the type of dish and the number of servings you want to reheat and the microwave automatically ...

Page 12: ...e remaining cooking time press AUTO COOK Auto Bake Auto Broil Auto Roast If you want to adjust the heating time use the MORE or LESS button see page 17 If you want to check the current time while reheating press the CLOCK button Item Weight Remarks Plate of Food 1 serving Cover plate with vented plastic wrap or wax paper Contents 3 4 oz meat poultry or fish up to 6 oz With bone 1 2 cup starch pota...

Page 13: ...n a large oval 2 5 litter 1 5 inch deep oven microwave safe casserole dish Press Auto Bake 4 times then Start Auto Broil 1 HAMBURGERS 1 TO 3 patties HIGH Spray rack with vegetable oil spray Place burgers on rack Touch Auto Broil once touch START Cook hamburgers to an internal temperature of 160 F 2 CHICKEN PIECES 1 to 2 LBS HIGH Spray rack with vegetable oil spray Place chicken pieces on rack touc...

Page 14: ...edium 0 high The display shows PRESS START OR ENTER NEXT STAGE 3 Press the Start button to begin cooking If you want to change the power level press Pause Cancel before you press Start and re enter all of the instructions Multi stage Cooking Some recipes require different stages of cooking at different temperatures You can set multiple stages of cooking with your microwave When convection is set w...

Page 15: ...set the cooking temperature press the number buttons Temperatures in convection cooking range from 100 F to 450 F To maintain a constant temperature the oven door should be kept closed as much as possibile while cooking 4 Press START to begin convection cooking Note If you press START pad immediately after press CONV F pad the cooking temperature will be set to 450 F Broiling You can broil in your...

Page 16: ...mpletely around the dish To use combination cooking 1 Use the number buttons to set a cooking time The display reads PRESS START OR FUNCTION PAD 2 Press Combo 1 or Combo 2 The display shows 350 F then PRESS START 3 Press START Combo 1 MWO 10 Conv 350 F Combo 2 MWO 30 Conv 350 F Combination cooking can also be set by following the instructions below 1 Press Combo 1 or Combo 2 The display shows 350 ...

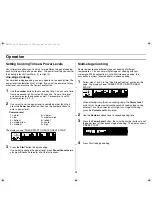
Page 17: ...put food in the oven while it is preheating Using the More or Less Button The More or Less button allows you to adjust pre set cooking times It only works with Auto Reheat Auto Cook and Instant cook buttons Use the More or Less button only after cooking has begun 1 To ADD more time to an automatic cooking procedure press the 9 More button The word MORE will appear in the display 2 To REDUCE the ti...

Page 18: ...ns to set the length of time you want the timer to run 2 Press the Kitchen Timer button 3 The display counts down and beeps when the time has elapsed Setting the Child Protection Lock You can lock your microwave oven so it can t be used by unsupervised children 1 Press the My Choice button and then press the 4 button The display shows CHILD LOCK ON OFF 2 Press the My Choice button once to select t...

Page 19: ...ting the Remind End Signal The Remind End signal can be set On or Off 1 Press the My Choice button and then press 3 The display shows REMIND END SIGNAL ON OFF 2 Press the My Choice button to select ON 3 Press the START button The display returns to the time of day Setting the Word Prompting Speed This set the scroll speed of the word display 1 Press the My Choice button and then press 6 The displa...

Page 20: ...r oven so be careful Ceramic porcelain and stoneware Use these if they are labeled Microwave Safe If they are not labeled test them to make sure they can be used safely Never use dishes with metallic trim Plastic Use only if labeled Microwave Safe Other plastics can melt Straw wicker and wood Use only for short term heating as they can be flammable Not Recommended Glass jars and bottles Regular gl...

Page 21: ...h as soup or hot chocolate should be shaken or stirred when cooking is complete Let liquids stand a moment before serving When heating baby food stir well and test the temperature before serving Adding Moisture Microwave energy is attracted to water molecules Food that is uneven in moisture content should be covered or allowed to stand so that the heat disperses evenly Add a small amount of water ...

Page 22: ... wax paper Turn over when cooking time is half up Let stand 10 min Pork Boneless or bone in Up to 4 lbs Cooking Time 11 15 min lb for 160 F Well Done Power Level High 0 for first 5 min then Medium 5 Place roast fat side down on roasting rack Cover with vented plastic wrap Turn over when cooking time is half up Let stand 10 min Bacon 2 6 slices Cooking Time 2 slices 1 1 min 4 slices 3 3 min 6 slice...

Page 23: ...with a lid or vented microwavable plastic wrap Whole unpeeled vegetables such as potatoes squash eggplant etc should have their skin pricked in several spots before cooking to prevent them from bursting For more even cooking rearrange whole vegetables halfway through the cooking time Generally the denser the food the longer the standing time Standing time refers to the time necessary for dense lar...

Page 24: ...each stage rearrange the food If there are any warm or thawed portions of food shield them with narrow flat pieces of aluminum foil Remove any pieces of food that are nearly defrosted Let stand covered for 5 10 minutes Ground Meat 0 5 3 0 lbs After each stage remove any pieces of food that are nearly defrosted Let stand covered with foil for 5 10 minutes Whole Chicken 2 5 6 0 lbs Remove giblets be...

Page 25: ...heat the vegetable mixture in the microwave on high 100 power level for 5 minutes Place chicken on platter and spoon vegetable mixture on top Makes about 4 servings Marinated Salmon over Rice Noodles Ingredients 2 8oz pieces Salmon fresh 1 4 cup Nappa Cabbage shredded 1 2 cup Green Onion chopped 1 4 cup Carrots shredded 1 small bag Rice Noodles Marinade 1 2 cup Soy Sauce 1 Tablespoon Rice Wine Vin...

Page 26: ...serving or day before Serve with potato chips or use as a topping on a baked potato Macaroni Salad Ingredients 1 pound Macaroni elbow dried 6 cups Water 1 2 cup Pepper green bell small dice 1 2 cup Pepper red bell small dice 1 2 cup Onion green chopped 1 3 cup Relish jar 1 2 cup Sour Cream 1 cup Mayonnaise light 1 Tbsp Mustard Dijon To taste Salt To taste Pepper Method of preparation Heat water in...

Page 27: ... 40 min Pan 12 cup Bundt pan Temperature 350 F Time 40 45 min Pan 8 round or square Temperature 350 F Time 45 50 min Do not grease pan Hang upside down on narrow necked bottle for 1 1 2 hours to cool before removing from pan Grease pan Remove from pan after 10 15 minutes standing time Grease pan Cake is done when toothpick comes out clean Let sit in pan for 10 15 minutes before removing Place on c...

Page 28: ...ure BEEF Hamburgers 5oz Broiling time 1 3 patties 35 minutes 4 patties 40 45 minutes Cook hamburger meat to an internal temperature of 160 F Ham steak Up to 2 lb Broiling time 30 40 min POULTRY Chicken pieces 1 2 pound Broiling time 35 40 min Place chicken pieces directly on the high rack Thicker pieces of chicken such as bone in breast may take longer to become fully cooked than small ones Turn c...

Page 29: ...have a qualified electrician repair the outlet Plug the oven into a different outlet The oven s display works but the power won t come on Make sure the door is closed securely Check to see if packing material or other material is stuck to the door seal Check for door damage Press Cancel twice and re enter all cooking instructions The power goes off before the set time has elapsed If there has not ...

Page 30: ... water or in the dishwasher Clean the outside surface of the oven with soap and a damp cloth Dry with a soft cloth To prevent damage to the operating parts of the oven don t let water seep into the openings Wash the door window with very mild soap and water Be sure to use a soft cloth to avoid scratching If steam accumulates inside or outside the oven door wipe with a soft cloth Steam can accumula...

Page 31: ...ons cleaning maintenance and environmental instructions that are covered and prescribed in the instruction book product removal and reinstallation problems caused by pest infestations and overheating or overcooking by user glass tray or turntable reduced magnetron power output related to normal aging SAMSUNG does not warrant uninterrupted or error free operation of the product THERE ARE NO EXPRESS...

Page 32: ...Rápida Spanish Usando el Botón PAUSE CANCEL Para pausar mientras está cocinando oprima una vez al botón PAUSE CANCEL Para detener el horno y borrar las instrucciones para cocinar oprima dos veces al botón PAUSE CANCEL Para corregir un error de programación oprima una vez al botón PAUSE CANCEL y vuelva a programr las instrucciones Para cancelar un ajuste del cronómetro oprima una vez al botón PAUSE...

Page 33: ...33 Note tjXWX hhG zlU GGw GZZGG SGq GY SGYWW GG aZWGwt ...

Page 34: ...34 Note tjXWX hhG zlU GGw GZ GG SGq GY SGYWW GG aZWGwt ...

Page 35: ...35 Note tjXWX hhG zlU GGw GZ GG SGq GY SGYWW GG aZWGwt ...

Page 36: ... AUTO DEFROST button repeatedly or using the number buttons 3 When the oven beeps press PAUSE CANCEL button and turn food over Press START to resume defrosting cycle Auto Reheat 1 Press AUTO REHEAT repeatedly to select type of dish to reheat 2 To increase serving size press the corresponding number button 3 Press START to begin reheating cycle Set Cooking Time and Power Levels 1 Use number buttons...

Reviews: