background image

12 

GB

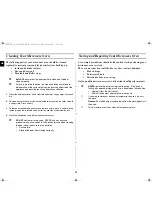
Using the Voice Play Feature

You can listen to a recorded message.

To listen a recorded message,

To stop playing while listening to the recorded message, press the 

Voice Play

 button.

If the unit is in the Child Look status, you cannot play the recorded 
message.

When you have a new recorded message, the "

Play

" icon will blink on 

the screen. If you listen to the recorded message, the "

Play

" icon will 

stop blinking.

Voice Play Clear Message

You can erase a recorded message. 

Switching the Beeper Off

You can switch the beeper off whenever you want. 

Safety-Locking Your Microwave Oven

Your microwave oven is fitted with a special Child Safety programme, 
which enables the oven to be “locked” so that children or anyone 
unfamiliar with it cannot operate it accidentally.

The oven can be locked at any time.

Press 

Voice Play

 button.

Result :

1) The recorded message is played back, and 

the elapsed time increases by the second 
as the message is played.

2) When playing the recorded message has 

completed, the screen returns to the 
previous status. (The screen returns to 
clock, or radio mode.)

Press 

Voice Play

, and 

Voice Rec

 button at the same time.

Result :

"

Play

" icon disappears on the screen.

1.

Press the 

 and 


buttons at the same time.

Result :

The following indication is displayed. 

The oven will not beep each time you 
press a button.

2.

To switch the beeper back on, press the 

 and 


buttons again at the same time.
Result :

The following indication is displayed. 

The oven operates with the beeper on 
again.

1.

Press the 


and 


buttons at the same time.

Result :

The oven is locked (no functions can be 
selected).

The display shows “L”.


2.

To unlock the oven, press the 


and 

 buttons again at 

the same time.
Result :

The oven can be used normally.

tX`^km†znTWY^_W†niU”GGwˆŽŒGXYGGm™‹ˆ SGtˆ G]SGYWW\GG_a\YGht

Summary of Contents for M197DF-5

Page 1: ...Using the Auto Reheat Feature 8 Auto Reheat Settings 8 Using the Auto Cook Feature 9 Auto Cook Setting 9 Using the Auto Power Defrost Feature 10 Auto Power Defrost Settings 10 Using the Radio Feature 11 Using the Voice Recorder Feature 11 Using the Voice Play Feature 12 Voice Play Clear Message 12 Switching the Beeper Off 12 Safety Locking Your Microwave Oven 12 Cookware Guide 13 Cleaning Your Mic...

Page 2: ...fitting on to the coupler Purpose The turntable serves as the main cooking surface it can be easily removed for cleaning VENTILATION HOLES DOOR LATCHES DOOR TURNTABLE COUPLER ROLLER RING SAFETY INTERLOCK HOLES LIGHT DOOR HANDLE DISPLAY CONTROL PANEL WIRE ANTENNA 1 DISPLAY 2 AUTO COOK BUTTON 3 AUTO REHEAT BUTTON 4 AUTO POWER DEFROST BUTTON 5 FM LIGHT 6 TUNER MORE LESS BUTTON 7 RADIO SELECT BUTTON O...

Page 3: ...y metallic cookware in the microwave oven Metallic containers Dinnerware with gold or silver trimmings Skewers forks etc Reason Electric arcing or sparking may occur and may damage the oven 2 DO NOT heat Airtight or vacuum sealed bottles jars containers Ex Baby food jars Airtight food Ex Eggs nuts in shells tomatoes Reason The increase in pressure may cause them to explode Tip Remove lids and pier...

Page 4: ...s stuck to oven walls or floor can cause paint damage and reduce the efficiency of the oven 12 You may notice a Clicking sound during operation especially when the oven is defrosting Reason This sound is normal when the electrical power output is changing 13 When the microwave oven is operating without any load the power will be cut off automati cally for safety You can operate normally after lett...

Page 5: ...efore using your microwave oven for the first time Setting the Time Your microwave oven has an inbuilt clock The time can be displayed in either the 24 hour or 12 hour notation You must set the clock When you first install your microwave oven After a power failure Do not forget to reset the clock when you switch to and from summer or winter time When you plug the power cable the unit is initialize...

Page 6: ...terference is detected by the oven s microprocessor the display may be reset To solve this problem disconnect the power plug and reconnect it Reset the time If the above guidelines do not enable you to solve the problem contact your local dealer or SAMSUNG after sales service Cooking Reheating The following procedure explains how to cook or reheat food ALWAYS check your cooking settings before lea...

Page 7: ...n the Microwave Auto Reheat and Auto Cook modes are selected Power Level Output FULL HIGH MEDIUM HIGH MEDIUM MEDIUM LOW DEFROST LOW KEEP WARM 1000 W 850 W 600 W 450 W 300 W 180 W 100 W Time Increasing Time Up to 1 min 1 3 min 3 10 min 10 20 min 20 40 min 40 99 min 5 sec unit 10 sec unit 30 sec unit 1 min unit 2 min unit 5 min unit 1 To stop temporarily Open the door Result Cooking stops To resume ...

Page 8: ...erving Size Standing Time Recommendations 1 Ready Meal Chilled 300 350 g 400 450 g 3 min Put on a ceramic plate and cover with microwave cling film This programme is suitable for meals consisting of 3 components e g meat with sauce vegetables and a side dishes like potatoes rice or pasta 2 Ready Meal frozen 300 350 g 400 450 g 4 min Take frozen ready meal and check if dish is suitable for microwav...

Page 9: ...300 350 g 400 450 g 500 550 g 600 650 g 700 750 g 3 mins Weigh the vegetables after washing cleaning and cutting into similar size Put them into a glass bowl with lid Add 30 ml 2 tablespoons water when cooking for 100 250 g add 45 ml 3 tablespoons for 300 450 g and add 60 75 ml 4 5 tablespoons for 500 750 g Stir after cooking When cooking bigger quantities stir once during cooking 2 Frozen Vegetab...

Page 10: ...ns The oven beeps halfway through defrosting to remind you to turn the food over Press button again to finish defrosting Food Serving Size Standing Time Recommendations 1 Meat 200 2000 g 20 60 mins Shield the edges with aluminium foil Turn the meat over when the oven beeps This programme is suitable for beef lamb pork steaks chops minced meat 2 Poultry 200 2000 g 20 60 mins Shield the leg and wing...

Page 11: ...s you can record a message 1 Press Radio MWO select On Off button Result The green backlight of the screen is turned to red Radio icons appears on the top and FM and MHZ icon appear on the bottom of the screen and the current frequency of the channel is displayed on the screen The frequency of the channel appeared on the screen is the frequency of the last channel 2 Press Tuner More Less button to...

Page 12: ...an be locked at any time Press Voice Play button Result 1 The recorded message is played back and the elapsed time increases by the second as the message is played 2 When playing the recorded message has completed the screen returns to the previous status The screen returns to clock or radio mode Press Voice Play and Voice Rec button at the same time Result Play icon disappears on the screen 1 Pre...

Page 13: ...lystyrene cups containers Paper bags or newspaper Recycled paper or metal trims Can be used to warm food Overheating may cause the polystyrene to melt May catch fire May cause arcing Glassware Oven to table ware Fine glassware Glass jars Can be used unless decorated with a metal trim Can be used to warm foods or liquids Delicate glass may break or crack if heated suddenly Must remove the lid Suita...

Page 14: ...e dishwasher safe plate whenever necessary DO NOT spill water in the vents NEVER use any abrasive products or chemical solvents Take particular care when cleaning the door seals to ensure that no particles Accumulate Prevent the door from closing correctly Storing and Repairing Your Microwave Oven A few simple precautions should be taken when storing or having your microwave oven serviced The oven...

Page 15: ...Model M197DF Power source 230V 50 Hz Power consumption Microwave 1500 W Output power 100 W 1000 W IEC 705 Operating frequency 2450 MHz Radio frequency 87 5 MHz 108 0 MHz Magnetron OM75P 31 Cooling method Cooling fan motor Dimensions W x H x D Outside Oven cavity 517 x 297 x 420 mm 336 x 241 x 349 mm Volume 28 liter Weight Net 15 kg approx tX km znTWY _W niU GGw GX GGm SGt G SGYWW GG_a YGht ...

Page 16: ...tX km znTWY _W niU GGw GX GGm SGt G SGYWW GG_a YGht ...

Reviews: