background image

English

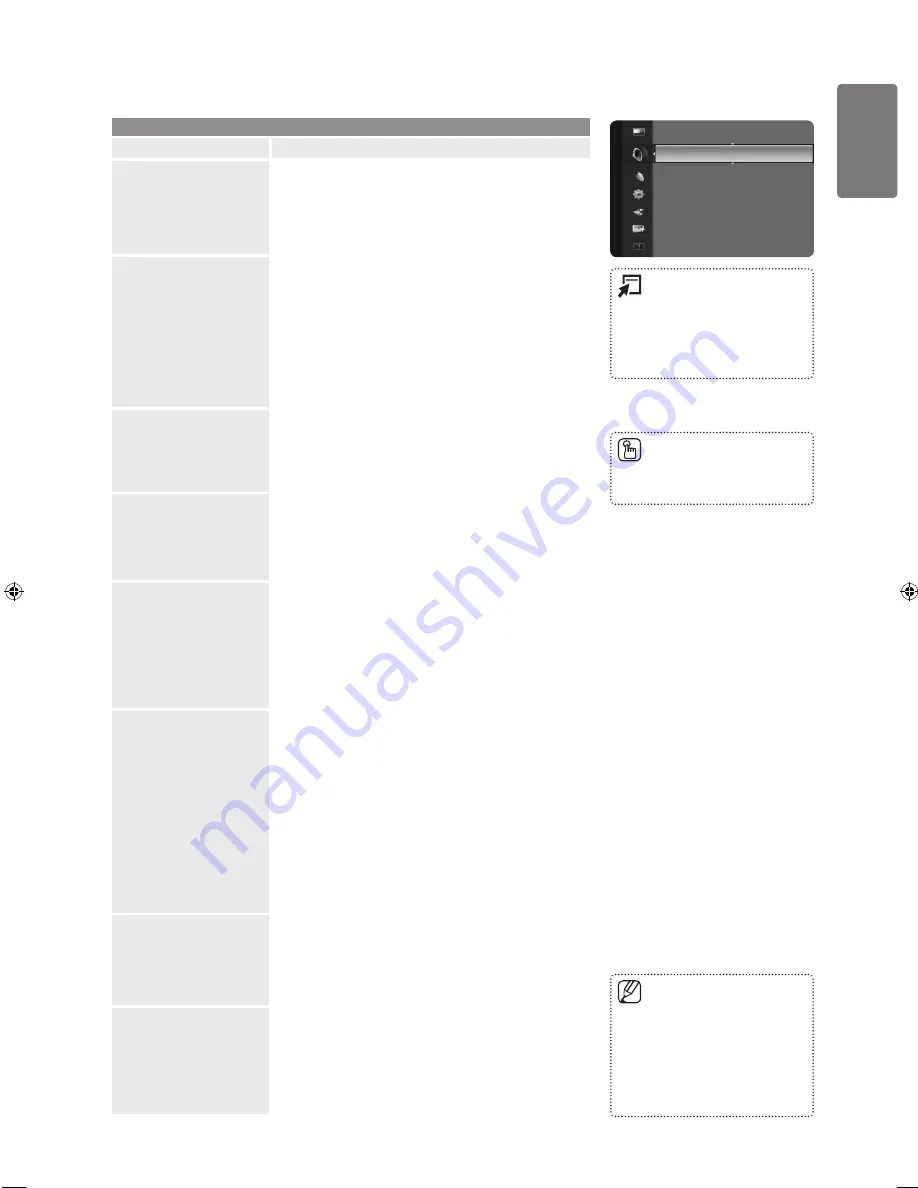
Using the M

enus

Sound Menu

Sound

Option

Description

Mode

You can select a sound mode to suit your personal preferences.

Standard

: Selects the normal sound mode.

Music

: Emphasizes music over voices.

Movie

: Provides the best sound for movies.

Clear Voice

: Emphasizes voice over other sounds.

Custom

: Recalls your customized sound settings.

Equalizer

The sound settings can be adjusted to suit your personal 

preferences.

Mode

: Selects the sound mode among the predefined 

settings.

Balance L/R: 

Adjusts the balance between the right and 

left speaker.

100Hz

 / 

300Hz

 / 

1�Hz

 / 

3�Hz

 / 

10�Hz

 (Bandwidth 

Adjustment): To adjust the level of different bandwidth 

frequencies.

Reset

: Resets the equalizer settings to the default values.

SRS TruSurround HD

SRS TruSurround HD is a patented SRS technology that 

solves the problem of playing 5.1 multichannel content 

over two speakers. TruSurround delivers a compelling, 

virtual surround sound experience through any two-speaker 

playback system, including internal television speakers.  

It is fully compatible with all multichannel formats.

Audio Language 

(digital channels only)

You can change the default value for audio languages. 

Displays the language information for the incoming stream.

While viewing a digital channel, this function can be 

selected.

You can only select the language among the actual 

languages being broadcast.

Audio Format 

(digital channels only)

When sound is emitted from both the main speaker and 

the audio receiver, a sound echo may occur due to the 

decoding speed difference between the main speaker 

and the audio receiver. In this case, use the TV Speaker 

function.

While viewing a digital channel, this function can be 

selected.

The Audio Format appears according to the broadcasting 

signal.

Audio Description 

(digital channels only)

This is an auxiliary audio function that provides an 

additional audio track for visually challenged persons. 

This function handles the Audio Stream for the AD (Audio 

Description), when it is sent along with the Main audio from 

the broadcaster. Users can turn the Audio Description On or 

Off and control the volume.

Audio Description

Turn the audio description function on or off.

Volume

You can adjust the audio description volume.

Volume

 is active when 

Audio Description

 is set 

to 

On

.

While viewing a Digital channel, this function can be 

selected.

•

Auto Volume

Each broadcasting station has its own signal conditions, 

and so it is not easy to adjust the volume every time the 

channel is changed. This feature lets you automatically 

adjust the volume of the desired channel by lowering the 

sound output when the modulation signal is high or by 

raising the sound output when the modulation signal is low.

Speaker Select

When you watch TV with it connecting to a Home theatre, 

turn the TV speakers off so you can listen to sound from the 

Home theatre’s (external) speakers.

External Speaker

: Used to listen to the sound of the 

External (Home Theatre) Speakers.

TV Speaker

: Used to listen to the sound of the TV 

Speakers.

The volume buttons and 

MUTE


buttons do not operate when the 

Speaker Select

 is set to 

External 

Speaker

.

If you select 

External Speaker


in the 

Speaker Select

 menu, the 

sound settings will be limited.

Press the 

TOOLS

 button to 

display the

 Tools

 menu. You can 

also configure the sound mode 

by selecting 

Tools

 → 

Sound 

Mode

.

Press the 

SRS

 button on the 

remote control to select 

Off

 or 

On

.

Mode   

: Custom   

Equalizer
SRS TruSurround HD 

: Off

Audio Language  

: - - -

Audio Format   

: - - -

Audio Description

Auto Volume 


: Off

Sound

BN68-02274D-01Eng.indd   25

2009-05-25   �� 5:46:26

Summary of Contents for LE32B530

Page 1: ...try Customer Care Centre Web Site EIRE 0818 717 100 www samsung com ie U K 0845 SAMSUNG 7267864 www samsung com uk LCD TV user manual imagine the possibilities Thank you for purchasing this Samsung product To receive more complete service please register your product at www samsung com register Model Serial No BN68 02274D 01Eng_Cover indd 1 2009 05 08 5 51 59 ...

Page 2: ...black borders top or bottom by using the zoom function This will help eliminate the black borders and fit the picture to the entire area of the screen Using a video game console may cause image retention and is not recommended When using a PC input avoid displaying still images for long durations and reduce the brightness or contrast settings to decrease the intensity of the picture IMPORTANT Imag...

Page 3: ...s Inc TruSurround HD technology is incorporated under license from SRS Labs Inc Manufactured under license from Dolby Laboratories Dolby and the double D symbol are trademarks of Dolby Laboratories Symbol Note One Touch Button TOOLS Button Press 2009 Samsung Electronics Co Ltd All rights reserved ...

Page 4: ...nt G R Advanced Settings 22 Picture Options 24 Picture Reset Auto Adjustment Screen 25 Sound Menu 25 Mode Equalizer SRS TruSurround HD Audio Language Audio Format Audio Description Auto Volume Speaker Select 26 Sound Reset 27 Setup Menu 27 Language Time 28 Game Mode Child Lock Change PIN Parental Lock Subtitle 29 Teletext Language Preference Digital Text Melody 29 Energy Saving Common Interface 30...

Page 5: ...hnician for assistance when installing the wall mounted bracket Samsung Electronics is not responsible for any damage to the product or injury to yourself or others if you elect to install the TV on your own Do not i nstall your Wall Mount Kit while your TV is turned on It may result in personal injury due to elec tric shock Remove the stand and cover the bottom hole with a cap and fasten with two...

Page 6: ...e figure are kept When using a stand or wall mount use parts provided by Samsung Electronics only If you use parts provided by another manufacturer it may result in a problem with the product or an injury due to the product falling If you use parts provided by another manufacturer it may result in a problem with the product or fire due to an increase in the internal temperature of the product due ...

Page 7: ...e purchase these additionally 2 Remove the screws from the centre back of the TV put the screws into the clamps and then fasten the screws onto the TV again Screws may not be supplied with the product In this case please purchase the screws of the following specifications Screw Specifications For a 17 29 Inch LCD TV M4 X L15 For a 32 40 Inch LCD TV M6 X L15 3 Connect the clamps fixed onto the TV a...

Page 8: ...nd may differ from actual product appearance Product design and specifications may be changed without notice in order to enhance product performance Speakers Blinks and turns off when the power is on and lights up in stand by mode Toggles between all the available input sources In the on screen menu use this button as you would use the ENTERE button on the remote control Press to see an on screen ...

Page 9: ... HDMI IN 1 DVI jack You can also use the ports to connect to a PC What is HDMI High Definition Multimedia interface allows the transmission of high definition digital video data and multiple channels of digital audio The HDMI DVI terminal supports DVI connection to an extended device with the appropriate cable not supplied The difference between HDMI and DVI is that the HDMI device is smaller in s...

Page 10: ...s on the A V device 8 AUDIO OUT R AUDIO L Connect RCA audio cables to AUDIO OUT R AUDIO L on the rear of your set and the other ends to corresponding audio in connectors on the Amplifier or DVD Home Theatre E P 9 COMPONENT IN Connect component video cables optional to component connector PR PB Y on the rear of your set and the other ends to corresponding component video out connectors on the DTV o...

Page 11: ... Analog Audio connection Amplifier DVD Home Theater Using a Audio Cable AUDIO IN OPTICAL Digital AUDIO Analog Best Normal HD connection Using a D Sub Cable Using an HDMI Cable HDMI OUT Using a D Sub Cable Using a D Sub Cable PC OUT AUDIO OUT HD connection Using a D Sub Cable Using an HDMI DVI Cable DVI OUT AUDIO OUT ...

Page 12: ...h the diagram inside the compartment 3 Replace the cover Remove the batteries and store them in a cool dry place if you won t be using the remote control for a long time If the remote control doesn t work check the following Is the TV power on Are the plus and minus ends of the batteries reversed Are the batteries drained Is there a power outage or is the power cord unplugged Is there a special fl...

Page 13: ...tely switched Press to temporarily cut off the sound p 30 Press to display and select the available video sources p 30 Press to increase or decrease the volume Displays the Channel List on screen p 19 Use to quickly select frequently used functions Use to select on screen menu items and change menu values p 16 Press to display information on the TV screen p 15 27 Alternately select Teletext Double...

Page 14: ...Digital Analogue Digital and Analogue channels Digital Digital channels Analogue Analogue channels The channel search will start and end automatically Press the ENTERE button at any time to interrupt the memorization process After all the available channels are stored the message Set the Clock Mode is displayed 7 Press the ENTERE button Press the or button to select Auto then press the ENTERE butt...

Page 15: ...he display identifies the current channel and the status of certain audio video settings 1 Press the INFO button on the remote control The TV will display the channel the type of sound and the status of certain picture and sound settings Press the INFO button once more or wait approximately 10 seconds and the display disappears automatically The Plug Play feat ure is only available in the TV mode ...

Page 16: ... Menu Channel Option Description Country The PIN number input screen appears Enter your 4 digit PIN number Analogue Channel You can change the country for analogue channels Digital Channel You can change the country for digital channels Auto Store You can scan for the frequency ranges available to you and availability depends on your country Automatically allocated programme numbers may not corres...

Page 17: ... number You can also select the channel number directly by pressing the number 0 9 buttons If there is abnormal sound or no sound reselect the sound standard required Search When you do not know the channel numbers Press the or button to start the search The tuner scans the frequency range until the first channel or the channel that you selected is received on the screen Store When you store the c...

Page 18: ...when the programme of your choice is highlighted The programme title is on the upper part of the screen centre Please click on INFO button for the detailed information Channel Number Running Time Status Bar Parental Level Video Quality Information HD SD Sound Modes Subtitle or Teletext languages of Subtitle or Teletext and brief summary of the highlighted programme are included on the detailed inf...

Page 19: ...from Favourite You can set channels you watch frequently as favourites The symbol will be displayed and the channel will be set as a favourite All favourite channels will be shown on Favourites menu Lock Unlock You can lock a channel so that the channel cannot be selected and viewed This function is available only when the Child Lock is set to On Refer to page 28 The PIN number input screen appear...

Page 20: ...s operation may be necessary after using the auto store Select All Deselect All Select All You can select all the channels in the channel list Deselect All You can deselect all the selected channels Auto Store For detailed procedures on setting up options refer to pages 16 17 Channel List Option Menu in Programmed You can view modify or delete a reservation Press the TOOLS button to use the option...

Page 21: ...cartoonish Tint G R Changes the picture hue from reddish to a greenish appearance Advanced Settings Samsung s new TVs allow you to make even more precise picture settings than previous models Black Tone Off Dark Darker Darkest Increases the picture s shadow detail by lightening the black level ie changing the gamma at low levels This is most commonly used for watching movies with dark scenes to ke...

Page 22: ...of flesh tones Increasing the value creates a more reddish picture Decreasing the value creates a more greenish picture Edge Enhancement Increases or decreases the emphasis at object edges Picture Options Colour Tone Selects a preset white balance or colour temperature setting to provide either a reddish or bluish hue dependant upon your personal preference Cool Selects a white balance or colour t...

Page 23: ... When setting the picture size to Auto Wide in a 16 9 wide TV you can determine the picture size you want to see the 4 3 WSS Wide Screen Service image or nothing Each individual European country requires different picture size so this function is intended for users to select it 16 9 Sets the picture to 16 9 wide mode Wide Zoom Magnify the size of the picture more than 4 3 Zoom Magnify the size of ...

Page 24: ...Fine tuning alone then adjust the frequency as best as possible Coarse and Fine tune again After the noise has been reduced readjust the picture so that it is aligned on the centre of screen PC Position Adjust the PC s screen positioning if it does not fit the TV screen Press the or button to adjusting the Vertical Position Press the or button to adjust the Horizontal Position Image Reset You can ...

Page 25: ...nnel this function can be selected The Audio Format appears according to the broadcasting signal Audio Description digital channels only This is an auxiliary audio function that provides an additional audio track for visually challenged persons This function handles the Audio Stream for the AD Audio Description when it is sent along with the Main audio from the broadcaster Users can turn the Audio...

Page 26: ... displayed on the screen Audio Type Dual 1 2 Default A2 Stereo Mono MONO Automatic change Stereo STEREO MONO Dual DUAL 1 DUAL 2 DUAL 1 NICAM Stereo Mono MONO Automatic change Stereo MONO STEREO Dual MONO DUAL 1 DUAL 2 DUAL 1 If the stereo signal is weak and an automatic switching occurs then switch to the mono This function is only activated in stereo sound signal It is deactivated in mono sound s...

Page 27: ...ou ve chosen set to Activate Off Time Set the hour minute and activate inactivate To activate timer with the setting you ve chosen set to Activate Volume Set the desired volume level Antenna Select Air or Cable Channel Select the desired channel Repeat Select Once Everyday Mon Fri Mon Sat Sat Sun or Manual When Manual is selected press the button to select the desired day of the week Press the ENT...

Page 28: ...umber input screen appears Enter your 4 digit PIN number The default PIN number of a new TV set is 0 0 0 0 You can change the PIN by selecting Change PIN from the menu When the parental ratings are set the symbol is displayed Allow All Press to unlock all TV ratings Block All Press to lock all TV ratings Subtitle You can activate and deactivate the subtitles Use this menu to set the Subtitle Mode ...

Page 29: ... as multimedia data MHEG is user runtime interaction technology and is being applied to various fields including VOD Video On Demand ITV Interactive TV EC Electronic Commerce tele education tele conferencing digital libraries and network games Melody A melody sound can be set to come on when the TV is powered On or Off The Melody does not play When no sound is output from the TV because the MUTE b...

Page 30: ...e picture test Check the colour pattern on the screen to see if the problem still exists Yes If the test pattern does not appear or there is noise in the test pattern select Yes Therefore contact Samsung s call centre for assistance No If the test pattern is properly displayed select No There may be a problem with your external equipment Please check your connections If the problem still persists ...

Page 31: ...lder version When software is upgraded video and audio settings you have made will return to their default factory settings We recommend you write down your settings so that you can easily reset them after the upgrade By Channel Upgrades the software using the broadcasting signal Standby Mode Upgrade To continue software upgrade with master power on Select On by pressing the or button 45 minutes a...

Page 32: ...e DIGITAL AUDIO OUT OPTICAL jack on your TV and the Digital Audio Input on the Home Theatre When following the connection above the Optical jack only outputs 2 channel audio You will only hear sound from the Home Theatre s Front Left and Right speakers and the subwoofer If you want to hear 5 1 channel audio connect the DIGITAL AUDIO OUT OPTICAL jack on the DVD player or Cable Satellite Box ie Anyn...

Page 33: ...t is switched to the selected device Switching to the selected devices may take up to 2 minutes You cannot cancel the operation during the switching operation The time required to scan for devices is determined by the number of connected devices When the device scan is complete the number of devices found are not displayed Although the TV automatically searches the device list when the TV is turne...

Page 34: ...hing to the device when the menu of the corresponding device is displayed on the screen Numeric buttons ENTERE buttons Colour buttons EXIT button After switching to the device while playing a file π Backward search μ Forward search Stop Play Pause Device with built in Tuner After switching to the device when you are watching a TV programme P P button Audio Device When Receiver is activated Y MUTE ...

Page 35: ...ng device s users manual Listening through a Receiver Home Theatre You can listen to sound through a receiver instead of the TV speaker 1 Press the TOOLS button Press the ENTERE button to select Anynet HDMI CEC 2 Press the or button to select Receiver Press the or button to select On or Off 3 Press the EXIT button to exit If your receiver supports audio only it may not appear in the device list Th...

Page 36: ...V in the Anynet menu Press the SOURCE button on the TV remote control and select a device other than Anynet devices Press P to change the TV mode Note that the channel button operates only when a tuner embedded Anynet device is not connected The message Connecting to Anynet device appears on the screen You cannot use the remote control when you are configuring Anynet or switching to a view mode Us...

Page 37: ... Press to activate Teletext mode after selecting the channel providing the Teletext service Press it twice to overlap the Teletext with the current broadcasting screen 7 exit Exit from the Teletext display 8 1 sub page Used to display the available sub page 9 2 page up Used to display the next Teletext page 0 3 page down Used to display the previous Teletext page 6 index Used to display the index ...

Page 38: ...ring manufacturing D Sub and HDMI DVI Input Mode Resolution Horizontal Frequency KHz Vertical Frequency Hz Pixel Clock Frequency MHz Sync Polarity H V IBM 640 x 350 31 469 70 086 25 175 720 x 400 31 469 70 087 28 322 MAC 640 x 480 35 000 66 667 30 240 832 x 624 49 726 74 551 57 284 1152 x 870 68 681 75 062 100 000 VESA CVT 720 x 576 35 910 59 950 32 750 1152 x 864 53 783 59 959 81 750 1280 x 720 4...

Page 39: ...e control malfunctions Replace the remote control batteries Clean the upper edge of the remote control transmission window Check the battery terminals Check signal cable message is displayed Check that the signal cable is firmly connected to the PC or video sources Check that the PC or video sources are turned on On PC mode Not Supported Mode message is displayed Check the maximum resolution and t...

Page 40: ...Weight With Stand 12 kg Environmental Considerations Operating Temperature Operating Humidity Storage Temperature Storage Humidity 10 C to 40 C 50 F to 104 F 10 to 80 non condensing 20 C to 45 C 4 F to 113 F 5 to 95 non condensing Stand Swivel Left Right 20 20 Design and specifications are subject to change without prior notice This device is a Class B digital apparatus For the power supply and Po...

Page 41: ...particular attention to cords at plug end adaptors and the point where they exit from the appliance To protect this apparatus from a lightning storm or when it is left unattended and unused for long periods of time unplug it from the wall outlet and disconnect the antenna or cable system This will prevent damage to the set due to lightning and power line surges Before connecting the AC power cord ...

Page 42: ...D YELLOW Warranty Card United Kingdom This Samsung product is warranted for a period of twelve 12 months from the original date of purchase against defective materials and workmanship In the event that warranty service is required you should return the product to the retailer from whom it was purchased However Samsung Authorised Dealers and Authorised Service Centres in other EC Countries will com...

Page 43: ...en en op een verantwoorde manier recyclen zodat het duurzame hergebruik van materiaalbronnen wordt bevorderd Huishoudelijke gebruikers moeten contact opnemen met de winkel waar ze dit product hebben gekocht of met de gemeente waar ze wonen om te vernemen waar en hoe ze deze artikelen milieuvriendelijk kunnen laten recyclen Zakelijke gebruikers moeten contact opnemen met hun leverancier en de algem...

Page 44: ...me bærekraftig gjenbruk av materielle ressurser Private forbrukere bør kontakte enten forhandleren de kjøpte produktet av eller lokale myndigheter for detaljer om hvor og hvordan disse artiklene kan resirkuleres på en miljøvennlig måte Forretningsbrukere bør kontakte sin leverandør og undersøke vilkårene i kjøpskontrakten Dette produktet og det elektroniske tilbehøret skal ikke blandes med annet k...

Page 45: ...t zakoupili nebo u příslušného městského úřadu vyžádat informace kde a jak mohou tyto výrobky odevzdat k bezpečné ekologické recyklaci Podnikoví uživatelé by měli kontaktovat dodavatele a zkontrolovat všechny podmínky kupní smlouvy Tento výrobek a jeho elektronické příslušenství nesmí být likvidován spolu s ostatním průmyslovým odpadem Čeština Správna likvidácia tohoto výrobku Elektrotechnický a e...

Page 46: ...ant atliekas šio gaminio ir jo elektroninių priedų negalima maišyti su kitomis pramoninėmis atliekomis Lietuvių kalba Õige viis toote kasutuselt kõrvaldamiseks elektriliste ja elektrooniliste seadmete jäätmed Selline tähistus tootel või selle tarvikutel või dokumentidel näitab et toodet ega selle elektroonilisi tarvikuid nt laadija peakomplekt USB kaabel ei tohi kasutusaja lõppemisel kõrvaldada ko...

Page 47: ... marchio riportato sulla batteria o sulla sua documentazione o confezione indica che le batterie di questo prodotto non devono essere smaltite con altri rifiuti domestici al termine del ciclo di vita Dove raffigurati i simboli chimici Hg Cd o Pb indicano che la batteria contiene mercurio cadmio o piombo in quantità superiori ai livelli di riferimento della direttiva UE 2006 66 Se le batterie non v...

Page 48: ...orok nem megfelelő kezelése esetén ezek az anyagok veszélyt jelenthetnek az egészségre vagy a környezetre A természeti erőforrások megóvása és az anyagok újrafelhasználásának ösztönzése érdekében kérjük különítse el az akkumulátorokat a többi hulladéktól és vigye vissza a helyi ingyenes akkumulátorleadó helyre Magyar Sposób poprawnego usuwania baterii w które wyposażony jest niniejszy produkt Doty...

Page 49: ... materialelor vă rugăm să separaţi bateriile de celelalte tipuri de deşeuri şi să le reciclaţi prin intermediul sistemului gratuit de returnare a bateriilor la nivel local Română Šī izstrādājuma bateriju pareiza utilizācija Piemērojama Eiropas Savienībā un citās Eiropas valstīs ar atsevišķām bateriju nodošanas sistēmām Šis marķējums uz baterijas rokasgrāmatā vai uz iepakojuma norāda ka šī izstrādā...

Reviews: