


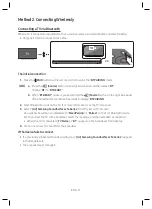


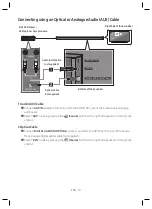
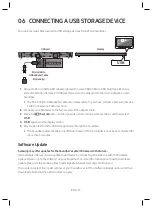


ENG - 18
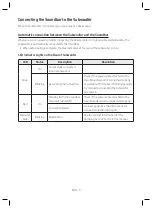
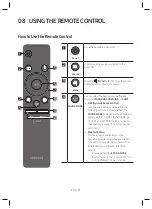
VOL
WOOFER
SOUND
MODE
PAIR
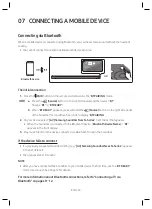
Bluetooth
PAIR
Press the
PAIR
button. “
BT PAIRING
” appears in the Soundbar’s display.
You can connect the Soundbar to a new Bluetooth device in this mode by selecting the
Soundbar from the Bluetooth device's search list.
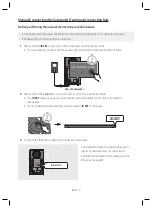
Play / Pause
VOL
WOOFER
SOUND
MODE
PAIR
Press the
p
button to pause a music file temporarily.
When you press the button again, the music file plays.
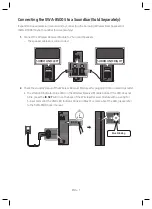
VOL
WOOFER
SOUND
MODE
PAIR
Up/Down/
Left/Right
Press the indicated areas to select Up/Down/Left/Right.
Press Up/Down/Left/Right on the button to select or set functions.
•
Repeat
To use the Repeat function in “
USB
” mode, press the
Up
button.
•
Music Skip
Press the
Right
button to select the next music file. Press the
Left
button to select the
previous music file.
•
/ Auto Power Link
You can turn and Auto Power Link on or off.
and Auto Power Link are turned on and turned off by the
Right
and
Left
buttons respectively.
– : If the Soundbar is connected to a Samsung TV through an HDMI cable,
you can control your Soundbar with a Samsung TV remote control.
Press and hold the
Right
button for 5 seconds to toggle ON and OFF.
– Auto Power Link : If the Soundbar is connected to your TV through a digital optical
cable, the Soundbar can automatically turn on when you turn on your TV. Press
and hold the
Left
button for 5 seconds to toggle Auto Power Link ON and OFF.
– / Auto Power Link are set to ON by default.
•
ID SET
Press and hold the
Up
button for 5 seconds to complete
ID SET
(when connecting to an
accessary item).
Summary of Contents for HW-N650
Page 1: ...HW N650 USER MANUAL...


