Operation
30
31
Turning the TV On and Off
Press the POWER button on the remote control or on the side panel to turn your TV on and off.
Note that audio on this product can being working before screen video.
Viewing the Menus and Displays
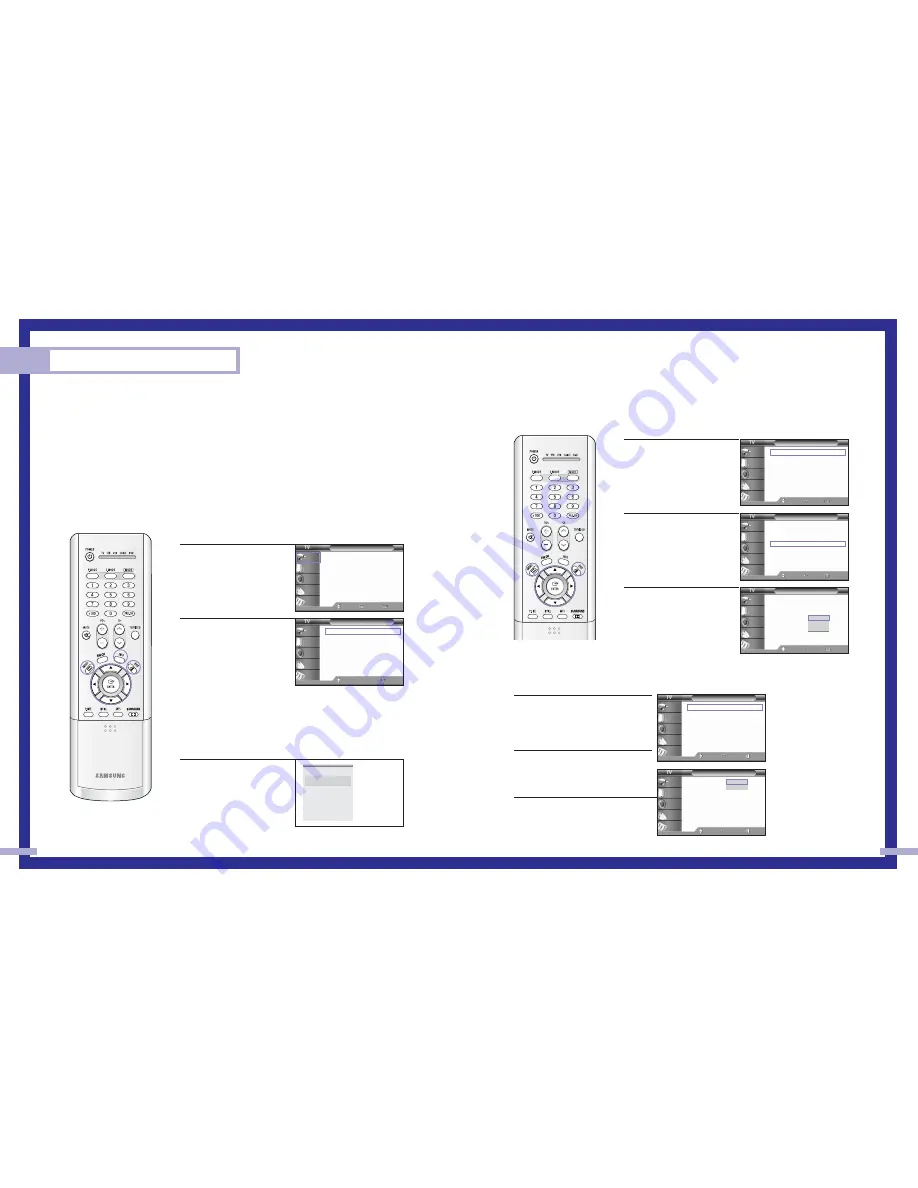
The on-screen menu system allows you to control the settings of your TV. Access the on-screen menu
system by pressing the MENU button on the remote control. Once the on-screen menu appears, use
the
…
/
†
/
œ
/
√
/ENTER on your remote control to select menu items and make adjustments.
You can also view the on-screen menu system and make some adjustments using the TV’s side
panel buttons.
Displaying the Menus
1
With the power on, press the
MENU button on the remote
control. The main menu
appears on the screen.
The Input menu is selected.
2
Use the
…
or
†
button to
select to items in the menu.
Use the
œ
,
√
or ENTER
button to display, change, or
use the selected items. Use
the ENTER or
√
button to
enter items in the menu.
On-screen menus disappear
from the screen automatically after
about two minutes, or you can press
the EXIT button on your remote
control to exit the menu.
Displaying Status Information
1
Press the INFO button on the
remote control. The TV will
display the channel, current
time, and the audio signal
you are listening to.
Selecting the Menu Language
Choose a language for the on-screen menus: English, Spanish or French.
1
Press the MENU button.
Press the
…
or
†
button to
select “Setup”, then press the
ENTER button.
2
Press the
…
or
†
button to
select “Language”, then
press the ENTER button.
3
Press the
…
or
†
button to
select the language, then
press ENTER button.
Press the EXIT button to exit
the menu.
Selecting the Antenna Input
You can connect to two different signal sources by choosing the antenna input(A or B).
1
Press the MENU button. Press the
…
or
†
button to select “Channel”,
then press the ENTER button.
2
Press the ENTER button to select
“Antenna”.
3
Press the
…
or
†
button to select
“A” or “B”, then press ENTER button.
Press the EXIT button to exit the
menu.
Input
Source List
√
Edit Name
√
Move
Enter
Exit
Input
Picture
Sound
Channel
Setup
Picture
Picture Mode
: Dynamic
√
Custom Picture
√
Color Tone
: Normal
√
Film Mode
: Off
√
DNIe
: On
√
Digital NR
: On
√
Size
√
PIP
√
Move
Enter
Return
Input
Picture
Sound
Channel
Setup
Air 12 - - - - -
Signal
Mono
Picture
Dynamic
Sound
Standard
Dolby
Off
MTS
Mono
- - : - - am
Setup
Time
√
V-Chip
√
Closed Caption
√
Language
: English
√
Melody
: On
√
Blue Screen
: Off
√
PC Setup
√
Move
Enter
Return
Input
Picture
Sound
Channel
Setup
Setup
Time
√
V-Chip
√
Closed Caption
√
Language
: English
√
Melody
: On
√
Blue Screen
: Off
√
PC Setup
√
Move
Enter
Return
Input
Picture
Sound
Channel
Setup
Channel
Antenna
: A
√
Air/CATV
: Air
√
Auto Program
√
Favorite Channel
√
Channel Label
√
Fine Tune
√
Add/Delete
√
▼
More
Move
Enter
Exit
Input
Picture
Sound
Channel
Setup
Channel
Antenna
: A
√
Air/CATV
: Air
√
Auto Program
√
Favorite Channel
√
Channel Label
√
Fine Tune
√
Add/Delete
√
▼
More
Move
Enter
Exit
Input
Picture
Sound
Channel
Setup
Setup
Time
V-Chip
Closed Caption
Language
: English
Melody
: On
Blue Screen
: Off
PC Setup
Move
Enter
Return
Input
Picture
Sound
Channel
Setup
English
Español
Français
A
B
Summary of Contents for HLN437W - 43" Rear Projection TV
Page 5: ...Your New Wide TV SAMSUNG ...
Page 10: ...Connections SAMSUNG ...
Page 15: ...Operation SAMSUNG ...
Page 47: ...Appendix SAMSUNG ...


