background image

ENG - iii

FCC Caution :


• Any changes or modifications not expressly 

approved by the party responsible for 
compliance could void the user’s authority to 
operate this equipment.


• This product satisfies FCC regulations when 

shielded cables and connectors are used to 
connect the unit to other equipment.  
To prevent electromagnetic interference with 
electric appliances, such as radios and 
televisions, use shielded cables and 
connectors for connections. 

Class B FCC Statement

This equipment has been tested and found to 
comply with the limits for a Class B digital device, 
pursuant to Part 15 of the FCC Rules. These limits 
are designed to provide reasonable protection 
against harmful interference in a residential 
installation. This equipment generates, uses and 
can radiate radio frequency energy and, if not 
installed and used in accordance with the 
instructions, may cause harmful interference to 
radio communications. However, there is no 
guarantee that interference will not occur in a 
particular installation. If this equipment does 
cause harmful interference to radio or television 
reception, which can be determined by turning 
the equipment off and on, the user is encouraged 
to try to correct the interference by one of the 
following measures:


Reorienting or relocating the receiving 
antenna.


Increasing the separation between the 
equipment and receiver.


Connecting the equipment to an outlet that is 
on a different circuit than the radio or TV.


Consulting the dealer or an experienced 
radio/TV technician for help.

FCC Radiation Exposure Statement : 

This equipment complies with FCC radiation 
exposure limits set forth for an uncontrolled 
environment. This equipment should be installed 

and operated so there is at least 8 inches (20 cm) 

between the radiator and your body. This device 
and its antenna(s) must not be co-located or 
operated in conjunction with any other antenna or 
transmitter.

Important Safety Instructions

Read these operating instructions carefully 
before using the unit. Follow all the safety 
instructions listed below. Keep these operating 
instructions handy for future reference.

1. 

Read these instructions.

2. 

Keep these Instructions.

3. 

Heed all warnings.

4. 

Follow all instructions.

5. 

Do not use this apparatus near water.

6. 

Clean only with dry cloth.

7. 

Do not block any ventilation openings.  
Install in accordance with the manufacturer’s 
instructions.

8. 

Do not install near any heat sources such as 
radiators, heat registers, stoves, or other 

apparatus (including amplifiers) that produce 

heat.

9. 

Do not defeat the safety purpose of the 
polarized or grounding-type plug.  
A polarized plug has two blades with one 
wider than the other. A grounding type plug 
has two blades and a third grounding prong. 
The wide blade or the third prong are 
provided for your safety. If the provided plug 

does not fit into your outlet, consult an 

electrician for replacement of the obsolete 
outlet.

Summary of Contents for Harman/Kardon HW-Q70R

Page 1: ...HW Q70R FULL MANUAL Imagine the possibilities Thank you for purchasing this Samsung product To receive more complete service please register your product at www samsung com register...

Page 2: ...is symbol instructs the user to consult the user manual for further safety related information WARNING To reduce the risk of fire or electric shock do not expose this appliance to rain or moisture To...

Page 3: ...and receiver Connecting the equipment to an outlet that is on a different circuit than the radio or TV Consulting the dealer or an experienced radio TV technician for help FCCRadiationExposureStatemen...

Page 4: ...ot covered Do not place the unit on amplifiers or other equipment which may become hot This unit is designed for continuous use To fully turn off the unit disconnect the AC plug from the wall outlet U...

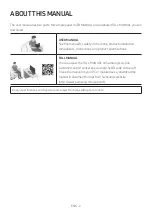
Page 5: ...ion components connections and product specifications FULLMANUAL You can access the FULL MANUAL on Samsung s on line customer support center by scanning the QR code on the left To see the manual on yo...

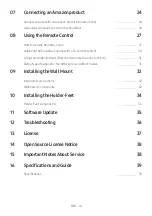
Page 6: ...fer if automatic connection fails 7 Connecting an SWA 8500S Sold Separately to your Soundbar 8 04 ConnectingtoyourTV 10 Method 1 Connecting with a Cable 10 Connecting a TV using an HDMI Cable 10 Conne...

Page 7: ...te control 30 Using the Hidden Buttons Buttons with more than one function 31 Output specifications for the different sound effect modes 31 09 InstallingtheWallMount 32 Installation Precautions 32 Wal...

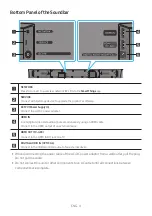
Page 8: ...duct Label Bottom of the Soundbar Main Unit The power components are labelled 1 2 For more information about power connections see page 5 To purchase additional components or optional cables contact a...

Page 9: ...n the following situations In D IN HDMI WIFI BT mode if there is no audio signal for 18 minutes Source Button Selects the source input mode Inputmode Display Optical Digital input D IN ARC HDMI OUT in...

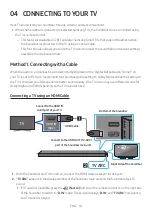
Page 10: ...udio signals simultaneously using an HDMI cable Connect to the HDMI output of an external device HDMIOUT TV ARC Connect to the HDMI ARC jack on a TV DIGITALAUDIOIN OPTICAL Connect to the digital optic...

Page 11: ...to the Subwoofer 2 Connect the power adapter to the Soundbar and then to a wall socket See the illustrations below For more information about the required electrical power and power consumption refer...

Page 12: ...ofer LED Status Description Resolution Blue On Successfully connected normal operation Blinking Recovering the connection Check if the power cable attached to the main Soundbar unit is connected prope...

Page 13: ...rns off and the blue indicator blinks 5 Sec RearofSubwoofer 2 Press and hold the Upbutton on the remote control for at least 5 seconds The IDSET message appears on the display of the Soundbar for a mo...

Page 14: ...a steel concrete or metallic wall is between the main unit and the wireless subwoofer the system may not operate at all because the wireless signal cannot penetrate metal PRECAUTIONS Wireless receivin...

Page 15: ...Sec 3 Press and hold the Upbutton on the remote control for at least 5 seconds The IDSET message appears on the display of the Soundbar for a moment and then it disappears The Soundbar will automatic...

Page 16: ...r TV is set to PCM we recommend that you change the setting to Dolby Digital When the setting on the TV is changed you will experience better sound quality The TV menu may use different words for Dolb...

Page 17: ...cable to the HDMI IN ARC port We recommend you use a coreless HDMI cable if possible If you use a cored HDMI cable use one whose diameter is less than 0 55 inches Anynet must be turned on This functi...

Page 18: ...of cabling Only one TV can be connected at a time SOUND MODE PAIR OR Theinitialconnection 1 Press the PAIR button on the remote control to enter the BTPAIRING mode OR a Press the Source button on the...

Page 19: ...y connected mobile device to the Soundbar BTPAIRING In this mode you can connect a new device to the Soundbar Press the PAIR button on the remote control or press and hold the Source button on the rig...

Page 20: ...e When using selected Samsung TVs 2016 2018 Samsung Smart TVs that support Bluetooth If you select WIFI mode when the TV is turned on the TV screen displays a pop up window providing instructions on h...

Page 21: ...r Q70R Wi Fi ForTVsreleasedin2016 Home Settings Sound Select Speaker AV Samsung Soundbar Q70R Wi Fi ForTVsreleasedin2015 Menu Sound Speaker List ForTVsreleasedin2014 Menu Sound Speaker Settings Multir...

Page 22: ...tant This product supports Dolby Atmos only in HDMI mode HDMI OUT HDMI IN ARC HDMICable HDMICable BottomoftheSoundbar HDMI ExternalDevice RightSideoftheSoundbar 1 Connect an HDMI cable from the HDMIIN...

Page 23: ...o is set to Off Make sure that the content supports DolbyAtmos ConnectingusinganHDMICable HDMI OUT HDMI IN ARC HDMICable HDMICable BottomoftheSoundbar HDMI ExternalDevice RightSideoftheSoundbar 1 Conn...

Page 24: ...N RightSideoftheSoundbar BD DVDplayer Set topbox Gameconsole 1 Connect DIGITALAUDIOIN OPTICAL on the main unit to the OPTICAL OUT jack of the Source Device using a digital optical cable not supplied 2...

Page 25: ...ooth device connected to the Soundbar b When BTREADY appears press and hold the Source button on the right side panel of the Soundbar for more than 5 seconds to display BTPAIRING 2 On your device sele...

Page 26: ...devices are simultaneously paired with the Soundbar If the Bluetooth device is turned off not in place or malfunctions Electronic devices may cause radio interference Devices that generate electromagn...

Page 27: ...etooth Bluetooth is a technology that enables Bluetooth compliant devices to interconnect easily with each other using a short wireless connection A Bluetooth device may cause noise or malfunction dep...

Page 28: ...sound mode To connect a Soundbar to a mobile device via a wireless network Wi Fi the SmartThings app is required RightSideoftheSoundbar Mobiledevice Theinitialconnection 1 Press the Source button on t...

Page 29: ...ete Adddevice from the app menu Your Soundbar is now added to the app Launch App Add speakers Auto pop up NOTE To connect an additional SWA 8500S wireless rear speaker kit not supplied disconnect the...

Page 30: ...zonEcho Use an Amazon Echo product to control your Soundbar and enjoy music services provided by Amazon Echo NOTE Confirm that the Soundbar is connected to Wi Fi Refer to Connecting via Wi Fi Wireless...

Page 31: ...ENG 25 2 In the Alexa app search SamsungWirelessAudio in Skills and then select ENABLE Skip this step if you have Skills set up already Select Skills Search Enable AmazonAlexa app...

Page 32: ...o the SmartThings account connected to the AmazonAlexa account AlexaDiscoverdevices TousevoicecommandsfortheSoundbarnamed Livingroom Action VoiceCommand To set the volume level to 5 AlexaSetthevolumet...

Page 33: ...d mode by choosing STANDARD SURROUND GAMEPRO or ADAPTIVESOUND Select the STANDARD mode if you want to enjoy the original sound GAMEPROmode Immerse yourself in the scene with a dedicated setting that o...

Page 34: ...or off Anynet and Auto Power Link are turned on and turned off by the Right and Left buttons respectively Anynet If the Soundbar is connected to a Samsung TV through an HDMI cable you can control you...

Page 35: ...ns If Surround Speakers are connected select REARLEVEL and then use the Up Down buttons to adjust the volume within a 6 to 6 range The VIRTUAL Speaker function can be turned ON OFF by using the Up Dow...

Page 36: ...N D B A R 5 Sec OFF TVREMOTE 3 If you want to control the Soundbar with your TV s remote push up and hold the WOOFER button for 5seconds repeatedly until ALL TVREMOTE appears in the display Then use y...

Page 37: ...thSubwooferOnly WithSubwoofer Wireless RearSpeakerKit STANDARD 2 0 ch 2 1 ch 2 1 ch 5 1 ch 3 1 ch 5 1 ch SURROUND 2 0 ch 3 1 2 ch 5 1 2 ch 5 1 ch 3 1 2 ch 5 1 2 ch GAME PRO 2 0 ch 3 1 2 ch 5 1 2 ch 5...

Page 38: ...unting screws according to the type and thickness of the wall you want to mount the Soundbar on Diameter M5 Length 1 3 8 inches or longer recommended Connect cables from the unit to external devices b...

Page 39: ...wall at each marking If the markings do not correspond to the positions of studs make sure you insert appropriate anchors or mollies into the holes before you insert the support screws If you use anc...

Page 40: ...Wall Mounts down so that the Bracket Wall Mounts rest securely on the Holder Screws 10 INSTALLINGTHE HOLDER FEET Holder FeetComponents x 2 x 2 Holder Foot AH81 09722A Holder Support AH81 09721A x 2 S...

Page 41: ...l Mount assembly on the bottom panel of the Soundbar 11 SOFTWARE UPDATE When the Soundbar is connected to the Internet software updates automatically occur even when the Soundbar is turned off To use...

Page 42: ...teries Isthedistancebetweentheremotecontroland Soundbarmainunittoofar Move the remote control closer to the Soundbar main unit TheredLEDonthesubwooferblinksand thesubwooferisnotproducingsound Thisissu...

Page 43: ...for details 13 LICENSE Manufactured under license from Dolby Laboratories Dolby Dolby Atmos Dolby Audio Dolby Digital Plus Pro Logic and the double D symbol are trademarks of Dolby Laboratories For DT...

Page 44: ...ngineer is called out to your home at your request and there is no defect in the product b You bring the unit to a repair center and there is no defect in the product You will be advised of the amount...

Page 45: ...403 0 mm AMPLIFIER Rated Output power 160W NOTES Samsung Electronics Co Ltd reserves the right to change the specifications without notice Weight and dimensions are approximate Dispose unwanted elect...

Page 46: ...service problems incorrect electrical line voltage fluctuations and surges customer adjustments and failure to follow operating instructions cleaning maintenance and environmental instructions that ar...

Page 47: ...rights reserved QUESTIONS OR COMMENTS COUNTRY IN THE US 1 800 SAMSUNG 726 7864 www samsung com us support Samsung Electronics America Inc 85 Challenger Road Ridge eld Park NJ 07660 CALL OR VISIT US ON...

Reviews: