Samsung EC-ST65ZZBPUUS User Manual Download Page 28

Extended functions

  27

Shooting modes

Take photos or record videos by selecting the best shooting mode for the conditions.

Icon

Description

Appears when taking photos of landscapes at night. 
This is available only when the flash is off.
Appears when taking portraits at night.
Appears when taking photos of landscapes with 
backlighting.
Appears when taking portraits with backlighting.

Appears when taking portraits.

Appears when taking close-up photos of objects.

Appears when taking close-up photos of text.

Appears when taking photos of sunsets.

Appears when taking photos of clear skies.

Appears when taking photos of forested areas.
Appears when taking close-up photos of colorful 
subjects.
Appears when the camera is stable (on a tripod, for 
example) and the subject is motionless for a period 
of time. This is available only when you are shooting 
in the dark.
Appears when taking photos of actively moving 
subjects.

Using the Smart Auto mode

In this mode, your camera automatically chooses the appropriate 
camera settings based on the type of scene it defects.  
Smart Auto Mode is helpful if you are not familiar with the camera 
settings for various scenes.

In Shooting mode, press [

].

Select 

Smart Auto

.

Align your subject in the frame.

• 

The camera selects a scene automatically. An appropriate 
scene mode icon appears at the top left of the screen. The 
icons are listed below.
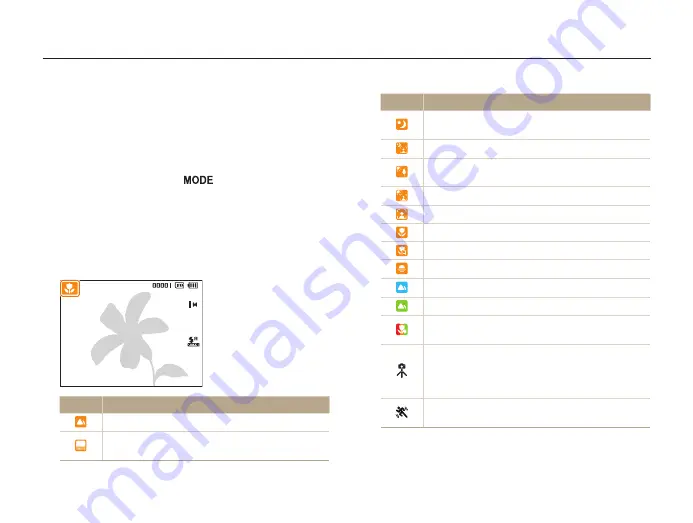
Icon

Description

Appears when taking photos of landscapes.
Appears when taking photos with bright white 
backgrounds.

Summary of Contents for EC-ST65ZZBPUUS

Page 1: ... instructions for your camera Please read this manual thoroughly Basic troubleshooting Quick reference Contents Basic functions Extended functions Shooting options Playback Editing Settings Appendixes Index User Manual ST65 ST67 Click a topic ...

Page 2: ...mity closer than 1 m 3 ft to people or animals If you use the flash too close to your subject s eyes this can cause temporary or permanent eyesight damage Keep your camera away from small children and pets Keep your camera and all accessories out of the reach of small children and animals Small parts may cause choking or serious injury if swallowed Moving parts and accessories may present physical...

Page 3: ... or cause injury Samsung is not responsible for damages or injuries caused by unapproved batteries chargers cables or accessories Do not use batteries for unintended purposes This may cause a fire or electric shock Do not touch the flash while it fires The flash is very hot when fired and may burn your skin When you use AC charger turn off the camera before you disconnect the power to the AC charg...

Page 4: ... the camera case Information stored on the card may be damaged or erased Never use a damaged charger battery or memory card This may result in electric shock or camera malfunction or cause a fire Check that the camera is operating properly before use The manufacturer takes no responsibility for any loss of files or damages that may result from camera malfunction or improper use You must plug the e...

Page 5: ...ut prior permission For Open Source License information refer to the OpenSourceInfo pdf in the provided CD ROM Organization of the user manual Basic functions 11 Learn about your camera s layout icons and basic functions for shooting Extended functions 26 Learn how to take a photo by selecting a mode and how to record a video or voice memo Shooting options 35 Learn about the options you can set in...

Page 6: ...ngs and precautions Camera buttons for example Shutter represents the shutter button Page number of related information The order of options or menus you must select to perform a step For example Select Shooting White Balance represents select Shooting and then select White Balance Annotation Abbreviations used in this manual Abbreviation Definition ACB Auto Contrast Balance AEB Auto Exposure Brac...

Page 7: ...nimal or still life Background the objects around the subject Composition the combination of a subject and background Background Subject Composition Exposure Brightness The amount of light that enters your camera determines the exposure You can alter the exposure with shutter speed aperture value and ISO speed By altering the exposure your photos will be darker or lighter Normal exposure Overexpos...

Page 8: ...ay down to make sure the subject is focused p 24 Use the mode p 31 Photos are blurred when shooting at night As the camera tries to let in more light the shutter speed slows This can make it difficult to steady the camera and may result in camera shake Turn on the flash p 38 Set ISO speed options p 39 Use a tripod to prevent your camera from shaking Select Night in the mode p 30 Subjects come out ...

Page 9: ...e brightness EV to adjust exposure 46 ACB to compensate for subjects against bright backgrounds 46 Metering 47 AEB to take three photos of the same scene with different exposures 49 Applying a different effect Photo styles to apply tones 50 Smart filter effects 51 Image adjustment to adjust saturation sharpness or contrast 52 Reducing camera shake mode 31 Viewing files by category in Smart Album 5...

Page 10: ...ing for backlighting ACB 46 Changing the metering option 47 Selecting a light source White balance 47 Using burst modes 49 Improving your photos 50 Basic functions 11 Unpacking 12 Camera layout 13 Inserting the battery and memory card 15 Charging the battery and turning your camera on 16 Charging the battery 16 Turning on your camera 16 Performing the initial setup 17 Learning icons 18 Selecting o...

Page 11: ...ng files to your Windows computer 68 Transferring files using Intelli studio 70 Transferring files by connecting the camera as a removable disk 72 Disconnecting the camera for Windows XP 73 Transferring files to your Mac computer 74 Printing photos with a PictBridge photo printer 75 Settings 76 Camera settings menu 77 Accessing the settings menu 77 Sound 78 Display 78 Settings 79 Appendixes 82 Err...

Page 12: ...tery 16 Turning on your camera 16 Performing the initial setup 17 Learning icons 18 Selecting options 19 Setting the display and sound 21 Changing the display type 21 Setting the sound 21 Taking photos 22 Zooming 23 Tips for getting a clearer photo 24 Basic functions Learn about your camera s layout icons and basic functions for shooting ...

Page 13: ... the following items Optional accessories Camera case Memory card Memory card adapter A V cable Battery charger Camera AC adapter USB cable Rechargeable battery Strap User Manual CD ROM Quick Start Manual The illustrations may differ from your actual items ...

Page 14: ...unctions Battery chamber cover Insert a memory card and battery Tripod mount Speaker Shutter button POWER button AF assist light timer lamp Flash Lens Microphone Zoom button Zoom in or out in Shooting mode Zoom in on part of a photo or view files as thumbnails in Playback mode Adjust volume in Playback mode ...

Page 15: ... Button Description Access options or menus Navigation In Shooting mode While setting Change the display option Move up Change the macro option Move down Change the flash option Move left Change the timer option Move right Confirm the highlighted option or menu Playback Enter Playback mode Function Access options in Shooting mode Delete files in Playback mode Status lamp Blinking When the camera i...

Page 16: ...ull it out of the slot Push the lock up to release the battery You can use the internal memory as a temporary storage device when the memory card is not inserted Insert a memory card in the correct direction Inserting a memory card in the wrong direction may damage your camera and memory card Memory card Battery Battery lock Insert a memory card with the gold colored contacts facing up Insert the ...

Page 17: ...layback mode Press The camera turns on and accesses Playback mode immediately When you turn on your camera by pressing and holding for about 5 seconds the camera does not emit any camera sounds Charging the battery Before using the camera for the first time you must charge the battery Attach the USB cable to the AC adapter and then plug the end of cable with the indicator light into your camera In...

Page 18: ...anguage and press or 3 Press or to select a language and press 4 Press or to scroll to Time Zone and press or 5 Press or to select a time zone and press To set the daylight saving time press 6 Press or to select Date Time Set and press or 7 Press or to select an item 8 Press or to set the date and time and press 9 Press or to select Date Type and press or 10 Press or to select a date format and pr...

Page 19: ... displayed will change according to the mode you select or the options you set Icon Description Auto focus frame Camera shake Zoom ratio Current date and time B Icons on the right Icon Description Photo resolution Video resolution Frame rate Photo quality Metering option Flash option Timer option Auto focus option Face detection A Information Icon Description Selected shooting mode Available numbe...

Page 20: ...ng but some options are not available Going back to the previous menu Press again to go back to the previous menu Half press Shutter to return to the Shooting mode 1 In Shooting mode press 2 Use the navigation buttons to scroll to an option or menu To move up or down press or To move left or right press or 3 Press to confirm the highlighted option or menu ...

Page 21: ...light Back Move 7 Press Example Selecting a White Balance option in the P mode 1 In Shooting mode press 2 Press or to scroll to Program and then press Smart Auto Program DIS Scene Movie This mode allows you to directly set various features for shooting 3 Press Shooting Sound Display Settings Photo Size Quality EV ISO White Balance Face Detection Focus Area Exit Change 4 Press or to scroll to Shoot...

Page 22: ...select Changing the display type Select a display type for Shooting or Playback mode Each type displays different shooting or playback information Press repeatedly to change a display type Show all photographic information Modes Display Type Choices Shooting Display all information about shooting Hide information about shooting except the available number of photos or available recording time and ...

Page 23: ...r to scroll to Smart Auto and then press Smart Auto Program DIS Scene Movie This mode recognizes the scene automatically 3 Align your subject in the frame 4 Half press Shutter to focus A green frame means the subject in focus A red frame means the subject is out of focus 5 Press Shutter to take a photo See page 24 for tips to get clearer photos ...

Page 24: ... The Digital zoom is not available with the Face Detection options Smart Filter effect or Tracking AF option It may take longer to save a photo when you are using the digital zoom Zooming You can shoot close up photos by adjusting the zoom Your camera has a 5X optical zoom and 3X digital zoom By using both you can zoom in up to 15 times Rotate Zoom right to zoom in on your subject Rotate Zoom left...

Page 25: ...ally Focus frame Press Shutter to take the photo if the focus frame appears in green Change the composition and half press Shutter again if the focus frame appears in red Reducing camera shake Select the mode to reduce camera shake digitally p 31 When is displayed Camera shake When shooting in the dark avoid setting the flash option to Slow Sync or Off The aperture remains open longer and it may b...

Page 26: ...nd the subject is too bright the subject is shiny or reflective the subject includes horizontal patterns such as blinds the subject is not positioned in the center of the frame Use the focus lock Half press Shutter to focus When the subject is in focus you can reposition the frame to change the composition When you are ready press Shutter to take your photo When you take photos in low light Turn o...

Page 27: ...ing the frame guide 30 Using the Night mode 30 Using the DIS mode 31 Using the Program mode 32 Recording a video 32 Recording voice memos 34 Recording a voice memo 34 Adding a voice memo to a photo 34 Extended functions Learn how to take a photo by selecting a mode and how to record a video or voice memo ...

Page 28: ...en taking close up photos of colorful subjects Appears when the camera is stable on a tripod for example and the subject is motionless for a period of time This is available only when you are shooting in the dark Appears when taking photos of actively moving subjects Using the Smart Auto mode In this mode your camera automatically chooses the appropriate camera settings based on the type of scene ...

Page 29: ... 3 Align your subject in the frame and then half press Shutter to focus 4 Press Shutter to take the photo 4 Half press Shutter to focus 5 Press Shutter to take the photo If the camera does not recognize a proper scene mode appears and the camera uses default settings Even if it detects a face the camera may not select a portrait mode depending on the subject s position or lighting The camera may n...

Page 30: ...s distance will be set to Auto Macro Using the Beauty Shot mode Take a photo of a person with options to hide facial imperfections 1 In Shooting mode press 2 Select Scene Beauty Shot 3 To make the subject s skin tone appear lighter face only press and then go to Step 4 To hide facial imperfections press and then go to Step 5 4 Select Shooting Face Tone an option Select a higher setting to make ski...

Page 31: ... to prevent overexposure 1 In Shooting mode press 2 Select Scene Night 3 Press 4 Select Shooting Long Time Shutter Using the frame guide When you want another person to take a photo of you you can compose the scene with the frame guide feature The frame guide helps the other person take a photo of you by showing part of the pre composed scene 1 In Shooting mode press 2 Select Scene Frame Guide 3 A...

Page 32: ...does not work in this mode If your subject is moving rapidly the photo may be blurry The DIS function may not work where the lighting is brighter than that of a fluorescent lamp 5 Select the aperture value or shutter speed Aperture Auto Auto Back Move Aperture value Shutter speed 6 Select an option If you select Auto the camera adjusts the aperture value or shutter speed automatically 7 Align your...

Page 33: ... per second As the frame rate increases action appears more natural but the file size also increases 60 FPS is available only when you set the video resolution to 320 X 240 The zoom ratio and angle of view might decrease when shooting video 24 FPS is available only when you set the video resolution to 1280 X 720 HQ Using the Program mode In the Program mode you can set various options except the s...

Page 34: ...Record a video with sound Off Record a video without sound Zoom Mute The camera stops recording sound temporarily when you use the zoom 7 Press 8 Select Movie Stabilizer a stabilizer option Option Description Off Record a video with the image stabilization function turned off On Record a video with the image stabilization function turned on to prevent your video from blurring 9 Set other options a...

Page 35: ...d then take a photo Begin recording the voice memo right after taking the photo 4 Record a short voice memo 10 seconds maximum Press Shutter to stop recording a voice memo before the 10 seconds are up You cannot add voice memos to photos if you set Continuous Motion Capture or AEB options Recording a voice memo 1 In Shooting mode press 2 Select Shooting Voice Record 3 Press Shutter to record You c...

Page 36: ...us area 42 Using face detection 43 Detecting faces 43 Taking a self portrait shot 44 Taking a smile shot 44 Detecting eye blinking 45 Adjusting brightness and color 46 Adjusting the exposure manually EV 46 Compensating for backlighting ACB 46 Changing the metering option 47 Selecting a light source White balance 47 Using burst modes 49 Improving your photos 50 Applying photo styles 50 Applying sma...

Page 37: ...e photos in normal quality The options may differ depending on the shooting mode Selecting a resolution As you increase the resolution your photo or video will include more pixels so it can be printed on larger paper or displayed on a larger screen When you use a high resolution the file size also increases When taking a photo 1 In Shooting mode press 2 Select Shooting Photo Size an option Option ...

Page 38: ...he face detection option you have selected the timer function or some timer options may not be available When you set burst options you cannot use the timer function 1 In Shooting mode press Off 2 Select an option Option Description Off The timer is not active 10 Sec Takes a photo in 10 seconds 2 Sec Takes a photo in 2 seconds Double Takes a photo in 10 seconds and then takes another 2 seconds lat...

Page 39: ...elect an option Option Description Off The flash does not fire The camera displays the camera shake warning when you are shooting in low light Auto The camera selects a proper flash setting for the scene it detects in the mode Preventing red eye If the flash fires when you take a photo of a person in the dark a red glow may appear in the person s eyes To prevent this select Red eye or Red eye Fix ...

Page 40: ... lighting The higher ISO speed you select the more image noise you may get When you select Motion Capture the camera sets the ISO speed to Auto When the is selected the image size is fixed to under 5M Option Description Red eye Fix The flash fires twice when the subject or background is dark The subject should not move until the flash fires a second time The camera corrects red eyes through its ad...

Page 41: ...39 in 100 cm when using the zoom Macro Focus on a subject 2 to 32 in 5 80 cm from the camera 39 in to 59 in 100 cm 150 cm when using the zoom Auto Macro Focus on a subject farther than 2 in 5 cm Farther than 39 in 100 cm when using the zoom The options may differ depending on the shooting mode Using macro Use macro to take close up photos of subjects such as flowers or insects Refer to macro optio...

Page 42: ...st reselect the subject to track If the camera fails to fix the focus the focus frame changes to a red single line frame If you use this function you cannot set self timer options Face Detection options Photo Style options and Smart Filter options Using tracking auto focus Tracking AF allows you to track and auto focus on your subject even when you are moving 1 In Shooting mode press 2 Select Shoo...

Page 43: ...o your subject s location in the scene 1 In Shooting mode press 2 Select Shooting Focus Area an option Option Description Center AF Focus on the center Suitable when subjects are located in the center Multi AF Focus on one or more of 9 possible areas Tracking AF Focus on and track the subject p 41 The options may differ depending on the shooting mode ...

Page 44: ...mera detects faces In some scene modes face detection is unavailable Face detection may not be effective when the subject is far from the camera The focus frame will appear orange for Smile Shot and Blink Detection it is too bright or too dark the subject is not facing the camera the subject is wearing sunglasses or a mask the subject is in backlit or the lighting condition is unstable the subject...

Page 45: ...y your camera can detect the smile more easily Taking a self portrait shot Take photos of yourself The camera automatically sets the photo distance to close up and emits a beep when ready When faces are located in the center the camera beeps rapidly 1 In Shooting mode press 2 Select Shooting Face Detection Self Portrait 3 When you hear a beep press Shutter If you turn Volume off in the sound setti...

Page 46: ...ed eyes it automatically takes two photos in succession 1 In Shooting mode press 2 Select Shooting Face Detection Blink Detection Hold your camera still while Capturing is displayed on the screen When blink detection fails the Picture taken with eyes closed message appears Take another photo ...

Page 47: ...eature is not available when you set Continuous Motion Capture AEB options Adjusting the exposure manually EV Depending on the intensity of the ambient light your photos may be too bright or dark In these cases you can adjust the exposure to get a better photo Darker Neutral 0 Brighter 1 In Shooting mode press 2 Select Shooting or Movie EV 3 Select a value to adjust the exposure Once you adjust th...

Page 48: ...s and lighting of your photos will vary depending on the metering mode you select 1 In Shooting mode press 2 Select Shooting or Movie Metering an option Option Description Multi Your camera divides the scene into several areas and then measures the light intensity of each area Suitable for general photos Spot Your camera measures only the light intensity of the very center of the frame If a subjec...

Page 49: ...B Automatically sets the white balance based on the lighting conditions Daylight Select when taking outdoor photos on a sunny day Cloudy Select when taking outdoor photos on a cloudy day or in shadows Fluorescent_H Select when shooting under a daylight fluorescent or three way fluorescent light Fluorescent_L Select when shooting under white fluorescent light Tungsten Select when taking indoor phot...

Page 50: ...SO speed is set to Auto Depending on the face detection option you selected some burst options are not available 1 In Shooting mode press 2 Select Shooting Drive an option Option Description Single Take a single photo Continuous While you are pressing Shutter the camera takes photos continuously Maximum of 3 photos Motion Capture While you are pressing Shutter the camera takes VGA photos 6 photos ...

Page 51: ...ector Custom RGB 3 Select a color R Red G Green B Blue Back Move 4 Adjust the amount of the selected color less or more Applying photo styles Apply a different photo style to your photos such as Soft Vivid or Forest Soft Vivid Forest 1 In Shooting mode press 2 Select Shooting or Movie Photo Style Selector an option Select Custom RGB to define your own RGB tone If you apply photo styles you cannot ...

Page 52: ...king colors high contrast and strong vignette effect of Lomo cameras Fish eye Distort close objects to imitate the visual effect of a fisheye lens Sketch Apply a pen sketch effect Defog Make a photo clearer If you select Miniature when you are recording a video the camera will not record sound When you apply a smart filter effect while you are recording a video the recording speed will be set to a...

Page 53: ...st sharpness and saturation of your photos 1 In Shooting mode press 2 Select Shooting Image Adjust 3 Select an adjustment option Contrast Sharpness Saturation 4 Select a value to adjust the selected item Contrast option Description Decrease the color and brightness Increase the color and brightness Sharpness option Description Soften the edges on your photos Suitable for editing the photos on your...

Page 54: ...wing files on a TV 67 Transferring files to your Windows computer 68 Transferring files using Intelli studio 70 Transferring files by connecting the camera as a removable disk 72 Disconnecting the camera for Windows XP 73 Transferring files to your Mac computer 74 Printing photos with a PictBridge photo printer 75 Playback Editing Learn how to play back photos videos or voice memos and edit photos...

Page 55: ... screen press Starting Playback mode View photos or play videos and voice memos stored in your camera 1 Press The most recent file will be displayed If the camera is off it will turn on and display the most recent file 2 Press or to scroll through files Press and hold to scroll through files quickly If you want to view files stored in the internal memory remove your memory card The camera will not...

Page 56: ...r week 1 In Playback mode rotate Zoom left 2 Press 3 Select a category Type Date Color Week Back Set Option Description Type View files by file type Date View files by the date they were saved Color View files by the dominant color of the image Week View files by the weekday they were saved When selecting Color Etc is shown if color is not extracted It may take some time for the camera to open Sma...

Page 57: ...o protect and then press Press again to cancel your selection Select Set Protected file 5 Repeat Step 4 to protect additional files individually 6 Press You cannot delete or rotate a protected file Viewing files as thumbnails Scan thumbnails of files In Playback mode rotate Zoom left to display 9 or 20 thumbnails Rotate Zoom right to return to the previous mode Filter To Do this Scroll through fil...

Page 58: ...ingle files or all files at once You cannot delete protected files To delete a single file 1 In Playback mode select a file and then press 2 Select Yes to delete the file To delete multiple files 1 In Playback mode press 2 Select Multiple Delete 3 Select the files you want to delete and then press Press again to cancel your selection 4 Press 5 Select Yes To delete all files 1 In Playback mode pres...

Page 59: ... show Select View selected photos in a slide show Interval Set the interval between photos This is available when you select Off in the Effect option See below Music Select a background audio Effect Select a transition effect Select Off for no effects Viewing photos Zoom in on part of a photo or view photos in a slide show Enlarging a photo In Playback mode rotate Zoom right to enlarge a photo Rot...

Page 60: ...n press Pause 2 Use the following buttons to control playback Press To Scan backward Pause or resume playback Scan forward Zoom left or right Adjust the volume level 4 Set the slide show effect 5 Select Start Play To loop the slide show select Repeat Press to pause or resume the slide show To stop the slide show and switch to Playback mode press and then or ...

Page 61: ...ng playback 1 Press at the point where you want the new video to begin and then rotate Zoom right 2 Press to resume playback 3 Press at the point where you want the new video to end and then rotate Zoom right 4 Select Yes The original video must be at least 10 seconds long The camera saves the edited video as a new file Capturing an image during playback 1 Press at the point where you want to save...

Page 62: ...le Options Voice memo On 3 Press Shutter to record a short voice memo 10 seconds maximum Press Shutter to stop recording a voice memo You cannot add a voice memo to protected files Playing a voice memo added to a photo In Playback mode select a photo that includes a voice memo and then press Press to pause or resume playback ...

Page 63: ...at you rotate or resize manually are not automatically converted to a lower resolution Rotating a photo 1 In Playback mode select a photo and then press 2 Select Edit Rotate an option Back Right 90 Move The rotated photo will be saved as the same file not a new file Resizing photos 1 In Playback mode select a photo and then press 2 Select Edit Resize an option Select to save the photo as a start i...

Page 64: ...ect a color R Red G Green B Blue Back Move 4 Adjust the amount of the selected color less or more Applying photo styles Apply a different photo style to the photo such as Soft Vivid or Forest Soft Vivid Forest 1 In Playback mode select a photo and then press 2 Select Edit Photo Style Selector an option Select Custom RGB to define your own RGB tone Back Soft Move ...

Page 65: ...lying smart filter effects Apply various filter effects to your photos to create unique images Miniature Vignetting Fish eye Sketch 1 In Playback mode select a photo and press 2 Select Edit Smart Filter 3 Select an effect Back Move Miniature ...

Page 66: ... press 2 Select Edit Image Adjust Red eye Fix Hiding facial imperfections 1 In Playback mode select a photo and then press 2 Select Edit Image Adjust Face Retouch 3 Select a level As the number increases the face becomes clearer Adjusting brightness contrast saturation 1 In Playback mode select a photo and then press 2 Select Edit Image Adjust 3 Select an adjustment option Brightness Contrast Satu...

Page 67: ...atible printers Creating a print order DPOF Select photos to be printed and set options such as the number of copies or paper size You can take the memory card to a print shop that supports DPOF Digital Print Order Format or you can print photos directly through a DPOF compatible printer at home Wide photos may print with the left and right edges cut off so be aware of the dimensions of your photo...

Page 68: ... can capture photos or videos while the camera is connected to a TV 1 In Shooting or Playback mode press 2 Select Settings Video Out 3 Select a video signal output according to your country or region 4 Turn off your camera and TV 5 Connect your camera to your TV using the A V cable Video Audio 6 Turn on your TV and then select the video output mode using the TV remote control 7 Turn on your camera...

Page 69: ...the computer as a removable disk Using a self assembled PC or a PC and OS that are not supported may void your warranty Requirements for Intelli studio Item Requirements CPU Intel Pentium 4 3 2 GHz or higher AMD Athlon FX 2 6 GHz or higher RAM Minimum 512 MB RAM 1 GB and above recommended OS Windows XP SP2 Vista 7 Hard disk capacity 250 MB or more 1 GB or more recommended Others CD ROM drive nVIDI...

Page 70: ...ert the installation CD in a compatible CD ROM drive 2 When the setup screen is appears click Samsung Digital Camera Installer to start installation 3 Select the programs to install and then follow the onscreen instructions 4 Click Exit to complete the installation and then restart your computer ...

Page 71: ...e is reversed it may damage your files The manufacturer is not responsible for any loss of data The battery charges while the camera is connected to a computer with the USB cable 3 Run Intelli studio on your computer 4 Turn on the camera The computer recognizes the camera automatically If the camera fails to connect a pop up window will appear Select Computer 5 Select a folder on your computer to s...

Page 72: ...oy more features such as creating slide shows with templates install the full version of Intelli studio by selecting Web Support Update Intelli studio Start Update from the program toolbar You cannot edit files directly on the camera Transfer files to a folder on your computer before editing Intelli studio supports the following formats Videos MP4 Video H 264 Audio AAC WMV WMV 7 8 9 AVI MJPEG Phot...

Page 73: ... menus 2 Display files in the selected folder 3 Change to the Photo edit mode 4 Change to the Video edit mode 5 Change to the Sharing mode You can send files by email or upload files to websites such as Flickr or YouTube 6 Enlarge or reduce the thumbnails in the list 7 Select a file type 8 View files of the selected folder on your computer 9 Show or hide files of the connected camera 10 View files...

Page 74: ...u want and drag or save them to your computer Disconnecting the camera for Windows XP The way to disconnect the USB cable for Windows Vista 7 is similar 1 If the status lamp on your camera is blinking wait until it stops 2 Click on the tool bar at the bottom right of your PC screen 3 Click the pop up message 4 Click the message box indicating safely removed 5 Remove the USB cable The camera may no...

Page 75: ... The computer recognizes the camera automatically and displays a removable disk icon If the camera fails to connect a pop up window will appear Select Computer 4 Double click the removable disk icon 5 Transfer photos or videos to the computer 1 Turn off the camera 2 Connect your camera to a Macintosh computer with the USB cable You must plug the end of the cable with the indicator light into your ...

Page 76: ... thumbnail prints Type Select the type of paper Quality Set the printing quality Date Set to print the date File Name Set to print the name of the file Reset Reset the print options Some options are not supported by some printers 1 In Shooting or Playback mode press 2 Select Settings USB 3 Select Printer 4 With the printer on connect your camera to the printer with the USB cable 5 Turn on your cam...

Page 77: ...Camera settings menu 77 Accessing the settings menu 77 Sound 78 Display 78 Settings 79 Settings Refer to options to configure your camera s settings ...

Page 78: ...revious screen Accessing the settings menu 1 In Shooting or Playback mode press 2 Select a menu Shooting Sound Display Settings Exit Change Volume Start Sound Shutter Sound Beep Sound AF Sound Menu Description Sound Set various camera sounds and the volume p 78 Display Customize the display settings such as start image and brightness p 78 Settings Change the settings for the camera system such as ...

Page 79: ...rightness Adjust the brightness of the screen Auto Dark Normal Bright Normal is fixed in Playback mode even if you have selected Auto Quick View Set the duration for reviewing a captured image before returning to the Shooting mode Off 0 5 sec 1 sec 3 sec Sound Default Item Description Volume Adjust the volume of any sound Off Low Medium High Start Sound Select the sound the camera emits when you t...

Page 80: ...ons Date and time language and video output settings are not reset Yes No Language Select a language for the display text Time Zone Select a region and set the daylight saving time DST Date Time Set Set the date and time Date Type Select a date format YYYY MM DD MM DD YYYY DD MM YYYY Off Item Description Power Save If you perform no operations for 30 seconds the camera automatically switches to Po...

Page 81: ...USA Canada Japan Korea Taiwan Mexico PAL supports only BDGHI Australia Austria Belgium China Denmark Finland Germany England Italy Kuwait Malaysia New Zealand Singapore Spain Sweden Switzerland Thailand Norway Item Description File No Specify how to name files Reset Set the file number to start from 0001 when inserting a new memory card formatting a memory card or deleting all files Series Set the...

Page 82: ...ion to use when you connect the camera to a computer or printer using a USB cable Auto Set your camera to select a USB mode automatically Computer Connect your camera to a computer for transferring files Printer Connect your camera to a printer for printing files Default ...

Page 83: ... camera 84 Using or storing the camera 85 About memory cards 86 About the battery 88 Before contacting a service center 92 Camera specifications 95 Glossary 99 FCC notice 103 Index 104 Appendixes Refer to error messages specifications and maintenance tips ...

Page 84: ...ry card is not compatible with your camera Insert a microSD microSDHC memory card DCF Full Error File names do not match the DCF standard Transfer the files on the memory card to your computer and then format the card p 79 File Error Delete the damaged file or contact a Samsung service center Low Battery Insert a charged battery or recharge the battery Memory Full Delete unnecessary files or inser...

Page 85: ...ns can damage the camera or cause it to malfunction Do not press on the lens cover or use a blower brush on the lens cover Cleaning your camera Camera lens and display Use a blower brush to remove dust and then wipe the lens gently with a soft cloth If any dust remains apply lens cleaning liquid to a piece of lens cleaning paper and then wipe gently ...

Page 86: ...othballs Using on beaches or shores Protect your camera from sand and dirt when you use it on beaches or in other similar areas Your camera is not waterproof Do not handle the battery adapter or memory card with wet hands Operating the camera with wet hands may cause damage to your camera Storing for extended period of time When you store the camera for an extended period place it in a sealed cont...

Page 87: ... and should not affect your camera s lifespan or performance When you use the camera in low temperatures it may take some time to turn on the color may be changed temporarily or after images may appear These conditions are not malfunctions and they will correct themselves when the camera is returned to normal temperatures Paint or metal on the outside of the camera may cause allergies itchy skin e...

Page 88: ...ive substances Prevent memory cards from making contact with liquids dirt or foreign substances If dirty wipe the memory card clean with a soft cloth before you insert the memory card in your camera Do not allow liquids dirt or foreign substances to come in contact with memory cards or the memory card slot Doing so may cause memory cards or the camera to malfunction When you carry a memory card us...

Page 89: ...longer Battery life Average shooting time Number of photos Shooting conditions when the battery was fully charged Photos Approximately 90 min Approximately 180 The battery life was measured under the following conditions in the mode 14M resolution and Fine quality Test Procedure 1 Set the flash option to Off take a single shot and zoom in or out 2 Set the flash option to Fill in take a single shot...

Page 90: ...n external power source while the battery is depleted using some high energy consuming functions will cause the camera to turn off To use the camera normally recharge the battery The battery cannot be recharged when the temperature is below 0 ºC or above 40 ºC Low battery message When the battery charge has fully discharged the battery icon will turn red and the Low Battery message will appear Not...

Page 91: ...e cable from your camera Do not bend or place heavy objects on the AC cable Doing so may damage the cable Notes about charging with a computer connected Use only the provided USB cable The battery may not charge when you use a USB hub other USB devices are connected to your computer you connect the cable to the port on the front side of your computer the USB port of your computer does not support ...

Page 92: ...sly or improperly For your safety follow these instructions for proper battery handling The battery can ignite or explode if not handled properly If you notice any deformities cracks or other abnormalities in the battery immediately discontinue use of the battery and contact a service center Use only authentic manufacturer recommend battery chargers and adapters and charge the battery only by the ...

Page 93: ...heats up While you use the camera it may heat up This is normal and should not affect your camera s lifespan or performance The flash does not work The flash option may be set to Off p 38 You cannot use the flash in some modes The flash fires unexpectedly The flash may fire due to static electricity This is not a malfunction Situation Suggested remedies Cannot turn on the camera Make sure that the...

Page 94: ...r disconnects the camera while transferring files The file transmission may be interrupted by static electricity Disconnect the USB cable and connect it again Situation Suggested remedies The date and time are incorrect Set the date and time in the display settings menu p 79 The display or buttons do not work Remove the battery and insert it again The camera screen works poorly If you use your cam...

Page 95: ... files play on your computer install and use the Intelli studio p 71 Make sure that the USB cable is connected correctly Intelli studio is not functioning properly End Intelli studio and restart the program You cannot use Intelli studio on Macintosh computers Depending on your computer s specification and environments the program may not launch automatically In this case click Start My Computer In...

Page 96: ...pending on battery condition Shake reduction Digital Image Stabilization DIS Image sensor Type 1 2 3 Approx 7 76 mm CCD Effective pixels Approx 14 22 mega pixels Total pixels Approx 14 54 mega pixels Lens Focal length Samsung 5X Zoom Lens f 4 9 24 5 mm 35 mm film equivalent 27 135 mm F stop range F3 5 W F5 9 T Digital zoom Still image mode 1 0X 3 0X Play mode 1 0X 13 5X depending on image size Dis...

Page 97: ...ignetting Fish Eye Sketch Defog Image Adjust ACB Red eye Fix Face Retouch Brightness Contrast Saturation Add Noise Effect Shooting mode Photo Style Selector Normal Soft Vivid Forest Retro Cool Calm Classic Negative Custom RGB Smart Filter Normal Miniature Vignetting Fish Eye Sketch Defog Image Adjust Sharpness Contrast Saturation White Balance Auto WB Daylight Cloudy Fluorescent_H Fluorescent_L Tu...

Page 98: ...nding on shooting conditions and camera settings Interface Digital output connector USB 2 0 Audio output Mono Internal speaker Mono Microphone Video output NTSC PAL selectable DC power input connector 4 2 V Voice recording Voice Recording Max 10 hours Voice Memo in a photo Max 10 sec Storage Media Internal memory Approx 19 MB External memory Optional microSD card up to 2 GB guaranteed microSDHC ca...

Page 99: ...nnector Type 20 pin USB AV out The power source may differ depending on your region Dimensions W x H x D 92 4 55 6 17 0 mm excluding protrusions Weight 110 g without battery and memory card Operating temperature 0 40 C Operating humidity 5 85 Software Intelli studio Specifications are subject to change without prior notice ...

Page 100: ...ally abiding by the rule of thirds leads to a good composition DCF Design rule for Camera File system A specification to define a file format and file system for digital cameras created by the Japan Electronics and Information Technology Industries Association JEITA Depth of field The distance between the nearest and farthest points that can be acceptably focused in a photograph Depth of field var...

Page 101: ...nsor The physical part of a digital camera that contains a photosite for each pixel in the image Each photosite records the brightness of the light that strikes it during an exposure Common sensor types are CCD Charge coupled Device and CMOS Complementary Metal Oxide Semiconductor ISO sensitivity The sensitivity of the camera to light based on the equivalent film speed used in a film camera At hig...

Page 102: ... present in a digital image High resolution images contain more pixels and typically show more detail than low resolution images Shutter speed Shutter speed refers to the amount of time it takes to open and close the shutter and it is an important factor in the brightness of a photo as it controls the amount of light which pass through the aperture before it reaches the image sensor A fast shutter...

Page 103: ...ons of the purchase contract This product and its electronic accessories should not be mixed with other commercial wastes for disposal Correct disposal of batteries in this product Applicable in the European Union and other European countries with separate battery return systems This marking on the battery manual or packaging indicates that the batteries in this product should not be disposed of w...

Page 104: ... one or more of the following measures Reorientate or relocate the receiving antenna Increase the distance between the equipment and receiver Connect the equipment into an outlet on a circuit different from that to which the receiver is connected Consult the dealer or an experienced radio TV technician for help CAUTION Changes or modifications not expressly approved by the manufacturer responsible...

Page 105: ...nlarging 58 Error messages 83 Exposure 46 F Face detection Blink Detection 45 Normal 43 Self Portrait 44 Smile Shot 44 Specifications 88 Beauty Shot mode 29 Blink detection 45 Burst Auto Exposure Bracket AEB 49 Continuous 49 Motion capture 49 C Camera shake 24 Capturing an image from a video 60 Cleaning Body 84 Display 84 Lens 84 D Date Time Set 79 Date Type 79 Deleting files 57 A ACB in Playback ...

Page 106: ...ctbridge 75 Playback button 16 Playback mode 54 Printing photos 75 Print order 66 Program mode 32 Protecting files 56 L Light source White balance 47 Long time shutter 30 M Macro 40 Maintenance 84 Memory card Capacity 87 microSD 86 microSDHC 86 MENU button 14 Metering Center weighted 47 Multi 47 Spot 47 MJPEG Motion JPEG 96 Mode button 14 Movie mode 32 Muting G Glossary 99 H Half pressing 6 I Icon...

Page 107: ... 37 Tracking focus 41 Transferring files for Mac 74 for Windows 68 V Video Playing 59 Recording 32 Video Out 80 Viewing files as thumbnails 56 by category 55 S Scene mode 28 Self Portrait 44 Service center 92 Settings Accessing 77 Camera 79 Display 78 Sound 78 Shooting mode DIS 31 Movie 32 Program 32 Scene 28 Smart Auto 27 Shutter speed 30 Slide show 58 Smart Album 55 Smart Auto mode 27 Smart butt...

Page 108: ...Please refer to the warranty that came with your product or visit our website http www samsung com for after sales service or inquiries ...

Reviews: