background image

CHANGING

SETUP

MENU

40

41

Setting Up the Language Features 

With the unit in Stop mode, press the MENU button.

Select 

Setup

using UP/DOWN buttons, then RIGHT

or ENTER button.   

Select 

Language Setup

using UP/DOWN buttons,

then press the RIGHT or ENTER button. 

Select 

Audio

using UP/DOWN buttons, then press

the RIGHT or ENTER button.

Press the UP/DOWN buttons to select ‘

English

’.

- Select “Original” if you want the default soundtrack language to

be the original language the disc is recorded in.

- Select “Others” if the language you want is not listed.

Press the ENTER button.

- English is selected and the screen returns to SETUP menu.

With the unit in Stop mode, press the MENU button.

Select 

Setup

using UP/DOWN buttons, then RIGHT

or ENTER button.  

Select 

Language Setup

using UP/DOWN buttons,

then press the RIGHT or ENTER button. 

Select 

Subtitle

using UP/DOWN buttons, then press

the RIGHT or ENTER button.

Use the UP/DOWN buttons to select ‘

English

’.

- Select “Automatic” if you want the subtitle language to be the

same as the language selected as the audio preference.

- Select “Others” if the language you want is not listed. 

Some discs may not contain the language you  select as 
your initial language; in that case the disc will use its     
original language setting.

Press the ENTER button.

- English is selected and the screen returns to SETUP menu.

NOTE

• If the selected language is not

recorded on the disc, the original
pre-recorded language is selected.

• 

How to make the SETUP menu
disappear or return to menu screen
during set up; 

Press RETURN or

LEFT button.

Using the Audio Language

Using the Subtitle Language

1
2
3

5

4

6

1
2

3
4
5

6

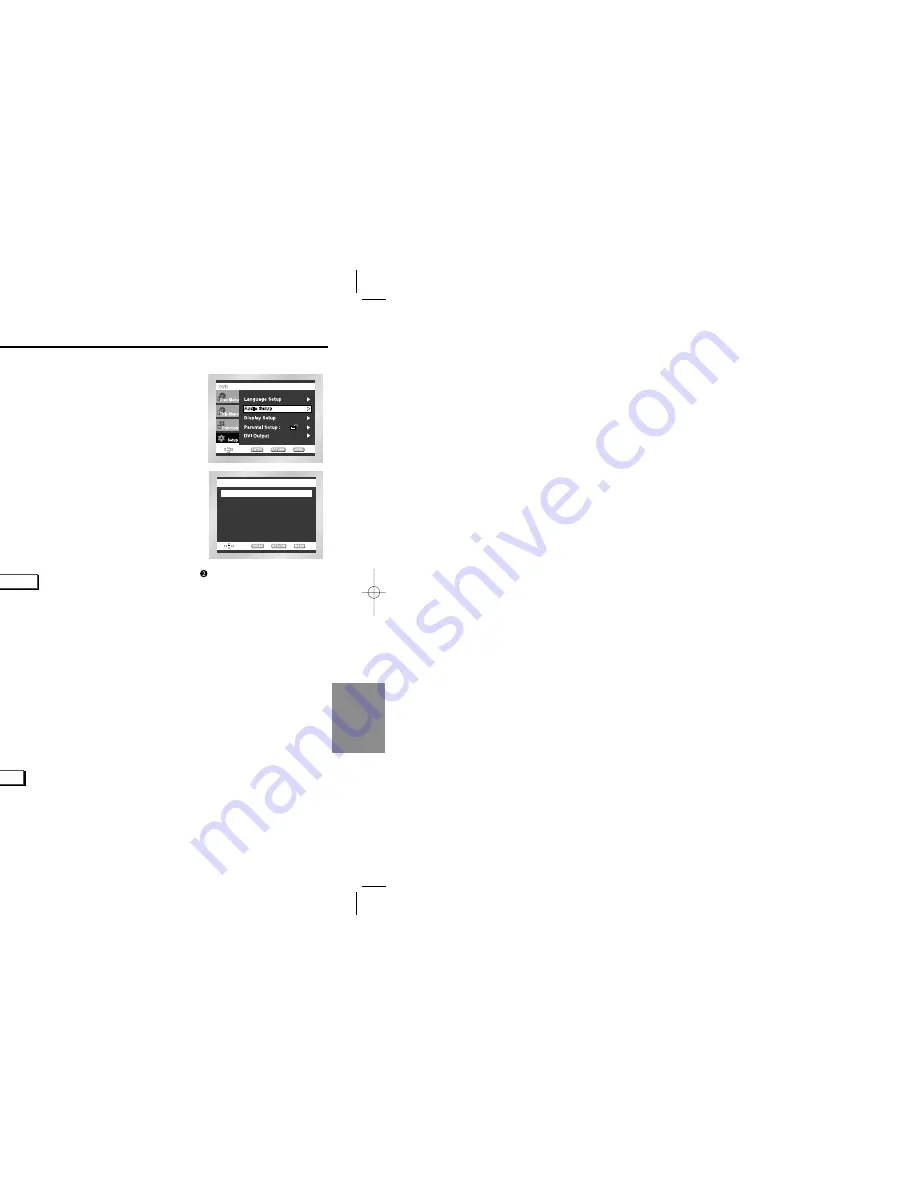
Setting Up the Audio Options

AUDIO SETUP

MPEG-2 Digital Out

   :  PCM

DTS

   :  Off

Dynamic Compression    :  On

PCM Down Sampling        :  On

Dolby Digital Out

   :  PCM

With the unit in Stop mode, press the MENU button.

Select 

Setup

using UP/DOWN buttons, then RIGHT

or ENTER button.

Select 

Audio Setup

using UP/DOWN buttons, then

press the RIGHT or ENTER button.

Use the UP/DOWN buttons to select the desired
item. Then press the RIGHT or ENTER button.

NOTE

• 

How to make the SETUP menu disappear or return to menu screen during set up; 

Press RETURN or LEFT button.

• Manufactured under license from Dolby Laboratories.

“Dolby” and the double-D symbol are trademarks of Dolby Laboratories.

• “DTS” and “DTS Digital Out” are trademarks of Digital Theater Systems, Inc.

1
2

3

4

MPEG-2 Digital Out

1. PCM

:

Converts to PCM(2CH) audio.
Select PCM when using the Analog
Audio Outputs.

2. Bitstream

Converts to MPEG-2 Digital 
Bitstream (5.1CH or 7.1CH).
Select Bitstream when using the 
Digital Audio Output.

Dolby Digital Out

1. PCM :

Converts to PCM(2CH) audio. 
Select PCM when using the Analog Audio Outputs.

2. Bitstream :

Converts to Dolby Digital Bitstream (5.1CH).
Select Bitstream when using the Digital Audio Output.

Be sure to select the correct Digital Output
or no audio will be heard.

DTS

1. Off : Doesn’t output digital signal.
2. On : Outputs DTS Bitstream via digital output only. 

Select DTS when connecting to a DTS Decoder.

Dynamic Compression

1

. On : To select dynamic compression.

2

. Off : To select the standard range.

PCM Down Sampling

1. On : Select this when the amplifier connected to the player is not 96KHz compatible. 

In this case, the 96KHz signals will be down converted to 48KHZ.

2. Off : Select this when the amplifier connected to the player is 96KHz compatible. 

In this case, all signals will be output without any changes.

NOTE

00168V-HD936(GB)-2  8/21/03 11:04 AM  Page 40

Summary of Contents for DVD-HD936

Page 1: ......

Page 2: ...3 Precautions 3 5 UTION USE OF ANY CONTROLS ADJUSTMENTS OR PROCEDURES OTHER THAN ECIFIED HEREIN MAY RESULT IN HAZARDOUS RADIATION EXPOSURE ...

Page 3: ...Selecting the Audio Language 27 Selecting the Subtitle Language 28 Changing the Camera Angle 29 Using the Instant Replay Skip Function 30 Using the Bookmark Function 31 Using the Zoom 3D Sound Functions 32 MP3 WMA Play 33 Program Play Random Play 35 Picture CD Playback 36 Changing Setup menu Using the Setup Menu 38 Setting Up the Language Features 39 Setting Up the Audio Options 41 Setting Up the ...

Page 4: ...io Video Audio Video Audio CD is recorded as a Digital Signal with better audio quality less distortion and less deterioration of audio quality over time Video with CD sound VHS quality MPEG 1 compression technology DVD contains excellent sound and video due to Dolby Digital and MPEG 2 system Various screen and audio functions can be easily selected through the on screen menu IDEO CD UDIO CD 12 Cm...

Page 5: ...d in the VIDEO OUT SELECT he PROGRESSIVE SCAN button must be set to off OMPONENT VIDEO OUT JACKS se these jacks if you have a TV with Component Video in jacks These jacks provide Pr Pb and video Along with Component Video provides the best picture quality PROGRESSIVE SCAN button is set to on progressive scan mode will work PROGRESSIVE SCAN button is set to off interlace scan mode will work Compone...

Page 6: ...ss this to switch the DVD s subtitle language IO button this button to access various audio functions a disc 16 TV POWER button Turns the TV s power on or off 17 CLEAR button Use to remove menus or status displays from the screen 18 I SKIP button This function skips playback ahead 10 seconds 19 CH buttons Channel selection 20 OPEN CLOSE button To open and close the disc tray 21 PLAY PAUSE button B...

Page 7: ...OR AV Cable S Video Cable Video Cable Video Output Jack S Video Jack Component Video Jacks DVD Player TV with Video Input Jack DVD Player TV with S Video Input Jack If S Video is selected in the VIDEO OUT SELECT DVD Player TV with Component Video Jacks If Component Video is selected in the VIDEO OUT SELECT TE mponent Video is selected S Video will not work OGRESSIVE SCAN is set to on VIDEO and S V...

Page 8: ...I connector the output from a DVI I is only a digital signal does not support HDCP High bandwidth Digital content protect snow noise appears e screen reful that various connectors are similar to DVI connector for example VESA PnD VESA DFD o on we adopt DVI ally with an analog TV an analog video signal is input to VIDEO IN ver when playing a DVD title the data transmitted to a TV is digital Therefo...

Page 9: ...reen will only appear the very first time you plug in the player ess the OPEN CLOSE button e STANDBY indicator light goes out and the tray opens ace a disc gently into the tray with the disc s label cing up ess the PLAY PAUSE button or OPEN CLOSE tton to close the disc tray opping Play ss the STOP button during play moving Disc ss the OPEN CLOSE button using Play ss the PLAY PAUSE or STEP button o...

Page 10: ...ng of the previous chapter playing a VCD 2 0 in Menu Off mode a VCD 1 1 or a CD if you press button it moves to the next track If you press the button s to the beginning of the track ore press makes it move to the beginning of the previous track ck exceeds 15 minutes when playing a VCD and you press the it moves forward 5 minutes If you press the button it moves ard 5 minutes 2X 4X 8X 16X 32X 128X...

Page 11: ...itle Menu using the UP DOWN buttons en press the RIGHT or ENTER button ng the Disc Menu ring the playback of a DVD disc press the ENU button on the remote lect Disc Menu using the UP DOWN buttons en press the RIGHT or ENTER button nding on the disc the Title and Disc Menus may not work Menu will only be displayed if there are at least two titles in the disc an also use the Disc Menu using the DISC...

Page 12: ... highlighted ess ENTER at the point where you want the repeat play to op B o terminate the function press the CLEAR button B REPEAT does not allow you to set point B until at least seconds has elapsed after point A has been set ess ENTER return to normal play press REPEAT again en press the LEFT RIGHT buttons to select Off ess ENTER Off Chapter Title A B ENTER Off Track Disc A B ENTER TE repeats p...

Page 13: ...l screen appears The picture will look vertically stretched Zoom Fit The top bottom left and right of the screen are cut off and the central portion of the screen is enlarged For 4 3 aspect ratio discs Normal Screen Displays the content of the DVD title in 4 3 aspect ratio Screen Fit The top and bottom of the screen are cut off and the full screen appears The picture would look vertically stretche...

Page 14: ...ired language on a DVD he audio languages are represented by abbreviations e the LEFT RIGHT buttons to select Stereo FT or RIGHT On VCD CD OTE unction depends on what languages are encoded on the disc and may not work with all DVDs D disc can contain up to 8 audio languages to have the same audio language come up whenever you play a DVD to Setting Up the Language Features on page 40 DVD VCD CD 27 ...

Page 15: ...een hen an ANGLE mark is shown press the NGLE button then an ANGLE select icon l appear at the upper left hand corner of e screen e the LEFT RIGHT buttons to select the sired screen angle turn off the display press the ANGLE tton again a DVD contains multiple angles of a particular scene you can select the Angle n ng the ANGLE button ...

Page 16: ...3 ess the BOOKMARK button to turn off the play calling a Marked Scene ring play press the BOOKMARK button the remote e the LEFT RIGHT buttons to select a arked scene ess the PLAY PAUSE buttons to skip the marked scene aring a Bookmark ring play press the BOOKMARK button the remote e the LEFT RIGHT buttons to select the okmark number you want to delete ess the CLEAR button to delete a okmark number...

Page 17: ...e first folder ENTER RETURN MENU ENTER PROGRAM RANDOM OTE s the REPEAT button to hear only music continuously and press it once again to release GRAM RANDOM playback cannot be used if the disc contains more than two types of file extensions ore than two file extensions are present select the media our choice by pressing UP DOWN then press the ENTER on change the currently playing media press the S...

Page 18: ...lay CD MP3 WMA ess the PROG button e the LEFT RIGHT buttons to select ROGRAM Press the ENTER button e the UP DOWN LEFT RIGHT buttons to ect the first track to add to the program ess the ENTER button The selection mbers appear in the Program Order box ess the PLAY PAUSE button e disc will be played in programmed order ess the PROG button e the LEFT RIGHT buttons to select ANDOM Press the ENTER butt...

Page 19: ...a consecutively written multisession disc can be played If there is a blank segment in the ltisession disc the disc can be played only up to the blank segment maximum of 500 images can be stored on a single CD dak Picture CDs are recommended hen playing a Kodak Picture CD only the JPEG files in the pictures folder can be played ture discs other than Kodak Picture CD may take longer to start playin...

Page 20: ... English ess the ENTER button nglish is selected and the screen returns to SETUP menu o make the SETUP menu disappear press the RETURN or EFT button e g Setting up in English e g Setting up in English LANGUAGE SETUP DISC MENU LANGUAGE Disc Menu nction changes the text language only on the disc screens ith the unit in Stop mode press the MENU button elect Setup using UP DOWN buttons then RIGHT ENTE...

Page 21: ...hen using the Analog Audio Outputs 2 Bitstream Converts to MPEG 2 Digital Bitstream 5 1CH or 7 1CH Select Bitstream when using the Digital Audio Output Dolby Digital Out 1 PCM Converts to PCM 2CH audio Select PCM when using the Analog Audio Outputs 2 Bitstream Converts to Dolby Digital Bitstream 5 1CH Select Bitstream when using the Digital Audio Output Be sure to select the correct Digital Output...

Page 22: ...n TV ill Mode ese options will help prevent picture shake in still mode and display small text earer Auto When selecting Auto Field Frame mode will be automatically converted Field Select this feature when the screen shakes in the Auto mode Frame Select this feature when you want to see small letters more clearly in the Auto mode reen Messages e to turn on screen messages On or Off ont Display jus...

Page 23: ... in Stop mode press the MENU button lect Setup using UP DOWN buttons en RIGHT or ENTER button lect DVI Output using UP DOWN buttons en press the RIGHT or ENTER button unction corrects a biased TV screen to secure mal view A or B Mode DVI OUTPUT DVI Output Mode B ...

Page 24: ...restricts it 2 The DVD s software doesn t support the feature e g angles 3 The feature is not available at the moment 4 You ve requested a title or chapter number or search time that is out of range Check if the disc has a Menu Some of the functions selected in the Setup Menu may not work properly if the disc is not encoded with the corresponding function The Screen Ratio is fixed on your DVDs Mak...

Page 25: ...istortion AC 110 240V 50 60 Hz 18 W 2 5 Kg 430mm W X 240mm D X 60mm H 5 C to 35 C 10 to 75 Reading Speed 3 49 m sec Approx Play Time Single Sided Single Layer Disc 135 min Reading Speed 1 2 to 1 4 m sec Maximum Play Time 74 min Reading Speed 1 2 to 1 4 m sec Maximum Play Time 20 min Reading Speed 1 2 to 1 4 m sec Maximum Play Time 74 min Video Audio 2 channel 1 0 Vp p 75 Ω load Y 1 0 Vp p 75 Ω loa...

Reviews: