background image

English

45

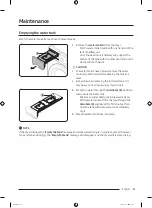
NOTE

To clean the filters thoroughly, clean the filters in 
running water, and then dry them completely.

5. 

Put the inner filter into the outer filter, and then 
reinsert the lint filter into the original position.

CAUTION

•  Clean the lint filter after each load. Otherwise, the drying performance may decrease.
•  If the filter surface is wet, allow it to completely dry before use.


-

Inserting the filter while it is wet can cause mold and/or odor to form and/or result in less drying.

•  When cleaning or removing the lint filter, do not shake or tap on the filter. Doing so can damage the 

filter.

•  Opening the outer and inner filters carelessly and with excessive force can damage the filters.

Heat exchanger

When it is time to clean the heat exchanger, the dryer will alert you by displaying the “

Clean heat 

exchanger

” message.

A dirty heat exchanger will hinder the product’s performance and should be cleaned regularly.

NOTE

•  Water droplets can form around the heat exchanger due to condensation caused by a temperature 

difference. This is normal and is not a sign of a leak.

•  If you are not planning on using the dryer for a long period of time, open the heat exchanger cover and 

ventilate.

Untitled-2   45

2023-07-18     5:11:17

Summary of Contents for DV17B9750 Series

Page 1: ...Heat Pump Dryer Usermanual DV17B9750 DC68 04437E 00 Untitled 2 1 2023 07 18 5 11 07...

Page 2: ...eezing 12 Installation 13 What s included 13 Installation requirements 15 Step by step installation 16 Environment 22 Before you start 23 Initial setup 23 Drying guidelines 24 Operations 26 Control pa...

Page 3: ...English 3 Appendix 53 Fabric care chart 53 Protecting the environment 54 Specification 55 Untitled 2 3 2023 07 18 5 11 07...

Page 4: ...sult in severe personal injury death and orproperty damage CAUTION Hazards orunsafe practices that may result in personal injury and orproperty damage NOTE Indicates that a risk of personal injury orm...

Page 5: ...m 8years and above and personswith reduced physical sensoryor mental capabilities orlack of experience and knowledge if theyhave been given supervision orinstruction concerning use of the appliance in...

Page 6: ...umulate around the tumble dryer not applicable forappliances intended to bevented to the exteriorof the building 11 Adequateventilation has to be provided to avoid the back flowof gases into the room...

Page 7: ...rning gas orotherfuels 19 The appliance must not be installed behind a lockable door a sliding doorora doorwith a hinge on the opposite side to that of the tumble dryer in such awaythat a full opening...

Page 8: ...es a bag overits head it may result in suffocation This appliance must be properly grounded Do not ground the appliance to a gas pipe plastic waterpipe ortelephone line This may result in electric sho...

Page 9: ...re is a dangerof suffocation Do not try to access the inside of the product when the drum is rotating Do not sit on the product orlean against the door This may result in the product turning overand r...

Page 10: ...n electric shock orfire as a result Do not let children orpets play in oron yourproduct The product doordoes not open easily from the inside and children may be seriously injured if trapped inside Usa...

Page 11: ...owders such as coal dust wheat flour etc This may result in electric shock fire oran explosion Do not place inflammable materials nearthe product This may result in toxic gases from the product damage...

Page 12: ...ow zero degree Celsius If draining directly using a long drain hose waterremaining inside the hose can freeze in winter Make sure there is no waterleft inside the hose afteruse If the drain hose has f...

Page 13: ...n below may differfrom yourdryer Before installation make sure the dryerhas all the parts listed here If the dryerand orparts are damaged ormissing contact the nearest Samsung customer service center...

Page 14: ...Samsung washing machine and dryers To purchase a stacking kit above contact a Samsung service centre orlocal appliance retailer The stacking kit differs with the washing machine model Forstacking inst...

Page 15: ...e center Do not unplug the dryerwhile it is operating Do not place flammable objects nearthe dryer Electrical and grounding requirements The dryerrequires an AC 220 240 V 50 Hz electrical supply The d...

Page 16: ...nstallation requirements on page 15 STEP 1 Select a location Location requirements Select a level well constructed surface that will withstand vibrations Select a location where a grounded 3 prong out...

Page 17: ...ryeris level make sure the dryerstands firmly on the floor 5 Plug in the dryer C D NOTE To set the dryerto the same height as the washing machine turn the levelling feet to the right until it fully re...

Page 18: ...hose to drain condensed waterdirectly to yourdrain system instead of draining to the built in watertank which is a default method Use the built in watertank only if you cannot drain the condensed wate...

Page 19: ...the bottom of dryer 2 To bend some point of the accessory hose use the supplied plastic hose guide B and secure the guide to the wall with a hook orto the tap with a piece of string Assemble the drai...

Page 20: ...sory hose about 70 mm away from a drain hole Do not insert the end outlet of the accessory hose into a sewer A sewersmell may flow into the dryer Wring out excess waterfrom items before putting them i...

Page 21: ...mm NOTE Completely dry the removed long drain hose and keep it in a safe place forlateruse 9 2 Remove the watertank drain hose from the holder B and then connect it to the drainwateroutlet A Firmly c...

Page 22: ...dryer They are necessary to keep the dryerlevel with the ground Afterinstallation we recommend that you wait at least1 hourbefore using the dryer STEP 5 Poweron Plug the powercord into a wall socket...

Page 23: ...appearagain The initial setup includes language selection and a brief tutorial When tapping a button tap exactly overthe icon Operating the washing machine and dryerat the same time may result in a lo...

Page 24: ...g them This will prevent fabric damage due to friction during the drying process and protect internal parts of the dryerfrom discoloration and damage Turn the items with buttons orembroideries inside...

Page 25: ...rremove items into orfrom the dryerwith the lint filterinstalled If the filteris not in place small items can fall into the filterslot and cause the dryerto malfunction STEP 5 Afterfinishing the dryin...

Page 26: ...Display The display shows the current cycle estimated time remaining cycle options and otheruseful oralert messages 05 OK Tap to confirm yourselection of function orsetting 06 Dry Level Tap to change...

Page 27: ...activated you can control your dryerremotely using the Smart Control app in yoursmartphone Icon description Wi Fi This icon indicates that the dryeris connected to Wi Fi Smart Control This icon indica...

Page 28: ...en turn the Navigation dial to select an option Formore information on Options see page 32 5 Tap to change the settings forthe selected option Some cycles may not have an available option 6 Tap and ho...

Page 29: ...yvary depending on the environment orusage conditions such as the amount of laundry the type of clothing orfabric and the type of pet hair The drying time may take longerto improve the result of deodo...

Page 30: ...ys training pants and otherperformance clothing 2 0 Denim Fordrying items made out of denim such as jeans 3 0 Iron Dry This cycle finishes the drying process in a moist state which facilitates ironing...

Page 31: ...drying may cause damage ordeform to an item Rack Dry Timed cycle foritems that needs to be dried on a drying rack Turn Navigation dial to select Rack Dry and tap to set the drying time between 20 min...

Page 32: ...he control panel for7 seconds afterentering the Options menu the display returns to the main screen Damp Alert This function alerts you when shirts and otheritems that require ironing are dry enough t...

Page 33: ...ion dial to select a desired cycle 4 Tap to add orremove the selected cycle Addition and removal of a cycle is saved automatically 5 Once you finish creating My Cycles tap to return to the cycles scre...

Page 34: ...o prevent children orinfants from accidentally starting orsetting the dryer Child Lock locks all buttons except for and 1 Close the door 2 Tap 3 Turn the Navigation dial to select Child Lock and then...

Page 35: ...sed cycles and settings 1 Tap and hold for3 seconds 2 Turn the Navigation dial to select AI Pattern and then tap 3 Tap to select On orOff The default setting is On Set it to Off if you do not want to...

Page 36: ...off automatically Wi Fi You can turn the dryer s Wi Fi on oroff 1 Tap and hold for3 seconds 2 Turn the Navigation dial to select Wi Fi and then tap 3 Tap to select On orOff The dryer s Wi Fi is off as...

Page 37: ...dryer However the dryerappears offline on the SmartThings app if the dryer s Wi Fi is off Close the doorbefore starting the Smart Control function If you use the dryer20 times without being connected...

Page 38: ...the instructions on the app You don t need a separate app to create youraccount NOTE If you have a Samsung account use the account to log in A registered Samsung smartphone user automatically logs in...

Page 39: ...ource samsung com opensource SMART_TP2_0 seq 0 leads to the open source license information as related to this product This offeris valid to anyone in receipt of this information NOTE Hereby Samsung d...

Page 40: ...ems fold and place flat on the rack 3 Close the doorand tap Turn the Navigation dial to select Rack Dry and then tap to select the drying time 4 Tap and hold Drying suggestions Items max1 5 kg Descrip...

Page 41: ...e careful when removing the full watertank It is very heavy and can cause injury if you drop it B 2 Empty the waterthrough the drain hole B and then clean inside the watertank Mix some neutral deterge...

Page 42: ...r 1 Gently press the top part of the outercover A to open 9 9 2 Unlock the innercoverfixers B and then pull the innercoverto remove A 3 Insert the provided micro soft filter Optional Filter C on the b...

Page 43: ...ing sharp orheavy objects near on the dryer Keep detergent and laundry supplies on the pedestal sold separately orin a separate storage container Control panel Clean with a soft damp cloth Do not use...

Page 44: ...filter and pull to remove the filter Do not detach the rubbersealing afterremoving the filter A 2 Open the outerfilterand remove the innerfilter A 3 Spread open the outerfilterand the innerfilter 4 Re...

Page 45: ...ng the lint filter do not shake ortap on the filter Doing so can damage the filter Opening the outerand innerfilters carelessly and with excessive force can damage the filters Heat exchanger When it i...

Page 46: ...utes 3 Clean the dust on the heat exchangerusing the provided brush Aftercleaning with the brush wipe off the remaining dust using a smooth damp cloth CAUTION To avoid physical injury and burns do not...

Page 47: ...osition and then lock the fixers 6 Close the heat exchanger s outercover NOTE Aftercleaning the heat exchanger tap to dismiss the notification message The message remains on until you dismiss it If th...

Page 48: ...nnercover Referto the Heat exchanger section on page 45 2 Remove the micro soft filter Optional Filter from the innercover 3 Clean the dust on the micro soft filter Optional Filter with the provided b...

Page 49: ...oritems to dry Dry heavy fabrics separately from light fabrics The item s are too small and may not getting enough spinning inside the drum Clean the filter Clean the heat exchanger If the Clean heat...

Page 50: ...aches easily such as black linen pants Check the inside of the pockets to make sure they are empty before drying The ambient temperature around the dryerrises or there is a damp soggy smell Heat pump...

Page 51: ...hold Draining malfunction Draining pump malfunction Frozen draining hose Watertank full Make sure the draining hose is not bent ordamaged If the hose is frozen wrap the hose with a towel soaked in war...

Page 52: ...orservice 3C Check the motorforoperation Try restarting the cycle If this continues call forservice AC6 Check communications between the main and the inverterPBAs Try restarting the cycle If this cont...

Page 53: ...h 30 C mild wash 30 C very mild wash Hand wash Do not wash NOTE The numbers in the wash tub specify the maximum washing temperatures in degrees celsius which must not be exceeded Bleaching Any bleach...

Page 54: ...Professional wet cleaning Mild professional wet cleaning Very mild professional wet cleaning Do not wet clean NOTE The letters in a circle indicate the solvents P F used in dry cleaning orwet cleaning...

Page 55: ...TRICALREQUIREMENTS AC 220 240 V 50 Hz 1800 2100 W ALLOWABLE TEMPERATURE 5 35 C NOTE The design and specifications are subject to change without notice forquality improvement purposes The energy label...

Page 56: ...LINE AT U A E 800 SAMSUNG 800 726 7864 www samsung com ae support English www samsung com ae_ar support Arabic OMAN 800 SAM CS 800 72627 KUWAIT 183 CALL 183 2255 BAHRAIN 8000 GSAM 8000 4726 QATAR 800...

Page 57: ...DV17B9750 DC68 04437E 00 Untitled 3 1 2023 07 18 5 13 49...

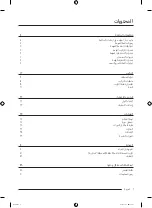
Page 58: ...2 4 4 4 5 8 9 10 11 11 12 12 14 15 21 22 22 23 25 25 27 28 31 34 36 40 40 41 42 48 48 50 Untitled 3 2 2023 07 18 5 13 49...

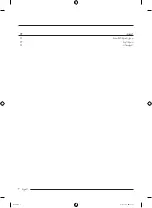
Page 59: ...3 52 52 53 54 Untitled 3 3 2023 07 18 5 13 49...

Page 60: ...4 Samsung Untitled 3 4 2023 07 18 5 13 50...

Page 61: ...5 1 1 2 2 8 3 3 4 4 5 5 6 6 3 Untitled 3 5 2023 07 18 5 13 50...

Page 62: ...6 7 7 8 8 9 9 10 10 11 11 12 12 13 13 14 14 15 15 16 16 Untitled 3 6 2023 07 18 5 13 50...

Page 63: ...7 17 17 18 18 19 19 20 20 21 21 22 22 Untitled 3 7 2023 07 18 5 13 50...

Page 64: ...8 Untitled 3 8 2023 07 18 5 13 50...

Page 65: ...9 Untitled 3 9 2023 07 18 5 13 50...

Page 66: ...10 Samsung Samsung Untitled 3 10 2023 07 18 5 13 50...

Page 67: ...11 Untitled 3 11 2023 07 18 5 13 50...

Page 68: ...12 Samsung 01 0 02 0 03 0 04 0 05 0 06 0 07 0 Untitled 3 12 2023 07 18 5 13 51...

Page 69: ...13 2 Samsung Samsung Samsung Untitled 3 13 2023 07 18 5 13 52...

Page 70: ...14 Samsung Samsung Samsung 50 240 220 Samsung Untitled 3 14 2023 07 18 5 13 52...

Page 71: ...15 20 25 490 20 550 3 3 9 14 35 5 Untitled 3 15 2023 07 18 5 13 52...

Page 72: ...16 A B 1 1 2 2 A 3 3 B 4 4 5 5 C D C D Untitled 3 16 2023 07 18 5 13 52...

Page 73: ...17 9 9 1 1 A B Untitled 3 17 2023 07 18 5 13 52...

Page 74: ...18 01 0 70 2 2 A 3 3 70 A C B 1 1 90 2 2 B B A C 3 3 Untitled 3 18 2023 07 18 5 13 53...

Page 75: ...19 A 1 1 A 2 2 70 Untitled 3 19 2023 07 18 5 13 53...

Page 76: ...20 1 1 A 70 9 2 2 B A Untitled 3 20 2023 07 18 5 13 53...

Page 77: ...21 20 HC Untitled 3 21 2023 07 18 5 13 54...

Page 78: ...22 01 0 02 0 Turn dial Tap O English US Ti ng Vi t 03 0 O Untitled 3 22 2023 07 18 5 13 54...

Page 79: ...23 43 Untitled 3 23 2023 07 18 5 13 54...

Page 80: ...24 40 44 Untitled 3 24 2023 07 18 5 13 54...

Page 81: ...25 01 0 10 02 0 03 0 04 0 05 0 06 0 4 1 4 3 2 1 07 0 Untitled 3 25 2023 07 18 5 13 55...

Page 82: ...26 08 0 240 20 09 0 3 10 1 Smart Control Smart Control Smart Control Smart Control Wi Fi Wi Fi Smart Control Smart Control 36 Smart Control 33 Untitled 3 26 2023 07 18 5 13 56...

Page 83: ...27 1 1 2 2 28 3 3 4 4 31 5 5 6 6 Untitled 3 27 2023 07 18 5 13 56...

Page 84: ...28 17 0 17 0 8 5 1 5 4 0 3 0 6 0 3 0 1 0 Untitled 3 28 2023 07 18 5 13 56...

Page 85: ...29 6 0 4 0 2 0 3 0 2 0 3 0 3 0 2 0 1 0 Untitled 3 29 2023 07 18 5 13 56...

Page 86: ...30 240 20 240 180 150 120 90 60 50 40 30 20 20 28 240 20 240 180 150 120 90 60 50 40 30 20 20 240 240 180 150 120 90 60 50 40 30 20 Untitled 3 30 2023 07 18 5 13 56...

Page 87: ...31 1 1 2 2 3 3 7 1 1 4 2 2 2 3 3 4 4 1 1 2 2 3 3 Untitled 3 31 2023 07 18 5 13 57...

Page 88: ...32 1 1 2 2 3 3 1 1 2 2 3 3 4 4 5 5 1 1 2 2 3 3 5 5 SmartThings Stay Connect Untitled 3 32 2023 07 18 5 13 57...

Page 89: ...33 1 1 2 2 3 3 47 44 1 1 2 2 3 3 4 4 Untitled 3 33 2023 07 18 5 13 57...

Page 90: ...34 3 1 1 3 2 2 3 3 7 1 1 3 2 2 3 3 1 1 3 2 2 3 3 Untitled 3 34 2023 07 18 5 13 58...

Page 91: ...35 1 1 3 2 2 3 3 1 1 3 2 2 3 3 3 Wi Fi Wi Fi 1 1 3 2 2 Wi Fi 3 3 Wi Fi Wi Fi Wi Fi Wi Fi Wi Fi Wi Fi 1 1 3 2 2 Untitled 3 35 2023 07 18 5 13 58...

Page 92: ...Wi Fi 3 Wi Fi SmartThings Wi Fi SmartThings Wi Fi Smart Control SmartThings 20 3 Smart Control Wi Fi AP Wi Fi Stay Connect SmartThings Stay Connect 1 1 SmartThings Stay Connect 24 Stay Connect 2 2 Wi...

Page 93: ...SmartThings Samsung Galaxy Apps App Store Samsung Samsung SmartThings Samsung Samsung SmartThings 1 1 AP 2 2 SmartThings 3 3 Add A new device is found 4 4 Specific Device Model Device Type 5 5 SmartT...

Page 94: ...38 http opensource samsung com http opensource samsung com opensource SMART_TP2_0 seq 0 URL 2014 53 EU Samsung http www samsung comm 2 472 2 412 20 Wi Fi Untitled 3 38 2023 07 18 5 13 58...

Page 95: ...39 240 1 1 A A A 2 2 3 3 4 4 1 5 Untitled 3 39 2023 07 18 5 13 59...

Page 96: ...40 A 1 1 A B 2 2 B B 30 3 3 Untitled 3 40 2023 07 18 5 13 59...

Page 97: ...41 1 1 A 9 9 2 2 B A 3 3 C Untitled 3 41 2023 07 18 5 14 00...

Page 98: ...42 4 4 5 5 Untitled 3 42 2023 07 18 5 14 00...

Page 99: ...43 1 1 A 2 2 A 3 3 4 4 Untitled 3 43 2023 07 18 5 14 00...

Page 100: ...44 5 5 Untitled 3 44 2023 07 18 5 14 01...

Page 101: ...45 1 1 A 9 9 2 2 B 10 3 3 Untitled 3 45 2023 07 18 5 14 01...

Page 102: ...46 4 4 5 5 6 6 Untitled 3 46 2023 07 18 5 14 01...

Page 103: ...47 1 1 44 2 2 3 3 4 4 Untitled 3 47 2023 07 18 5 14 01...

Page 104: ...48 44 Untitled 3 48 2023 07 18 5 14 02...

Page 105: ...49 400 Samsung Untitled 3 49 2023 07 18 5 14 02...

Page 106: ...50 400 FC 9C1 dF tC tC5 3C Untitled 3 50 2023 07 18 5 14 02...

Page 107: ...51 AC6 PBA HC Samsung Untitled 3 51 2023 07 18 5 14 02...

Page 108: ...52 95 60 60 40 40 40 30 30 30 80 60 Untitled 3 52 2023 07 18 5 14 04...

Page 109: ...53 200 150 110 F P W 1430 R 134a 0 829 0 32 Untitled 3 53 2023 07 18 5 14 06...

Page 110: ...54 A B C D DV17B9750 17 0 A 686 B 984 C 840 D 1393 77 0 240 220 50 2100 1800 35 5 UAE S 5010 2 3 Untitled 3 54 2023 07 18 5 14 06...

Page 111: ...Untitled 3 55 2023 07 18 5 14 06...

Page 112: ...G 800 726 7864 www samsung com ae support English www samsung com ae_ar support Arabic OMAN 800 SAM CS 800 72627 KUWAIT 183 CALL 183 2255 BAHRAIN 8000 GSAM 8000 4726 QATAR 800 800 2255 Untitled 3 56 2...

Reviews: