background image

63

S

O

F
T

W

A

R

E

HOW TO USE EDITING SOFTWARE

MGI PhotoSuite lll SE

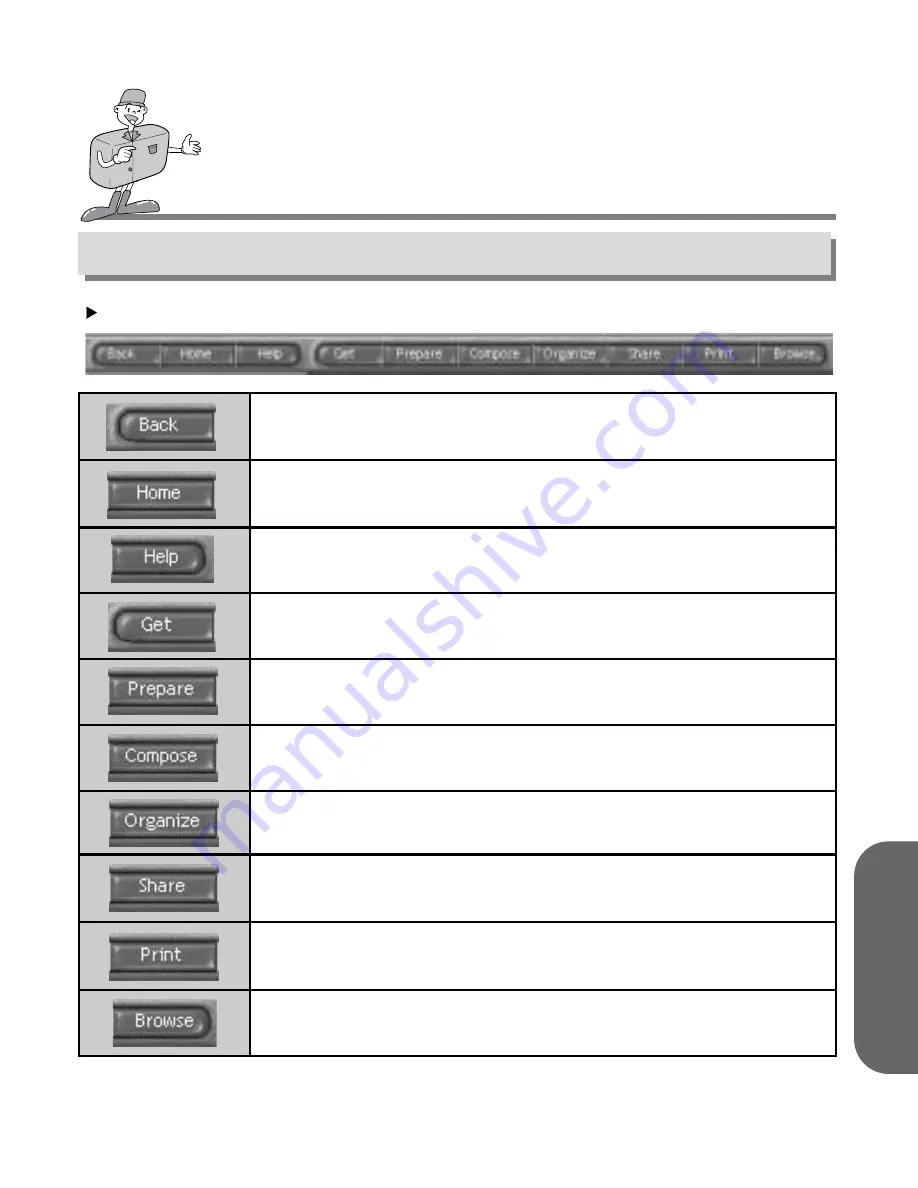
Introduciton to navigation bar

Back

return to the previous step.

Home

Return to Welcome screen.

Help

Display help window.

Get

Get images.

Prepare

A number of photo editing activities can be performed within this module.

Compose

Use your photos in a variety of fun and interesting ways.

Organize

Organize your photos and other media files into albums.

Share

Save your results to show to others.

Print

Print hard copies of photos and projects.

Browse

Browse the web site.

Summary of Contents for Digimax 130

Page 1: ...ying a Samsung Camera This manual will guide you through using the Digimax 130 Including taking pictures downloading images and using MGI PhotoSuite software Please read this manual before using your new camera ENGLISH ...

Page 2: ...ce in commercial installation This equipment generates absorbs and can emit radio frequency energy If it is not installed and used in accordance with the instructions it may cause harmful interference to radio communication There is however no guarantee that interference will not occur in a some situations Should any interference occur when this device is in operation please try one or more of the...

Page 3: ...e check that you have the correct contents before using this product AC Adapter Digital camera 4 AA Alkaline Pouch Batteries User manual Video cable USB cable CompactFlash card CF CARD Accessories Optional Camera strap Application S W Driver CD ROM Product warranty ...

Page 4: ...THIS DIGITAL CAMERA CAN BE USED FOR 4 Viewing images on TV Editing images on a PC Recording images onto CD Printing images ...

Page 5: ...ED FOR Inserting images directly into any electronic document Taking a self portrait and using the image to personalize name cards You can even create your own unique gift wrap paper by using your digital images Creation of a digital photo album ...

Page 6: ...r 55 SettinguptheMGIPhotoSuiteIIISE 57 SettinguptheMGIPhotoVista 59 Howtouseeditingsoftware 61 MGI PhotoSuite III SE 61 MGIPhotoVista 74 SettingupCameraDriverforMac 80 Settingupthefunction 33 SettingupthefunctionbyusingaLCDmonitor 33 Recordmode 33 Playmode 37 Setupmode 41 Deletemode 47 PCmode 49 Beforecontactingservicecenter 50 Specifications 51 Selectthequalityandtheresolutionmode 31 SelecttheSel...

Page 7: ...will help prevent danger and injury to others Prior to using this camera please read the user manual thoroughly Keep the manual in a safe place Warning This is a descriptive statement warning of the result if the instructions are ignored or not understood Note This explains use of the camera please refer to this Reference This should assist further in the operation of the camera ...

Page 8: ...t accidents e g Swallowing batteries or small camera accessories In case of accidents please consult a doctor immediately There is a risk of permanent eye damage if the flash is operated at a distance of less than one meter from a person s eyes There is a possibility of injury from the camera s moving parts Should any form of liquid enter the camera do not use it Switch off the camera and then dis...

Page 9: ...positioned correctly with regard to polarity When the camera is not in use for long periods always unplug the camera from its power source batteries or AC Power Adapter for safety purposes Leaking batteries can cause fire and pollution to the environment Allowing dust to accumulate in the camera over a long period is hazardous as extreme circumstances may cause a fire It is best to clean your came...

Page 10: ... IDENTIFICATION OF FEATURES Strap eyelet Viewfinder Self timer lamp Flash Focus dial Lens Product Exterior Rear Viewfinder LED 1 LED 2 Menu select button Self timer button Menu select button Enter button LCD button LCD monitor ...

Page 11: ...tom Power button Quality button Mode dial Shutter button Menu button LCD panel USB connection terminal Flash button Video connection terminal Video output terminal DC input connection point DC 6V IN Battery chamber cover CompactFlash card CF CARD slot cover Tripod socket ...

Page 12: ...ou take a picture A picture can be spoiled when a finger hair or camera strap is in front of the lens or the flash Note Please use the LCD monitor when using Macro mode 0 4m 0 8m As there can be some differences between what is seen through the Viewfinder and the resulting image when taken at a range closer than 1 5m it is recommended that you use the LCD monitor to compose the shot ...

Page 13: ... available shots remaining PLAY mode Number of images captured DELETE mode Number of images captured PC mode PC Connection mode Self timer mode indicator Battery status indicator Image resolution indicator 1280 960 pixels 640 480 pixels PC mode indicator The batteries are fully charged The batteries are partially charged There are no batteries capacity Preparing new batteries The camera will be fo...

Page 14: ...ternal memory to CF CARD DPOF Digital Print Order Format SETUP Menu DATE TIME DATE TIME setting LANGUAGE LANGUAGE setting SOUND buzzer sound setting FORMAT MEDIA formatting CF CARD or Internal memory VIDEO MODE change VIDEO MODE NTSC or PAL RESET TO DEFAULT change the settings to factory default settings DELETE Menu DELETE CURRENT delete current image DELETE ALL delete all images SETUP MENU 01 01 ...

Page 15: ...ve the batteries if the camera will not be used for long periods Batteries can lose power over time and are prone to leak if kept inside the camera Do not use manganese batteries as they cannot deliver sufficient power Low temperatures below O C can cause the camera to work for a shorter period of time due to reduced battery performance The batteries will recover at normal temperatures Do not use ...

Page 16: ...camera Please ensure that you use an AC adapter with the correct specification for the camera Failure to do so may affect your warranty WARNING Always turn off the power before taking the AC adapter out of the main supply Keep the metallic part of camera away from any metallic material to prevent fatal damage Auto power off in each mode This camera will automatically switch off when not in use for...

Page 17: ...nsert the card towards the arrow The front side of the CF CARD red arrow printed and front side of camera should face the same direction when card is inserted 2 Turn the power off using the power button 1 Push the Card eject lever down 2 Remove CF CARD as shown in the picture 3 To close the CF CARD cover push the CF CARD cover in the opposite direction of the arrow until you hear a click 3 ...

Page 18: ...e quality Normal quality Super fine quality Fine quality Normal quality File format Number of shots L 1280 960 pixels S 640 480 pixels Using a new CF CARD for the first time Before using the CF CARD it must be initialized Initializing prepares the CF CARD for recording data For more details please refer to the page 44 FORMAT MEDIA Note If used over extended periods a CF CARD may deteriorate and it...

Page 19: ...se do not use or store in an environment where there are extremes of temperature Do not allow the CF CARD to come into contact with dirt Should this happen clean the dirt off with a soft cloth Please keep the CF CARD in its case when not in use During and after periods of extended use you may notice that the CF CARD is warm This is perfectly normal READY Preserving the CF CARD data If the card is ...

Page 20: ...ETUP mode and the SETUP menu will then be displayed 2 Select DATE TIME by pressing Memu select button 3 Press Enter button and the cursor will skip to the data field The first item Month in this field will be selected 4 Press Enter button to proceed to the next item 5 Use Menu select buttons to change the numbers 6 Repeat 5 6 to change the date or time 7 When the last item is selected changed pres...

Page 21: ...setup covers from 2001 2099 It is automatically programmed to allow for a leap year month It is originally set as 01 01 2001 00 00 AM If 1 minute passed where the camera did not have batteries in it you will need to check date time Attaching the strap To prevent accidental damage to the camera always use the strap Refer to the illustrations below 1 2 ...

Page 22: ...the camera is booting up When it changes to green the camera is ready for use Turn the Mode dial to RECORD mode 1 2 Select the desired mode macro or portrait landscape by turning the Focus dial Landscape Portrait 0 8 m infinity Macro between 0 4 m 0 8 m Select the desired image quality and resolution on the LCD panel with the Quality button Using the LCD monitor you can set the function in detail ...

Page 23: ... the quality of pictures should they be taken under certain circumstances If the subject is highly reflective or shiny If the subject is moving at high speed When there is strong reflected light or when the background is very bright Reference If there is insufficient memory available The 0000 mark will be displayed on the LCD panel If you press the Shutter button the following message will be disp...

Page 24: ...he same settings as mentioned above Menu button MENU The Menu button is only active in RECORD mode and PLAY mode Press the Menu button to turn on the RECORD menu and PLAY menu To turn off the menu press the Menu button again Shutter button Press the button in RECORD mode for image capturing processing and storing Before taking a shot please ensure that your camera has sufficient storage capacity a...

Page 25: ...gain Power off the camera Change to another mode excluding RECORD mode The camera automatically disables the Self timer function after an image is captured Enter button ENTER The Enter button is active at any time when a menu or dialog box is displayed Use the button to select confirm the currently highlighted item LCD button LCD The LCD button is only active in RECORD mode and PLAY mode While in ...

Page 26: ...available in PLAY mode Enter button In PLAY mode to use the Digital zoom press the Enter button and the image will be magnified The magnification rate will be changed by pressing the Enter button as 2x 4x Menu select button In PLAY mode to scroll through the images use the Menu select button However in Digital zoom mode the Menu select button will highlight the various images The zoom indicator an...

Page 27: ...The most recent image captured will be shown when the Mode dial is set to PLAY mode Use the Menu select button to browse the captured images In single image display press the Enter button once to view the extended image 2x Zoom and press the Enter button twice to view an even more extended image 4x Zoom By pressing the Enter button 3 times the extended image will return to its initial image size F...

Page 28: ...nitor using a video output terminal You can set SLIDE SHOW LCD brightness and DPOF settings Note When making a Macro shot you will need to use a tripod to avoid camera shake Please use the LCD monitor when using Macro photography 0 4m 0 8m When shots are taken of a subject within a range of 1 5m there can be some differences between the result and what you viewed through the optical viewfinder It ...

Page 29: ... LED Color Status Instruction LED2 BLINKING ON Self timer is in operation Self timer button has been pressed Red Red Self timer lamp B A S I C SET UP mode DATE TIME LANGUAGE SOUND FORMAT MEDIA VIDEO MODE and RESET TO DEFAULT settings can be changed DELETE mode In this mode you can delete images in the internal memory or CF CARD In DELETE mode the recorded images can be deleted all at once or singu...

Page 30: ...de Auto flash Fill in flash Flash off Red eye reduction Note When a subject is closer than 1m there will be an additional exposure 2 3times to ensure the correct lighting levels Please do not move until the main flash fires Using the flash frequently will reduce the life of the batteries Under normal operating conditions the charging time for the flash is normally under 10 seconds If the batteries...

Page 31: ...internal memory cannot be changed once an image has been captured SETTING UP THE FUNCTION Setting up the function by using the LCD panel Image quality and resolution can only be set under RECORD mode This camera provides 6 different image resolution quality combination settings The default setting is 1280X960 pixels resolution at the Super fine quality To change the setting press the Quality butto...

Page 32: ...ly be set under RECORD mode Press the Self timer button to activate it The Self timer lamp red is turned on Press the Shutter button to activate When you press the Self timer button the Self timer lamp blinks slowly for 7 seconds The lamp will blink rapidly for a further 3 seconds before the picture is taken Refer to page 13 Selecting the Self timer mode Checking the battery 1 2 3 ...

Page 33: ...setting Press the Enter button and the cursor will skip to the data field Use the Menu select button to increase decrease the LCD BRIGHTNESS Brightness setting 5 5 Interval 1 Default setting is 0 Press the Enter button again to make the change The cursor returns to the RECORD menu automatically when the change has been made Press the Menu button again to make the RECORD menu disappear The setting ...

Page 34: ...ed on the LCD monitor Use the Menu select button to select QUICKVIEW setting Press the Enter button and the cursor will go to the data field Use the Menu select button to select the data ON OFF The default setting is ON Press the Enter button again to make the change The cursor returns to the RECORD menu automatically when the change has been made Press the Menu button again to make the RECORD men...

Page 35: ...e displayed on the LCD monitor Use the Menu select button to select WHITE BALANCE setting Press the Enter button and the cursor will skip to the data field Use the Menu select button to select WHITE BALANCE setting Auto Sun Shade Fluorescent Tungsten The default setting is AUTO Press the Enter button again to make the change The cursor returns to the RECORD menu automatically when the change has b...

Page 36: ...ing Press the Enter button and the cursor will skip to the data field Use the Menu select button to select data The exposure compensation is over a range of 1 8 to 1 8 EV in steps of 0 3 EV The default setting is 0 0 Press the Enter button again to make the change The cursor returns to the RECORD menu automatically when the change has been made Press the Menu button again to make the RECORD menu d...

Page 37: ...hing the SLIDE SHOW the auto power off system will be applied If running time of the SLIDE SHOW is over 30 minutes the auto power off system will be applied Turn the power on Set the camera to PLAY mode By pressing the Menu button the PLAY menu will be displayed on the LCD monitor Use the Menu select button to select SLIDE SHOW Press the Enter button and the cursor will skip to the data field Use ...

Page 38: ... want to stop the SLIDE SHOW press one of the following buttons LCD button Menu button Enter button and Menu select button and camera turns to PLAY mode 7 8 Reference When the SLIDE SHOW starts without images on the internal memory or CF CARD the following message will appear This setting is reset to 2 minutes when the camera power is off MESSAGE NO IMAGES ...

Page 39: ... will return to the PLAY menu automatically Press the Enter button after selecting NO and the cursor will return to the PLAY menu automatically Press the Menu button again to make the PLAY menu disappear COPY TO CF CARD Copy the recorded images on the internal memory to CF CARD message 1 message 2 1 2 3 4 5 6 7 Note A NO CARD message will be displayed on the LCD monitor and the camera will make be...

Page 40: ... CARD can be printed PRINT QUANTITY setting PRINT QUANTITY Default setting is 1 PRINT SIZE setting PRINT SIZE Default setting is PRINT STD PRINT INDEX print images on a page as THUMBNAILS Default setting is ON PRINT ENABLE set up DPOF Note When you change each item of DPOF set up PRINT ENABLE as ENABLE Otherwise the DPOF setting is discarded By pressing the Shutter button on PLAY mode the DPOF set...

Page 41: ... you to put the date and time on your data Refer to page 20 for more information SETUP mode Note The date time that is displayed on the LCD monitor does not print onto the images when printed or viewed by the image viewer To print date time onto the images please use an image processing program such as PhotoSuite SETUP MENU 01 01 2001 00 00 AM DATE TIME LANGUAGE SOUND FORMAT MEDIA VIDEO MODE RESET...

Page 42: ...UAGE setting Press the Enter button and the cursor will skip to the LANGUAGE data field Use the Menu select button to select a LANGUAGE The default setting is ENGLISH Press the Enter button again to make the change and the cursor will automatically return to the SETUP menu 1 2 3 4 5 6 ENGLISH Chinese Japenese Português Español Deutsch Français SETUP MENU ENGLISH DATE TIME LANGUAGE SOUND FORMAT MED...

Page 43: ...or will skip to the SOUND data field Use the Menu select button to select data ON OFF The default setting is ON Press the Enter button again after selecting ON and the cursor will return to the SETUP menu automatically The SOUND is set to ON Press the Enter button again after selecting OFF and the cursor returns to the SETUP menu automatically The SOUND set off The setting is saved even if the cam...

Page 44: ...rnal memory Select YES and press Enter button The message ARE YOU SURE will be displayed to confirm FORMAT MEDIA Select YES and press the Enter button The cursor will return to the SETUP menu automatically After selecting NO press the Enter button to discard FORMA MEDIA The cursor will then return to the SETUP menu automatically 1 2 3 4 5 6 processing complete Reference You must format the CF card...

Page 45: ...xternal monitor The information on the external screen will be exactly the same as on the LCD monitor Refer to page 37 40 Turn the power on Set the camera to SETUP mode and the SETUP menu will be displayed on the LCD monitor Use the Menu select button to select VIDEO MODE Press the Enter button and the cursor will skip to the VIDEO MODE data field Use the Menu select button to select data NTSC PAL...

Page 46: ...d Use the Menu select button to select data YES NO After selecting YES press the Enter button again to make the change and the cursor will return to the SETUP menu automatically After selecting NO press the Enter button again to discard RESET TO DEFAULT and the cursor will return to the SETUP menu automatically ITEM DEFAULT Resolution 1280 960 Super fine quality Auto Auto ON 0 0 0 2 seconds ON NTS...

Page 47: ...nserted To delete the images recorded in the CF CARD make sure that the card is inserted before deletion Turn the power on Set the camera to DELETE mode and the SETUP menu will be displayed on the LCD monitor Use the Menu select button to select DELETE CURRENT By pressing the Enter button the last image captured will be displayed Use the Menu select button to select image Pressing the Enter button...

Page 48: ...he following message will be displayed Use the Menu select button to select data YES NO After selecting YES press the Enter button again to delete all and the following message will be displayed Take a picture turning the Mode dial to RECORD mode After selecting NO press the Enter button again and the setting will be discarded The cursor will return to the DELETE menu 1 2 3 4 5 6 DELETE MENU DELET...

Page 49: ...cable There are no menus associated with this mode When you connect the camera to the PC you should ensure that the camera is in PC mode PC mode PC MODE Note Before connecting the camera to the PC you will need to do the following in this order 1 Turn the Mode dial to PC mode 2 Turn the power on 3 Connect USB cable A D V A N C E D ...

Page 50: ...nes Power on Initialize Images are dim You have selected the incorrect focus mode If the subject is closer than 0 8m select macro mode and if the subject is beyond 0 8m select normal mode The flash mode does not work The camera s flash is turned off Cancel the Flash off mode The screen is too bright There is excessive exposure LCD monitor is too bright Reset exposure compensation Set LCD BRIGHTNES...

Page 51: ...l 640 480 pixels Large Super fine 16 1 Fine 24 1 Normal 48 2 Small Super fine 33 2 Fine 66 2 Normal 134 4 Single image Thumbnails Slide show Digital output connector USB Video output NTSC PAL user selectable DC power input connector 6 0V 4 AA alkaline Ni MH batteries AC adapter optional 106 71 47mm 4 2 2 8 1 9in 190g 6 7oz without batteries Camera Driver Windows 98 98SE 2000 ME Mac OS 8 6 or later...

Page 52: ...ed Copyright for both software is licensed only for use with a camera In the unlikely event of a manufacturing fault we will repair or exchange your camera We cannot however be held responsible in any way for damage caused by inappropriate use Before reading this manual you should have a basic knowledge of computers and O S Operating Systems Windows is a registered trademark of Microsoft Macintosh...

Page 53: ...E Memory Minimum 32MB RAM Others USB port CD ROM Drive 80MB of available hard disk space 16 bit color display adapter and compatible monitor a desktop area of 800 by 600 pixels 24 bit color display adapter True color display recommended For Macintosh Computer Power Mac G3 or later Operating System Mac OS 8 6 or later Memory Minimum 32MB RAM Others USB port CD ROM Drive 64MB of available hard disk ...

Page 54: ...refer to page 55 For Macintosh refer to page 80 MGI PhotoSuite lll SE Photography program Refer to page 61 MGI PhotoVista This program enables you to create spectacular 360 panoramic images in a snap Refer to page 74 Internet link http www samsungcamera com English http www zoomin co kr Korean Reference If the frame is not displayed run Windows Explorer and select D camera exe in the CD ROM root d...

Page 55: ...ndow will then be displayed Click Next to prepare the Camera Driver installation Start Installation of Digimax 130 window will be displayed Click Next to start installation An Installation Complete window will be displayed Click Finish and the installation will be completed In order to activate the Camera Driver you will need to restart your computer The Install window will be displayed to indicat...

Page 56: ...a Driver using the following steps Trace start menu setting controller system device manager and if there is the Other device click the right mouse button over the Other device Then select Properties and click driver re install The Device driver update wizard will start 1 Device driver update wizard will start 2 Selet search method 3 Select search location 4 To select search location trace and cli...

Page 57: ...panish A Welcome window will be displayed Click Next to move to the next step The Software License Agreement window will be displayed If you agree to this click Yes the window will then move to the next step If you disagree click Cancel and the install program will be canceled Select set up type Full the program will be installed with all the options Custom you can choose what you would like to in...

Page 58: ... start installation The MGI Registration window will be displayed before completing installation Send send your name and e mail address to MGI Register now move to the on line registration window Register later postpone registration Installation is completed You should restart computer after finishing installation 6 7 8 ...

Page 59: ...xt to move to the next step The Software License Agreement window will be displayed If you agree to it click Yes This will take you to the next step If you disagree click Cancel and the install program will be canceled Select a folder where you would like PhotoVista to be installed The default folder is C Program Files MGI Photovista If you want to install PhotoVista in a different folder click Br...

Page 60: ...opying Files window will display Click Next to start installation The Online Registration window will display Click Continue to continue The Online Registration Utility window will be displayed The mark means that it is a required field Click Cancel should you not wish to register Set up is complete Click Finish to finish set up 6 7 8 9 ...

Page 61: ...USE EDITING SOFTWARE MGI PhotoSuite lll SE This software is only compatible with Windows To open MGI PhotoSuite lll SE click the start programs MGI PhotoSuite lll SE MGI PhotoSuite lll SE and MGI PhotoSuite lll SE will then open ...

Page 62: ...Prepare A number of photo editing activities can be performed within this module Compose Use your photos in a variety of fun creative and interesting ways Organize Organize your photos and other media files into albums Share Save your results to show to others Print Print hard copies of photos and projects ...

Page 63: ...Help Display help window Get Get images Prepare A number of photo editing activities can be performed within this module Compose Use your photos in a variety of fun and interesting ways Organize Organize your photos and other media files into albums Share Save your results to show to others Print Print hard copies of photos and projects Browse Browse the web site ...

Page 64: ...me screen or the Get button on the Navigation bar Click Computer from the list of options displayed on the activity panel The Open file selector is displayed Now select the image file and click open The Welcome screen will change to the next work step with the selected image displayed To obtain images from the computer 1 2 3 ...

Page 65: ... bar Click Computer from the list of options displayed on the activity panel The Open file selector is displayed Click Look in to choose Removable Disk and click open for the open file window to be displayed Note When you connect a PC to the Camera use the following sequence 1 Turn the Mode dial to PC mode 2 Turn the power on 3 Connect the USB cable Refer to page 49 for more information about conn...

Page 66: ... image and click Open The Welcome screen will change to the next work step with the selected image displayed 3 4 Reference When you use the Digimax 130 only Computer and Album from the list of options displayed are available You will be able to obtain images from the digital camera Computer and Album Only ...

Page 67: ...e Navigation bar Click Album from the list of options displayed on the activity panel After selecting Album on the Choose a photo album click an image in the album and click Open The Welcome screen will change to the next work step with the selected image displayed Acquiring images from an Album Refer to page 71 for more information about creating an Album 1 2 3 ...

Page 68: ...EPARE step Rotate Crop You can rotate flip or crop images along with a host of others Touchup Remove Red eye Remove Scratches etc are available in this menu Special Effects A number of special effects can be applied Stitching Join a series of photos together to create a sweeping panoramic effect Initial image Rotated image PREPARE ...

Page 69: ...any collage and layout options Card tag Use your photos to create items such as Gift Tags Greeting Cards Invitations Postcards and Sports Cards Calendars Use your photos to create a variety of calendars monthly quarterly seasonal yearly Collections Photos can also be used to create a variety of items for business purposes Add frames and boarder effects to your photos with the predefined templates ...

Page 70: ...ge Delete Delete selected image Properties view image information Choose an action to manage your album Add click Add to add an image to an Album Sort click Sort to Sort saved images Search click Search to Search saved images Reset click Reset to reset the setting Update click Update to update images Create Slide Show click Create Slide Show to create a Slide Show Always start on this page If you ...

Page 71: ... click the large Organize button on the Welcome screen or the Organize button on the Navigation bar Click Album in Choose a photo album to view or edit The Master Album window will be displayed then click New Put a new Album name in the New Album window and click OK A new album will now be created 1 2 3 4 ...

Page 72: ...Save As To assign a new name or path to the file Send E mail e mailing images Send to Kodak PhotoNet Online Sending images to Kodak PhotoNet Share Your Pictures At GatherRoom com Sending images to GatherRoom com and sharing images Slide Show Viewing images as a slide show Click SAVE and the Save Project window will be displayed Enter the file name and click Save S to save an image 1 2 ...

Page 73: ... Multiples Print multiple copies of a photo or project or one copy of each of the photos included in an album according to a predefined template Choose a printer choose an orientation choose the print size choose the number of copies You can then print the images 1 2 Reference For more information please refer to the Help file in Help MGI PhotoSuite lll help ...

Page 74: ...MGI Photovista is an easy to use program that lets you create spectacular 360 panoramic images in a snap This software is only compatible with Windows To open MGI Photovista click start button programs MGI Photovista MGI Photovista and it will open ...

Page 75: ...oad the first image source of the panorama Rotate Images Rotates all selected images counterclockwise Flip Image Horizontally Flips the selected image horizontally Flip Image Vertically Flips the selected image vertically Select Lens Select lens for effect Stitch Panorama Creating a panoramic effect ...

Page 76: ...to select the first image of the sequence A dialogue box will then be displayed DESCRIPTION BUTTON Add Add All Remove Remove All Sort Reverse Add image to source file Add all images to source file Remove image from source file Remove all images from source file Images are sorted by file name Images are sorted by file name in reverse order 1 ...

Page 77: ... PhotoVista The file names are Displayed in the Select Lens window Click Select Lens to select a lens When you click Stitch Panorama the Stitch Options window will be displayed When checking Full 360 panorama 360 panorama image will be displayed 2 3 4 ...

Page 78: ... Saving images Click File in Stitched_Result menu to save a panoramic image To save a panoramic image as a JPG or BMP file format click Save As Click Publish Panorama to send the image to a designated server for sharing purposes 1 2 3 Save Cancel ...

Page 79: ...USE EDITING SOFTWARE MGI PhotoVista Click Upload Pictures and images are sent to www GatherRound com Click Print Panorama to print it 4 5 Reference For more information please refer to the Help file in Help Quick Start Tutorial ...

Page 80: ...c will start Select Install Location and click Install Click Cancel and the installation will be canceled Click Continue and the installation will progress Installation was successful Click Continue for additional installation Click Restart to restart the computer After restarting computer a new folder will be made automatically on the desktop when you connect camera to Mac 1 2 3 4 5 ...

Page 81: ... of restarting computer after installation Don t take off the USB cable or turn off the power during the image download or opening the image file It may make the system shutdown It is impossible to transfer image from Mac to camera and delete image that is in Removable Disk ...

Page 82: ...MEMO 82 ...

Page 83: ...MEMO 83 ...

Page 84: ...65824 SCHWALBACH GERMANY TEL 49 6196 66 53 01 FAX 49 6196 66 53 33 SAMSUNG FRANCE S A R L BP 51 TOUR MAINE MONTPARNASSE 33 AV DU MAINE 75755 PARIS CEDEX 15 FRANCE TEL 33 1 4279 2282 FAX 33 1 4320 4510 S MARKET COM IMP EXP LTDA Av zaki narchi 1392 v guilherme cep 02029 001 SÃO PAULO SP BRAZIL TEL 55 11 6221 6833 FAX 55 11 6221 6833 SAMSUNG TECHWIN MOSCOW OFFICE KOSMODAMIANSKAYA NABEREZNA 40 42 MOSC...

Reviews: