


9
Y
O U R
N
E W
T V
INPUT
OUTPUT
VIDEO
AUDIO
75
CAUTION
RISK OF ELECTRIC SHOCK.
DO NOT OPEN.
CAUTION :
TO PREVENT ELECTRICAL SHOCK, DO NOT REMOVE
THIS COVER. NO USER-SERVICEABLE PARTS INSIDE.
REFER SERVICING TO QUALIFIED SERVICE PERSONNEL.
WARNING :
TO PREVENT DAMAGE WHICH MAY RESULT
IN FIRE OR SHOCK HAZARD, DO NOT EXPOSE THIS
APPLIANCE TO RAIN OR MOISTURE.
1
2
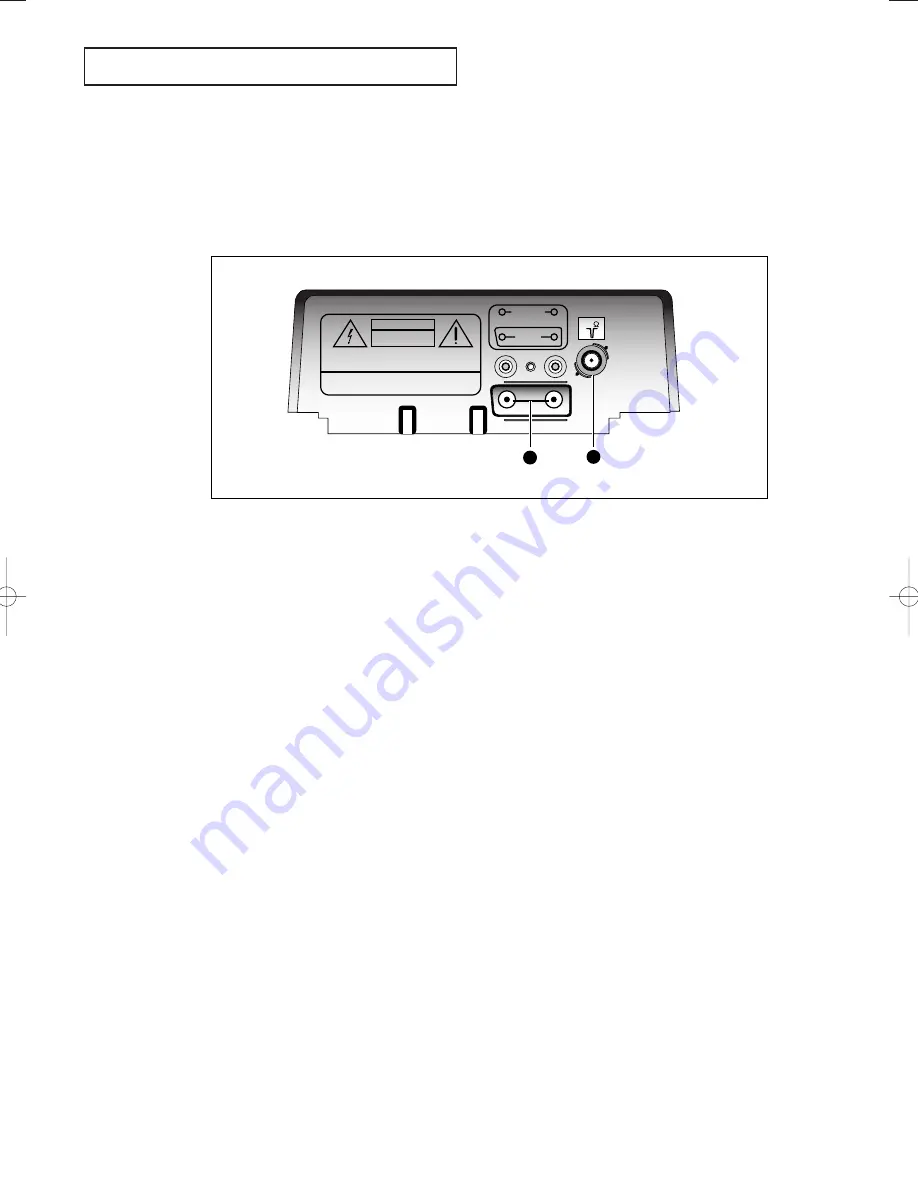
Rear Panel Jacks
Use the rear panel jacks to connect an A/V component that will be connected
continuously, such as a VCR.
For more information on connecting equipment, see pages 11 – 17.
Œ
VIDEO and AUDIO input jacks
Use these jacks to connect a VCR or other
video equipment.
´
VHF/UHF Antenna terminal
Use this terminal to connect an outdoor
antenna or cable system.
02825A(E)-CHAPTER 1 6/16/03 4:05 PM Page 9


