background image

Appendixes

  84

Settings menu

Learn about various options to configure your camera's settings.

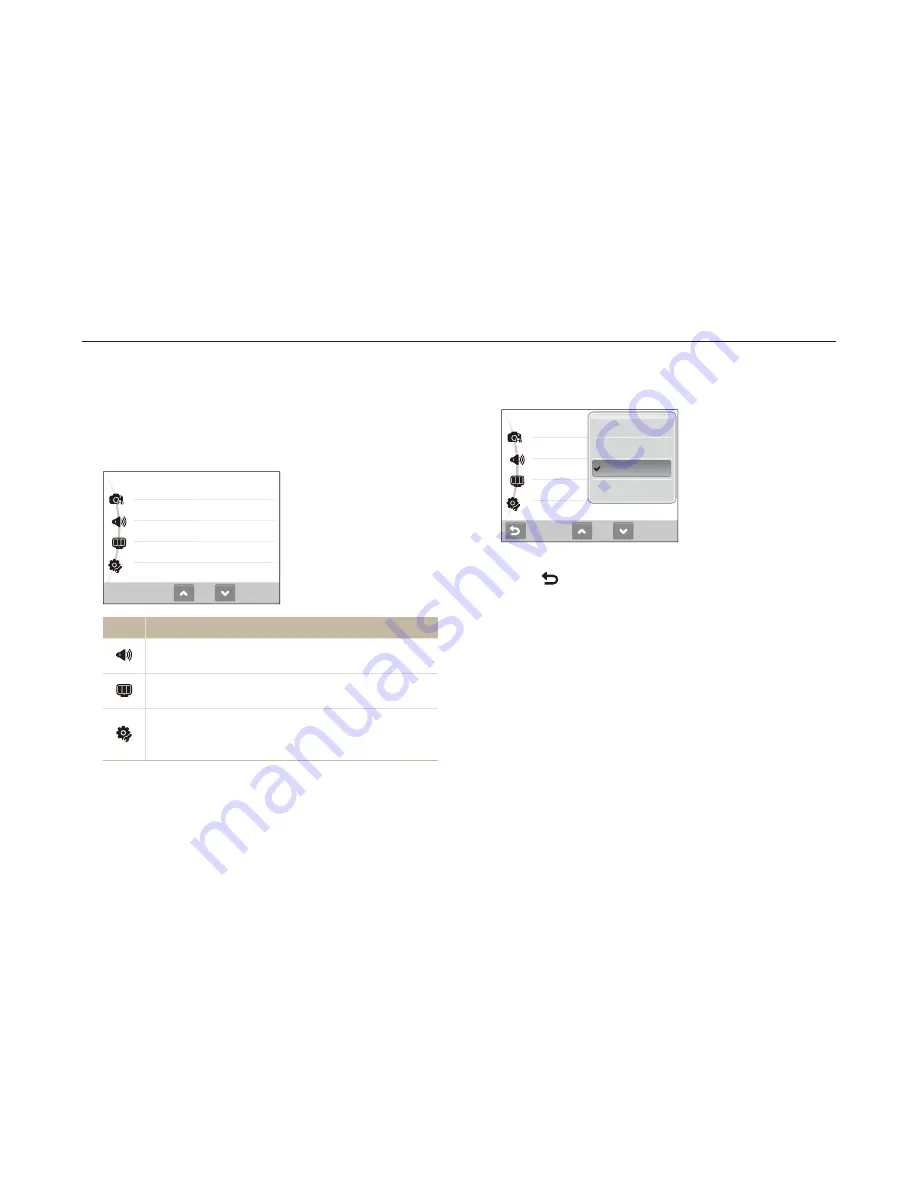
Select an option and save your settings.

1/2

Volume

Haptic Strength

Haptic&Sound

Shutter Sound

Start Sound 

:Off

Off

Low

Medium

High

Select 

 to return to the previous screen.

Accessing the settings menu

In Shooting or Playback mode, press [

MENU

].

Select a menu.

1/2

Volume

Haptic Strength

Haptic&Sound

Shutter Sound

Start Sound

:Medium

:High

:All

:1

:Off

Icon

Description

Sound settings

: Set various camera sounds and 

volume. (p. 88)

Display settings

: Customize the display settings, such 

as language and brightness. (p. 88)

Camera settings

: Change the settings for the camera 

system, such as memory format, default file name, and 
USB mode. (p. 89)

Summary of Contents for CL65

Page 1: ...age instructions for your camera Please read this manual thoroughly Click a topic User Manual CL65 Quick reference Contents Basic functions Extended functions Shooting options Playback Editing Wireles...

Page 2: ...ell Prevent damage to subjects eyesight Do not use the ash in close proximity closer than 1 m 3 ft to people or animals Using the ash too close to your subject s eyes can cause temporary or permanent...

Page 3: ...or t foreign substances If dirty wipe the memory card clean with a soft cloth before inserting in your camera Turn off the camera when inserting or removing the memory t card Safety precautions Handle...

Page 4: ...vehicles Consult the manufacturers of your electronic devices to solve any interference problems you experience Do not bend drop or subject memory cards to heavy impact t or pressure Do not use memory...

Page 5: ...from unquali ed service is not covered by your warranty Ensure maximum battery and charger life Overcharging batteries may shorten battery life After charging is t nished disconnect the cable from yo...

Page 6: ...ode and how to record a video or voice memo Shooting options 33 Learn about the options you can set in Shooting mode Playback Editing 55 Learn how to play back photos videos or voice memos and edit ph...

Page 7: ...this manual Icon Function Additional information Safety warnings and precautions Camera buttons for example Shutter represents the shutter button Page number of related information The order of option...

Page 8: ...t of a scene such as a person animal or still life Background t the objects around the subject Composition t the combination of a subject and background Background Subject Composition Exposure Brightn...

Page 9: ...just the sensitivity to light t f 46 EV to adjust exposure t f 53 ACB to compensate for subjects against bright t backgrounds f 54 Metering t f 55 AEB to take 3 photos of the same scene with different...

Page 10: ...for backlighting ACB 47 Changing the metering option 48 Selecting a light source White balance 49 Using burst modes 51 Improving your photos 52 Applying photo styles 52 Basic functions 11 Unpacking 12...

Page 11: ...utomatically 72 Connecting to a WLAN manually 73 Storing your information 73 Storing email addresses 74 Setting the le size to share 74 Checking information 74 Entering text 75 Using photo or video sh...

Page 12: ...Setting the touch screen 19 Selecting a display type 19 Setting the touch vibration or sound 19 Taking photos 20 Zooming 21 Tips for getting a clearer photo 22 Basic functions Learn about your camera...

Page 13: ...Strap Silver ADXX XXXXXA Black ADXX XXXXXA Software CD ROM ADXX XXXXXB A V cable ADXX XXXXXB Quick Start Manual ADXX XXXXXA HDMI adapter ADXX XXXXXA Unpacking Check your product box for the following...

Page 14: ...rt familiarise yourself with your camera s parts and their functions Shutter button POWER button Lens Flash AF assist light timer lamp Microphone GPS antenna Multifunction jack Accepts USB A V cable o...

Page 15: ...t When saving a photo or video being read by a computer or printer or out of focus Steady t When connecting to a computer or in focus Zoom button Zoom in or out t Zoom in on part of a photo or view le...

Page 16: ...ment sharpness contrast saturation t Long time shutter t Audio recording t Another row of options Icons The icons displayed will change according to the mode you select or the options you set A Status...

Page 17: ...o start your camera Turning on your camera in Playback mode Press Playback The camera turns on and accesses Playback mode immediately Press and hold Playback to mute camera sounds Rotate the lens cove...

Page 18: ...he screen Doing so may damage the screen When you touch or drag on the screen discolorations will occur It is t not a malfunction but a characteristic of the touch screen Touch or drag lightly to redu...

Page 19: ...stures Perform certain functions by drawing commands on the touch screen Gesture Description Draw a horizontal bar from left to right to view t the next le Draw a horizontal bar from right to left to...

Page 20: ...d All Select an option 3 Option Description Off The camera will neither vibrate nor sound Haptic The camera will vibrate Sound The camera will sound All The camera will vibrate and sound simultaneousl...

Page 21: ...n the a mode Auto the camera s default shooting mode If not select the mode icon t a Auto This mode minimizes user settings for quick convenient shooting Align your subject in the frame 2 Half press 3...

Page 22: ...e The digital zoom is not available when using t S d s in some scenes and v modes and when used with Face Detection It may take longer to save a photo when using the digital zoom t Zooming You can sho...

Page 23: ...ically set Focus frame Press t Shutter to take the photo if displayed in green Change the frame and half press t Shutter again if displayed in red Reducing camera shake Select the d mode to reduce cam...

Page 24: ...d the subject is too bright the subject is shiny the subject includes horizontal patterns such as blinds the subject is not positioned in the center of the frame Use the focus lock Half press Shutter...

Page 25: ...me guide 28 Adjusting the exposure in the Night mode 29 Using the DIS mode 30 Using the Program mode 30 Recording a video 31 Recording voice memos 33 Recording a voice memo 33 Adding a voice memo to a...

Page 26: ...e depending on the subject s position or lighting The camera may not select the correct scene depending on shooting t environments such as camera shake lighting and distance to the subject Even if you...

Page 27: ...ter face only select f an option Select a higher setting to make skin tone appear lighter t Level 2 Using the Scene mode Take a photo with options preset for a speci c scene In Shooting mode select 1...

Page 28: ...s 2 Shutter Transparent guides will appear on the left and right of the t frame Cancel Frame Back Ask another person to take a photo 3 The person must align the subject in the frame by using the t gui...

Page 29: ...in the Night mode In the Night mode you can catch brief ashes of light as curved streaks by extending the exposure Use a slow shutter speed to extend the time until the shutter closes Increase the ap...

Page 30: ...e frame and half press 3 Shutter to focus Press 4 Shutter to take the photo Using the DIS mode Reduce camera shake and prevent blurred photos with Digital Image Stabilization DIS functions Before corr...

Page 31: ...your video from blurring Set other options as desired For options refer to 5 Shooting options Press 6 Shutter to start recording Press 7 Shutter again to stop recording Recording a video Record video...

Page 32: ...des To pause recording The camera allows you to pause temporarily while recording a video With this function you can record your favorite scenes as a single video Select to pause while recording Selec...

Page 33: ...1 f Memo Align your subject in the frame and take a photo 2 You will begin recording a voice memo right after taking the t photo Record a short voice memo 10 seconds maximum 3 Press t Shutter to stop...

Page 34: ...cting faces 44 Taking a self portrait shot 45 Taking a smile shot 45 Detecting eye blinking 45 Using smart face recognition 46 Adjusting brightness and colour 47 Adjusting the exposure manually EV 47...

Page 35: ...a resolution As you increase the resolution your photo or video will include more pixels so it can be printed on larger paper or displayed on a larger screen When you use a high resolution the le siz...

Page 36: ...Selecting image quality Photos you take are compressed and saved in JPEG format Higher quality images will result in larger sizes In Shooting mode select 1 f In some modes select f Select an option 2...

Page 37: ...timer t Depending on the selected face defection option the timer is not t available or some timer options are not available In Shooting mode select 1 Select an option 2 Off Option Description Off Th...

Page 38: ...ou are more than 3 m away from the camera t your movements are too subtle t there is too much light or backlight t Using the motion timer 1 In Shooting mode select Press 2 Shutter Stand within 3 m fro...

Page 39: ...Off Option Description Off The ash will not re t Camera shake warning t will be displayed when shooting in low light Auto The camera will select a proper ash setting for the detected scene in the S mo...

Page 40: ...uces red eyes t Fill in The ash always res t Light intensity is adjusted automatically t Slow Sync The ash res and the shutter stays open longer t Select this when you want to capture ambient light to...

Page 41: ...ther than 80 cm Auto Macro Focus on a subject farther than 5 cm farther than 50 cm when using zoom Macro Focus on a subject 5 80 cm 50 80 cm when using zoom Super Macro Focus on a subject between 3 to...

Page 42: ...same patterns on the subject and the background are the same the camera shakes excessively In these cases the focus frame will appear as a white single line frame If the camera fails to track the subj...

Page 43: ...g mode select 1 f Select an option 2 Center AF Option Description Center AF Focus on the center suitable when subjects are located in the center Multi AF Focus on one or more of 9 possible areas when...

Page 44: ...the faces appear in grey focus frames The closer you are to the subject the quicker your camera will detect faces In some scene modes face detection is unavailable t Face detection may not be effectiv...

Page 45: ...automatically take 2 photos in succession In Shooting mode select f Hold your camera still while t Capturing is displayed on the screen When blink detection fails t Picture taken with eyes closed mes...

Page 46: ...he camera recognizes a new face when there are 10 registered t faces it will replace the face in the lowest priority with the new one The camera can recognize up to 3 faces in one scene t When the cam...

Page 47: ...1 0 2 2 1 0 0 2 1 EV p d v Adjusting brightness and color Learn how to adjust the brightness and color for better image quality Select 3 The adjusted exposure value will appear as shown below t Once...

Page 48: ...when t Continuous Motion Capture or AEB is in use Compensating for backlighting ACB When the light source is behind your subject or there is high contrast between your subject and the background your...

Page 49: ...t frame with emphasis placed on the center Suitable for photos with subjects in the center of the t frame Changing the metering option The metering mode refers to the way in which a camera measures t...

Page 50: ...ght Fluorescent_L Select when shooting under white uorescent light Tungsten Select when taking indoor photos under incandescent bulbs or halogen lamps Custom Set Use your pre de ned settings Selecting...

Page 51: ...Shooting options 50 Adjusting brightness and color De ning your own white balance In Shooting mode select 1 f Aim the lens at a piece of white paper 2 Press 3 Shutter...

Page 52: ...then saves them AEB Take 3 photos with different exposures normal t underexposed and overexposed Use a tripod to prevent blurry photos t The options may differ depending on the shooting mode You can...

Page 53: ...rom the photos style options select a color R Red G Green B Blue Select the amount of the selected color 2 Custom RGB Select 3 Applying photo styles Apply different styles to your photos such as Soft...

Page 54: ...printing Adjusting your photos Adjust the sharpness saturation and contrast of your photos In Shooting mode select 1 f twice Select an adjustment option 2 t Sharpness t Contrast t Saturation Select a...

Page 55: ...ormation onto the t photos GPS icon status Color Description Green The camera is receiving GPS signals Red The camera is not receiving GPS signals Yellow The camera has not received GPS signals and th...

Page 56: ...color 66 De ning your own RGB tone 66 Applying a special effect 67 Correcting exposure problems 67 Creating a print order DPOF 68 Viewing les on a TV HDTV 69 Printing photos with a photo printer PictB...

Page 57: ...ete les p 65 Play a slide show p 67 Edit photos p 70 Select a display type p 18 Play videos or voice memos Video p 68 Voice memo p 69 Starting Playback mode View photos or play videos and voice memos...

Page 58: ...rt Album View and manage les by categories such as date le type or week In Playback mode select 1 a category Type Date Colour Week Face Option Description Type View les by the le type Date View les by...

Page 59: ...t Select les you want to protect 3 Select t to select all les Select t to cancel your selection Select 4 Viewing les as thumbnails Scan thumbnails of les In Playback mode push Zoom down to display 9 o...

Page 60: ...In Playback mode press 1 MENU Select 2 Protect All Lock Deleting les Delete single les or all les at once You cannot delete protected les To delete a single le In Playback mode select a le 1 Select 2...

Page 61: ...ycle bin les you delete will be sent to the recycle bin instead of being deleted permanently This applies to single les or selected les only if you choose to delete all les those les will not be sent...

Page 62: ...interval will be set to 1 sec Music Select background audio Effect Select a transition effect t Select t for no effects Select 3 to start the slide show Touch on the screen except for option icons to...

Page 63: ...ideo to end and select Select 4 Yes The original video should be at least 10 seconds long t The edited video will be saved as a new le t Playing a video You can play a video capture an image from a vi...

Page 64: ...ing icons to control playback 2 Icon Description Pause or resume playback Stop playback Adjust volume or mute sound Capturing an image during playback Select 1 at the point where you want to save a st...

Page 65: ...r saturation Resizing photos In Playback mode select a photo 1 Select 2 an option Select t to save the photo as a start image p 88 2048 X 1536 Select 3 Available options differ depending on the size o...

Page 66: ...elect 2 a color R Red G Green B Blue Select the amount of the color 3 Custom RGB Select 4 Editing color Apply a different color tone to the photo such as Soft Vivid or Forest Soft Vivid Forest In Play...

Page 67: ...hite to make the main subject stand out Elegant Apply effects to the photo to make it brighter and softer Add Noise Add noise to the photo to give it an aged look Select 3 Correcting exposure problems...

Page 68: ...alance In Playback mode select a photo 1 Select 2 Select 3 Creating a print order DPOF Select photos to be printed and set options such as number of copies or paper size The memory card can be taken t...

Page 69: ...TV screen select on the camera screen On some TVs digital noise may occur or part of an image may not t appear Images may not appear centered on the TV screen depending on t your TV settings You can c...

Page 70: ...number of copies and select If you selected to print the photos you want repeat steps 5 6 t for all photos to print Select 7 Yes to con rm Printing starts Select t Cancel to cancel printing With the p...

Page 71: ...Option Description Size Specify the size of the print Layout Create thumbnail prints Type Select the type of paper Quality Set the printing quality Date Set to print the date File Name Set to print th...

Page 72: ...devices 80 Viewing photos on a TV screen 80 Viewing photos on another device 81 Sending photos to another camera 81 Receiving photos from another camera 82 Sending photos via Bluetooth 83 Wireless ne...

Page 73: ...twork t administrator or network service provider When connecting to the network you will be charged according to t your contract with your network service provider Connecting to a WLAN automatically...

Page 74: ...ished select 6 O Select 7 Connecting to a WLAN manually In Shooting mode select Network 1 n Select 2 Access Point Setting The camera will search for and display available WLAN t connections Select a W...

Page 75: ...serial number of your camera to register it with the Samsung website In Shooting mode select Network 1 n Select 2 Device Information Storing email addresses Store up to 10 email addresses in your came...

Page 76: ...Entering text To enter text when storing your information or email addresses select the appropriate letters symbols and numbers When you are nished select O Icon Description Enter small letters Enter...

Page 77: ...such as Zoom in Flickr Picasa and Facebook You can also upload your videos to video sharing websites such as YouTube In Shooting mode select Network 1 The camera automatically connects to the last WLA...

Page 78: ...or video sharing websites Uploading photos Select 1 Drag photos to the selection area and select 2 Add The number of photos you can upload may differ depending on the selected website Select an album...

Page 79: ...omatically connects to the last WLAN t connection If the camera has not connected to the WLAN it automatically t searches for available WLAN connections For details refer to page xx Select 2 For infor...

Page 80: ...in the user setting t Refer to page xx For information about searching for the camera and browsing t the photos on the TV refer to the TV user manual AP Viewing photos on a TV screen View your photos...

Page 81: ...Enter the password 4 digits on the receiving camera 4 The selection area automatically appears on the sending t camera Drag photos to the selection area 5 The photos will be sent to the receiving came...

Page 82: ...Receiving photos from another camera In Shooting mode select Network 1 a Select 2 Receive Select the name of the sending camera 3 Enter the sending camera s password and select 4 O When the sending ca...

Page 83: ...t Network 1 Select 2 Yes The camera will search for and display Bluetooth enabled t devices If you have searched for the Bluetooth enabled devices a list t of Bluetooth enabled devices appears Select...

Page 84: ...mera settings 86 Error messages 88 Camera maintenance 89 Cleaning your camera 89 About memory cards 90 About the battery 90 Before contacting a service center 92 Camera speci cations 94 FCC notice 98...

Page 85: ...screen Accessing the settings menu In Shooting or Playback mode press 1 MENU Select a menu 2 1 2 Volume Haptic Strength Haptic Sound Shutter Sound Start Sound Medium High All 1 Off Icon Description S...

Page 86: ...is selected Quick View Set the duration for reviewing a captured image or video before returning to Shooting mode Off 0 5 sec 1 sec 3 sec Power Save If you perform no operations for 30 seconds the cam...

Page 87: ...der is 9999 The camera de nes le names according to the t Digital rule for Camera File system DCF standard If you change the names of les intentionally the camera may not play back the les Camera sett...

Page 88: ...ra to a printer for printing les Item Description Imprint Set whether to display the date and time on your photos when printing Off Date Date Time The date and time will be displayed on the bottom t r...

Page 89: ...memory card p 89 t DCF Full Error File names do not match the DCF standard Transfer the les on the memory card to your computer and format the card p 89 File Error Delete the damaged le or contact a s...

Page 90: ...These t solutions can damage the camera or cause it to malfunction Make sure to close the lens cover before cleaning t Cleaning your camera Camera lens and touch screen Use a blower brush to remove du...

Page 91: ...ards you can use You can use SD Secure Digital memory cards Memory card capacity The memory capacity may differ depending on shooting scenes or shooting conditions These capacities are based on a 1 GB...

Page 92: ...n t you use a USB hub other USB devices are connected to your computer you connect the cable to the port on the front side of your computer the USB port of your computer does not support the power out...

Page 93: ...res unexpectedly The ash may re due to static electricity This is not a malfunction of the camera The date and time are incorrect Set the date and time in the display settings menu The touch screen or...

Page 94: ...again Situation Suggested remedies The memory card has an error The memory card has not been reset Format the card p 89 Cannot play back les If you change the name of a le your camera may not play the...

Page 95: ...Auto Red eye Fill in Slow Sync Red eye Fix Range Wide 0 2 m 4 6 m ISO Auto t Tele 0 5 m 2 3 m ISO Auto t Recharging time Approx 4 sec Image sensor Type 1 2 3 CCD Effective pixels Approx 12 2 mega pix...

Page 96: ...ion t Funny Face Face Retouch Red eye Fix Snow t Mosaic Highlight Voice recording Voice Recording Max 10 hours t Voice Memo in a photo Max 10 sec t Shake reduction Dual IS Optical Image Stabilisation...

Page 97: ......

Page 98: ...cations Dimensions W x H x D 98 x 59 x 17 2 mm Weight 124 2 g without battery and memory card Operating temperature 0 40 C Operating humidity 5 85 Software Multi stage Speci cations are subject to ch...

Page 99: ...can be determined by turning the equipment off and on the user is encouraged to try to correct the interference by one or more of the following measures Reorientate or relocate the receiving antenna I...

Page 100: ...eaning Body 89 Display 89 Lens 89 Color tone 65 D Date and time 86 Deleting les 59 Digital Image Stabilisation 29 Digital zoom 21 DIS mode 29 Display brightness 85 Display type 19 DPOF 67 Dragging 17...

Page 101: ...ting photos 69 Print order 67 Program mode 29 Protecting les 58 Q Quick View 85 R Recording Video 30 Voice memo 32 Recycle bin 60 Red eye 38 Reset 86 Resizing 64 Resolution Photo 34 Video 34 RGB tone...

Page 102: ...Start image 85 T Timer 36 Touching 17 Touch screen 14 Touch vibration 19 V Video Playing 62 Recording 30 Video Out 87 Viewing les as thumbnails 58 on TV 68 Slide show 61 Voice memo Playing 63 Recordin...

Page 103: ...se refer to the warranty that came with your product or visit our website http www samsung com for after sales service or inquiries The CE Mark is a Directive conformity mark of the European Community...

Reviews: