

◈
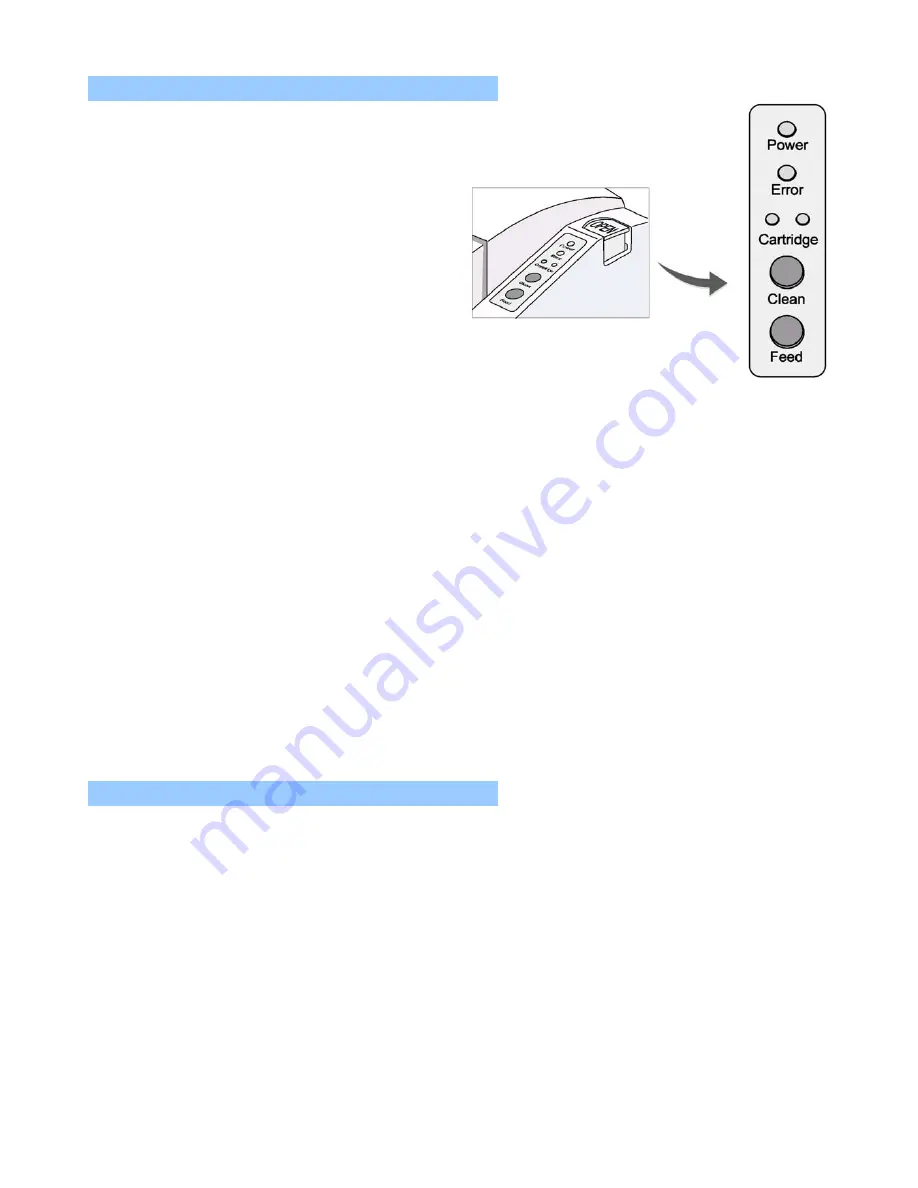
Keypad Controls and Indicator Lights
Most of the functions of this printer are governed by software, but
you can monitor the printer’s status by looking at the lights on the
control panel and for some procedures you will use the buttons.
•
•
Keypad Controls
Clean Button
The Clean button is used to clean the printer head.
(Refer to operator’s manual)
Feed Button
The feed button is used to feed paper or to start self test and for
hexadecimal dump mode.
(Refer of operator’s manual)
Keypad Indicator Lights
Power Indicator
Light
This indicator light is on when the power is turned on. It blinks when the printer is in the
self-test printing standby state. Always wait until this indicator light stops blinking before
you start using the printer and before you turn it off.
Error Indicator
Light
When this indicator light is on (but not blinking), it means that the printer is out of paper or
almost out of paper or the printer covers are open. When this light is blinking, there is an
error. If you see this light blinking, turn off the printer for a few seconds and then turn it
back on. If the light is still blinking, call your supervisor or a service person.
Cartridge Indicator
Light (LH/RH)
The right indicator is for the right cartridge and the left indicator for the left cartridge.
If the printer is a single color printer, the left cartridge indicator will be used.
In most cases, the left cartridge is black, and the right is a color.
This indicator light (LH/RH) blinks when the cartridge is almost out of ink and stays on
when the cartridge(s) is removed.
◈
Printer Self Testing
•
Self test
The self test lets you know if your printer is operating properly. It checks the control circuits,
printer mechanisms, print quality, ROM version, and DIP switch settings.
The test is independent of any other equipment or software, so it is a good idea to run it when you first set up the
printer or if you have any trouble. If the self test works correctly, the problem is in the other equipment or the
software, not the printer.
Running the self test
1) Make sure the printer is turned off and the printer cover is closed properly.
2) While holding down the Feed button, turn on the printer and continue to hold until the paper begins to feed.
The self test prints the printer settings and cuts the paper and pauses. (The power light blinks.)
3) Press the Feed button to continue printing the rolling ASCII pattern. Repeat for the nozzle pattern, receipt pattern
and NV bit image(s).
4) The self test mode terminates after printing NV bit image(s) automatically.


