background image

11

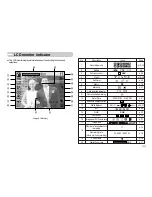
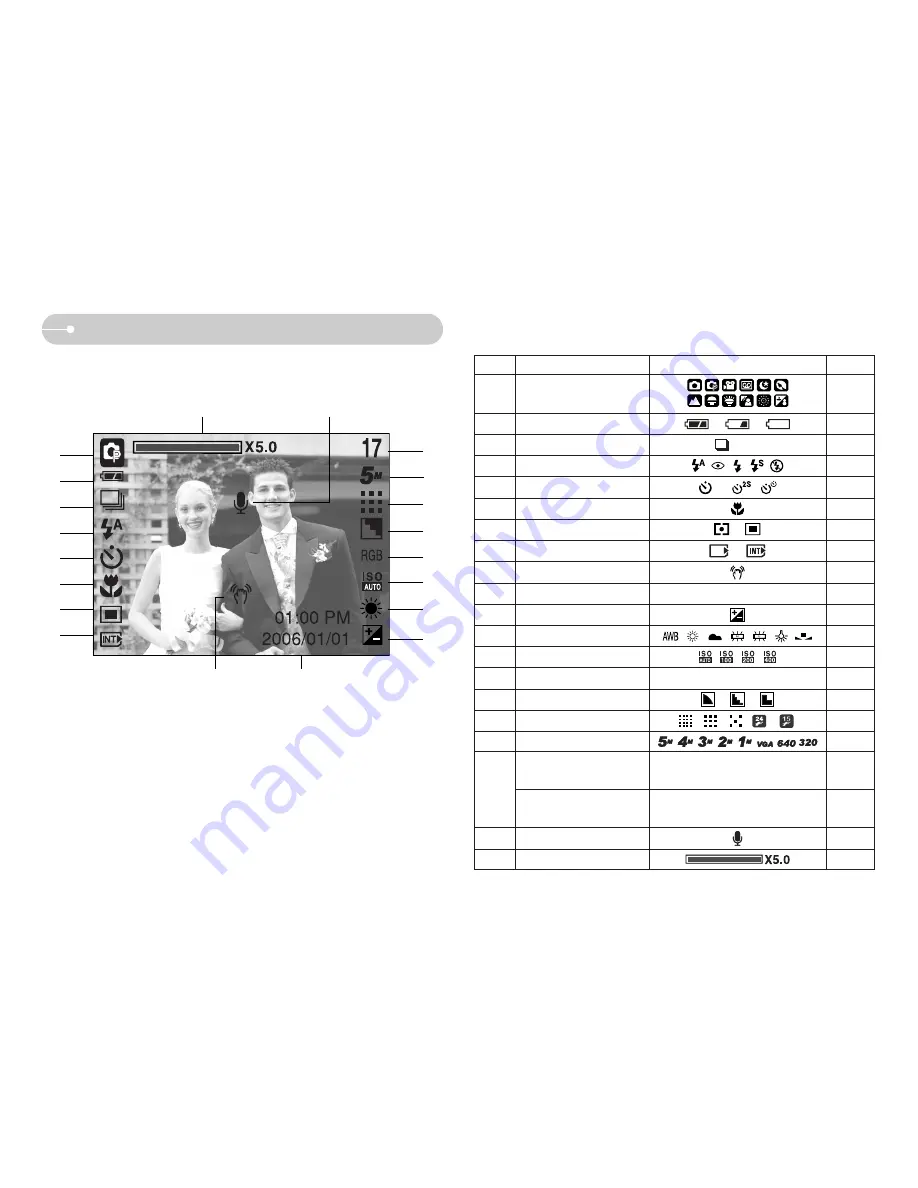
No.

Description

Icons

Page

2

Battery

p.8

3

Continuous shot

AEB

p.32

4

Flash

p.18~20

5

Self-timer

p.20

6

Macro

p.16

7

Metering

p.31

8

Card inserted indicator

-

9

Camera shake warning

-

10

Date/ Time

2006/01/01   01:00 PM

p.51

11

Exposure compensation

p.27

12

White Balance

p.26~27

13

ISO

p.26

14

RGB

RGB

p.25

15

Sharpness

p.32

16

Image quality / Frame rate

p.31

17

Image size

p.30

19

Voice memo

p.18

20

Digital Zoom rate

p.17

18

Recording mode

1

p.12~15

Number of available shots

remaining

17

00:00:23 / 00:37:43

p.10

p.10

Remaining time 

(Movie clip/ Voice recording)

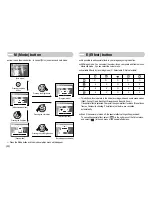
LCD monitor indicator

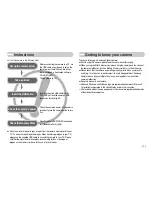
[ Image & Full Status ]

The LCD monitor displays information about the shooting functions and
selections.

Summary of Contents for A503 - Digimax 5MP Digital Camera

Page 1: ...l will guide you through using the camera including capturing images downloading images and using the application software Please read this manual carefully before using your new camera This manual is based on model Digimax A503 User s Manual ENGLISH ...

Page 2: ...e the supplied USB cable to connect the camera to your PC Please note that the manufacturer accepts no responsibility for loss or damage of images on the memory card due to the use of a card reader Thank you for buying a Samsung Digital Camera Prior to using this camera please read the user manual thoroughly When you require After Sales service please bring the camera and the cause of the camera m...

Page 3: ...flammable or explosive gases as this could increase the risk of explosion Shouldanyformofliquidoraforeignobjectenterthecamera donotuseit Switchoffthecamera andthendisconnectthepowersource YoumustcontactyourdealerorSamsungCamera Servicecentre Donotcontinuetousethecameraasthismaycauseafireorelectricshock Do not insert or drop metallic or inflammable foreign objects into the camera through access poi...

Page 4: ...hooting 32 Sharpness 32 OSD On Screen Display information 33 Starting play mode 33 Playing back a still image 33 Playing back a movie clip 34 How to capture the movie clip 34 Playing back a recorded voice 34 LCD monitor indicator 35 Using the camera buttons to adjust the camera 35 Thumbnail Enlargement button 35 Voice memo Up button 37 Play Pause Down button 37 Delete button 38 Left Right Menu OK ...

Page 5: ...24 bit color display recommended DirectX 9 0 or later For Macintosh Power Mac G3 or later Mac OS 10 0 10 3 Minimum 64MB RAM 110MB of available hard disk space USB port CD ROM drive QuickTime 6 01 or later for Movie Clip System Requirements When you connect the camera to a computer or printer you must use the USB cable supplied with the camera or the external devices may not recognise the camera CA...

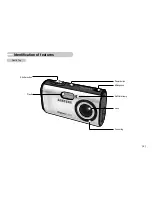
Page 6: ... 5 Identification of features Front Top Flash Shutter button Microphone Power button Self timer lamp Lens Focus ring ...

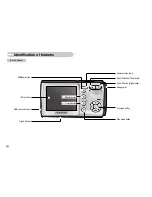
Page 7: ...tures Back Bottom LCD monitor USB connection port Tripod Socket Play mode button 5 function button E Effects button Delete button Zoom T button Digital zoom Camera status lamp Zoom W button Thumbnail Strap eyelet M Mode button ...

Page 8: ... seconds and 2 seconds later a second picture will be taken Camera Status Lamp Status Description Power on Thelampturnsonandoffwhenthecameraisreadytotakeapicture After taking a picture The lamp blinks while saving the image data and turns off when the camera is ready to take a picture While movie recording The lamp blinks While voice recording The lamp blinks USBcableisconnectedtoaPC The lamp ligh...

Page 9: ...lose power over time and are prone to leaking if kept inside the camera We recommend high capacity batteries listed above as manganese batteries cannot deliver sufficient power Low temperatures below 0 C can affect the performance of the batteries and you may experience reduced battery life Batteries will usually recover at normal temperatures Do not use old and new batteries at the same time Do n...

Page 10: ... any liquid Should this happen carefully clean the memory card with a soft cloth Please keep the memory card in its case when not in use During and after periods of extended use you may notice that the memory card is warm This is perfectly normal Do not use a memory card that is used in another digital camera To use the memory card in this camera format the memory card by using this camera Do not ...

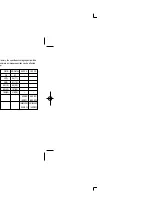
Page 11: ...d shooting capacity will be roximate as image capacities can be affected er FINE NORMAL 24FPS 15FPS 18 27 22 7 34 11 28 9 41 14 45 15 65 22 95 32 127 43 182 62 218 75 23SEC 36SEC 8SEC 28SEC 1MIN23SEC 2MIN3SEC 12SEC 42SEC ...

Page 12: ...ensation p 27 12 White Balance p 26 27 13 ISO p 26 14 RGB RGB p 25 15 Sharpness p 32 16 Image quality Frame rate p 31 17 Image size p 30 19 Voice memo p 18 20 Digital Zoom rate p 17 18 Recording mode 1 p 12 15 Number of available shots remaining 17 00 00 23 00 37 43 p 10 p 10 Remaining time Movie clip Voice recording LCD monitor indicator Image Full Status The LCD monitor displays information abou...

Page 13: ...camera modes are available Selecting the MODE menu 1 Insert the battery p 8 2 Insert the memory card p 8 As this camera has a 24MB internal memory you do not have to insert the memory card If the memory card is not inserted an image will be stored in the internal memory If the memory card is inserted an image will be stored on the memory card 3 Close the battery chamber cover 4 Press the power but...

Page 14: ...t the FULL sub menu on the MODE menu p 12 2 Select the Auto mode by pressing the M Mode button p 22 3 Point the camera towards the subject and compose the image by using the LCD monitor 4 Press the shutter button to capture an image Avoid obstructing the lens or the flash when you capture an image How to use the Movie clip mode A movie clip can be recorded for as long as the available recording ti...

Page 15: ...VIE CLIP mode 3 Point the camera towards the subject and compose the image by using the LCD monitor Press the shutter button and movie clips are recorded for as long as the available recording time Movie clips will still be recorded if the shutter button is released 4 Press the Pause button to pause recording 5 Press the Pause button again to resume the recording 6 If you wish to stop recording pr...

Page 16: ...ausing while recording a voice recording This camera allows you to temporarily stop during unwanted recording while recording a voice Using this function you can record your favorite voices into a voice recording file without having to create multiple voice recording files 1 Press the shutter button and voice is recorded for as long as the available recording time Voice will still be recorded if t...

Page 17: ...u select voice memo recording the recording will start after the camera has finished storing the image data Macro focus mode The focus range is 0 2m A Macro icon will display on the LCD monitor when you select this focus mode To prevent the image from being dim maintain the focus range at 0 2m When the Flash Off or Slow synchro mode is selected in a low lighting condition the camera shake warning ...

Page 18: ...l zoom WIDE When the digital zoom is in operation pressing the ZOOM W button will reduce the digital zooming in steps Releasing ZOOM W button stops digital zooming Digital zoom 5X Digital zoom 2 5X WIDE zoom Pressing the ZOOM W button Pressing the ZOOM W button If the menu is not displayed this button works as the DIGITAL ZOOM button To use the digital zoom the LCD monitor has to be turned on Imag...

Page 19: ... correct flash to suit the picture taking situation Voice recording Voice memo UP button While the menu is showing press the UP button to move up the sub menu cursor When the menu is not displayed on the LCD monitor the UP button operates as the voice recording or voice memo button You can record your voice or add your voice over to a stored still image Refer to page 15 for more information about ...

Page 20: ...h mode Description Flash mode indicator If the subject or background is dark the camera flash will operate automatically Auto flash Auto Red eye reduction Fill in flash Slow synchro Flash off If a subject or background is dark the camera flash will work automatically and will reduce the red eye effect by using the red eye reduction function The flash will operate in conjunction with a slow shutter...

Page 21: ... 2 seconds before the image is taken Double self timer A picture will be taken after about 10 seconds and 2 seconds later a second picture will be taken When using the flash the 2 second self timer may be delayed for longer than 2 seconds depending on the flash charge time 3 When you press the SHUTTER button the picture will be taken after the specified time has elapsed INFORMATION Selecting the 1...

Page 22: ...the LCD monitor this button is used for shifting the cursor to the sub menu or for confirming data Pressing the MENU button Menu off 2560X1920 2272X1704 2048X1536 1600X1200 SIZE MOVE SET OK M Mode button Auto mode Movie clip mode You can select the desired recording mode The selectable recording modes are different from what you selected sub menu in the MODE menu STILL MOVIE Select from a recordin...

Page 23: ...tton Still image mode You can select the colour focus composite and frame menus Movie clip mode You can select the colour menu Available Effects by recording mode O Selectable X Not selectable This button will not operate in the Voice recording mode and some scene modes Night Sunset Dawn Backlight Fireworks and Beach Snow If a special effect is selected the rest of the special effect functions Pre...

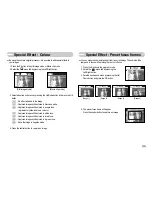
Page 24: ...ing the camera s digital processor it is possible to add special effects to your images 1 Press the E button in the still image mode or Movie clip mode 2 Select the menu tab by pressing the Left Right button Still image mode Movie clip mode You can make the subject stand out from its surroundings The subject will be sharp and in focus while making the rest out of focus 1 Press the E button in the ...

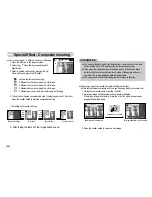
Page 25: ... will start after taking the last composite shooting INFORMATION Moving backward to the 2nd shot You can combine 2 4 different shots in a still image 1 Press the E button in the program mode 2 Select the menu tab by pressing the Left Right button 3 Select a desired sub menu by pressing the Up Down button and press the OK button cancels the composite shooting 2 different shots are combined in a sti...

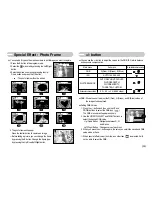
Page 26: ...rom the icon other than is selected it will not be able to select the RGB Main menu Sub menu Available camera mode RGB R Red G Green B Blue ISO AUTO 100 200 400 Exposure compensation 2 0 0 0 2 0 0 5EV steps WHITE BALANCE AUTO DAYLIGHT CLOUDY FLUORESCENT H FLUORESCENT L TUNGSTEN CUSTOM button Special Effect Photo Frame You can add 9 types of frame like borders to a still image you want to capture 1...

Page 27: ...he speed or specific light sensitivity of a camera is rated by ISO numbers button Selecting a White Balance 1 Press the button and then use the UP and DOWN buttons to select the white balance icon The white balance menu bar will appear as shown 2 Use the LEFT and RIGHT buttons to set the white balance to the desired value The value you set will be displayed on the LCD monitor AUTO The camera autom...

Page 28: ...is overwritten White paper Exposure compensation This camera automatically adjusts the exposure according to the ambient lighting conditions You can also select the exposure value by using the button Compensating Exposure 1 Press the button and then use the UP and DOWN buttons to select the exposure compensation icon The exposure compensation menu bar will appear as shown 2 Use the LEFT and RIGHT ...

Page 29: ...the mode you have selected The items indicated by are default settings Menu tab Main menu Sub menu Camera working mode Page STILL MOVIE FULL AUTO PROGRAM MOVIE NIGHT PORTRAIT LANDSCAPE SUNSET DAWN BACKLIGHT FIREWORKS BEACH SNOW 2560X1920 2272X1704 2048X1536 1600X1200 1024X768 640X480 SIZE Movie clip 640X480 320X240 S FINE FINE NORMAL MODE MODE SET p 29 p 30 p 30 p 30 p 31 QUALITY SIZE Still image ...

Page 30: ...ndscape sunset dawn backlight fireworks beach snow camera modes are available STILL MOVIE A still image mode that was selected on the MODE SET menu and movie clip mode can be selected FULL Auto Program Movie clip and Scene modes can be selected STILL MOVIE FULL MODE 3 Use the UP and DOWN buttons to select a sub menu PresstheLEFT orRIGHT button PresstheUP orDOWN button PresstheUP orDOWN button Pres...

Page 31: ...nes BACKLIGHT Portrait without shadows caused by backlight FIREWORKS Firework scenes BEACH SNOW For ocean lake beach and snowscape scenes When NIGHT LANDSCAPE SUNSET DAWN and FIREWORKS scene modes are selected it is possible that camera shake will occur In this case you should use a tripod INFORMATION Taking high resolution images will use much more memory than low resolution images making fewer s...

Page 32: ...he data INFORMATION STILL IMAGE mode MOVIE CLIP mode S FINE FINE NORMAL QUALITY 24 FPS 15 FPS FRAME RATE Metering If you cannot obtain suitable exposure conditions you can change the metering method to take brighter pictures MULTI Exposure will be calculated based on an average of the available light in the image area However the calculation will be biased towards the centre of the image area This...

Page 33: ...number of pictures in continuous shooting SINGLE Take one picture only CONTINUOUS Images will be taken continuously until the shutter button is released The shooting capacity depends on the memory AEB Take three pictures in a series in different exposures standard exposure 0 0EV short exposure 0 5EV and over exposure 0 5EV Use the mode if it is hard to decide exposure of the object High resolution...

Page 34: ...mode If the memory card is inserted in the camera all the camera functions apply only to the memory card If the memory card is not inserted in the camera all the camera functions apply only to the internal memory If you have turned on the camera by pressing the POWER button you can press the PLAY MODE button once to switch to Play mode and press it again to switch to Recording mode You can turn th...

Page 35: ...pture function capture still images from the movie clip Pressing the E button Paused CAPTURE E Play Button Playing back a recorded voice In order to play back voice files recorded with the camera the camera must be connected to your PC See p 62 Your PC must have a sound card and speakers installed Please be sure to install the camera driver before connecting the camera to your PC 1 Connect the cam...

Page 36: ...il mode was selected 3 Press the 5 function button to move to a desired image 4 To view an image separately press the enlargement button The LCD monitor displays shooting information about the displayed image By pressing the Play mode button for over 1 Sec you can check the recording information 100 0009 Play mode display Recording information Pressing for over 1 Sec Pressing the Play mode button ...

Page 37: ...image can t be trimmed TRIMMING TRIM CANCEL CONFIRM OK Image size 5M 4M 3M 2M 1M VGA Maximumenlargementrate X8 0 X7 1 X6 4 X5 0 X3 2 X2 0 Image enlargement 1 Select an image that you want to enlarge and press the enlargement button 2 Different parts of the image can be viewed by pressing the 5 function button 3 Pressing the thumbnail button will zoom back to the original full sized image You can t...

Page 38: ...utton to select an image that you wish to add sound to 2 Press the voice memo button and the voice memo indicator will display The camera is now ready to record a voice memo 3 Press the shutter button to start recording a voice memo to the still image for up to 10 seconds While the voice is recording the recording status window will be displayed as shown alongside 4 The recording can be stopped by...

Page 39: ... UP DOWN button and then press the OK button If DELETE is selected deletes the selected images If CANCEL is selected cancels Delete Image Press the DELETE button DELETE DELETE CANCEL CONFIRM OK DELETE DELETE CANCEL CONFIRM OK Before deleting images from the camera download those you wish to keep to your computer INFORMATION LEFT RIGHT MENU OK buttons activate the following LEFT button While the me...

Page 40: ...onitor In the PLAY mode pressing the MENU button displays the menu on the LCD monitor The menus you can set up in Play mode are as follows To capture an image after setting up the play menu press the PLAY button or shutter button Menu tab Main menu Sub menu Secondary menu Page SHOW PLAY REPEAT INTERVAL 1 3 5 10 OFF E1 4 MIX RIGHT 90 LEFT 90 180 HORIZONTAL VERTICAL 2272X1704 2048X1536 1600X1200 102...

Page 41: ...econdary menu Page ONE PIC ALL PICS NO YES AUTO POSTCARD CARD LETTER 4 X 6 L 2L A4 A3 AUTO FULL 1 2 4 8 9 16 CUSTOM SET p 47 SIZE LAYOUT AUTO SET p 47 IMAGES p 46 Menus are subject to change without prior notice Menu tab Main menu Sub menu Secondary menu Page AUTO PLAIN PHOTO FAST PHO AUTO DRAFT NORMAL FINE AUTO OFF ON AUTO OFF ON STANDARD INDEX NO YES NO YES CUSTOM SET p 48 RESET QUALITY DATE FIL...

Page 42: ...the SHOW menu and press the Right button 2 Select a desired sub menu by pressing the Up Down button PLAY The slide show is closed after one cycle REPEAT The slide show is repeated until cancelled 3 Press the OK button to start the slide show Press the Pause button to pause the slide show Press the Pause button again to resume the slide show To stop the slide show press the Pause button and then pr...

Page 43: ... be the start up image The resized image will have a new file name 1 Press the play mode button and press the menu button 2 Press the LEFT RIGHT button and select the RESIZE menu tab 3 Select a desired sub menu by pressing the UP DOWN button and press the OK button A large sized image can be resized to a smaller sized image but not vice versa Only JPG images can be resized MOVIE and WAV files can ...

Page 44: ...is used to protect specific shots from being accidentally erased LOCK It also unprotects images that have been previously protected UNLOCK Protecting Images 1 Press the play mode button and press the menu button 2 Press the LEFT RIGHT button and select the PROTECT menu tab 3 Select a desired sub menu by pressing the UP DOWN button and press the OK button SELECT Only the image that is displayed on ...

Page 45: ...mber of copies to print for the current picture only ALL PICS Set the number of copies to print for each picture excluding movie clips and voice recordings 5 Use the UP and DOWN buttons to select the number of copies and then press the OK button The DPOF icon will appear by the pictures for which the number of copies to print is set 100 0009 MOVE PIC SET OK EXIT SH 00 PRINTS STANDARD INDEX PRINT S...

Page 46: ...ult 1 Press the play mode button and press the menu button 2 Press the LEFT RIGHT button and select the DPOF menu tab 3 Select the CANCEL menu by pressing the UP DOWN button and press the RIGHT button 4 Select a desired sub menu by pressing the UP DOWN button If STANDARD is selected Cancels the standard print setting If INDEX is selected Cancels the index print setting If PRINT SIZE is selected Ca...

Page 47: ... Select pictures to print 1 Use the LEFT and RIGHT buttons to select the IMAGE menu tab 2 Use the UP and DOWN buttons to select the desired sub menu value and then press the OK button When ONE PIC is selected The PictBridge function will be applied only to the picture currently displayed When ALL PICS is selected The PictBridge function will be applied to all pictures excluding movie clips and voi...

Page 48: ... then press the RIGHT button 3 Use the UP and DOWN buttons to select the desired sub menu value and then press the OK button CUSTOM SET You can select the Paper Size Print Format Paper Type Print Quality Date Print and File Name Print menus for printed pictures NO YES AUTO SET MOVE SIZE LAYOUT TYPE QUALITY AUTO AUTO AUTO AUTO CUSTOM SET MOVE The menus you can set up are as follows Setting the size...

Page 49: ... on the manufacturer and printer model some menus may not be available When a printer does not support the DPOF the menu is still displayed but not available DPOF PRINT This allows you to directly print the files with DPOF information Printing Pictures 1 Use the LEFT and RIGHT buttons to select the PRINT menu tab 2 Use the UP and DOWN buttons to select the desired submenu value and then press the ...

Page 50: ...ndary menu Page SERIES RESET PWR SAVE OFF 1 3 5MIN p 50 ENGLISH 한국어 FRANÇAIS DEUTSCH ESPAÑOL ITALIANO P CCK PORTUGUÊS DUTCH DANSK SVENSKA SUOMI BAHASA POLSKI Magyar NO YES 06 01 01 OFF YY MM DD MM DD YY DD MM YY TIME 13 00 OFF IMPRINT DATE p 52 DATE TIME FILE FORMAT LANGUAGE DATE p 50 p 50 p 51 p 51 In this mode you can set up basic settings You can use the setup menu in all camera modes except Vo...

Page 51: ... the exception of Voice Recording mode press the MENU button 2 Press the LEFT RIGHT button and select the SETUP menu tab 3 Select the FILE menu by pressing the UP DOWN button and press the RIGHT button 4 Select a desired sub menu by pressing the UP DOWN button and press the OK button SERIES New files are named using numbers that follow the previous sequence even when a new memory card is used or a...

Page 52: ...mory including protected images will be deleted Be sure to download important images to your PC before formatting the memory Sub menus NO The memory will not be formatted Press the menu button three times and the menu display will disappear YES A confirmation window will display Select the FORMAT message and press the OK button A PROCESSING message appears and the memory card will be formatted If ...

Page 53: ...tion to include DATE TIME on still images Sub menus OFF The DATE TIME will not be imprinted on the image file DATE Only the DATE will be imprinted on the image file DATE TIME The DATE TIME will be imprinted on the image file LCD sub menu DARK NORMAL BRIGHT Connecting an External Device USB You can select an external device to which you want to connect the camera using the USB cable Sub menus COMPU...

Page 54: ... subject to change without prior notice Menutab Mainmenu Submenu Page OFF LOGO USERIMAGE1 USERIMAGE2 S BEEP OFF ON p 52 p 51 S IMAGE Start up image Sub menus NO Settings will not be restored to their defaults YES All settings will be restored to their defaults Initialisation All camera menu and function settings will be restored to their default values However values for DATE TIME and LANGUAGE wil...

Page 55: ...the memory card if you do not intend using the camera for an extended period of time Important notes Be sure to observe the following precautions This unit contains precision electronic components Do not use or store this unit in the following locations Areas exposed to severe changes in temperature and humidity Areas exposed to dust and dirt Areas exposed to direct sunlight or the inside of a veh...

Page 56: ...t harmful to the camera and is not a malfunction Before an important event or going on a trip you should check the camera condition Take a picture for testing the camera condition and prepare extra battery Samsung cannot be held responsible for camera malfunctions Warning indicator There are several warnings that may appear on the LCD display CARD ERROR ㆍMemory card error Turn off the camera power...

Page 57: ...w memory card ㆍThe memory card is locked Refer to CARD LOCKED error message p 55 ㆍThe camera s power is off Turn the camera power on ㆍThe battery are exhausted Insert fresh batteries ㆍBattery is inserted incorrectly with the polarities reversed Insert the battery according to the polarity marks FILE ERROR ㆍFile error Format the memory card ㆍMemory card error Contact a camera service centre LOW BAT...

Page 58: ...e correctly The camera buttons do not operate ㆍCamera malfunction Remove re insert battery and switch the camera on A card error has occurred while the memory card is in the camera ㆍIncorrect memory card format Reformat the memory card The images don t play back ㆍIncorrect file name Violation of DCF format Do not change the image file name Colour of image is different to the original scene ㆍWhite ...

Page 59: ... User selectable gram Scene t Portrait Landscape Sunset Dawn Backlight orks Beach Snow gle Continuous AEB c 2 sec Double self timer 10sec 2sec rding time memory capacity dependent 320 x 240 ps 15fps ox 24 Approx 8 MB flash memory ard High Speed MMC 1GB Guaranteed EG DCF EXIF 2 2 DPOF 1 1 PictBridge 1 0 I MJPEG 3M 2M 1M VGA 48x1536 1600x1200 1024x768 640x480 ...

Page 60: ...g fault we will repair or exchange your held responsible in any way for damage and OS that has not been guaranteed by the e Samsung warranty hould have a basic knowledge of computers irements For Macintosh Power Mac G3 or later Mac OS 10 0 10 3 or later Minimum 64MB RAM 110MB of available hard disk space ce USB port CD ROM drive QuickTime 6 01 or later for Movie Clip MHz ay ...

Page 61: ... A503 in some contents Be sure to check the system requirements before installing the driver You should allow 5 10 seconds for running the automatic setup program according to the capability of the computer If the frame does not show run the Windows Explorer and select Samsung exe in the CD ROM Drive root directory INFORMATION Camera driver This enables images to transfer between the camera and PC...

Page 62: ...pens after starting Digimax Master the camera driver was set up successfully 3 After restarting the computer connect the camera to your PC with the USB cable If you have installed the camera driver The Found New Hardware Wizard may not open On a Windows 98 or 98 SE system the Found New Hardware Wizard dialog box opens and a window asking you to select a driver file may appear In this case specify ...

Page 63: ...UP menu tab 3 Select the USB menu by pressing the UP DOWN button and press the RIGHT button 4 Use the UP and DOWN buttons to select COMPUTER and then press the OK button 5 Press the menu button twice and the menu will disappear 6 Connect the PC to the camera with the USB cable If you connect the USB cable to a USB port on your PC and then turn on the power the camera will automatically switch to c...

Page 64: ...py or move the image files Windows 98SE 1 Check whether the camera and PC are transferring a file If the camera status lamp blinks please wait until the lamp has finished blinking and is constantly on 2 Unplug the USB cable Windows 2000 ME XP The illustrations may be different from the real display in accordance with the Windows O S 1 Check whether the camera and PC are transferring a file If the ...

Page 65: ...plug the USB cable 1 A USB Driver for MAC is not included with the software CD as MAC OS supports the camera driver 2 Check the MAC OS You can check the MAC OS version during MAC OS start up This camera is compatible with MAC OS 10 0 10 3 3 Connect the camera to the Macintosh and turn the camera power on 4 A new icon will be displayed on the desktop after connecting the camera to the MAC 1 Double ...

Page 66: ...w and click the Select All button You can save captured images and selected folder If you click the Cancel button downloading will be cancelled 3 Click Next button 4 Select a destination and make a folder to save downloaded images and folders Folder names can be made in order of date and images will be downloaded Folder name will be made as you want and images will be downloaded After selecting a ...

Page 67: ...to the Help menu in Digimax Master for further information Digimax Master Image viewer You can view the stored images Image viewer functions are listed below Menu bar You can select menus File Edit View Tools Change functions Auto download help etc Image selection window You can select the desired images in this window Media type selection menu You can select image viewer image edit and movie edit...

Page 68: ...max Master for further information FAQ Please check the following if the USB connection malfunctions Case 1 USB cable is not connected or it is not the supplied USB cable Connect the supplied USB cable Case 2 The camera is not recognised by your PC Sometimes the camera may appear under Unknown Devices in Device Manager Install the camera driver correctly Turn off the camera remove the USB cable pl...

Page 69: ...facturer If the movie clip can t be deleted removable disk can t be extracted or an error message displays during the file transfer If you install only the Digimax Master the problems mentioned above occasionally happen Close the Digimax Master program by clicking the Digimax Master icon on the Taskbar Install all the application programs included in the software CD You must install the Movie clip...

Page 70: ...ation This equipment generates uses and can radiate radio frequency energy and if not in stalled and used in accordance with the instructions may cause harmful interference to radio communications However there is no guarantee that interference will not occur in a particular installation If this equipment does cause harmful interference to radio or television reception which can be determined by t...

Page 71: ...MEMO MEMO 70 ...

Page 72: ...MEMO MEMO 71 ...

Page 73: ...MEMO MEMO 72 ...

Page 74: ...1 4320 4510 www samsungphoto fr SAMSUNGOPTO ELECTRONICSGMBH AMKRONBERGERHANG6 D 65824SCHWALBACH TS GERMANY TEL 49 0 6196665303 FAX 49 0 6196665366 www samsungcamera de TIANJINSAMSUNGOPTO ELECTRONICSCO LTD 7PINGCHANGROADNANKAIDIST TIANJIN P RCHINA POSTCODE 300190 TEL 86 22 2761 4599 FAX 86 22 2769 7558 www samsungcamera com cn SAMSUNGOPTO ELECTRONICSUKLIMITED SAMSUNGHOUSE1000HILLSWOODDRIVE HILLSWOO...

Reviews: