background image

Follow these instructions to change the vertical size of the 
monitor's entire display.

Adjust the pincushion setting when the sides of the display 
are bowed in or bowed out.

Adjust the pinbalance setting when the sides of the display 
are bowed towards the left or right.

Adjust the trapezoid setting when the top or bottom of the 
display is too large or small.

Adjust the parallelogram setting when the display is leaning 
left or right.

Adjust the rotation setting when the entire display is tilted left 
or right.


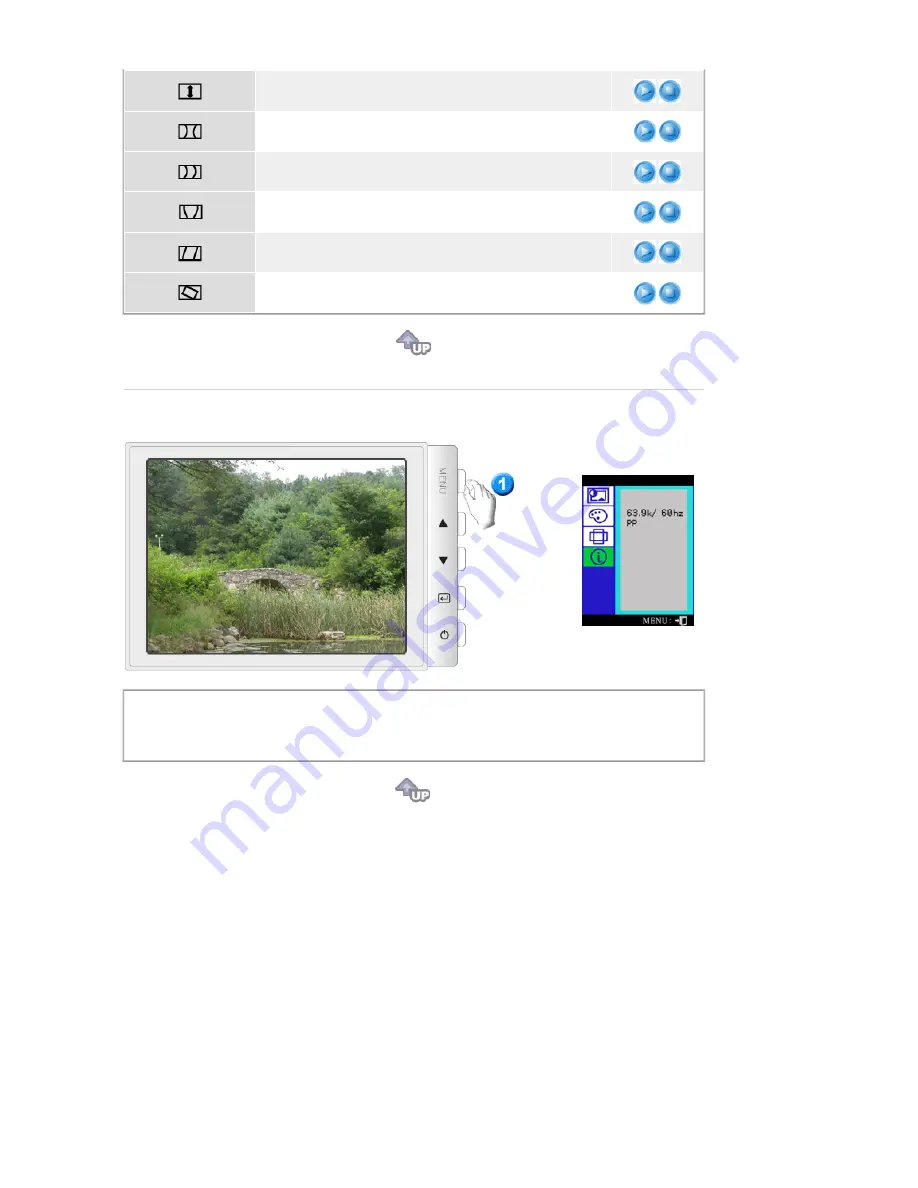
You can see the frequency (user control mode) used by the user, the polarity of the operational 
signals, the default frequency (default mode) set when you buy the monitor and the resolution 
level.  

Note

: These screens do not allow any changes to the settings, they are for information only. 


Summary of Contents for 790DF

Page 1: ...Install drivers Install programs SyncMaster 591s 591v 793s 793v 783DF 793DF 793MB 795DF 795MB 797DF 997DF ...

Page 2: ...ll times Do not disassemble Disconnect the plug from the outlet Do not touch Grounding to prevent an electric shock Power When not used for extended periods of time set your computer to a screen saver z If the same image is present for long periods of time Phosphor Burnt can be occured or the screen may be blurred Do not use a damaged or loose plug ...

Page 3: ...ck or fire Disconnect the plug from the outlet during storms or lightening or if it is not used for a long period of time z This may cause an electric shock or fire Do not connect too many extension cords or plugs to an outlet z This may cause fire Do not disconnect the power cord while using the monitor z A surge may be caused by the separation and may damage the monitor Do not use the power cord...

Page 4: ...could be damaged or broken Do not place the monitor face down z The CDT surface may be damaged Do not use the monitor without the monitor stand z It could break down or cause fire due to bad ventilation z If the monitor must be used without the supplied stand take steps to insure proper ventilation When installing the product make sure to keep it away from the wall more than 10cm 4inch for ventila...

Page 5: ...rgent with a smooth cloth z You may prevent the coated CDT from being damaged or the monitor cabinet from being dissolved cracked or discolored z You may buy a recommended detergent at any Samsung Service Center If the connector between the plug and the pin is dusty or dirty clean it properly with a dry cloth z A dirty connector may cause an electric shock or fire Others Do not remove cover or bac...

Page 6: ...uce eye fatigue Watching the monitor continuously at a too close angle may result in eyesight damage Do not use or store inflammable substances near the monitor z This may cause an explosion or fire Do not try to move the monitor by pulling only the wire or the signal cable z This may cause a breakdown electric shock or fire due to damage to the cable Do not move the monitor right or left by pulli...

Page 7: ...ion of the image Do not install the product on an unstable uneven surface or a location prone to vibrations z Dropping the product may cause damage to the product or personal injury Using the product in a location prone to vibrations may shorten the lifetime of the product or may catch fire ...

Page 8: ... või moonutada kujutist Ärge paigaldage seadet kõikuvale ebatasasele pinnale või kohtadesse kus esineb vibratsiooni z Seadme kukkumine võib põhjustada vigastusi nii seadmele kui ka kasutajale Seadme kasutamine kohtades kus esineb vibratsiooni lühendab toote kasutusiga ja võib põhjustada tulekahju ...

Page 9: ...contact your dealer Unpacking Monitor and Stand Some models include a stand attached Manual Quick Setup Guide Warranty Card Not available in all locations User s Guide Monitor Driver Natural Color software Cable SyncMaster 997DF SyncMaster 591s 591v 793s 793v 997DF 793DF 793MB 795DF 795MB 797DF ...

Page 10: ...Power Cord Signal Cable Option Stand Stand For Multimedia model Option Manual User Guide Cable Sound Cables 2each DC Power Cord Stand Multimedia Speaker Stand Front ...

Page 11: ...on Use this button for turn the monitor on and off Power indicator This light glows green during normal operation and blinks green once as the monitor saves your adjustments See PowerSaver described in the manual for further information regarding power saving functions For energy conservation turn your monitor OFF when it is not needed or when leaving it unattended for long periods Rear General BN...

Page 12: ...ration at the back of the monitor may vary from product to product Power port Connect the power cord for your monitor to the power port on the back of the monitor Signal port Connect the signal cable to the 15 pin D sub connector on the back of your monitor BNC Connectors Option Connect the signal cable to the BNC signal port on the back of your monitor SeeConnecting the Monitor for further inform...

Page 13: ...l cable to the video port on your computer video board video card or graphics card Power port Connect the power cord for your monitor to the power port on the back of the monitor Tilt Swivel Base You can separate the base from the monitor ...

Page 14: ...or If any items are missing contact your dealer Unpacking Monitor and Stand Some models include a stand attached Manual Quick Setup Guide Warranty Card Not available in all locations User s Guide Monitor Driver Natural Color software Cable Power Cord SyncMaster 783DF ...

Page 15: ...Stand Stand For Multimedia model Option Manual User Guide Cable Sound Cables 2each DC Power Cord Stand Multimedia Speaker Stand Front ...

Page 16: ...or turn the monitor on and off Power indicator This light glows green during normal operation and blinks green once as the monitor saves your adjustments See PowerSaver described in the manual for further information regarding power saving functions For energy conservation turn your monitor OFF when it is not needed or when leaving it unattended for long periods Rear The configuration at the back ...

Page 17: ...video card or graphics card See Connecting the Monitor for further information regarding cable connections Bottom Signal Cable Connect the signal cable to the video port on your computer video board video card or graphics card Power port Connect the power cord for your monitor to the power port on the back of the monitor Tilt Swivel Base You can separate the base from the monitor ...

Page 18: ...ble to the 15 pin D sub connector on the back of your monitor 2 2 Connecting to a new Macintosh Connect the monitor to the Macintosh computer using the D SUB connection cable 2 3 Connecting to an old Macintosh Connect your monitor to the Macintosh using the adapter for Macintosh sold separately 3 Turn on your computer and monitor If your monitor displays an image installation is complete BNC Conne...

Page 19: ...to a new Macintosh Connect the monitor to the Macintosh computer using the D SUB connection cable 2 3 Connecting to an old Macintosh Connect your monitor to the Macintosh using the adapter for Macintosh sold separately 3 When you use a BNC connector Connect the signal cable to the BNC signal port on the back of your monitor computer 4 Turn on your computer and monitor If your monitor displays an i...

Page 20: ...ion may occur when the monitor is placed on top of a mostly hollow cabinet such as your computer If this occurs place a pad or magazine beneath the monitor stand High sound volume may also cause sound distortion lower the volume Multimedia Speaker Stand 1 Mic By pass Jack To transmit your voice connect a sound cable from the Mic By pass jack to the mic in jack on the sound card slot in your comput...

Page 21: ...The base is detachable Attaching and Removing the Base If your monitor was supplied with the base detached attach the base as follows Remove the twist tie before attaching the base to the monitor ...

Page 22: ...y one position When prompted by the operating system for the monitor driver insert the CD ROM included with this monitor Driver installation is slightly different from one operating system to another Follow the directions appropriate for the operating system you have Prepare a blank disk and download the driver program file at the Internet web site shown here z Internet web site http www samsung c...

Page 23: ... 2000 Windows Me Windows NT Linux When prompted by the operating system for the monitor driver insert the CD ROM included with this monitor Driver installation is slightly different from one operating system to another Follow the directions appropriate for the operating system you have Prepare a blank disk and download the driver program file at the Internet web site shown here z Internet web site...

Page 24: ...s tab then click Advanced 4 Click the Properties button on the Monitor tab and select Driver tab 5 Click Update Driver and select Install from a list or then click Next button 6 Select Don t search I will then click Next and then click Have disk ...

Page 25: ...u can see following message window then click the Continue Anyway button Then click OK button 9 Click the Close button then click OK button continually This monitor driver is under certified MS logo and this installation doesn t damage your system The certified driver will be posted on Samsung Monitor homepage http www samsung com ...

Page 26: ...n is active click the Properties button then follow next steps continually Microsoft Windows Millennium Operating System 1 Click Start Setting Control Panel 2 Double click Display icon 3 Select the Settings tab and click Advanced Properties button 4 Select the Monitor tab 5 Click the Change button in the Monitor Type area 6 Choose Specify the location of the driver 7 Choose Display a list of all t...

Page 27: ...me as those shown on the monitor The Natural Color S W is the very solution for this problem It is a color administration system developed by Samsung Electronics in association with Korea Electronics Telecommunications Research Institute ETRI This system is available only for Samsung monitors and makes the color of the images on the monitor the same as the printed or scanned images For more inform...

Page 28: ...pens the OSD menu Also use to exit the OSD menu or return to the previous menu These buttons allow you to highlight and adjust items in the menu Use to select the OSD menu Brightness SyncMaster 591s 591v ...

Page 29: ...Menu Description When OSD is not on the screen push the button to adjust brightness Contrast Menu Description When OSD is not on the screen push the button to adjust Contrast ...

Page 30: ... or arcs To eliminate this pattern use the horizontal moire adjustments A Moirë pattern can appear on your screen looking like a series of concentric circles or arcs To eliminate this pattern use the vertical moire adjustments The Degauss feature will remove color impurities caused by magnetic fields Use the recall feature to reset these monitor settings to their original levels Position Size Pinc...

Page 31: ...e monitor color setting Blue When you adjust the Brightness and Contrast after sRGB mode is selected sRGB mode exits Menu Description Play Stop Follow these instructions to change the horizontal position of the monitor s entire display Follow these instructions to change the vetical position of the monitor s entire display Follow these instructions to change the horizontal size of the monitor s en...

Page 32: ...eft or right Adjust the trapezoid setting when the top or bottom of the display is too large or small Adjust the parallelogram setting when the display is leaning left or right You can see the frequency user control mode used by the user the polarity of the operational signals the default frequency default mode set when you buy the monitor and the resolution level Note These screens do not allow a...

Page 33: ...Opens the OSD menu Also use to exit the OSD menu or return to the previous menu These buttons allow you to highlight and adjust items in the menu Use to select the OSD menu Brightness SyncMaster 783DF ...

Page 34: ...Menu Description When OSD is not on the screen push the button to adjust brightness Contrast Menu Description When OSD is not on the screen push the button to adjust Contrast ...

Page 35: ... or arcs To eliminate this pattern use the horizontal moire adjustments A Moirë pattern can appear on your screen looking like a series of concentric circles or arcs To eliminate this pattern use the vertical moire adjustments The Degauss feature will remove color impurities caused by magnetic fields Use the recall feature to reset these monitor settings to their original levels Position Size Pinc...

Page 36: ...e monitor color setting Blue When you adjust the Brightness and Contrast after sRGB mode is selected sRGB mode exits Menu Description Play Stop Follow these instructions to change the horizontal position of the monitor s entire display Follow these instructions to change the vetical position of the monitor s entire display Follow these instructions to change the horizontal size of the monitor s en...

Page 37: ...ing when the top or bottom of the display is too large or small Adjust the parallelogram setting when the display is leaning left or right Adjust the rotation setting when the entire display is tilted left or right You can see the frequency user control mode used by the user the polarity of the operational signals the default frequency default mode set when you buy the monitor and the resolution l...

Page 38: ...Opens the OSD menu Also use to exit the OSD menu or return to the previous menu These buttons allow you to highlight and adjust items in the menu Use to select the OSD menu Brightness SyncMaster 797DF ...

Page 39: ...Menu Description When OSD is not on the screen push the button to adjust brightness Contrast Menu Description When OSD is not on the screen push the button to adjust Contrast ...

Page 40: ... or arcs To eliminate this pattern use the horizontal moire adjustments A Moirë pattern can appear on your screen looking like a series of concentric circles or arcs To eliminate this pattern use the vertical moire adjustments The Degauss feature will remove color impurities caused by magnetic fields Use the recall feature to reset these monitor settings to their original levels Position Size Pinc...

Page 41: ...Use to adjust the monitor color setting Blue When you adjust the Brightness and Contrast after sRGB mode is selected sRGB mode exits Menu Description Play Stop Follow these instructions to change the horizontal position of the monitor s entire display Follow these instructions to change the vetical position of the monitor s entire display Follow these instructions to change the horizontal size of ...

Page 42: ...large or small Adjust the parallelogram setting when the display is leaning left or right Adjust the rotation setting when the entire display is tilted left or right Adjust the side pin corner correction when the top or bottom of the display is too large or small You can see the frequency user control mode used by the user the polarity of the operational signals the default frequency default mode ...

Page 43: ...Opens the OSD menu Also use to exit the OSD menu or return to the previous menu These buttons allow you to highlight and adjust items in the menu Use to select the OSD menu Brightness SyncMaster 997DF ...

Page 44: ...Menu Description When OSD is not on the screen push the button to adjust brightness Contrast Menu Description When OSD is not on the screen push the button to adjust Contrast ...

Page 45: ...this pattern use the vertical moire adjustments The Degauss feature will remove color impurities caused by magnetic fields Use the recall feature to reset these monitor settings to their original levels Position Size Pincushion Trapezoid Parallelogram Pinbalance Rotation H Moire and V Moire Note If you have selected Yes all settings listed above will be reset All other settings will remain the sam...

Page 46: ...Use to adjust the monitor color setting Blue When you adjust the Brightness and Contrast after sRGB mode is selected sRGB mode exits Menu Description Play Stop Follow these instructions to change the horizontal position of the monitor s entire display Follow these instructions to change the vetical position of the monitor s entire display Follow these instructions to change the horizontal size of ...

Page 47: ...large or small Adjust the parallelogram setting when the display is leaning left or right Adjust the rotation setting when the entire display is tilted left or right Adjust the side pin corner correction when the top or bottom of the display is too large or small You can see the frequency user control mode used by the user the polarity of the operational signals the default frequency default mode ...

Page 48: ...menu These buttons allow you to highlight and adjust items in the menu Use to select the OSD menu MagicBright2 is a new feature providing optimum viewing environment depending on the contents of the image you are watching Brightness SyncMaster 793s 793v 793DF 793MB 795DF 795MB ...

Page 49: ...hen OSD is not on the screen push the button to adjust brightness MagicBright2 Menu Description MagicBright2 Then push the MagicBright2 button again to circle through available preconfigured modes SyncMaster 793MB 795MB ...

Page 50: ... or arcs To eliminate this pattern use the horizontal moire adjustments A Moirë pattern can appear on your screen looking like a series of concentric circles or arcs To eliminate this pattern use the vertical moire adjustments The Degauss feature will remove color impurities caused by magnetic fields Use the recall feature to reset these monitor settings to their original levels Position Size Pinc...

Page 51: ...e monitor color setting Blue When you adjust the Brightness and Contrast after sRGB mode is selected sRGB mode exits Menu Description Play Stop Follow these instructions to change the horizontal position of the monitor s entire display Follow these instructions to change the vetical position of the monitor s entire display Follow these instructions to change the horizontal size of the monitor s en...

Page 52: ...ing when the top or bottom of the display is too large or small Adjust the parallelogram setting when the display is leaning left or right Adjust the rotation setting when the entire display is tilted left or right You can see the frequency user control mode used by the user the polarity of the operational signals the default frequency default mode set when you buy the monitor and the resolution l...

Page 53: ...ere is no feedback to assist in correctly setting the controls of the monitor MagicTune is a software utility that guides you through the tuning process with easy to understand instructions and back ground patterns designed for each monitor control Basic Functionality MagicTune is a software utility that allows monitor adjustment and color tuning using the Display Data Channel Command Interface DD...

Page 54: ...nsert the installation CD into the CD ROM drive 2 Click the MagicTune installation file 3 Select installation Language Click Next 4 When the InstallationShield Wizard window appears click Next 5 Select I agree to the terms of the license agreement to accept the terms of use ...

Page 55: ...6 Choose a folder to install the MagicTune program 7 Click Install 8 The Installationation Status window appears ...

Page 56: ...xecutable icon appears on your desktop Double click the icon to start the program 11 The following window appears if the installation is successful Magictune execution icon may not appear depending on specification of computer system or monitor If that happens press F5 Key ...

Page 57: ... affected by such factors as the video card motherboard and the network environment See Troubleshooting if you have trouble during installation System Requirements OS z Windows 98 SE z Windows Me z Windows NT z Windows 2000 z Windows XP Home Edition z Windows XP Professional Hardware z 32MB Memory above z 25MB Hard disk space above For more information visit the MagicTune website ...

Page 58: ...s easy and convenient access to all tabs and sub menu items Button Tab Definition MagicTune allows for quick accurate tuning of the display with the ability to easily save and use monitor configurations that are best suited for you z OSD mode may appear inconsistent with the explanation in guidance book depending on specification of each monitor OK Applies any changes made and exits MagicTune Rese...

Page 59: ...st the brightness for best viewing conditions Contrast Adjusts the difference in brightness between the bright and dark areas on screen Determines the crispness of the images MagicBright is a new feature providing the optimum viewing environment depending on the contents of the image you are watching Currently four different modes are available Each mode has its own pre configured brightness value...

Page 60: ... 1 Text For documentations or works involving heavy text 2 Internet For working with a mixture of images such as text and graphics 3 Entertain For watching motion pictures such as a DVD or VCD Color Tone Color Control n m l k j i n m l k j Color Tone The tone of the color can be changed z Warm Normal Cool z Custom Color Control Adjusts of the monitor image color You can change the monitor color to...

Page 61: ... n m l k j n m l k j n m l k j n m l k j n m l k j n m l k j n m l k j n m l k j n m l k j n m l k j n m l k j n m l k j Geometry 1 Adjusts the Position Size and Rotation values z Position z Size z Rotation Geometry 2 Adjusts the Pincushion Pinbalance Trapezoid and Parallelogram values z Pincushion z Pinbalance z Trapezoid z Parallelogram Other Adjusts the Moire Degauss Sidepin Corner and Pinbalan...

Page 62: ...ner Bottom Preferences Loads the Preferences Dialog Box Preferences in use will have an V in the check box To turn on or off any Preference position the cursor over the box and click z Enable task tray menu To access the MagicTune menus click the icon on the task tray menu The menus are not displayed if the Enable System Tray is deselected in Options Preferences z Select Language The language chos...

Page 63: ...lp files User Manual if you need any help installing or running MagicTune The User Manual opens within a basic browser window Asset ID Opens a monitor info window showing the manufacturing date of the monitor Version Displays the version number of MagicTune ...

Page 64: ...nu If the program runs on Windows XP go to Control Panel in the Start menu 2 Click the Add or Remove Programs icon in Control Panel 3 In the Add or Remove Programs screen scroll down to find MagicTune Click on it to highlight it 4 Click the Change Remove button to remove the program 5 Click Yes to begin the uninstall process 6 Wait until the Uninstall Complete dialog box appears Visit the MagicTun...

Page 65: ...MagicTune feature is found only on PC VGA with Window OS that supports Plug and Play Visit the MagicTune website for technical support for MagicTune FAQs questions and answers and software upgrades To check whether your PC is available for MagicTune feature follow the steps below When Windows is XP Control Panel Performance and Maintenance System Hardware Device Manager Monitors After deleting Plu...

Page 66: ...screen the login screen does not appear contact a service center or your dealer Can you see on the screen You can see this message when the signal from the video card exceeds the maximum resolution and frequency that the monitor can properly handle Adjust the maximum resolution and frequency that the monitor can handle properly There is no image on the screen Is the power indicator on the monitor ...

Page 67: ...ing Modes The screen is partially distorted Are there any magnetic products such as an adapter speaker or a high voltage wire near the monitor Enter the OSD and perform a Degauss Keep the monitor away from any magnetic products LED is blinking but no images on the screen Is the frequency properly adjusted when checking the Display Timing on the menu Adjust the frequency properly by referring to th...

Page 68: ...2000 Set the resolution at the Control Panel Display Settings Contact the video card manufacturer for details How can I set the Power Saving function Windows ME XP 2000 Set the function at BIOS SETUP of the computer or the screen saver Refer to Windows Computer Manual The monitor makes a sound when it is turned on This is normal as some sound may be generated when the metal case and the electromag...

Page 69: ...ere are any sub woofer speakers near the monitor unplug and relocate the woofer to another room 2 Remove all electronic devices such as radios fans clocks and telephones that are within 3 feet one meter of the monitor 3 Degauss the monitor if any devices were removed from the area Useful Tips z A monitor recreates visual signals received from the computer Therefore if there is trouble with the com...

Page 70: ...ogin screen does not appear contact a service center or your dealer Can you see on the screen You can see this message when the signal from the video card exceeds the maximum resolution and frequency that the monitor can properly handle Adjust the maximum resolution and frequency that the monitor can handle properly There is no image on the screen Is the power indicator on the monitor blinking at ...

Page 71: ...ing Modes The screen is partially distorted Are there any magnetic products such as an adapter speaker or a high voltage wire near the monitor Enter the OSD and perform a Degauss Keep the monitor away from any magnetic products LED is blinking but no images on the screen Is the frequency properly adjusted when checking the Display Timing on the menu Adjust the frequency properly by referring to th...

Page 72: ...2000 Set the resolution at the Control Panel Display Settings Contact the video card manufacturer for details How can I set the Power Saving function Windows ME XP 2000 Set the function at BIOS SETUP of the computer or the screen saver Refer to Windows Computer Manual The monitor makes a sound when it is turned on This is normal as some sound may be generated when the metal case and the electromag...

Page 73: ...ere are any sub woofer speakers near the monitor unplug and relocate the woofer to another room 2 Remove all electronic devices such as radios fans clocks and telephones that are within 3 feet one meter of the monitor 3 Degauss the monitor if any devices were removed from the area Useful Tips z A monitor recreates visual signals received from the computer Therefore if there is trouble with the com...

Page 74: ...creen the login screen does not appear contact a service center or your dealer Can you see on the screen You can see this message when the signal from the video card exceeds the maximum resolution and frequency that the monitor can properly handle Adjust the maximum resolution and frequency that the monitor can handle properly There is no image on the screen Is the power indicator on the monitor b...

Page 75: ...ing Modes The screen is partially distorted Are there any magnetic products such as an adapter speaker or a high voltage wire near the monitor Enter the OSD and perform a Degauss Keep the monitor away from any magnetic products LED is blinking but no images on the screen Is the frequency properly adjusted when checking the Display Timing on the menu Adjust the frequency properly by referring to th...

Page 76: ...2000 Set the resolution at the Control Panel Display Settings Contact the video card manufacturer for details How can I set the Power Saving function Windows ME XP 2000 Set the function at BIOS SETUP of the computer or the screen saver Refer to Windows Computer Manual The monitor makes a sound when it is turned on This is normal as some sound may be generated when the metal case and the electromag...

Page 77: ...ere are any sub woofer speakers near the monitor unplug and relocate the woofer to another room 2 Remove all electronic devices such as radios fans clocks and telephones that are within 3 feet one meter of the monitor 3 Degauss the monitor if any devices were removed from the area Useful Tips z A monitor recreates visual signals received from the computer Therefore if there is trouble with the com...

Page 78: ...l screen the login screen does not appear contact a service center or your dealer Can you see on the screen You can see this message when the signal from the video card exceeds the maximum resolution and frequency that the monitor can properly handle Adjust the maximum resolution and frequency that the monitor can handle properly There is no image on the screen Is the power indicator on the monito...

Page 79: ...ing Modes The screen is partially distorted Are there any magnetic products such as an adapter speaker or a high voltage wire near the monitor Enter the OSD and perform a Degauss Keep the monitor away from any magnetic products LED is blinking but no images on the screen Is the frequency properly adjusted when checking the Display Timing on the menu Adjust the frequency properly by referring to th...

Page 80: ...2000 Set the resolution at the Control Panel Display Settings Contact the video card manufacturer for details How can I set the Power Saving function Windows ME XP 2000 Set the function at BIOS SETUP of the computer or the screen saver Refer to Windows Computer Manual The monitor makes a sound when it is turned on This is normal as some sound may be generated when the metal case and the electromag...

Page 81: ...ere are any sub woofer speakers near the monitor unplug and relocate the woofer to another room 2 Remove all electronic devices such as radios fans clocks and telephones that are within 3 feet one meter of the monitor 3 Degauss the monitor if any devices were removed from the area Useful Tips z A monitor recreates visual signals received from the computer Therefore if there is trouble with the com...

Page 82: ...ayer coated with anti static Glare Resolution Optimum resolution 800 x 600 85Hz Maximum resolution 1024 x 768 Active Display Horizontal 267 4 mm Vertical 200 4 mm Synchronization Horizontal 30 55 kHz Vertical 50 120 Hz Input Signal Definition Video Signal RGB Analog 0 7 Vpp positive at 75 ohms Sync Signal Separate H V sync TTL level positive or negative Display Color Unlimited Maximum Pixel Clock ...

Page 83: ... monitor automatically returns to normal operation when you press a key on the keyboard For energy conservation turn your monitor OFF when it is not needed or when leaving it unattended for long periods The PowerSaver system operates with a VESA DPMS compliant video card installed in your computer Use a software utility installed on your computer to set up this feature State Normal Operation Power...

Page 84: ... Horizontal Cycle and the inverse number of the Horizontal Cycle is called Horizontal Frequency Unit kHz Vertical Frequency Like a fluorescent lamp the screen has to repeat the same image many times per second to display an image to the user The frequency of this repetition is called Vertical Frequency or Refresh Rate Unit Hz ...

Page 85: ...ayer coated with anti static Resolution Optimum resolution 1024 x 768 85Hz Maximum resolution 1280 x 1024 60Hz Active Display Horizontal 312 4 mm Vertical 234 4 mm Synchronization Horizontal 30 70 kHz Vertical 50 160 Hz Input Signal Definition Video Signal RGB Analog 0 7 Vpp positive at 75 ohms Sync Signal Separate H V sync TTL level positive or negative Display Color Unlimited Maximum Pixel Clock...

Page 86: ...switching your monitor into a low power mode when it has not been used for a certain amount of time The monitor automatically returns to normal operation when you press a key on the keyboard For energy conservation turn your monitor OFF when it is not needed or when leaving it unattended for long periods The PowerSaver system operates with a VESA DPMS compliant video card installed in your compute...

Page 87: ... time to scan one line connecting the right edge to the left edge of the screen horizontally is called Horizontal Cycle and the inverse number of the Horizontal Cycle is called Horizontal Frequency Unit kHz Vertical Frequency Like a fluorescent lamp the screen has to repeat the same image many times per second to display an image to the user The frequency of this repetition is called Vertical Freq...

Page 88: ...ted with anti static Resolution Optimum resolution 1024 x 768 85Hz Maximum resolution 1280 x 1024 60Hz Active Display Horizontal 312 4 mm Vertical 234 4 mm Synchronization Horizontal 30 70 kHz Vertical 50 160 Hz Input Signal Definition Video Signal RGB Analog 0 7 Vpp positive at 75 ohms Sync Signal Separate H V sync TTL level positive or negative Display Color Unlimited Maximum Pixel Clock 110 MHz...

Page 89: ...switching your monitor into a low power mode when it has not been used for a certain amount of time The monitor automatically returns to normal operation when you press a key on the keyboard For energy conservation turn your monitor OFF when it is not needed or when leaving it unattended for long periods The PowerSaver system operates with a VESA DPMS compliant video card installed in your compute...

Page 90: ... time to scan one line connecting the right edge to the left edge of the screen horizontally is called Horizontal Cycle and the inverse number of the Horizontal Cycle is called Horizontal Frequency Unit kHz Vertical Frequency Like a fluorescent lamp the screen has to repeat the same image many times per second to display an image to the user The frequency of this repetition is called Vertical Freq...

Page 91: ...coated with anti static Resolution Optimum resolution 1024 x 768 85Hz Maximum resolution 1600 x 1200 65Hz Active Display Horizontal 312 4 mm Vertical 234 4 mm Synchronization Horizontal 30 85 kHz Vertical 50 160 Hz Input Signal Definition Video Signal RGB Analog 0 7 Vpp positive at 75 ohms Sync Signal Separate H V sync TTL level positive or negative Display Color Unlimited Maximum Pixel Clock 185 ...

Page 92: ...itching your monitor into a low power mode when it has not been used for a certain amount of time The monitor automatically returns to normal operation when you press a key on the keyboard For energy conservation turn your monitor OFF when it is not needed or when leaving it unattended for long periods The PowerSaver system operates with a VESA DPMS compliant video card installed in your computer ...

Page 93: ...e time to scan one line connecting the right edge to the left edge of the screen horizontally is called Horizontal Cycle and the inverse number of the Horizontal Cycle is called Horizontal Frequency Unit kHz Vertical Frequency Like a fluorescent lamp the screen has to repeat the same image many times per second to display an image to the user The frequency of this repetition is called Vertical Fre...

Page 94: ...adow mask Multi layer coated with anti static Resolution Optimum resolution 1024 x 768 85Hz Maximum resolution 1600 x 1200 Active Display Horizontal 312 4 mm Vertical 234 4 mm Synchronization Horizontal 30 96 kHz Vertical 50 160 Hz Input Signal Definition Video Signal RGB Analog 0 7 Vpp positive at 75 ohms Sync Signal Separate H V sync TTL level positive or negative Display Color Unlimited Maximum...

Page 95: ...itching your monitor into a low power mode when it has not been used for a certain amount of time The monitor automatically returns to normal operation when you press a key on the keyboard For energy conservation turn your monitor OFF when it is not needed or when leaving it unattended for long periods The PowerSaver system operates with a VESA DPMS compliant video card installed in your computer ...

Page 96: ...e time to scan one line connecting the right edge to the left edge of the screen horizontally is called Horizontal Cycle and the inverse number of the Horizontal Cycle is called Horizontal Frequency Unit kHz Vertical Frequency Like a fluorescent lamp the screen has to repeat the same image many times per second to display an image to the user The frequency of this repetition is called Vertical Fre...

Page 97: ...ask Multi layer coated with anti static Resolution Optimum resolution 1280 x 1024 85Hz Maximum resolution 1600 x 1200 Active Display Horizontal 352 3 mm Vertical 264 3 mm Synchronization Horizontal 30 96 kHz Vertical 50 160 Hz Input Signal Definition Video Signal RGB Analog 0 7 Vpp positive at 75 ohms Sync Signal Separate H V sync TTL level positive or negative Signal cable 15pin D Sub Display Col...

Page 98: ... by switching your monitor into a low power mode when it has not been used for a certain amount of time The monitor automatically returns to normal operation when you press a key on the keyboard For energy conservation turn your monitor OFF when it is not needed or when leaving it unattended for long periods The PowerSaver system operates with a VESA DPMS compliant video card installed in your com...

Page 99: ... time to scan one line connecting the right edge to the left edge of the screen horizontally is called Horizontal Cycle and the inverse number of the Horizontal Cycle is called Horizontal Frequency Unit kHz Vertical Frequency Like a fluorescent lamp the screen has to repeat the same image many times per second to display an image to the user The frequency of this repetition is called Vertical Freq...

Page 100: ...r CHILE 800 726 7864 SAMSUNG http www samsung com cl COSTA RICA 0 800 507 7267 http www samsung com latin ECUADOR 1 800 10 7267 http www samsung com latin EL SALVADOR 800 6225 http www samsung com latin GUATEMALA 1 800 299 0013 http www samsung com latin JAMAICA 1 800 234 7267 http www samsung com latin PANAMA 800 7267 http www samsung com latin PUERTO RICO 1 800 682 3180 http www samsung com lati...

Page 101: ... samsung com se U K 0870 242 0303 http www samsung com uk CIS RUSSIA 8 800 200 0400 http www samsung ru UKRAINE 8 800 502 0000 http www samsung com ur Asia Pacific AUSTRALIA 1300 362 603 http www samsung com au CHINA 800 810 5858 010 6475 1880 http www samsung com cn HONG KONG 2862 6001 http www samsung com hk INDIA 3030 8282 1600 1100 11 http www samsung com in INDONESIA 0800 112 8888 http www sa...

Page 102: ...o exchange information automatically This monitor follows the international standard VESA DDC for the Plug Play function Resolution The number of horizontal and vertical dots used to compose the screen image is called resolution This number shows the accuracy of the display High resolution is good for performing multiple tasks as more image information can be shown on the screen Example If the res...

Page 103: ...ICS MÉXICO S A de C V Vía Lopez Portillo No 6 Col San Fco Chilpan Tultitlán Estado de México C P 54940 Tel 01 55 5747 5100 01 800 726 7864 EXPORTADO POR Samsung Electronics CO LTD 416 Mae tan 3dong Yeongtong gu Suwon City Gyeonggi do Korea ...

Reviews: