Samsung 450 Series User Manual Download Page 39

English - 3

Setting the tV Speaker on/off

1. 

Press the 

mEnu 

button to display the menu. 

    Press the ▲ or ▼ button to select "Sound", then press the 

EntEr  

button.

2. 

Press the ▲ or ▼ button to select "TV Speaker", then press the 

EntEr  

button.

3. 

Press the ▲ or ▼ button to select “Off”, then press the 

EntEr

 button.

    Press the 

ExIt

 button to exit.


 When “TV Speaker” is set to “Off”, Sound menus except “MTS” (in TV mode) 

and “Sound Select”(in PIP mode) cannot be adjusted.


The 

Vol

Vol


and 

mutE

 buttons do not operate when the "TV Speaker"  

      is set to Off.

Sound output from the TV speakers is muted.

move  


Enter 

return

Mode 

: Custom  

Equalizer 


SrS tS xt 

: off  


MTS 

: Stereo 

auto Volume  

: off 

tV Speaker 

: on 

Sound Select 

: Main 

Sound

tV

move  


Enter 

return

mode 

: Custom  

Equalizer 


SrS tS xt 

: off


mtS 

: Stereo

auto Volume  

: off

tV Speaker 

: off

Sound Select 

: main

Sound

tV

off

on

tV'S Internal Speakers

audio out (optical, l/r out) to Sound System

rf

aV, S-Video

Component, PC, hDmI

rf

aV, S-Video

Component, PC, hDmI

tV Speaker on

Speaker Output Speaker Output

Speaker Output

Sound Output

Sound Output

Sound Output

tV Speaker off

Mute

Mute

Mute

Sound Output

Sound Output

Sound Output

Video no Signal

Mute

Mute

Mute

Mute

Mute

Mute

listening to the Sound of the Sub (PIP) Picture

1. 

Press the 

mEnu 

button to display the menu. 

    Press the ▲ or ▼ button to select "Sound", then press the 

EntEr  

button.

2. 

Press the ▲ or ▼ button to select “Sound Select”, then press the 

EntEr

 button.

3.   

Press the ▲ or ▼ button to select “Main” or “Sub”, then press the 

EntEr


button.

    Press the 

ExIt

 button to exit.

• 

main

: Used to listen to the sound of the main picture.

• 

Sub

: Used to listen to the sound of the sub picture.


 You can select this option when “PIP” is set to “On”. (See page 32)

When the PIP feature is activated, you can listen to the sound of the sub (PIP) picture.

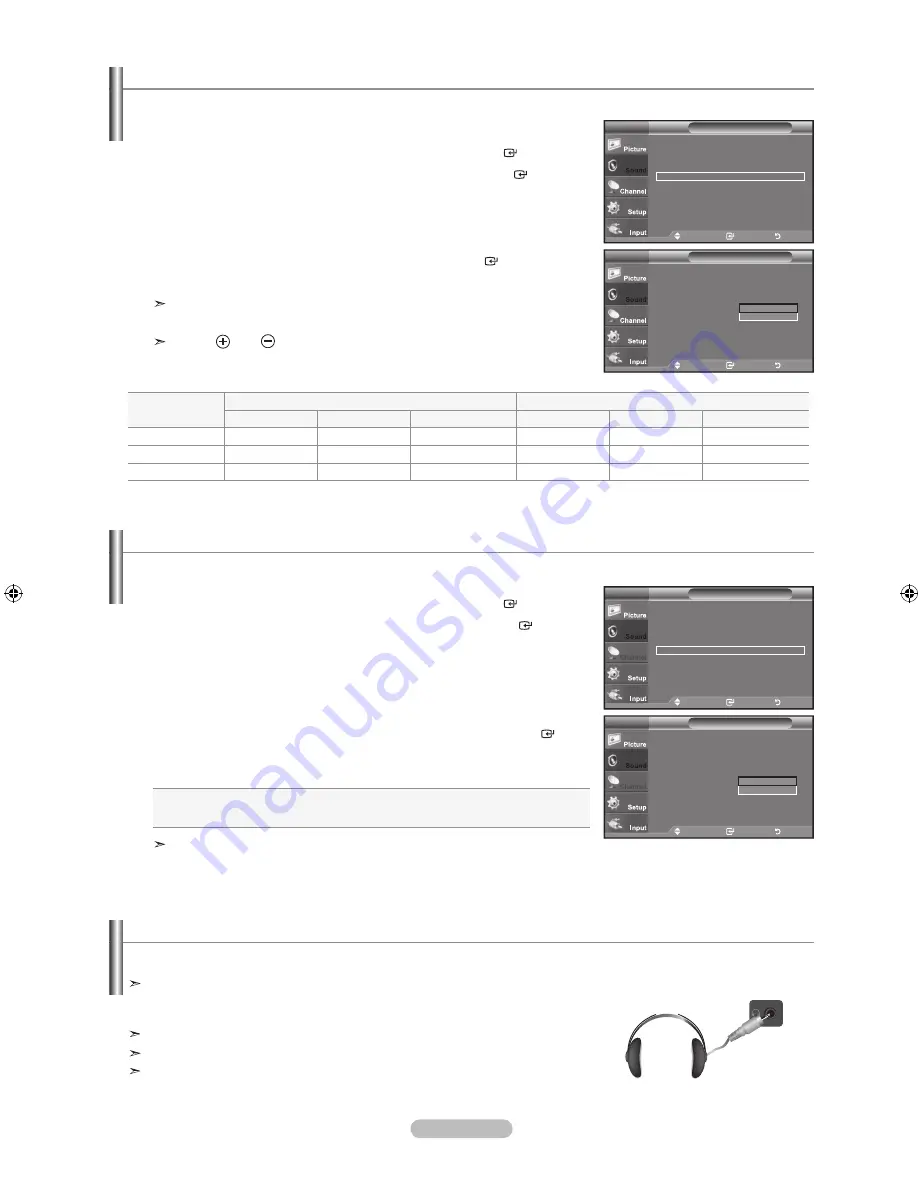
You can connect a set of headphones to your set if you wish to watch a TV program without disturbing other people in the room.

Connecting headphones (Sold separately)

 When you insert the headphone’s plug into the headphone jack, you can operate  

“Auto Volume” ,“MTS” (in TV mode) and “Sound Select”(in PIP mode) in Sound 

menu.
Prolonged use of headphones at a high volume may damage your hearing.
You will not hear sound from the speakers when you connect headphones to the TV.
The headphone volume and TV volume are adjusted separately.

TV Side Panel

move  


Enter 

return

Mode 

: Custom  

Equalizer 


SRS TS XT 

: Off  


MTS 

: Stereo 

Auto Volume  

: Off 

tV Speaker 

: on 

Sound Select 

: Main 

Sound

tV

move  


Enter 

return

mode 

: Custom  

Equalizer 


SrS tS xt 

: off 


mtS 

: Stereo

auto Volume  

: off

tV Speaker 

: on

Sound Select 

: main

Sound

tV

mian

Sub

BN68-01395J-00Eng.indd   37

2008-04-23   ¿ÀÀü 11:37:36

Summary of Contents for 450 Series

Page 1: ...EMALA 1 800 299 0013 www samsung com latin HONDURAS 800 7919267 JAMAICA 1 800 234 7267 www samsung com latin PANAMA 800 7267 www samsung com latin PUERTO RICO 1 800 682 3180 www samsung com latin REP DOMINICA 1 800 751 2676 www samsung com latin NICARAGUA 00 1800 5077267 MEXICO 01 800 SAMSUNG 726 7864 www samsung com TRINIDAD TOBAGO 1 800 SAMSUNG 726 7864 www samsung com latin VENEZUELA 0 800 100 ...

Page 2: ...he LCD TV in 4 3 format for a long period of time may leave traces of borders displayed on the left right and center of the screen caused by the difference of light emission on the screen Playing a DVD or a game console may cause a similar effect to the screen Damages caused by the above effect are not covered by the Warranty Displaying still images from Video games and PC for longer than a certai...

Page 3: ...3 Picture Control Changing the Picture Standard 24 Customizing the Picture Settings 24 Adjusting the Detailed Settings 25 Configuring Picture Options 28 Resetting the Picture Settings to the Factory Defaults 31 Viewing Picture in Picture 32 Sound Control Changing the Sound Standard 34 Customizing the Sound 34 Setting the TruSurround XT SRS TS XT 35 Choosing a Multi Channel Sound MTS track 36 Autom...

Page 4: ...lable in all locations Stand Stand Screw M4 X L16 LN26A450C1 LN32A450C1 Stand Screw M4 X L14 LN32A450C1 The items color and shape may vary depending on the model General Information List of Features Adjustable picture settings that can be stored in the TV s memory Automatic timer to turn the TV on and off A special sleep timer HDMI DVI connection of your PC to this TV Excellent Picture Quality DNI...

Page 5: ...ress to change channels In the on screen menu use the CH buttons as you would use the and buttons on the remote control 5 Power Press to turn the TV on and off 6 REMOTE CONTROL SENSOR Aim the remote control towards this spot on the TV 7 POWER INDICATOR Blinks and turns off when the power is on and lights up in stand by mode 8 SPEAKERS Buttons on the Lower Right Part of the Panel The buttons on the...

Page 6: ...information on connecting equipment see pages 7 18 The product color and shape may vary depending on the model 1 2 9 0 8 7 3 4 5 6 3 2 6 2 1 7 3 4 2 3 0 8 9 5 TV Side Panel TV Rear Panel LN26A450C1 LN40A450C1 1 2 9 0 8 7 3 4 5 6 3 2 6 2 1 7 3 4 2 3 0 8 9 5 LN32A450C1 TV Side Panel TV Rear Panel English Viewing the Connection Panel ...

Page 7: ...ust use the HDMI IN 2 jack 4 ANT IN Connects to an antenna or cable TV system 5 SERVICE Connector for SERVICE only Connect this to the jack on the optional wall mount bracket This will allow you to adjust the TV viewing angle using your remote control 6 HEADPHONE Connects a set of external headphones for private listening 7 AUDIO OUT Connects to the audio input jacks on your Amplifier Home theater...

Page 8: ...OLOR BUTTONS Use these buttons in the Channel list and WISELINK etc CC Controls the caption decoder E MODE Press to select the optional display and sound modes for sports cinema and games Use these buttons in the WISELINK and Anynet modes This remote can be used to control recording on Samsung recorders with the Anynet feature SOURCE Press to display and select the available video sources PRE CH T...

Page 9: ...oks like the diagram to the right see Antennas with 75 Ω Round Leads If you have two antennas see Separate VHF and UHF Antennas 1 Place the wires from the twin leads under the screws on a 300 75 Ω adapter not supplied Use a screwdriver to tighten the screws 2 Plug the adaptor into the ANT IN terminal on the back of the TV ANT IN Antennas with 300 Ω Flat Twin Leads If you are using an off air anten...

Page 10: ... ANT OUT terminal on the cable box and the B IN terminal on the RF A B switch 5 Connect another cable between the other OUT terminal on the splitter and the A IN terminal on the RF A B switch 6 Connect the last RF cable between the OUT terminal on the RF A B switch and the ANT IN terminal on the rear of the TV Splitter Incoming cable Splitter Cable Box Incoming cable Splitter Cable Box RF A B Swit...

Page 11: ...te receiver Set Top Box Audio Cable Not supplied 2 DVI to HDMI Cable Not supplied 1 1 Connect an HDMI Cable between the HDMI IN 1 2 or 3 jack on the TV and the HDMI jack on the DVD Player or Cable Box Satellite receiver Set Top Box 1 Connect a DVI to HDMI Cable or DVI HDMI Adapter between the HDMI IN 2 jack on the TV and the DVI jack on the DVD Player or Cable Box Satellite receiver Set Top Box 2 ...

Page 12: ...ONENT IN 1 also Each DVD Player or Cable Box Satellite receiver Set Top Box has a different back panel configuration When connecting a DVD Player or Cable Box Satellite receiver Set Top Box match the color of the connection terminal to the cable DVD Player or Cable Box Satellite receiver Set Top Box TV Rear Panel Component Cable Not supplied 1 Audio Cable Not supplied 2 Connecting a Camcorder The ...

Page 13: ...r Camcorder Tape to view your VCR tape Each VCR has a different back panel configuration When connecting a VCR match the color of the connection terminal to the cable VCR Rear Panel Video Cable Not supplied 4 Audio Cable Not supplied 5 Your Samsung TV can be connected to an S Video jack on a VCR This connection delivers a better picture as compared to a standard VCR 1 To begin follow steps 1 3 in ...

Page 14: ... 2 1 Connect a D Sub Cable between PC IN PC connector on the TV and the PC output connector on your computer 2 Connect a PC Audio Cable between the PC IN AUDIO jack on the TV and the Audio Out jack of the sound card on your computer Each PC has a different back panel configuration When connecting a PC match the color of the connection terminal to the cable When using an HDMI DVI cable connection y...

Page 15: ...TV ANT IN Antennas with 300 Ω Flat Twin Leads If you are using an off air antenna such as a roof antenna or rabbit ears that has 300 Ω twin flat leads follow the directions below 1 Plug the antenna lead into the ANT IN terminal on the back of the TV Antennas with 75 Ω Round Leads ANT IN Separate VHF and UHF Antennas If you have two separate antennas for your TV one VHF and one UHF you must combine...

Page 16: ...e ANT OUT terminal on the cable box and the B IN terminal on the RF A B switch 5 Connect another cable between the other OUT terminal on the splitter and the A IN terminal on the RF A B switch 6 Connect the last RF cable between the OUT terminal on the RF A B switch and the ANT IN terminal on the rear of the TV Splitter Incoming cable Splitter Cable Box Incoming cable Splitter Cable Box RF A B Swi...

Page 17: ...er Set Top Box 1 Connect a DVI to HDMI Cable or DVI HDMI Adapter between the HDMI IN 2 jack on the TV and the DVI jack on the DVD Player or Cable Box Satellite receiver Set Top Box 2 Connect Audio Cables between the DVI IN HDMI 2 R AUDIO L jack on the TV and the DVD Player or Cable Box Satellite receiver Set Top Box or DVD Player or Cable Box Satellite receiver Set Top Box Rear Panel TV Rear Panel...

Page 18: ...ONENT IN 1 also Each DVD Player or Cable Box Satellite receiver Set Top Box has a different back panel configuration When connecting a DVD Player or Cable Box Satellite receiver Set Top Box match the color of the connection terminal to the cable DVD Player or Cable Box Satellite receiver Set Top Box TV Rear Panel Component Cable Not supplied 1 Audio Cable Not supplied 2 Connecting a Camcorder The ...

Page 19: ...r Camcorder Tape to view your VCR tape Each VCR has a different back panel configuration When connecting a VCR match the color of the connection terminal to the cable Your Samsung TV can be connected to an S Video jack on a VCR This connection delivers a better picture as compared to a standard VCR 1 To begin follow steps 1 3 in the previous section to connect the antenna or cable to your VCR and ...

Page 20: ... output connector on your computer 2 Connect a PC Audio Cable between the PC IN AUDIO jack on the TV and the Audio Out jack of the sound card on your computer Each PC has a different back panel configuration When connecting a PC match the color of the connection terminal to the cable When using an HDMI DVI cable connection you must use the HDMI IN 2 jack Using the D Sub Cable 1 Connect a HDMI DVI ...

Page 21: ...sage Check antenna input is displayed with OK selected Press the ENTER button 5 Press the or button to select Air STD HRC or IRC then press the ENTER button 6 Press the ENTER button to select Start The TV will begin memorizing all of the available channels To stop the search before it has finished press the ENTER button with Stop selected 7 The Clock Set menu is displayed Press the or button to mo...

Page 22: ...that are far apart tune to one channel then use the number button to select the second channel Then use the PRE CH button to quickly alternate between them If you want to reset this feature 1 Press the MENU button to display the menu Press the or button to select Setup then press the ENTER button 2 Press the ENTER button again to select Plug Play For further details on setting up options refer to ...

Page 23: ...nd Custom MTS Stereo SRS TS XT Off 05 54 pm Move Enter Exit Mode Standard Backlight 7 Contrast 95 Brightness 45 Sharpness 40 Color 50 Tint G 50 R 50 Detailed Settings Picture Options Reset OK Picture TV Using the TOOLS Button You can use the TOOLS button to select your frequently used functions quickly and easily The Tools menu changes depending on which external input mode you are viewing 1 Press...

Page 24: ...ocal cable company to identify the type of cable system that exists in your particular area At this point the signal source has been selected Storing Channels in Memory Automatic Method 1 First select the correct signal source Air STD HRC or IRC 2 Press the or button to select Auto Program then press the ENTER button 3 Press the ENTER button to select Start The TV will begin memorizing all of the ...

Page 25: ...ion easier 1 Press the MENU button to display the menu Press the or button to select Input then press the ENTER button Press the or button to select Edit Name then press the ENTER button 2 Press the or button to select AV1 AV2 S Video Component1 Component2 PC HDMI1 HDMI2 or HDMI3 input jack then press the ENTER button 3 Press the or button to select VCR DVD Cable STB Satellite STB PVR STB AV Recei...

Page 26: ... When you make changes to Backlight Contrast Brightness Sharpness Color or Tint the OSD will be adjusted accordingly In PC mode you can only make changes to Backlight Contrast and Brightness 26 32 inch In PC mode you can only make changes to Contrast and Brightness 40 inch Settings can be adjusted and stored for each external device you have connected to an input of the TV The energy consumed duri...

Page 27: ...ic Contrast You can adjust the screen contrast so that the optimal contrast is provided 6 Press the or button to select Dynamic Contrast then press the ENTER button 7 Press the or button to select Off Low Medium or High Press the ENTER button Off Turns off the dynamic contrast adjustment function Low Sets the dynamic contrast to low Medium Sets the dynamic contrast to medium High Sets the dynamic ...

Page 28: ...s the or button to select Red Green or Blue to change it Press the ENTER button 16 Press the or button to decrease or increase the value of a particular item Press the ENTER button In Color you can adjust the RGB values for the selected color To reset the adjusted RGB value select Reset Red Adjusts the red saturation level Green Adjusts the green saturation level Blue Adjusts the blue saturation l...

Page 29: ...ightness B Gain Adjusts the blue color brightness Reset The previously adjusted white balance will be reset to the factory defaults Changing the adjustment value will refresh the adjusted screen Flesh Tone You can emphasize the pink flesh tone in the picture 20 Press the or button to select Flesh Tone then press the ENTER button 21 Press the or button to decrease or increase the value Press the EN...

Page 30: ...r may have its own set of screen sizes as well In general though you should view the TV in 16 9 mode as much as possible 1 Follow the Activating Picture Options instructions numbers 1 and 2 2 Press the or button to select Size then press the ENTER button 3 Press the or button to select the screen format you want Press the ENTER button Press the EXIT button to exit 16 9 Sets the picture to 16 9 wid...

Page 31: ... press the ENTER button You can initialize the setting HD High Definition 16 9 1080i 1920x1080 720p 1280x720 Settings can be adjusted and stored for each external device you have connected to an input of the TV Input Source Picture Size TV AV S Video Component 480i 480p 16 9 Wide Zoom Zoom 4 3 Component 1080i HDMI 1080i 16 9 Wide Zoom Zoom 4 3 Just Scan PC 16 9 4 3 Alternately you can press the P ...

Page 32: ...reduction function off Low Reduces screen noise at a low level Medium Reduces screen noise at a medium level High Reduces screen noise at a high level Auto Automatically recognizes and reduces screen noise Press the EXIT button to exit Setting the HDMI Black Level You can select the black level on the screen to adjust the screen depth 1 Follow the Activating Picture Options instructions numbers 1 ...

Page 33: ... button to select Off or On then press the ENTER button Press the EXIT button to exit Blue Only Mode is available when the picture mode is set to Movie or Standard Resetting the Picture Settings to the Factory Defaults 1 Press the MENU button to display the menu Press the ENTER button to select Picture 2 Press the or button to select Reset then press the ENTER button Press the or button to select ...

Page 34: ...Signal Source External A V for PIP 3 Press the or button to select Source then press the ENTER button Select the source of the sub picture PIP by pressing the or button and press the ENTER button The sub picture can serve different source selections based on what the main picture is set to Changing the Size of the PIP Window 4 Press the or button to select Size then press the ENTER button Press th...

Page 35: ...channel can be active when the sub picture is set to TV Easy Setting 1 Press the TOOLS button on the remote control 2 Press the or button to select PIP then press the ENTER button 3 Press the or button to select a particular item 4 Press the or button to select the required option 5 Press the EXIT or TOOLS button to exit Move Enter Return PIP On Source TV Size Position Channel Air 4 PIP TV PIP PIP...

Page 36: ...de Press the or button to select Standard Music Movie Speech or Custom sound setting then press the ENTER button Press the EXIT button to exit Standard selects the normal sound mode Music emphasizes music over voices Movie provides the best sound for movies Speech emphasizes voice over other sounds Custom recalls your customized sound settings see Customizing the Sound Easy Setting 1 Press the TOO...

Page 37: ...t Off or On then press the ENTER button Press the EXIT button to exit TruSurround XT SRS and Symbol are trademarks of SRS Labs Inc TruSurround XT technology is incorporated under license from SRS Labs Inc Move Enter Return Mode Custom Equalizer SRS TS XT Off MTS Stereo Auto Volume Off TV Speaker On Sound Select Main Sound TV Move Enter Return Mode Custom Equalizer SRS TS XT Off MTS Stereo Auto Vol...

Page 38: ... MTS button on the remote control repeatedly to select Mono Stereo or SAP Depending on the particular program being broadcast you can listen to Mono Stereo or SAP Choosing a Multi Channel Sound MTS track Easy Setting 1 Press the TOOLS button on the remote control 2 Press the or button to select MTS 3 Press the or button to select the Stereo SAP or Mono 4 Press the EXIT or TOOLS button to exit Anyn...

Page 39: ...o the Sound of the Sub PIP Picture 1 Press the MENU button to display the menu Press the or button to select Sound then press the ENTER button 2 Press the or button to select Sound Select then press the ENTER button 3 Press the or button to select Main or Sub then press the ENTER button Press the EXIT button to exit Main Used to listen to the sound of the main picture Sub Used to listen to the sou...

Page 40: ... again the symbol next to the channel disappears and the channel is not added 6 Repeat steps 5 for each channel to be selected or canceled Press the EXIT button to exit is active when Child Lock is selected to On You can add or delete a channel so only channels you want are displayed Move Enter Return Air Cable Air Auto Program Channel Manager Fine Tune Color System Auto Channel TV Move Enter Retu...

Page 41: ... channel to be locked or unlocked Press the EXIT button to exit Select On or Off in Child Lock to easily turn the channels which selected on to be active or inactive A blue screen is displayed when Child Lock is activated This feature allows you to prevent unauthorized users such as children from watching unsuitable programmes by muting out video and audio Child Lock cannot be released using the b...

Page 42: ...m Auto Channel TV Move Enter Return Fine Tune Air 24 0 Reset Adjust Save Return Fine Tune Air 24 10 Reset Adjust Save Return Fine Tune Air 24 10 Reset Using the Color System Feature 1 Press the MENU button to display the menu Press the or button to select Channel then press the ENTER button 2 Press the or button to select Color System then press the ENTER button Select the required option Auto PAL...

Page 43: ...t the dialog box PC Display If the signal from the system equals the standard signal mode the screen is adjusted automatically If the signal from the system doesn t equal the standard signal mode adjust the mode by referring to your videocard user guide otherwise there may be no video For the display modes listed below the screen image has been optimized during manufacturing D Sub Input Mode Resol...

Page 44: ...ect PC mode 1 Press the MENU button to display the menu Press the or button to select Picture then press the ENTER button Press the or button to select Screen then press the ENTER button 2 Press the or button to select Coarse or Fine then press the ENTER button Press the or button to adjust the screen quality Vertical stripes may appear or the picture may be blurry Press the ENTER button Press the...

Page 45: ...ition Press the ENTER button Press the EXIT button to exit Initializing the Screen Position or Color Settings You can replace all image settings with the factory default values Preset Press the SOURCE button to select PC mode 1 Press the MENU button to display the menu Press the or button to select Picture then press the ENTER button Press the or button to select Screen then press the ENTER button...

Page 46: ...Day Year Hour Minute or am pm Set the date and time you want by pressing the or button then press the ENTER button Press the EXIT button to exit The current time will appear every time you press the INFO button You can set the month day year hour and minute directly by pressing the number buttons on the remote control Time Setting Setup Plug Play Language English Time Caption Melody Off Entertainm...

Page 47: ...r button to select Off then press the ENTER button 4 Press the EXIT button to exit Easy Setting 1 Press the TOOLS button on the remote control 2 Press the or button to select Sleep Timer 3 Press the or button to select the minute 4 Press the EXIT or TOOLS button to exit Setup Plug Play Language English Time Caption Melody Off Entertainment Off Energy Saving Off AV Color System Auto PIP TV Move Ent...

Page 48: ...on will eventually turn off if no controls are operated for 3 hours after the TV was turned on by the timer This function is only available in timer On mode and prevents overheating which may occur if a TV is on for too long time Setting the On Off Timer Selecting a Menu Language 1 Press the MENU button to display the menu Press the or button to select Setup then press the ENTER button Press the o...

Page 49: ... channels and fields display different information Field 2 carries additional information that supplements the information in Field 1 For example Channel 1 may have subtitles in English while Channel 2 has subtitles in Spanish 4 Press the or button to select Channel or Field then press the ENTER button Press the or button to select 1 or 2 then press the ENTER button Press the EXIT button to exit P...

Page 50: ...e E MODE button on the remote control repeatedly to change the Entertainment setting O Adjusting the TV On Off Melody Sound 1 Press the MENU button to display the menu Press the or button to select Setup then press the ENTER button 2 Press the or button to select Melody then press the ENTER button 3 Press the or button to select Off Low Medium or High then press the ENTER button Off Turns off the ...

Page 51: ...Medium High Auto Using the AV Color System Feature Normally the TV can receive image and sound with good quality when in the mode Auto This mode detects the signal color system automatically In case of some signal reception with color unsatisfactory select the AV Color System Mode to PAL M PAL N or NTSC 1 Press the MENU button to display the menu Press the or button to select Setup then press the ...

Page 52: ... TV and the HDMI OUT jack of the corresponding Anynet device using an HDMI cable 2 Connect the HDMI IN jack of the home theater and the HDMI OUT jack of the corresponding Anynet device using an HDMI cable Connect only one Home Theater You can connect an Anynet device using the HDMI cable Some HDMI cables may not support Anynet functions Some HDMI cables may not support Anynet functions Anynet work...

Page 53: ... Record Menu on Device Device Operation Receiver Off Setup TV Air 9 Move Enter Return Easy Setting 1 Press the TOOLS button on the remote control 2 Press the or button to select Anynet HDMI CEC then press the ENTER button Setting an Anynet Device to turn Off Automatically when the TV is Turned Off 2 Press the or button to select Auto Turn Off then press the ENTER button 3 Press the or button to se...

Page 54: ...iption View TV Switches from Anynet to TV broadcast mode Record Starts a recording This menu works only for a device supporting recording Device_Name Menu Shows the menu of the connected device Example When a DVD Recorder is connected the DVD Recorder s title menu appears Device_Name Operation Shows the play control menu of the connected device Example When a DVD Recorder is connected the play con...

Page 55: ...menus If there is a power interruption to the TV when the Receiver is set to On by disconnecting the power cord or a power failure the TV Speaker may be set to Off when you turn the TV on again refer to page 37 Recording You can make a recording of a TV program using a recorder Press the REC button Recording begins Only when the Anynet enabled recording device is connected You can record the sourc...

Page 56: ...o exit Anynet Select View TV in Anynet menu Press the SOURCE button on the TV remote control and select a device other than Anynet devices Press any of CH PRE CH to change the TV mode Note that the channel button operates only when a tuner embedded Anynet device is not connected The message Connecting to Anynet device appears on the screen You cannot use the remote control when you are configuring...

Page 57: ...teries Clean the upper edge of the remote control transmission window Check the battery terminals Check signal cable message Ensure that the signal cable is firmly connected to the PC source Not Supported Mode message Check the maximum resolution and connected device s Video frequency Compare these values with the data in the Display Modes The image is too light or too dark Adjust the Brightness a...

Page 58: ... frequency domain Horizontal frequency kHz 30 60 Vertical frequency Hz 60 75 PC Maximum refresh rate at 60 Hz 1360 X 768 Image is not centered on the screen Adjust the horizontal and vertical position The screen position must be adjusted on the output source i e STB with a digital signal The picture appears distorted in the corner of the screen If Just Scan is selected with some external devices t...

Page 59: ...nd at a proper level do not apply excess downward pressure to the upper left of right sides of the TV 2 Fasten two screws at position 1 and then fasten two screws at position 2 Stand the product up and fasten the screws If you fasten the screws with the LCD TV placed down it may lean to one side 1 Remove four screws from the back of the TV 2 Separate the stand from the TV Two or more people should...

Page 60: ...arrow button when no OSD is displayed on the TV screen the Adjustment screen appears Press the INFO button to reset Press the or button to select Yes then press the ENTER button The position is initialized to the default setting 3 Press the blue button Press the and buttons to select a save mode from either Position 1 Position 2 or Position 3 in order to save the current position To not save the c...

Page 61: ...ension as they may cause damage to the inside of the TV set For wall mounts that do not comply with the VESA standard screw specifications the length of the screws may differ depending on their specifications Do not use screws that do not comply with the VESA standard screw specifications Do not use fasten the screws too strongly this may damage the product or cause the product to fall leading to ...

Page 62: ...nsington Lock depending on the model The Kensington Lock is a device used to physically fix the system when using it in a public place The appearance and locking method may differ from the illustration depending on the manufacturer Refer to the manual provided with the Kensington Lock for proper use The locking device has to be purchased separately Cable Figure 1 Figure 2 Optional The location of ...

Page 63: ...nally 2 Remove the screws from the center back of the TV put the screws into the clamps and then fasten the screws onto the TV again Screws may not be supplied with the product In this case please pur chase the screws of the following specifications Screw Specifications For a 17 29 Inch LCD TV M4 X 15 For a 32 40 Inch LCD TV M6 X 15 3 Connect the clamps fixed onto the TV and the clamps fixed onto ...

Page 64: ... to 95 non condensing 50 F to 104 F 10 C to 40 C 10 to 80 non condensing 4 F to 113 F 20 C to 45 C 5 to 95 non condensing Stand Swivel Left Right 0 0 20 20 Model Name LN40A450C1 Screen Size Diagonal 40 inches Power Consumption Normal operation Standby 200 W 1W PC Resolution 1360 x 768 60 Hz Sound Output 10W x 2 Dimensions WxDxH Body With stand 39 0 X 3 2 X 25 2 inches 989 8 X 81 7 X 640 7 mm 39 0 ...

Page 65: ...This page is intentionally left blank ...

Page 66: ...te da tela ao exibir uma imagem estática O fato de assistir a TV LCD no formato 4 3 por um longo período de tempo pode deixar traços de bordas exibidos nas partes esquerda direita e central da tela causados pela diferença da emissão de luz na tela A utilização de um DVD ou de um console de jogo pode causar um efeito similar na tela Danos provocados pelo efeito acima não são cobertos pela Garantia ...

Page 67: ...e imagem 24 Personalizando as definições de imagem 24 Como ajustar as configurações detalhadas 25 Configurando as opções de imagem 28 Redefinição dos ajustes de imagem para os ajustes de fábrica 31 Ver PIP 32 CONTROLE DE SOM Alterando o padrão de som 34 Personalizar o som 34 Ajuste de TruSurround XT SRS TS XT 35 Selecionando uma trilha de som multicanal MTS 36 Controle automático de volume 36 Conf...

Page 68: ...Surround XT oferece um sistema virtual Dolby surround Verifique se recebeu os seguintes acessórios com o televisor LCD Se faltar algum dos acessórios contacte o vendedor Controle remoto Baterias AAA x 2 Não disponível em todos os locais Cabo de Alimentação Pano de limpeza Tampa da parte inferior Manual de Instruções Certificado de garantia Certificado de registro Guia de segurança não disponível e...

Page 69: ...anal No menu de tela use os botões CH para substituir os botões e no controle remoto 5 ALIMENTAÇÃO Pressione liga desliga o televisor 6 SENSOR DO CONTROLE REMOTO Posicione o controle remoto em direção a este local no televisor 7 INDICADOR DE ALIMENTAÇÃO Pisca quando recebe informação do controle remoto apaga quando a TV está ligada e acende em modo stand by 8 ALTO FALANTES Botões da parte inferior...

Page 70: ...u um leitor de DVD Para obter informações sobre a ligação de equipamentos consultar as páginas 7 18 1 2 9 0 8 7 3 4 5 6 3 2 6 2 1 7 3 4 2 3 0 8 9 5 Painel lateral da TV Painel traseiro da TV LN26A450C1 LN40A450C1 1 2 9 0 8 7 3 4 5 6 3 2 6 2 1 7 3 4 2 3 0 8 9 5 LN32A450C1 Painel lateral da TV Painel traseiro da TV A cor do produto pode variar dependendo do modelo ...

Page 71: ...onector HDMI IN 2 4 ANT IN Conecta uma antena ou um sistema de TV a cabo 5 SERVICE Conector apenas para MANUTENÇÃO Conecte o à entrada no suporte de parede opcional Isto possibilita o ajuste do ângulo de visão da TV através do controle remoto 6 HEADPHONE Conecte um conjunto de fones de ouvido externos para audição particular 7 AUDIO OUT Conecte as saídas de áudio da TV nas entradas no Amplificador...

Page 72: ...tela da TV 0 BOTÕES COLORIDOS Use estes botões na lista de canais etc CC Controla o decodificador de legenda E MODE Pressione para selecionar a melhor exibição e modos de som em esportes cinema e jogos Use estes botões nos modos DMA e Anynet Este controle remoto pode ser usado para controlar a gravação nos gravadores Samsung que tenham o recurso Anynet SOURCE Pressione para exibir e selecionar as ...

Page 73: ...ndutor semelhante à ilustração da direita consulte Antenas com cabo condutor redondo de 75 Ω Se você tiver duas antenas consulte Separar antenas VHF e UHF 1 Introduzir os dois cabos por baixo dos parafusos em um transformador de 300 75 Ω não fornecido Apertar os parafusos com uma chave de fenda 2 Conectar ao terminal ANT IN na parte de trás da TV ANT IN Antenas com dois cabos achatados de 300 Ω Ca...

Page 74: ...star identificado como ANT IN VHF IN ou simplesmente IN 5 Ligar outro cabo entre o outro terminal OUT no separador e o terminal A IN no alternador RF A B 6 Conecte o último cabo RF entre o terminal OUT no interruptor RF A B e o terminal ANT IN na parte traseira da TV Separador Cabo Separador Decodificador Cabo Separador Decodificador Alternador RF A B Cabo ANT IN Separador Cable Box Cabo Alternado...

Page 75: ...Box Painel traseiro da TV Cabo de áudio Não fornecido 2 Cabo DVI para HDMI não fornecido 1 Conectando o DVD Player ou receptor decodificador de Satélite Set Top Box via HDMI Esta conexão pode ser efetuada apenas se houver uma saída de HDMI no dispositivo externo 1 Conecte um cabo HDMI IN 1 2 ou 3 entre o conector HDMI na TV e o conector HDMI no DVD Player ou receptor decodificador de Satélite Set ...

Page 76: ...u receptor decodificador de Satélite Set Top Box possui uma configuração de painel traseiro diferente Ao conectar um DVD Player ou um receptor decodificador de Satélite Set Top Box use um terminal de conexão com a mesma cor do cabo DVD Player ou receptor decodificador de Satélite Set Top Box Painel traseiro da TV Cabo de vídeo componente Não fornecido 1 Cabo de áudio Não fornecido 2 Conectando uma...

Page 77: ... de vídeo cassete ou de câmera de vídeo Cada dispositivo de fonte de entrada externa possui uma configuração diferente para o painel traseiro Ao conectar um dispositivo externo use um terminal de conexão com a mesma cor do cabo vídeo cassete Painel traseiro da TV Cabo de RF Não fornecido 3 Cabo de vídeo Não fornecido 4 Cabo de áudio Não fornecido 5 ANT IN Conexão S Video O televisor Samsung pode s...

Page 78: ...ainel traseiro Ao conectar um PC use um terminal de conexão com a mesma cor do cabo Ao usar uma conexão a cabo HDMI DVI é necessário utilizar um terminal HDMI DVI IN Usando o cabo D Sub 1 Conecte um cabo D Sub entre o conector PC IN PC na TV e o conector de saída PC no seu computador 2 Conecte um cabo de áudio PC entre o conector PC IN AUDIO na TV e o conector Audio Out da placa de som no seu comp...

Page 79: ...da TV ANT IN Antenas com dois cabos achatados de 300 Ω Caso esteja sendo utilizada uma antena off air como uma antena montada no telhado ou rabbit ears com dois cabos achata dos de 300 Ω seguir as indicações abaixo 1 Conecte o cabo da antena no terminal ANT IN na parte traseira da TV Antenas com cabos redondos de 75 ohm ANT IN Separar antenas VHF e UHF Se houver duas antenas separadas para o telev...

Page 80: ...estar identificado como ANT IN VHF IN ou simplesmente IN 5 Ligar outro cabo entre o outro terminal OUT no separador e o terminal A IN no alternador RF A B 6 Conecte o último cabo RF entre o terminal OUT no interruptor RF A B e o terminal ANT IN na parte traseira da TV Separador Cabo Separador Decodificador Cabo Separador Decodificador Alternador RF A B Cabo ANT IN Separador Cable Box Cabo Alternad...

Page 81: ...élite Set Top Box via HDMI Esta conexão pode ser efetuada apenas se houver uma saída de HDMI no dispositivo externo 1 Conecte um cabo HDMI IN 1 2 ou 3 entre o conector HDMI na TV e o conector HDMI no DVD Player ou receptor decodificador de Satélite Set Top Box O que é HDMI HDMI High Definition Multimedia Interface ou seja interface multimídia de alta definição é uma interface de próxima geração qu...

Page 82: ...u receptor decodificador de Satélite Set Top Box possui uma configuração de painel traseiro diferente Ao conectar um DVD Player ou um receptor decodificador de Satélite Set Top Box use um terminal de conexão com a mesma cor do cabo Conectando uma filmadora As entradas do painel lateral na TV facilitam a conexão de uma filmadora com a sua TV Elas permitem que você visualize as fitas da filmadora se...

Page 83: ...ita de vídeo cassete ou de câmera de vídeo Cada dispositivo de fonte de entrada externa possui uma configuração diferente para o painel traseiro Ao conectar um dispositivo externo use um terminal de conexão com a mesma cor do cabo Conexão S Video O televisor Samsung pode ser ligado a um sinal S Video de um vídeo cassete Esta ligação produz uma imagem melhor em comparação com a obtida de um vídeo c...

Page 84: ... Ao usar uma conexão a cabo HDMI DVI é necessário utilizar um terminal HDMI DVI IN Usando o cabo D Sub 1 Conecte um cabo D Sub entre o conector PC IN PC na TV e o conector de saída PC no seu computador 2 Conecte um cabo de áudio PC entre o conector PC IN AUDIO na TV e o conector Audio Out da placa de som no seu computador Usando o cabo HDMI DVI 1 Conecte um cabo HDMI DVI entre o conector HDMI IN 2...

Page 85: ...para selecionar Ar STD HRC ou IRC e em seguida pressione o botão ENTER 6 Pressione o botão ENTER para selecionar Iniciar A TV começará a memorizar todos os canais disponívei Para interromper a busca antes de terminar pressione o botão ENTER com Parar selecionado 7 O menu de ajuste do relógio é exibido Pressione o botão ou para mover entre Mês Dia Ano Hora Minuto ou am pm Configure Mês Dia Ano Hora...

Page 86: ...ou CH para mudar de canal Pressionando se os botões CH ou CH o televisor muda de canal em seqüência Vão aparecer todos os canais que o televisor memorizou O televisor tem de memorizar pelo menos três canais Não aparecem os canais que foram apagados ou que não foram memorizados Consulte as páginas 22 para memorizar os canais Utilizando os botões de números 1 Pressione os botões de números para ir d...

Page 87: ...mentas é alterado dependendo do modo de entrada externa que você está assistindo 1 Pressione o botão TOOLS O menu Ferramentas será exibido 2 Pressione o botão ou para selecionar um menu 3 Pressione os botões ENTER para exibir alterar ou usar os itens selecionados Para obter uma descrição mais detalhada de cada função consulte a página correspondente Anynet HDMI CEC consulte a página 51 Modo de Ima...

Page 88: ...a a memorização de canais Seleção de uma fonte de transmissão memorização dos canais automática e adição ou exclusão de canais Gestor canais Selecionar a fonte do sinal de vídeo Antes que o televisor possa começar a memorizar os canais disponíveis é preciso especificar o tipo de fonte de sinal ligada ao televisor ex uma antena ou um sistema de televisão a cabo 1 Pressione o botão MENU para exibir ...

Page 89: ...is fácil 1 Pressione o botão MENU para exibir o menu Pressione os botões ou para selecionar Entrada e em seguida pressione o botão ENTER Pressione o botão ou para selecionar Editar Nome e em seguida pressione o botão ENTER 2 Pressione o botão ou para selecionar a entrada AV1 AV2 S Video Componente1 Componente2 PC HDMI1 HDMI2 HDMI3 a seguir pressione ENTER 3 Pressione o botão ou para selecionar a o...

Page 90: ...ssione o botão ENTER Pressione o botão EXIT para sair Ao efetuar ajustes em Luz de fundo Contraste Brilho Nitidez Cor ou Matiz o OSD será ajustado de acordo No modo PC você pode efetuar ajustes em Luz de fundo Contraste e Brilho 26 32 polegadas No modo PC você pode efetuar ajustes em Contraste e Brilho 40 polegadas As definições podem ser ajustadas separadamente para cada entrada da TV A energia c...

Page 91: ...ta como alta Ativação do contraste dinâmico Você pode ajustar o contraste da tela para obter um excelente contraste 6 Pressione o botão ou para selecionar Contraste Dinâmico e em seguida pressione o botão ENTER 7 Pressione o botão ou para selecionar Desligada Baixo Média Alta Pressione o botão ENTER Desligada Desliga a função de ajuste de contraste dinâmico Baixo Define o contraste dinâmico como b...

Page 92: ... Pressione o botão ou para selecionar Vermelho Verde ou Azul para alterar Pressione o botão ENTER 16 Pressione o botão ou para reduzir ou aumentar o valor de um item específico Pressione o botão ENTER Em Cor você pode ajustar os valores RGB para a cor selecionada Para restaurar o valor RGB ajustado selecione Rest Padrões Vermelho Ajusta o nível de saturação do vermelho Verde Ajusta o nível de satu...

Page 93: ... ajustada Tom de Pele Você pode enfatizar a tonalidade de pele na imagem 20 Pressione o botão ou para selecionar a Tom de Pele e pressione o botão ENTER 21 Pressione o botão ou para reduzir ou aumentar o valor Pressione o botão ENTER A alteração do valor de ajuste atualizará a tela ajustada Mover Entrar Retornar Verm Offset 25 Verde Offset 25 Azul Offset 25 Verm Gain 25 Verde Gain 25 Azul Gain 25 ...

Page 94: ...ralmente você deve visualizar a TV no modo 16 9 o máximo possível 1 Siga as instruções em Ativando as opções de imagem números 1 e 2 2 Pressione o botão ou para selecionar Tamanho e em seguida pressione o botão ENTER 3 Pressione os botões ou para selecionar o formato de tela desejado Pressione o botão ENTER Pressione o botão EXIT para sair 16 9 Programa a imagem para o modo 16 9 Zoom Amplo Ampliar...

Page 95: ...t Padrões e pressione o botão ENTER Você pode inicializar a configuração HD Alta definição 16 9 1080i 1920x1080 720p 1280x720 As definições podem ser ajustadas separadamente para cada entrada da TV Fonte de entrada Tamanho da imagem TV AV S Video Componente 480i 480p 16 9 Zoom Amplo Zoom 4 3 Componente 1080i HDMI 1080i 16 9 Zoom Amplo Zoom 4 3 Apenas varrer PC 16 9 4 3 Você também pode pressionar ...

Page 96: ...o Média Reduz o ruído da tela no nível médio Alta Reduz o ruído da tela no nível alto Auto Reconhece e reduz automaticamente o ruído da tela Pressione o botão EXIT para sair Ajustando o Nível de Preto HDMI Selecione diretamente o nível de preto na tela para ajustar a profundidade da tela 1 Siga as instruções em Ativando as opções de imagem números 1 e 2 Consulte a página 28 2 Pressione o botão ou ...

Page 97: ... ENTER Pressione o botão EXIT para sair O Modo Somente Azul está disponível quando o modo imagem está configurado em Filme ou Padrão Redefinição dos ajustes de imagem para os ajustes de fábrica 1 Pressione o botão MENU para exibir o menu Pressione o botão ENTER para selecionar Imagem 2 Pressione os botões ou para selecionar Rest Padrões e depois pressione o botão ENTER Pressione o botão ou para se...

Page 98: ...e de sinal A V externo para PIP 3 Pressione o botão ou para selecionar Origem e em seguida pressione o botão ENTER Selecione a origem da sub imagem PIP pressionando o botão ou e a seguir o botão ENTER A sub imagem pode servir a diferentes seleções de fonte com base na definição da imagem principal Alterar o tamanho da janela PIP 4 Pressione o botão ou para selecionar Tamanho e em seguida pressione...

Page 99: ...a sub imagem estiver definida como TV Fácil definição 1 Pressione o botão TOOLS no controle remoto 2 Pressione o botão ou para selecionar PIP e pressione o botão ENTER 3 Pressione o botão ou para selecionar um item específico 4 Pressione o botão ou para selecionar a opção solicitada 5 Pressione o botão EXIT ou TOOLS para sair Mover Entrar Retornar PIP Ligado Origem TV Tamanho Posição Canal Ar 4 PI...

Page 100: ...ersonalizado Em seguida pressione o botão ENTER Pressione o botão EXIT para sair Padrão seleciona o modo de som normal Música destaca a música sobre as vozes Filme fornece o melhor som para filmes Diálogo destaca as vozes em relação a outros sons Personalizado retorna às configurações de som personalizadas consulte Personalizando o som Fácil definição 1 Pressione o botão TOOLS no controle remoto 2...

Page 101: ... botão ENTER Pressione o botão EXIT para sair TruSurround XT SRS e o símbolo são marcas registradas da SRS Labs Inc A tecnologia TruSurround XT é incorporada sob licença da SRS Labs Inc Fácil definição 1 Pressione o botão TOOLS no controle remoto 2 Pressione o botão ou para selecionar SRS TS XT 3 Pressione o botão ou para selecionar Desligada ou Ligado 4 Pressione o botão EXIT ou TOOLS para sair S...

Page 102: ...lha de som multicanal MTS Controle automático de volume 1 Pressione o botão MENU para exibir o menu Pressione o botão ou para selecionar Som e em seguida pressione o botão ENTER 2 Pressione o botão ou para selecionar Volume Automático e em seguida pressione o botão ENTER 3 Pressione o botão ou para selecionar Desligada ou Ligado e em seguida pressione o botão ENTER Pressione o botão EXIT para sair...

Page 103: ...o de TV e Seleção do Som no modo PIP no menu Som O uso prolongado de fones de ouvido em um volume alto pode prejudicar sua audição Você não ouvirá o som dos alto falantes quando conectar os fones de ouvido à TV O volume do fone de ouvido e da TV são ajustados separadamente Como ouvir o som da sub imagem PIP 1 Pressione o botão MENU para exibir o menu Pressione o botão ou para selecionar Som e em s...

Page 104: ...mbolo próximo ao canal irá desaparecer e o canal não será adicionado 6 Repita a etapa 5 para cada canal selecionado ou cancelado Pressione o botão EXIT para sair está ativo quando o Bloqueio de Canais é selecionado como Ligado Pressione o botão CH LIST no controle remoto para acessar as listas de canais Você pode adicionar ou excluir um canal para exibir somente os canais desejados CONTROLE DE CAN...

Page 105: ...ara cada canal bloqueado ou desbloqueado Pressione o botão EXIT para sair Selecione Ligado ou Desligada Bloqueio de Canais para trocar facilmente os canais selecionados em como ativos ou inativos Uma tela azul é exibida no canal quando o Bloqueio de Canais é ativado Pressione o botão CH LIST no controle remoto para acessar as listas de canais Este recurso permite que você impeça usuários não autor...

Page 106: ...lecionar Canal e em seguida pressione o botão ENTER 2 Pressione o botão ou para selecionar Sistema de cor e em seguida pressione o botão ENTER Selecione a opção desejada Auto PAL M PAL N NTSC pressionando o botão ou Pressione o botão ENTER Pressione o botão EXIT para sair Usando o recurso de sistema de cor Normalmente a TV pode receber imagem e som de boa qualidade quando está no modo AUTO Este mo...

Page 107: ...alor correto é 60 ou 60 Hz Caso contrário clicar em OK e sair da caixa de diálogo Modos de visualização EXIBIÇÃO DO PC Se o sinal do sistema for igual ao modo de sinal padrão a tela se ajusta automaticamente Se o sinal do sistema não for igual ao modo de sinal padrão ajuste o modo consultando o guia do usuário da placa de vídeo do contrário poderá não haver vídeo Para os modos de visualização abai...

Page 108: ...e o botão ENTER Pressione o botão ou para ajustar a qualidade da tela É possível aparecer faixas verticais ou a imagem ficar sem nitidez Pressione o botão ENTER Pressione o botão EXIT para sair Regular a qualidade da tela O propósito de ajustar a qualidade da imagem é o de remover ou reduzir interferências na imagem Se a interferência não for removida somente com a sintonização fina então faça os ...

Page 109: ...o EXIT para sair Inicializar as configurações de posição na tela ou cores É possível retornar todos os ajustes de imagem aos valores definidos de fábrica Predefinição Pressione o botão SOURCE para selecionar o modo PC 1 Pressione o botão MENU para exibir o menu Pressione o botão ou para selecionar Imagem e em seguida pressione o botão ENTER Pressione o botão ou para selecionar Tela e em seguida pr...

Page 110: ...a mover entre Mês Dia Ano Hora Minuto ou am pm Ajuste a data e hora desejada pressionando o botão ou e pressione o botão ENTER Pressione o botão EXIT para sair A hora atual será exibida sempre que você pressionar o botão INFO Configure também a hora usando os botões de número no controle remoto AJUSTE DE TEMPO Configuração Plug Play Idioma Português Hora Closed Caption Melodia Desligada Entretenim...

Page 111: ...essione o botão ENTER 4 Pressione o botão EXIT para sair Fácil definição 1 Pressione o botão TOOLS no controle remoto 2 Pressione o botão ou para selecionar Sleep Timer 3 Pressione o botão ou para selecionar o minuto 4 Pressione o botão EXIT ou TOOLS para sair TV Configuração Plug Play Idioma Português Hora Closed Caption Melodia Desligada Entretenimento Desligada Economia energia Desligada Sistem...

Page 112: ...o correspondente coloque em Ativado Repetir Selecione Uma vez Todos os dias Seg Sex Seg Sáb ou Sábado Domingo Volume Define o nível de volume necessário Canal Selecione o canal desejado Pressione o botão EXIT para sair Defina diretamente a Hora e os Minuto Canal os botões numéricos no controle remoto Desligamento automático Ao ajustar o temporizador para Ligado sua TV será desligada se você não op...

Page 113: ...ções em Canal e Campo Os diferentes canais e campos exibem informações distintas O Campo 2 oferece informações que suplementam as do Campo 1 Por exemplo O canal 1 pode ter legendas em inglês ao passo que o canal 2 tem legendas em espanhol 4 Pressione o botão ou para selecionar Canal e Campo e pressione o botão ENTER Pressione o botão ou para selecionar 1 ou 2 e pressione o botão ENTER Pressione o ...

Page 114: ...o som e cores estimulantes Cinema Fornece excelente imagem e qualidade de som para assistir filmes Você pode desfrutar uma imagem excelente e som de alta qualidade Jogo Fornece excelente imagem e qualidade de som para jogos Este modo acelera a velocidade de reprodução do painel ao utilizar um console de jogos externo conectado à TV Pressione o botão EXIT para sair Se você configurar quaisquer dos ...

Page 115: ...TV no modo de economia de energia baixo Média Configura a TV no modo de economia de energia médio Alta Configura a TV no modo de economia de energia alto Auto Ajusta automaticamente o brilho da tela da TV de acordo com as cenas Pressione o botão EXIT para sair Fácil definição 1 Pressione o botão TOOLS no controle remoto 2 Pressione o botão ou para selecionar Economia energia 3 Pressione o botão ou...

Page 116: ...e saída HDMI do dispositivo Anynet correspondente usando um cabo HDMI 2 Conecte a HDMI IN do home theater ao conector de saída HDMI do dispositivo Anynet correspondente usando um cabo HDMI Conecte apenas um Home Theater Você pode conectar um dispositivo Anynet usando o cabo HDMI Existem alguns cabos HDMI que não suportam funções Anynet Existem alguns cabos HDMI que não suportam funções Anynet O An...

Page 117: ...ressione o botão TOOLS no controle remoto 2 Pressione o botão ou para selecionar Anynet HDMI CEC em seguida pressione o botão ENTER Configurando um dispositivo Anynet para desligar automaticamente ao desligar a TV 2 Pressione o botão ou para selecionar Desligamento Auto em seguida pressione o botão ENTER 3 Pressione o botão ou para selecionar Sim em seguida pressione o botão ENTER A função de Desl...

Page 118: ...a de Anynet para modo de transmissão TV Gravar Inicia uma gravação Este menu somente funciona para um dispositivo que realiza gravação Menu Nome_do_dispositivo Mostra o menu do dispositivo conectado Exemplo Se há um gravador de DVD conectado é exibido o menu com o título do gravador de DVD Operação Nome_do_dispositivo Mostra o menu de controle de reprodução do dispositivo conectado Exemplo Se há u...

Page 119: ...er interrupção de energia para a TV quando o Receiver for configurado em Ligado desconectando o cabo ou devido a falha de energia o Alto falante da TV pode ser configurado em Desligada ao ligar a TV novamente consulte a página 37 A gravação Você pode gravar um programa da TV usando um gravador Pressione o botão REC Inicia a gravação Somente quando o dispositivo de gravação habilitado Anynet estive...

Page 120: ...t Selecione Ver TV no menu Anynet Pressione o botão SOURCE no controle remoto da TV e selecione um dispositivo que não seja um dos dispositivos Anynet Pressione CH PRE CH e similares para mudar para o modo TV Note que o botão de canal só funciona quando um dispositivo Anynet com sintonizador interno não estiver conectado A mensagem Conectando ao dispositivo Anynet é exibida na tela Não é possível ...

Page 121: ...missão Verificar os terminais das pilhas Mensagem Verif cabo de sinal Verificar se que o cabo de sinal está firmemente ligado às entradas do computador Mensagem Função Não Disponível Verificar as resoluções máximas e a freqüência do transformador de vídeo Compare estes valores com os dados dos modos de exibição A imagem está demasiadamente clara ou escura Regule o brilho e o contraste Regule a fun...

Page 122: ...ínio de frequências Freqüência horizontal kHz 30 60 Freqüência vertical Hz 60 75 Velocidade máxima de atualização a 60Hz 1360 X 768 A imagem não está centralizada na tela Regule a posição horizontal e vertical A posição da tela deve ser ajustada na fonte de saída ex Decodificador Digital STB com um sinal digital Uma distorção da imagem aparece no canto da tela Se Apenas varrer estiver selecionado ...

Page 123: ...orte e nivelada corretamente não aplique pressão excessiva na parte superior esquerda das laterais à direita da TV 2 Aperte dois parafusos na posição 1 e depois dois parafusos na posição 2 Levante o produto e aperte os parafusos Se você apertar os parafusos sem levantar a TV LCD ela poderá inclinar para um lado 1 Remova os quatro parafusos da parte traseira da TV 2 Separe o suporte da TV Duas ou m...

Page 124: ...onar um botão de seta quando não há uma exibição de OSD na tela da TV a tela Ajuste é exibida Pressione o botão INFO para redefinir Pressione o botão ou para selecionar Sim e pressione o botão ENTER A posição é inicializada na configuração padrão 3 Pressione o botão azul Pressione os botões e para selecionar o modo salvar a partir da posição 1 posição 2 ou posição 3 a fim de salvar a posição atual...

Page 125: ...o conjunto da TV Para montagens em paredes que não estejam em conformidade com essas especificações VESA de parafuso padrão o comprimento dos parafusos pode ser diferente dependendo das especificações de cada uma delas Não use parafusos que não estejam em conformidade com as especificações VESA de parafuso padrão Não aperte os parafusos com muita força pois isso pode danificar o produto ou ocasion...

Page 126: ...endendo do modelo O bloqueio Kensington é um dispositivo usado para proteger fisicamente o sistema quando usado em um local público A aparência e o método de bloqueio podem ser diferentes daqueles apresentados na ilustração dependendo do fabricante Consulte o manual fornecido com o bloqueio Kensington para utilizá la adequadamente O dispositivo de desbloqueio precisa ser adquirido separadamente Ca...

Page 127: ...nte 2 Remova os parafusos da parte traseira central da TV coloque os parafusos nas braçadeiras e aperte os novamente na TV Talvez os parafusos não sejam fornecidos com o produto Nesse caso adquira parafusos com as seguintes especificações Especificações de parafusos Para uma TV LCD de 17 29 polegadas M4 X 15 Para uma TV LCD de 32 40 polegadas M6 X 15 3 Conecte as braçadeiras fixadas na TV e as bra...

Page 128: ...o 10 C a 40 C 50 F a 104 F 10 a 80 não condensação 20 C a 45 C 4 F a 113 F 5 a 95 não condensação Rotação do suporte esquerda direita 0 0 20 20 Modelo LN40A450C1 Tamanho da tela diagonal 40 polegadas Consumo Operação normal Standby 200 W 1W PC Resolución 1360 x 768 60 Hz Som Saída 10W x 2 Dimensões LxPxA Corpo Com suporte 989 8 X 81 7 X 640 7 mm 39 0 X 3 2 X 25 2 pulgadas 989 8 X 300 X 694 3 mm 39...

Page 129: ...Esta página está em branco intencionalmente ...

Reviews: