background image

19

5. If you want to hear the effects in the monitors, turn up 
the AUX1 RTN and/or AUX2 RTN until you have the level 
of effects you want in those mixes. For more information 
on setting up a monitor mix, see the following section.
NOTE: If the effect sound is distorted even though the 
EFX RTN is turned down low, lower the EFX 1 controls of 
each channel.
6. Repeat the steps above for the second EFX section on 
the TXM20 using the EXF 2 auxiliary send instead of EFX 
1.

SENDING AN INDEPENDENT MIX TO THE 
MONITOR SPEAKERS

The TXM16 and TXM20 allow you to operate the power 
amplifiers in a MONO/ AUX1 mode. This lets you use one 
amplifier for speakers facing the audience, and the other 
amplifier for the monitor speakers facing the musicians. 
You can also use an external power amp to power your 
monitors when running the TXM Mixer in stereo.  Either 
way, you’ll want to make a separate mix for the monitor 
system that’s different fro the MAIN mix, let say to hear 
more vocals than instruments.  Follow these simple steps 
to set up your monitor mix. For this example we assume 
that you will be using an external power amp.

1. Connect the AUX 1 Output to the input of your monitor 
power amplifier. Connect your amplifier to your monitor 
speakers according the amplifier operating instructions.

2. Make sure that the  AUX 1 Send  level fader  is all the 
way down.

3. Raise the AUX 1 controls for the channels that you wish 
to hear from the monitor speakers.
 

NOTE: The MONITOR controls are not affected by the level 
settings of each channel. This allows you to create a mix 
for the monitor that is independent of the MAIN mix.

Now raise the AUX 1 Send fader up until you get a good 
level. If feedback occurs, back down on the AUX 1 Send 
fader.
4. You can use the MONITOR GRAPHIC EQUALIZER to cut 
the frequencies that cause feedback. Setting the equal-
izer to get the most gain before feedback requires a good 
ear, but mostly, a lot of painful experience.  If you are just 
starting out use the standard “smile” EQ curve where the 
mids are cut down and the lows and high are slightly 
boosted.

Operating the TXM16 and TXM20

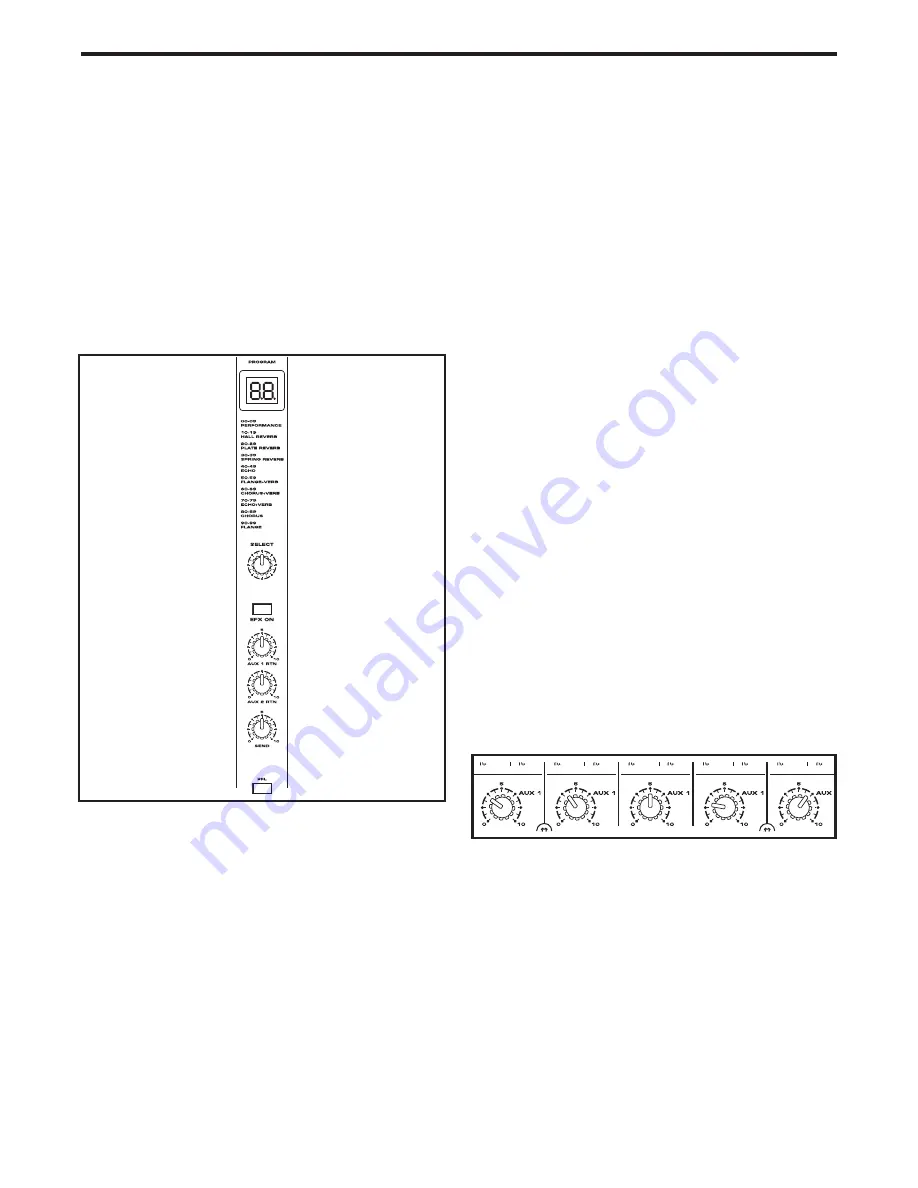
USING THE DIGITAL EFFECTS 

The TXM mixers feature a built-in, high quality, 24-bit 
Multi Effect Processor, (two on the TXM20), offering stu-
dio grade effects.  The EFX section features clean Delay, 
lush Reverbs and multi-effects like Delay or 
Reverb.  You can add a broad range of studio 
quality effects by simply dialing through the 100 presets.  
The following details the operation of the internal DSP 
effects in the EFX section:
1. Connect a mic or instrument to the desired channel, 
adjust the level and equalizer to your liking and make 
sure the MAIN fader level is set so you can hear it in your 
speakers.

2. Now select the desired EFX program using the SELECT 
control knob located in the middle of the EFX chan-
nel strip. Set the DSP SELECT switch to one of the 100 
effects. You can check the EFX Program List to find the 
effect perfect for your performance. The first bank of 10 
presets have been programmed with common effects for 
live performance, and the following banks are set up in 
groups by the types of effects.
3. Once you have selected the desired EFX program, raise 
the EFX 1 control on the channels you wish to apply the 
digital effect to.
4. Now use the EFX RTN fader control to adjust the effects 
return level.  The EFX RTN fader control sets the overall 
level control for the DSP EFX processor. 

Summary of Contents for Txm16

Page 1: ...Powered Mixers 1000 WATT POWERED MIXERS WITH 24BIT DIGITAL EFFECTS ...

Page 2: ... ...

Page 3: ...ant Safety Instructions 1 Please read all instructions before operating the unit 2 Keep these instructions for future reference 3 Please heed all safety warnings 4 Follow manufacturers instructions 5 Do not use this unit near water or moisture 6 Clean only with a damp cloth 7 Do not block any of the ventilation openings Install in accordance with the manufacturers instructions 8 Do not install nea...

Page 4: ... il rischio di incendio o di scariche elettriche non esponete questo apparecchio a pioggia o umidità Per ridurre il pericolo di scariche elettriche evitate di rimuoverne il coperchio o il pannello posteriore Non esistono all interno dell apparecchio parti la cui regolazione è a cura dell utente Per even tuale assistenza fate riferimento esclusivamente a personale qualificato Il fulmine con la punt...

Page 5: ... Output Section 10 Main Output Section 11 Power Amp Section 12 Txm16 And Txm20 Input And Output Connections 14 Rear Panel 16 Speaker Connection 17 Operating The Txm16 And Txm20 18 Using The Digital Effects 19 Sending An Independent Mix To The Monitor Speakers 19 Using An External Effect 20 Recording Your Performance From The Txm16 And Txm20 21 Using the MONO OUTPUT to Drive a Subwoofer System 21 T...

Page 6: ...all the channels or two different effects on different groups of channels The auxiliary buses are also extremely flexible when it comes to monitor mixes The TXM16 and TXM20 will give you clean clear sound reproduction thanks to the high quality low noise microphone preamps super clean low impedance mix bus two on board 9 band graphic equalizers and the high output low distortion power amplifier Th...

Page 7: ...rd microphone With the mixer s XLR connectors connecting standard low impedance dynamic mics is simple and con denser microphones are connected easily using the available 48 Volt Phantom Power Each of the TXM16 and TXM 20 s mic line chan nels feature a convenient Insert Point jack to patch in external effects and a Three band Equalizer with variable mid range control enabling you to tailor the ton...

Page 8: ...GH frequency response is flat when the knob is in the 12 00 position Rotating the knob towards the right will boost the channel s high frequency response at 12 kHz by 15dB and rotating it towards the left will cut the high frequency by 15dB MF MID FREQUENCY CUT BOOST The MID CUT BOOST knob is used in conjunction with the MID FREQUENCY knob to create the tonal shape in the mid range frequency when ...

Page 9: ...internal power amplifier For more information on the POWER AMP MODE switch see the section POWER AMP MODE Switch on page 12 in this manual 6 7 6 AUX2 PreFaderSendTXM16 PRE POSTTXM20 Each of the TXM16 and TXM20 s Mono Input channels include an AUX 2 send which controls the amount of that channel s signal that is sent to the AUX 2 Output On the TXM16 the signal that feeds Aux 2 is sent before or pre...

Page 10: ...e backlit MUTE switch allowing you to easily turn that chan nel on or off When MUTE switch is illuminated the channel is off conversely when the backlight is off the channel is on 12 PFL Pre Fader Listen switch The Mono Input channel s PFL or Pre Fader Listen switch allows you to listen or solo a channel or group of chan nels in the headphones When the PFL switch is pressed down the channel is ass...

Page 11: ...n page 4 of this manual 18 AUX 1 Pre Fader Send Each of the TXM16 and TXM20 s stereo input channels include an AUX 1 send which controls the amount of that channel s signal that is sent to the AUX 1 Output The sig nal feeding Aux 1 is sent before or pre the channel Fader so the channel Fader has no effect on the Aux 1 level The Aux 1 bus is usually used to create a separate mix for a floor monitor...

Page 12: ...put signals to the left and others to the right 24 MUTE switch The Stereo Input channels feature a large backlit MUTE switch allowing you to easily turn that channel on or off When MUTE switch is illuminated the channel is off con versely when the backlight is off the channel is on 25 PFL Pre Fader Listen switch The Stereo Input channel s PFL or Pre Fader Listen switch allows you to listen or solo...

Page 13: ...t position and the Effects Display shows two dashes 32 AUX1RTN EffectsReturntoAux1controlknob The AUX 1 RTN control is used to adjust the level of the effects from the built in digital Multi effect that s being sent to the Aux 1 monitor bus This allows you to add the DSP effects to the signal in your monitor speakers Turn this knob up if you want to hear the effect in the AUX 1 monitor mix 33 AUX ...

Page 14: ...channels in the headphones When the stereo input channel s PFL switch is pressed down that channel s sig nal is assigned to the solo bus and can be heard in any optional headphones plugged in to the PHONES connec tor located in the front panel jack field Since the signal is sent pre fader you can hear the signal regardless of the position of the channel Level control This allows you to listen to a...

Page 15: ...the signal up and down to prevent pops when the switch is turned on and off 48 PFL switch The CD TAPE input channel s PFL or Pre Fader Listen switch allows you to listen or solo the CD TAPE input in the headphones When the CD TAPE input channel s PFL switch is pressed down that channel s signal is assigned to the solo bus and can be heard in any optional head phones plugged in to the PHONES connec...

Page 16: ...right PEAK LED s illuminate when the signal from the MAIN mix is beginning to reach a level where distortion occurs If the PEAK lights stay on your mix is too hot and you need to lower the MAIN mix volume It is okay for the PEAK light to occasionally light however they should go off quickly and not stay on 55 LED VU METER The OUTPUT LEVEL METER allows you to monitor the level of the signal which i...

Page 17: ... Amp Mode switch The TXM16 and TXM20 have two internal power ampli fiers which can run in stereo or as two separate mono amplifiers Depending on the position of the MODE switch the amplifiers received their input signals from the MAIN AUX 1 or AUX 2 monitor bus The MODE switch is used to select one of four different operating modes MAIN L MAIN R MONO AUX 1 AUX 1 AUX 2 and MONO BRIDGE The switch ha...

Page 18: ...g the slider in the negative direction will cut that frequency by up to 12dB The response curve set using the Graphic Equalizer is also applied to the signal at the AUX 1 output 64 MONITOR EQ ON OFF switch The EQ ON OFF switch is used to engage or bypass the MONITOR EQUALIZER When the switch is in the down position the EQ is on and when the switch is up the EQ is bypassed 65 MAIN STEREO EQUALIZER ...

Page 19: ...connector Stereo Input Channels 1 4 inch and RCA Each of the TXM mixers has two sets of full featured stereo input channels Channels 9 10 and 11 12 on the TXM16 and Channels 13 14 and 15 16 on the TXM20 Use these for connecting stereo signals like those from CD or MP3 players electronic keyboards drum machines and other line level signals These inputs have both 1 4 inch and RCA connectors for conn...

Page 20: ...point on TRS TIP RING SLEEVE jack for interfacing external effects processors on Left and Right MIX bus The signal is sent on the tip the Send and returns the Return on the sleeve of the connector M PHONES 1 4 inch jack Connect standard stereo headphone 60 to 600 Ohms here N MONO SUB OUT 1 4 inch jack The Left and Right Mix outputs are summed together and sent to the MONO SUB output The volume of ...

Page 21: ...the BRIDGE jack use an 8 through 16 Ohm speaker CAUTION When using a bridge connection do not con nect anything to the AMP 2 jacks R AMP 1 Powered Speaker Outputs The AMP 1 output has a 1 4 inch jack and a Speakon TXM16 and TXM20 Input and Output Connections connector which are powered outputs used to connect your left side main PA speaker when using the TXM16 and TXM20 in stereo mode When operati...

Page 22: ...ed in parallel to both the 1 4 inch jack and a Speakon connec tor of AMP1 and AMP 2 or a single speaker can be con nected to the BRIDGE jack bridge connection For each of these the required speaker impedance will differ Refer to the following diagrams and make sure that the speaker impedance is not less than the specified value Additional or alternative amplifiers and speakers or pow ered speakers...

Page 23: ...the basic operation of the TXM16 and TXM20 CONNECTING MICROPHONES AND INSTRUMENTS 1 Before connecting mics or instruments make sure that the power of all your systems components including the TXM mixer is turned off Also make sure that the vol ume and gain controls of each channel of the TXM16 or TXM20 and the MAIN MONO Aux1 and AUX2 level faders are turned all the way down 2 Next make the connect...

Page 24: ...mix Now raise the AUX 1 Send fader up until you get a good level If feedback occurs back down on the AUX 1 Send fader 4 You can use the MONITOR GRAPHIC EQUALIZER to cut the frequencies that cause feedback Setting the equal izer to get the most gain before feedback requires a good ear but mostly a lot of painful experience If you are just starting out use the standard smile EQ curve where the mids ...

Page 25: ...the hook up 1 Using standard 1 4 inch insert Y cable connect the MAIN Insert to the Left input and output of a stereo com pressor like a Samson C com 16 or S com plus 2 Using another standard 1 4 inch insert Y cable connect the MAIN Insert to the Right input and output of a stereo compressor like a Samson C com 16 or S com plus 3 Now follow the directions in your compressor users manual to set the...

Page 26: ... subwoofer system by engaging the SUBWOOFER ON OFF switch located in the MONO output strip When the SUBWOOFER ON OFF switch is pressed in the variable Low Pass or high cut filter is active Now you can use the FREQUENCY control knob to set the high frequency limit of the MONO SUBWOOFER OUT The TXM mixer s FREQUENCY control has a range from 20Hz to 200Hz allowing you to tune the output for a variety...

Page 27: ... an exter nal power amp which is driving 2 monitor speakers For inputs two microphones are connected to channel 1 and 2 s low imped ance inputs and the output of the Bass Direct Box is also connected to the Low Impedance input on channel 4 The Keyboards as well as the Lead and Rhythm Guitar signal processors outputs are connected to the TXM16 s line inputs TXM16 s AUX OUT con nected to an external...

Page 28: ...d two moni tor speakers connected to POWER AMP 1 For inputs two microphones are connected to channel 1 and 2 s low imped ance inputs and the output of the Bass Direct Box is also connected to the Low Impedance input on channel 4 The Keyboards as well as the Lead and Rhythm Guitar signal processors outputs are connected to the TXM16 s line inputs ...

Page 29: ...e CONNECTING THE TXM16 and TXM20 There are several ways to interface the TXM16 and TXM20 to support a variety of applications The TXM16 and TXM20 feature balanced inputs and outputs so connecting balanced and unbalanced signals is possible Balanced TRS 1 4 Connector 1 4 Insert Cable ...

Page 30: ... OUT 24dB TAPE IN to MAIN OUT Crosstalk 1KHz 70dB adjacent input 70dB input to output Input Channel Equalization Mono Channel HIGH 12KHz shelving 15dB Maximum MID variable 100 Hz to 8kHz peaking 15dB Maximum LOW 80Hz shelving 15dB Maximum Stereo Channel HIGH 12KHz shelving 15dB Maximum MID 2 5KHz peaking 15dB Maximum LOW 80Hz shelving 15dB Maximum Meters 11 POINT LED METERS 20 15 10 7 5 3 0 1 2 4 ...

Page 31: ...26 Block Diagram ...

Page 32: ...Samson Technologies Corp 45 Gilpin Avenue Hauppauge New York 11788 8816 Phone 1 800 3 SAMSON 1 800 372 6766 Fax 631 784 2201 www samsontech com ...

Reviews: