17
Using Equalization
One of the most exciting aspects to using a mixer such as the SD8 is having the
ability to shape a sound, using a process called equalization. But there are few
areas of audio engineering more misunderstood than equalization, and, just as
good EQ can really help a sound, bad EQ can really hurt it, so read on...
Every naturally occurring sound consists of a broad range of pitches, or
frequencies, combined together in a unique way. This blend is what gives every
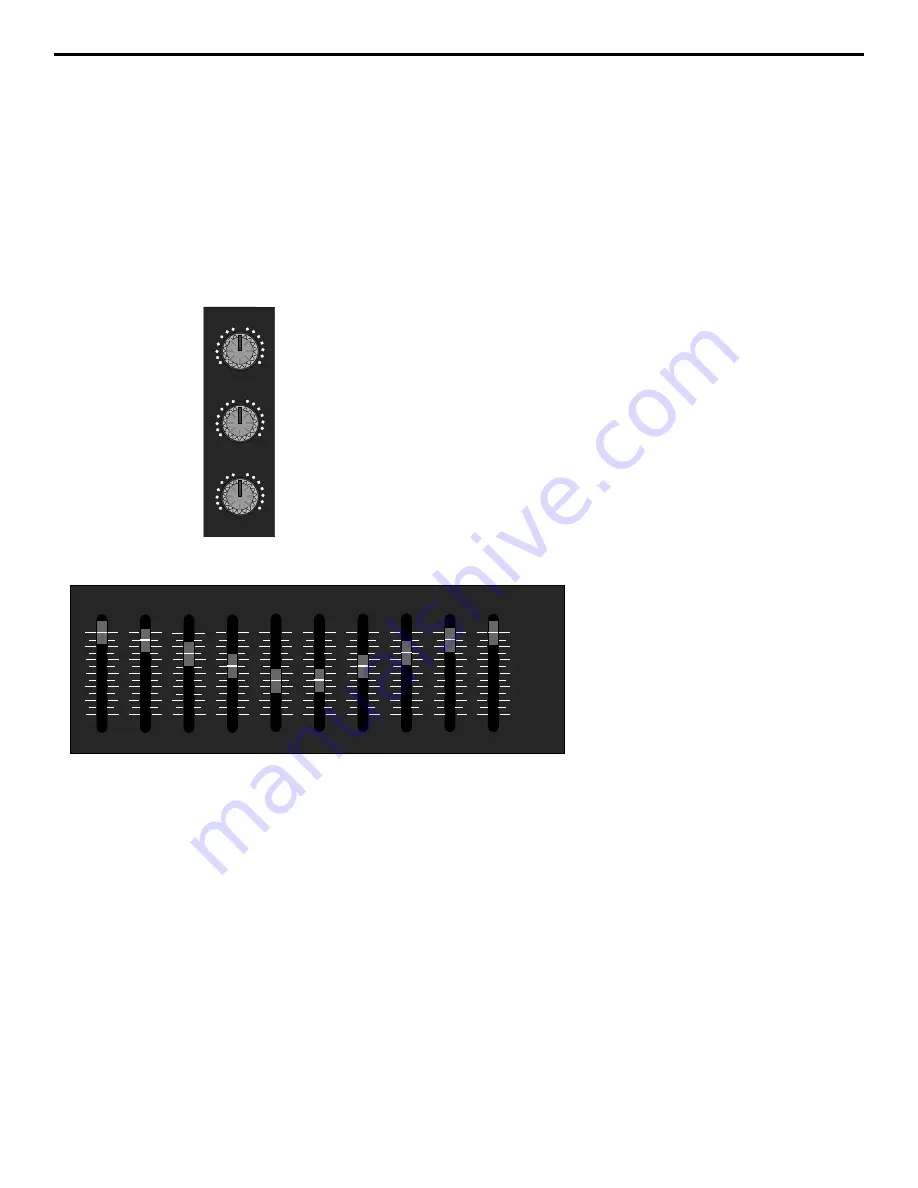
sound its distinctive tonal color. The EQ section in a mixer allows you to alter a
sound by boosting or attenuating specific frequency areas. The SD8 provides a
ten-band graphic master equalizer (more about this shortly) as well as
independent three-band equalization for each channel, with center frequency
areas of, from high to low: 10 kHz, 800 Hz, and 80 Hz. Each channel EQ knob is
labeled with the maximum amount of cut or boost provided (± 15 db in the case
of the high and low frequencies and ± 12 db in the case of the mid frequency).
We provided these particular frequency areas because they have maximum
impact on musical signals—that’s why they are sometimes known as “sweet
spots.” When an EQ knob is in its center detented position (“0”), it is having no
effect. When it is moved right of center, the particular frequency area is being
boosted; when it is moved left of center, the frequency area is being attenuated.
The high and low EQ controls employ what is known as a shelving curve (where
frequencies either above or below the specified area are affected) while the mid
frequency control employs what is known as a bell curve (where frequencies
both above and below the specified area are affected).
The ten-band graphic master equalizer
affects the overall output signal of the
SD8. Its main function is to allow you to
“tune” the device to the particular room
environment you are in. Perhaps its
most important job is to enable you to
eliminate ringing or feedback problems
caused when a microphone is too close
to a loudspeaker. To accomplish this,
start with all ten bands flat (that is, all
ten sliders at their detented “0” center
position). Then, one by one, raise each
slider until you hear the feedback or ringing markedly increase. This allows you
to identify the problematic frequency area (it will most commonly be one or more
of the high mid-range or high frequency areas). When you’ve located the
problem area(s), it’s simply a matter of lowering that slider or sliders below the
0 point until the ringing or feedback disappears. Don’t lower the frequency area
any further than you need to, or the quality of the overall sound may suffer.
If you don’t specifically need to utilize the SD8’s ten-band graphic master
equalizer in a particular environment, leave it completely flat (all sliders at their
center detented “0” position).
HIGH
+15
O
-15
MID
+12
O
-12
LOW
+15
O
-15
32Hz
64Hz
125Hz
250Hz
500Hz
1K
2K
4K
8K
16K
+12dB
0dB
-12dB
32Hz
64Hz
125Hz
250Hz
500Hz
1K
2K
4K
8K
16K
Ten-band graphic master equalizer


