14
Operating the MDR8
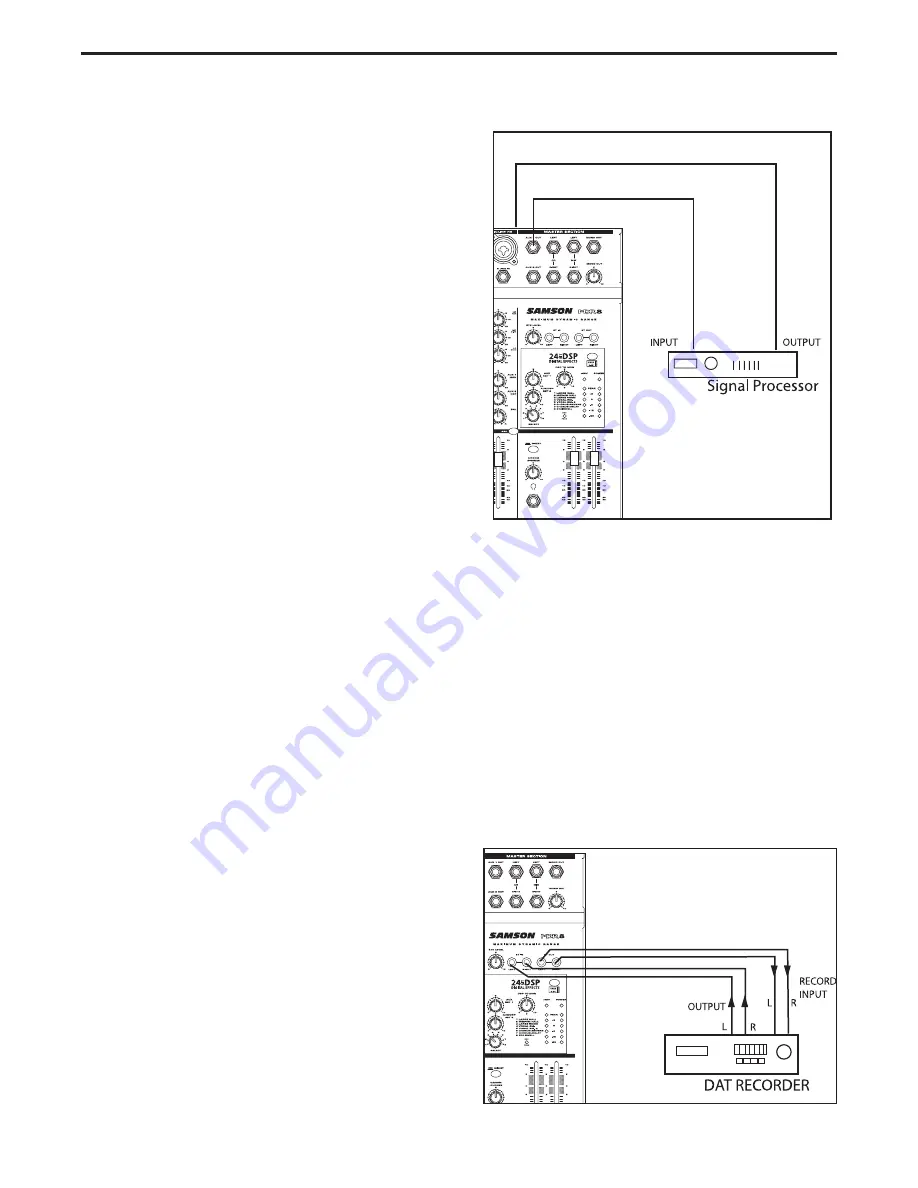
USING AN EXTERNAL EFFECT
If you prefer to use an external device for effects process-
ing, you can easily connect the unit using the MDR8 EFX
bus disconnecting the internal DSP. Follow the simple
steps below to interface your processor:
1.
Connect the AUX 2 OUTPUT to the input of the exter-
nal effect processor.
2.
Connect the outputs of the effect processor to the
AUX 2 RETURN located on the MDR8’s rear panel.
3.
Set the L/R mix faders to the "0" position.
4.
Raise the AUX 2/DSP knobs for the channels to which
you want the external effect to be applied.
5. Set the input level of the external effect so that the
sound is not distorted and so that the effect’s input
meter does not indicate a clipped signal.
6. Use the AUX/DSP RET 2 control to adjust the level of
the effects processed by the external effects device.
PLAYING BACK A CD USING 2TK LEVEL
The MDR8 has a dedicated input for playing back a stereo device such as a CD, Tape or Mini Disk. Below is a
description of how you can play back a CD, Tape or MD using the MDR8’s 2 TRACK INPUT.
1. Turn the 2TK LEVEL control and the LEFT / RIGHT MIX level control all the way down.
2. Press the MIX/2T button down.
3. Adjust the LEFT / RIGHT MIX faders in the master section to the "0" position.
4. Start playback on the CD, Tape or MD player, and use the 2T to MIX control to set the desired level.
RECORDING A MIX FROM THE MDR8
You can record the audio from the MDR8’s mixer section
including the MIC, LINE, TAPE IN and AUX inputs to a
Cassette deck, MD, DAT or any other type of recorder
using the RECORD outputs. Simply connect the MDR8’s
2 TRACK OUT to the input jacks of the recorder as
shown in the diagram on the right and follow the steps
below.
1. Adjust the LEFT / RIGHT MIX faders in the master
section to the "0" position.
2. Set a clean signal using the recorder’s input level
controls and meters.
3. Press
RECORD.
4. Play back using as described in the previous section
"PLAYING BACK A CD USING 2T TO MIX".
Summary of Contents for MDR 8
Page 6: ...4 Front and Rear Panel Layout ...
Page 23: ...21 Block Diagram ...


