

SAL National Pty Ltd. 40 Biloela Street Villawood NSW 2163 ABN 21 633 189 474
Copyright SAL V5 JUN19 |
www.sal.net.au
| Page 2 of 2
11. Specific installation procedures & feature: (if any)
12. Warranty – In accordance with SAL standard terms and conditions of sale, SAL warrant this product to be free from defects in materials and or workmanship for
a period as stated below for goods not subject to incorrect installation, maintenance, operation, mishandling, environmental, unauthorised modifications or electrical
operating conditions outside the nominated product specification as detailed in these installation instructions. The benefits to you given by this warranty are in addition
to other rights and remedies you have under law. Our goods come with guarantees that cannot be excluded under the Australian Consumer Law. You are entitled to a
replacement or refund for a major failure and compensation for any other reasonably foreseeable loss or damage. You are also entitled to have the goods repaired or
replaced if the goods fail to be of acceptable quality and the failure does not amount to a major failure.
Warranty term – Twelve (12) months for commercial use and twenty four (24) months for residential use from date of purchase.
How to make a claim?
Step # 1 – Within 30 days of the fault discovery, please contact the original place of the SAL product purchase during standard (local) business hours, with the following
information (a) proof of purchase (b) description and quantity of the claimed fault (c) address of installation. (d) operating hours of the product.
Step # 2 – It is then the responsibility of the original place of product purchase to report the matter to SAL aftersales;
Step # 3 – Upon review of your claim and if the product is required to be returned to SAL for technical evaluation, then at the owners expense the product must be
returned to SAL as per the above nominated locations.
Step # 4 – Pending the evaluation, the claim will be validated resulting in the product being repaired or replaced with the same or best equivalent product at the
discretion of SAL, or rejected if the product fault was found to be caused by conditions beyond the responsibility of SAL warranty obligations. Consideration of installation,
product removal, return freight and or testing fees are not the responsibility of SAL.
• Black matt finish, low profile design
• Three LED indicators to display system status
• 240V power supply included
• Plug and play with PIXIE PLUS App
• Wi-Fi and internet connectivity, control your PIXIE devices from anywhere in the world
• Compatible with Google Home and Amazon Alexa
• Designed for USE WITH SAL PIXIE SMART PRODUCTS ONLY
Operation instruction
Operation of SET button
• To start working, connect PIXIE Gateway with power supply, plug power supply
to the mains
• Follow the guides in PIXIE PLUS App to finish all the configurations
Long press for 5 seconds
Reboot PIXIE Gateway, reconnect all the network
Manually reset the PIXIE Gateway
Quickly press 9 times
Installation instruction
1. Installation
2. Setup PIXIE Gateway (For new users)
3. Setup PIXIE Gateway (For existing PIXIE app users who wish to
transfer existing data & settings to the PIXIE PLUS app)
4. Link with Google Home
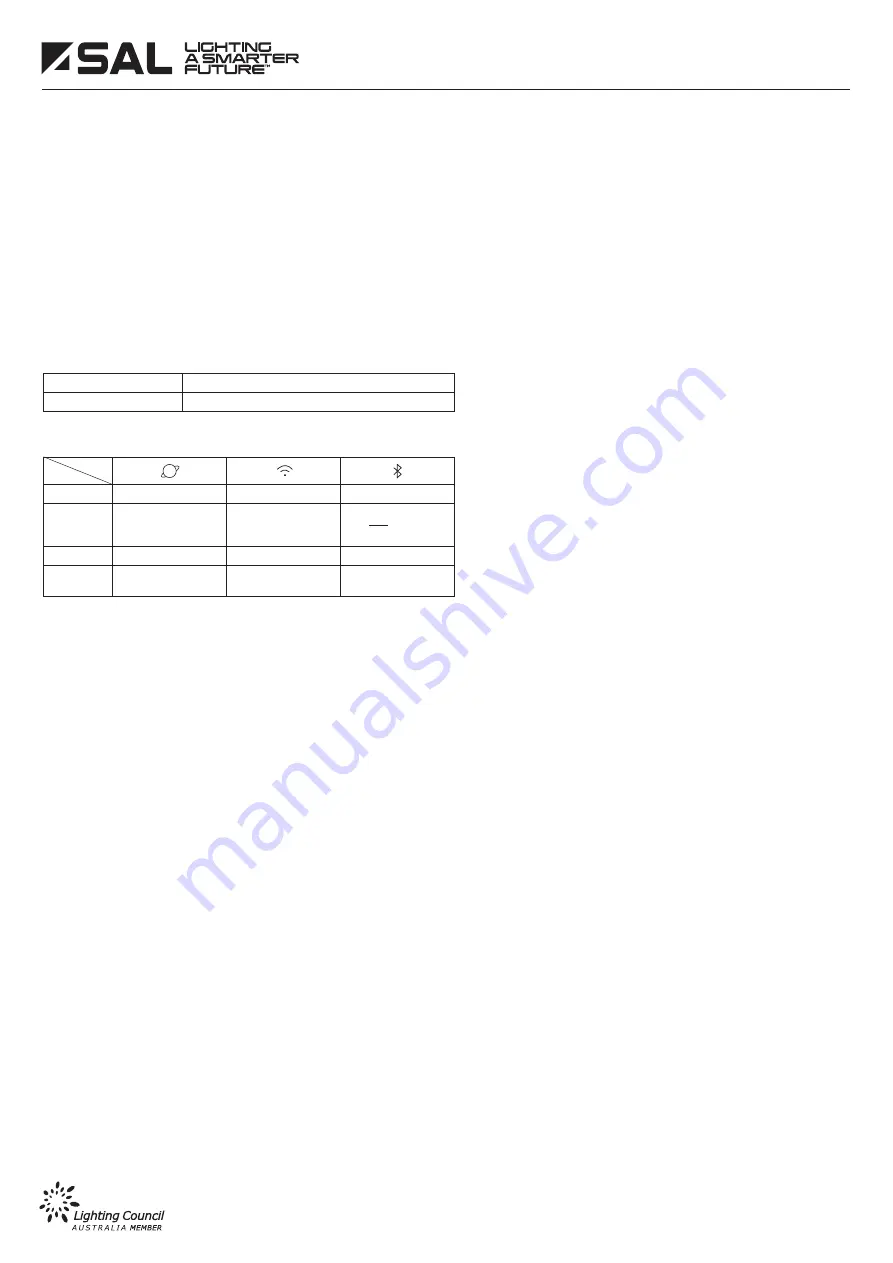
LED Indicator status
Ready for configuration Ready for configuration Ready for configuration
Connecting
Connecting
Connecting
Device is online
Local router connection
is successful
PIXIE Bluetooth network
is set
Device is not online,
please check your
internet connection
Device is not online,
please check your
router setting
Indicator
Red
Status
Blue blinking
Red blinking
Blue
• Choose a position within range of your Wi-Fi router and a PIXIE device
• For optimal connectivity, place PIXIE Gateway at an open area,
which is not inside a drawer or cabinet
• Connect PIXIE Gateway with power supply, plug power supply to the
mains
• Three LED indicators will turn on and blink in red, showing it's ready to
configure
• Download the latest PIXIE PLUS App, and you are ready to go!
• Hold your phone and stand close to the PIXIE Gateway
• Launch PIXIE PLUS App, register an account and login
• Choose "Create a HOME"
• Search until the PIXIE Gateway is found by the App
• Important: select the correct gateway
(check the gateway ID on the label under gateway body)
• Follow the guides to choose your Wi-Fi network
• When three LED indicators turn static blue, it's all set
• Make sure the PIXIE app and PIXIE PLUS app are up-to-date
• Hold you phone and stand close to the PIXIE Gateway
• Launch PIXIE PLUS App, register an account and login
• Select the option “Transfer HOME” at welcome page
• Follow the guides and confirm the data transfer
• Search until the PIXIE Gateway is found
• Important: Select the correct gateway
(check the gateway ID on the label under gateway body)
• Follow the guides to set up Wi-Fi connection
• When three indicators turn static blue, it’s all set
• Launch Google Home App
• Make sure login with a Google account
• Tap "Add" and then "Set up device"
• Tap "Works with Google"
• Search for and add "SAL PIXIE Plus", then login and authorise
Need more help?
• Tap "Help" under "Setting" in PIXIE PLUS App
• Tap "Email us" under "Setting" in PIXIE PLUS App
• Visit SAL website https://www.sal.net.au/contact-us
NSW | ACT | QLD
– SAL National Pty Ltd, 40 Biloela Street Villawood NSW 2163
| P # 02 9723 3099
QLD
– SAL National Pty Ltd, 36 Whitelaw Place Richlands QLD 4077
| P # 07 3879 5999
VICT | TAS | SA | NT
– SAL National Pty Ltd, 46-48 Keys Road Moorabbin Victoria 3189 | P # 03 9532 3168
WA
– SAL National Pty Ltd, 29 Beringarra Av Malaga WA 6090
| P # 08 9248 7458


