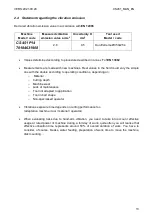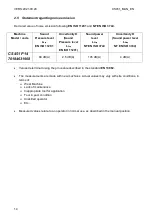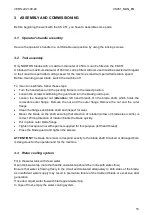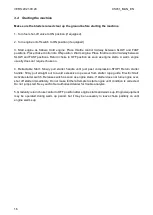
VERS.2021.09.28 CS451_MAN_EN
23
Add Fuel
Nominal Fuel Tank Volume: CH395/CH440 : 7.19 qt. (6.8 L)
Ensure engine is cool. 1. Clean area around fuel cap. 2. Remove fuel cap. Fill to base of filler neck.
Do not overfill fuel tank. Leave room for fuel to expand. 3. Reinstall fuel cap and tighten securely.
Fuel Valve
Engines are equipped with a fuel valve and integral screen filter located at inlet of carburetor. It
controls and filters fuel flow from tank to carburetor. Clean fuel valve cup of debris.
1. Remove two nuts, two screws, and carburetor cover panel. 2. Turn fuel valve lever to OFF position.
3. Remove fuel valve cup. Remove O-ring and filter screen. 4. Clean screen and fuel valve cup with
solvent and wipe it off. 5. Check screen and O-ring, replace if damaged. 6. Reinstall O-ring followed
by fuel valve cup. Rotate fuel valve cup until it is finger tight. Turn with a wrench 1/2 to 3/4 full turn. 7.
Turn fuel valve to ON position and check for leaks. If fuel valve leaks repeat steps 5 & 6. 8. Tighten
fuel cap securely. 9. Reinstall carburetor cover panel securing EN with hardware removed in step 1.
Spark Plugs
Clean out spark plug recess. Remove plug and replace
1. Check gap using wire feeler gauge. Adjust gap, see specification table for adjustment. 2. Install
plug into cylinder head. 3. Torque plug to 20 ft. lb. (27 N·m).
Air Cleaner
NOTE: Running engine with cover positioned for cold weather operation in normal conditions can
damage engine.
NOTE: Operating engine with loose or damaged air cleaner components could cause premature wear
and failure. Replace all bent or damaged components.
NOTE: Paper element cannot be blown out with compressed air.
Quad-Clean™
Move bails on air cleaner cover down; remove latches from under tabs on base; remove cover. or
Turn air cleaner cover (counterclockwise) to release tabs inside cover from base; remove cover.
Precleaner:
1. Remove precleaner from paper element. 2. Replace or wash precleaner in warm water with
detergent. Rinse and allow to air dry. 3. Lightly oil precleaner with new engine oil; squeeze out excess
oil. 4. Reinstall precleaner over paper element.
Paper Element:
1. Separate precleaner from element; service precleaner and replace paper element. 2. Install new
paper element on base; install precleaner over paper element. Position air cleaner cover for normal
operation (sun decal out) or cold weather operation (snowflake decal out). Place latches under tabs
on base; lift up bails to secure cover. or Turn air cleaner cover (clockwise) to secure tabs inside cover
in base.
Low-Profile
1. Remove screw and air cleaner cover. 2. Remove foam element from base. 3. Wash foam element
in warm water with detergent. Rinse and allow to air dry. 4. Lightly oil foam element with new engine
oil; squeeze out excess oil. 5. Reinstall foam element into base. 6. Reinstall cover and secure with
screw.

