Sail F 4 Owner'S Manual Download Page 10

16

17

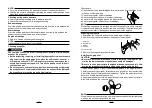
Avoid accidentally pulling the lanyard during normal operation. Loss 

of engine power means the loss of most steering control. Also, with-

out engine power, the boat could slow rapidly. This could cause peo-

ple and objects in the boat to be thrown forward.

3.Place the throttle grip in the "

START

" (start) 

position.

4.Place the choke knob in the "

START

" (start) 

position. After the engine starts, return the kn-

ob to the "RUN" (run) position.

NOTE:

When restarting a warm engine, place the choke knob in the "

RUN

" (run) position.

If the choke knob is left in the "

START

" (start) position while the engine is 

running, the engine will run poorly or stall.

5.Pull the manual starter handle slowly until 

you feel resistance. Then give a strong pull 

straight out to start the engine. Repeat if necessary.

6.After the engine starts, slowly return the m-

anual starter handle to the original position before releasing it.

7.Slowly return the throttle grip to the fully closed position.

NOTE:

When the engine is cold, it needs to be warmed up. 

If the engine does not start on the first try, repeat the procedure. If the engine 

fails to start after 4 or 5 tries, open the throttle a small amount (between 1/8 

and 1/4) and try again. Also if the engine is warm and fails to start, open the 

throttle a same amout and try to start the engine again.

Warming up engine

Manual start models

1. After starting the engine, return the choke knob to the halfway position. 

For approximately the first 5 minutes after starting, warm up the engine by 

operating at one fifth throttle or less. After the engine has warmed up, push 

the choke knob in fully. Failure to do so will shorten engine life.

NOTE:

If the choke knob is left pulled out after the engine starts, the engine will stall.

In temperatures of -5

 or less, leave the choke knob pulled out fully for app-

roximately 30 seconds after starting.

2. Check for a steady flow of water from the cooling water pilot hole.

CAUTION:

A flow of water from the hole on the exha-

ust cover shows that the water pump is p-

umping water through the cooling passa-

ges. If water is not flowing out of the hole 

at all times while the engine is running, 

overheating and serious damage could 

occur. Stop the engine and check whether

the cooling water inlet on the lower case 

or the cooling water pilot hole is blocked. 

Consult your dealer if the problem cannot 

be located and corrected.

Shifting

Before shifting, make sure there are no swimmers or obstacles in the water near you.
CAUTION:

To change the boat direction or shifting position from forward to rever-

se or viceversa, first close the throttle so that the engine idles (or runs 

at low speeds.)
Forward (tilller handle and remote control models)

Tiller control models

1. Place the throttle grip in the fully closed position.

2. Move the gear shift lever quickly and firmly from neutral to forward.

N

F

Summary of Contents for F 4

Page 1: ...4 Stroke Outboard Motor F 4...

Page 2: ...rated power of the outboard should be equal to or less than the rated horsepower capacity of the boat if the rated horsepower capacity of the boat is unknown consult the dealer or boat manufacturer D...

Page 3: ...e fuel tank cap Caution labels Lable CAUTION Store the engine only as shown Otherwise engine damage could result from Leaking oil Fueling instructions GASOLINE AND ITS VAPORS ARE HIGHLY FLAMMABLE AND...

Page 4: ...k NOTE Select a propeller which will allow the engine to reach the middle or upper half of the operating range at full throttle with the maximum boat load If operating conditions such as light boat lo...

Page 5: ...hoose the setting that offers the best performance and fuel economy for the desired operation 1 Throttle indicator 1 Forward F 2 Neutral N 3 Reverse R Throttle grip The throttle grip is on the tillerh...

Page 6: ...moved 1 Lock plate 2 Lanyard Engine stop button To open the ignition circuit and stop the engine push this button Choke knob for pull type To supply the engine with the rich fuel mixture required to s...

Page 7: ...ere instability Do not install an outboard motor with more horsepower than the maximum rating on capacity plate of the boat If the boat does not have a capacity plate consult the boat manufacturer The...

Page 8: ...nt on the boat Otherwise the engine could be com pletely lost if it accidentally falls off the transom 3 Secure the clamp bracket to the transom using the bolts provided with the outboard if packed Fo...

Page 9: ...l Filling fuel When the air vent screw is loosened gasoline vapor will be released Gasoline is highly flammable and its vapors are flammable and expl osive Refrain from smoking and keep away from open...

Page 10: ...up engine Manual start models 1 After starting the engine return the choke knob to the halfway position For approximately the first 5 minutes after starting warm up the engine by operating at one fif...

Page 11: ...ce and fuel economy while reducing strain on the engine Correct trim angle depends upon the combination of boat engine and propeller Correct trim is also affected by variables such as the load in the...

Page 12: ...up and down If the engine will be stopped for some time or if the boat is moored in shallows the outboard motor should be tilted up to protect the propeller and casing fr om damage by collision with...

Page 13: ...y turning it counterclockwise and a djust the steering friction according to operator preference If there is too much resistance it could be difficult to steer which could result in an accident Unit m...

Page 14: ...ups which you may carry out yourself The symbol indicates work to be carried out by your SAIL dealer NOTE When operating in salt water turbid or muddy water the engine should be flushed with clean wat...

Page 15: ...ap with a wire thickness gauge adjust the gap to specification if necessary 1 Spark plug gap 2 Spark plug I D mark NGK Spark plug gap 0 6 0 7 mm 0 024 0 028 in When fitting the plug alaways clean the...

Page 16: ...l is above the upper level mark drain until the level meets the specified capacity Overfilling the oil could cause leakage or damage 1 Put the outboard motor in an upright position not tilted 2 Prepar...

Page 17: ...rom cavitation or ve ntilation or other damage Check the propeller shaft for damage Check the splines shear pin for wear or damage Check for fish line tangled around the propeller shaft Check the prop...

Page 18: ...e inject the gear oil into the gear oil drain screw hole Recommended gear oil Hypoid gear oil SAE 90 Gear oil quantity 120 cm3 4 064 US oz 4 24 Imp oz 6 When the oil begins to flow out of the oil leve...

Reviews: