


1-16
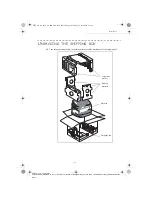
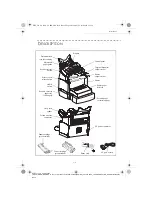
Installation
Date en cours : 23 avril 2003
\\Sct31nt3\BE31-DOC\DOC 31 - En cours\Travaux en cours\MFL-MFC-MFK\MFL_251 270 819 A_LASER PRO 341 GB_EXPORT\Installation
Gb.fm
+
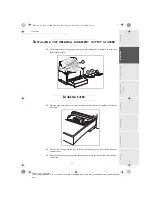
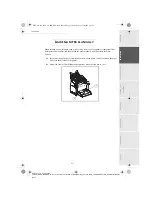
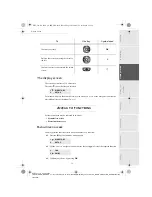
Make sure the On/Off switch is set to 0 (Off).
7
(/(3+21(
&211(&7,21
+
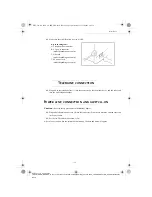
Plug end of the telephone line (1) into the connector on the fax machine (A), and the other end
into the wall telephone socket.
3
2:(5
/,1(
&211(&7,21
$1'
6:,7&+
21
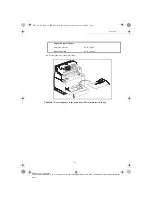
Caution -
Refer to safety procedures in the Safety Chapter.
+
Plug end of the main power cord (2) into the connector (E) on the fax machine, and the other end
in the wall outlet.
+
Set the On/Off switch to position 1 (On).
After a few seconds, when the printer has warmed up, the date and time will appear.
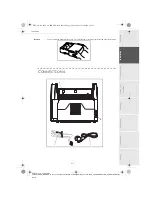
Key to the diagram:
A: Telephone line connector
B: AC power connector
(model depending on country)
1: Line cord
(model depending on country)
2: AC power cord
(model depending on country)
MFL_251 270 819 A_LASER PRO 341 GB.book Page 16 Mercredi, 23. avril 2003 2:55 14


