13
12
14
5
4-4
Step 5
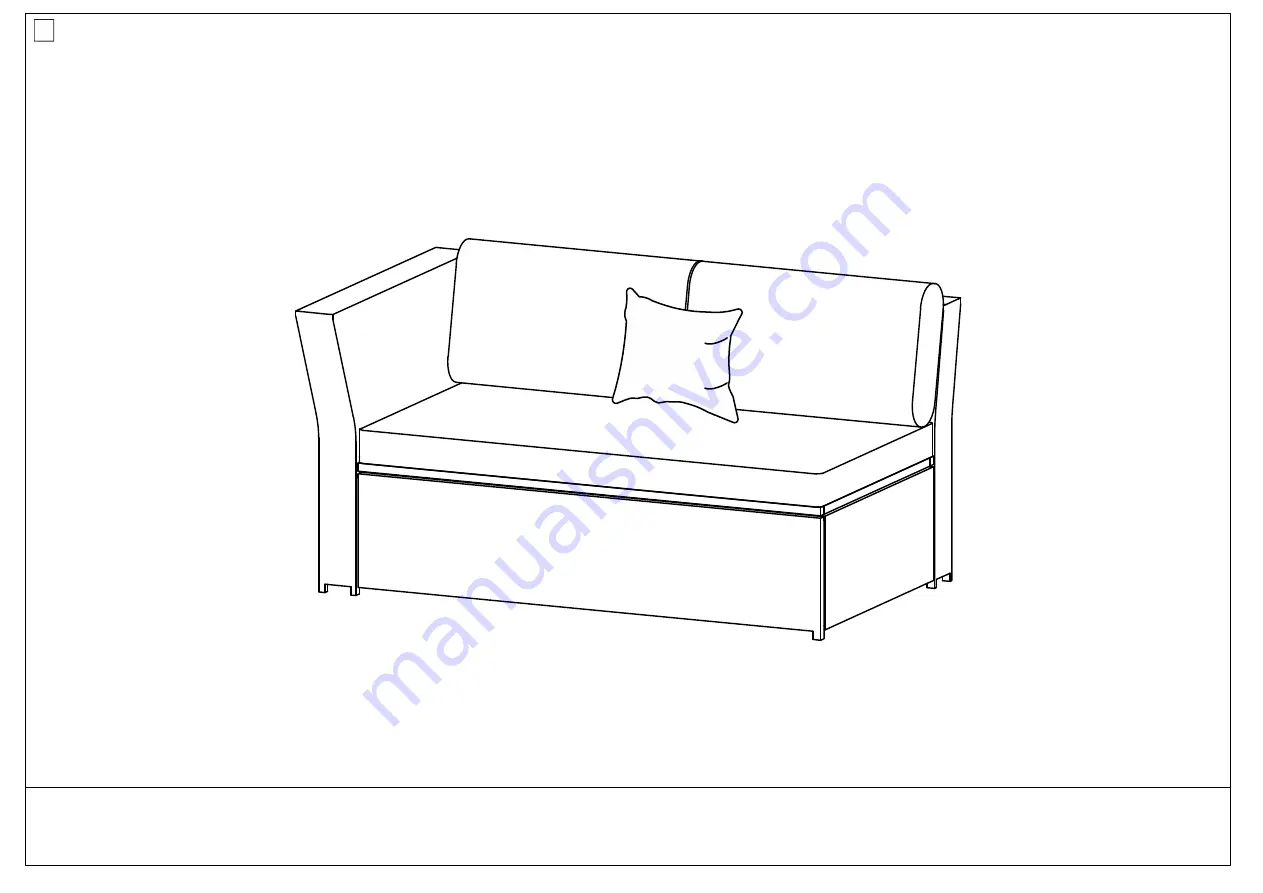
Puton Bench Seat Cushion (12), Bench Back Cushion (13) & Pillow (14) to complete Bench
Page 1: ...fore they harden or stain with a slightly dampened sponge 1 4 Bench Left Seat Frame Bench Left Front Frame Bench Side Frame Bench Left Frame Corner Top Frame Corner Bottom Frame Part List and Hardware List QUANTITY PIECE 1X DESCRIPTION Flat washer Allen key PICTURE 1X 1X 1X 1X 1X 1X 1X 17 18 19 5 21 22 23 C D Allen bolt M6x15 mm A Allen bolt M6x30 mm B Bench Left Back Frame Corner Front Frame Corn...
Page 2: ... you begin assembly of this item This item should be assembled on a soft surface to prevent scratching the finish during assembly This item may require periodic tightening CARE AND MAINTENANCE Store outdoor furniture indoors or cover well when not in use Remove wicker furniture from standing water Dust regularly with small brush or vacuum Spills should be taken care of immediately before they harde...
Page 3: ...5 tighten Bolt B with Allen key F 3 4 PREPARATION Before beginning assembly of product make sure all parts are present Compare parts with package contents list and hardware contents list If any part is missing or damaged do not attempt to assemble the product Estimated Assembly Time 15 minutes Tools Required for Assembly included Allen Key Step 4 Connect part from Step 3 Bench Right Front Frame 4 ...
Page 4: ...13 13 12 14 5 4 4 Step 5 Puton Bench Seat Cushion 12 Bench Back Cushion 13 Pillow 14 to complete Bench ...
Page 5: ...lt M6x40 mm 6X 8 9 10 11 12 13 14 15 F Allen bolt M6x110 mm 1X 1X 1X 1X 1X 2X 1X 1X NOTICE Please make sure that you have all parts indicated before you begin assembly of this item This item should be assembled on a soft surface to prevent scratching the finish during assembly This item may require periodic tightening CARE AND MAINTENANCE Store outdoor furniture indoors or cover well when not in us...
Page 6: ... you begin assembly of this item This item should be assembled on a soft surface to prevent scratching the finish during assembly This item may require periodic tightening CARE AND MAINTENANCE Store outdoor furniture indoors or cover well when not in use Remove wicker furniture from standing water Dust regularly with small brush or vacuum Spills should be taken care of immediately before they harde...
Page 7: ... 5 tighten Bolt B with Allen key F 3 4 PREPARATION Before beginning assembly of product make sure all parts are present Compare parts with package contents list and hardware contents list If any part is missing or damaged do not attempt to assemble the product Estimated Assembly Time 15 minutes Tools Required for Assembly included Allen Key Step 4 Connect part from Step 3 Bench Right Front Frame 4...
Page 8: ...13 13 12 14 5 4 4 Step 5 Puton Bench Seat Cushion 12 Bench Back Cushion 13 Pillow 14 to complete Bench ...
Page 9: ...harden or stain with a slightly dampened sponge 1 5 Bench Left Seat Frame Bench Left Front Frame Bench Side Frame Bench Left Frame Corner Top Frame Corner Bottom Frame Pillow Part List and Hardware List QUANTITY PIECE 1X DESCRIPTION Flat washer Allen key PICTURE 1X 1X 1X 1X 1X 1X 1X 17 18 19 5 21 22 23 C D Allen bolt M6x15 mm A Allen bolt M6x30 mm B Bench Left Back Frame Corner Front Frame Corner ...
Page 10: ... small brush or vacuum Spills should be taken care of immediately before they harden or stain with a slightly dampened sponge 2 5 Corner Top Frame Corner Bottom Frame Part List and Hardware List QUANTITY PIECE DESCRIPTION Flat washer Allen key PICTURE 1X 1X 1X 1X 20X 1X 21 22 23 Allen bolt M6x15 mm 4X A Allen bolt M6x30 mm 16X B Corner Front Frame Corner Back Frame Corner Right Frame Corner Left F...
Page 11: ...rner Back Frame 24 tighten Bolt B with Allen key F Step 2 Connect part from Step 1 Corner Bottom Frame 22 tighten Bolt B with Allen key F Step 3 Connect part from Step 2 Corner Left Frame 26 tighten Bolt B with Allen key F 3 5 23 24 25 B E E E B B E B B B B 22 E E E 26 ...
Page 12: ...4 5 Step 4 Connect part from Step 3 Corner Top Frame 21 tighten Bolt A with Allen key F 4 5 A E 21 27 23 25 26 Step 5 Puton Rain cover 27 to complete Corner ...
Page 13: ...6 G G G G 23 25 21 Step 6 Connect Corner Right Frame 25 Corner Left Frame 26 Corner Top Frame 21 with Piston G 5 5 ...