5.5 Inspecting the sealing elements
Guide bearing seal
Remove the brake pads (12) (see Chap. 6.1).
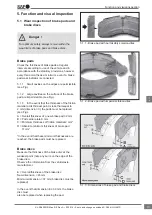
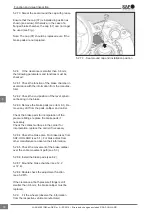
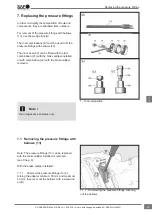
5.5.1 The guide bushings (4) and (5) must be
sealed with the bellows (9) and the cover (10)
or (68). Parts (9), (10) and (68) must not show any
cracks or damage (see Fig.).
Check for proper seating.
5.5.2 Remove the brake pads to inspect the inner
bellows (9) (observe Chap. 6.1).
If necessary, repair the brake calliper with a suitable
service kit (see Chap. 1.2 and Chap. 9).
Check the bellows on the pressure fittings (13)
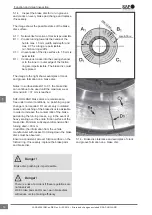
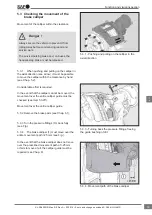
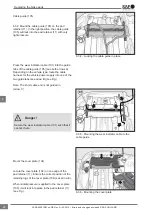
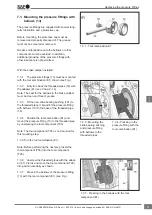
5.5.3 Unscrew the pressure fittings (13) via the
adjuster (23) with the adapter (61) as far as is
necessary to be able to see the bellows clearly
(see Fig.).
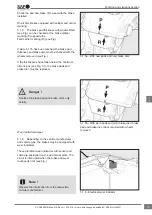
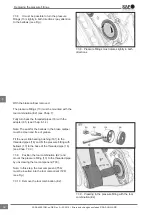
Unscrew the pressure fittings (13) a minimum of
35 to maximum 40 mm or insert a new pad on
the outside and unscrew the pressure fittings as
far as the disc.
Caution!
5.5.3
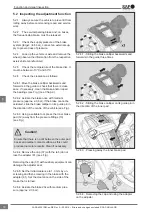
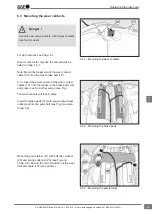
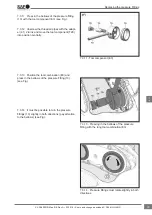
The bellows on the pressure fittings (13)
must not exhibit any cracks or other damage
(see Fig.).
Check for proper seating.
Note: The ingress of dirt and moisture into the
brake will cause corrosion and impair the function
of the clamping mechanism and adjustment.
If necessary, replace the pressure fittings (13) with
bellows (see Chap. 7).
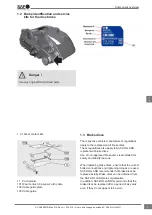
5.5.1 - Inspecting the calliper guide seal
5.5.3 - Unscrewing the pressure fittings min. 35 mm
to max. 40 mm
5.5.4 - Inspecting the bellows
Function and visual inspection
21
en
XL-SA40001RM-en-DE Rev A • 02.2016 • Errors and changes excluded © SAF-HOLLAND

