Rev. 1.4
Sabio Digital KN1 Assembly Guide
8 of 11
www.sabioproducts.com
Section 7.0 - Keyboard Installation
The keyboard is packaged separately and must be installed by the system
builder. To install the keyboard, follow these instructions:
1.
Open up the notebook completely so that the LCD is level with the lower
bottom chassis. This will provide unobstructed access for removing the
keyboard cover (or also commonly referred to as the “C” surface).
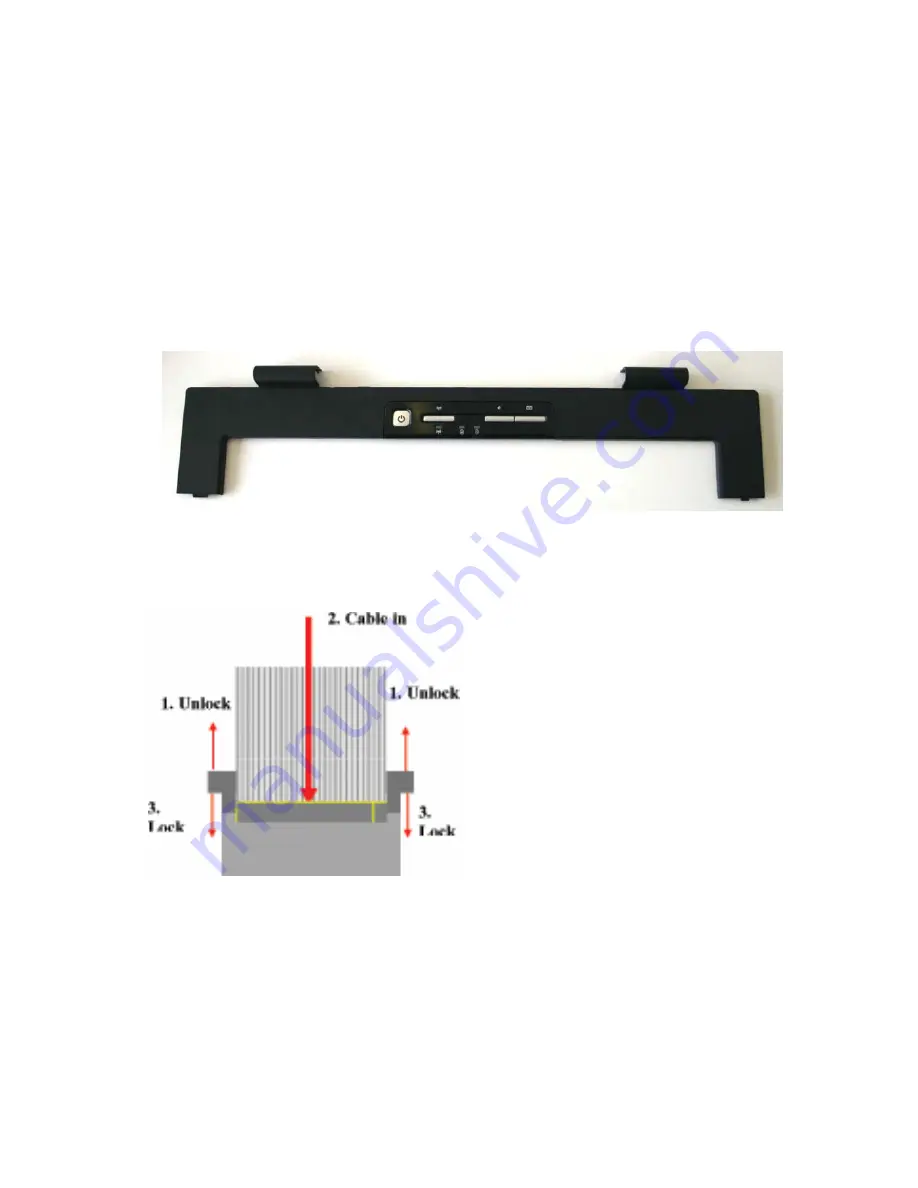
(Illustration 7a)
2.
Using a small flathead screwdriver, insert the tip of the screwdriver
between the keyboard and the keyboard cover in the area under the email
hotkey button and gently pry up the cover. This will cause the cover to
pop up far enough where it can be removed completely by hand.
Illustration 7a – Keyboard Cover
3.
Check to see that the flat cable connector on the motherboard is in the
unlocked position (#1 & #3, Illustration 7b)
Illustration 7b – Keyboard Cable Connector
4.
With the keyboard lying on top of the palm rest, insert the keyboard cable
into the keyboard connector on the motherboard. (#2, Illustration 7b)
5.
Lock keyboard connector on each end by hand or with a small flathead
screwdriver. (#1 & #3, Illustration 7b)


