“135-Vault Table”
Pg. 3
SECTION I
ASSEMBLY
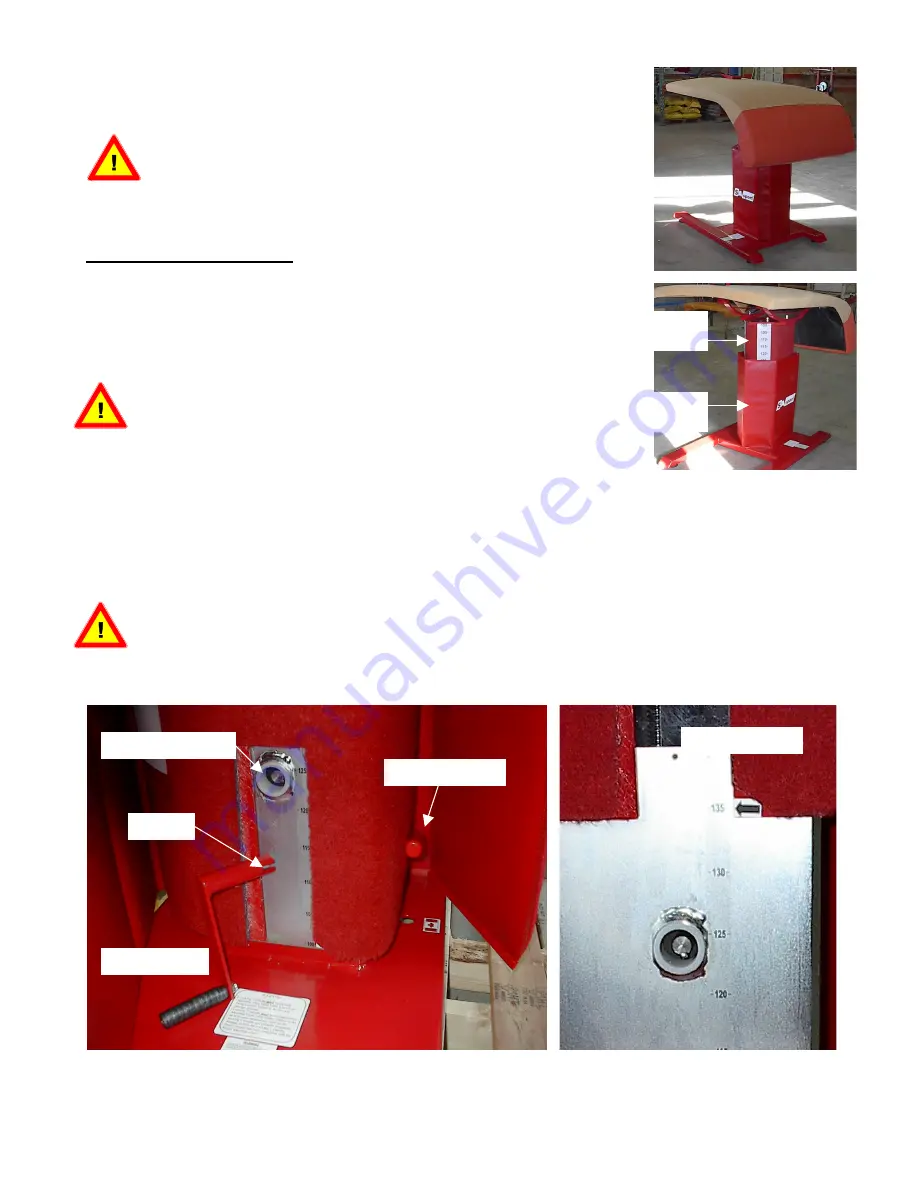
Note: The Vault Table must never be used if the upper and lower Pads
are not installed. The lower Pad must fasten closed with Velcro
flap as shown in the pictures to the right.
Adjustment of Vault Table
1. Open Velcro flap on the side, which has warning labels, attached to the
base.
2. Loosen the locking handle by turning it counterclockwise.
Never Attempt to adjust the table without unlocking the locking handle!
3. Take the Crank and insert it into the Gear Drive hole, aligning the notch
with the square key on the shaft. Ensure the crank is fully engaged with the
shaft before attempting to crank the handle.
4. Turn the crank until the desired height is attended; align the arrow on the outer column with the
numbers shown on the inner column beside the Crank Hole.
5. Lock the locking handle by turning it clockwise.
Never leave the table unlocked when in use, this can result in damage to the lifting device and place
the athlete at risk. The locking handle must always be locked after adjustment of the table!
6. Remove the Crank Handle and Close the lower pad around the Vault table Column.
Crank Handle
Notch
Gear Drive Hole
Locking Handle
Height Marking
Lower
Pad
Upper
Pad


