9
System Settings with DHCP-Server
9
System Settings without DHCP-Server
1. Connect the TC IP 1 with a
patch cord (separately deliv-
erable) to the local network.
2. Connect the temperature
sensor (optional) at the
spring terminals.
3. Push the TC IP 1 in a plug.
4. The TC IP 1 can be reached
with a browser entering the
address http://192.168.0.2
or http://TCIP1.
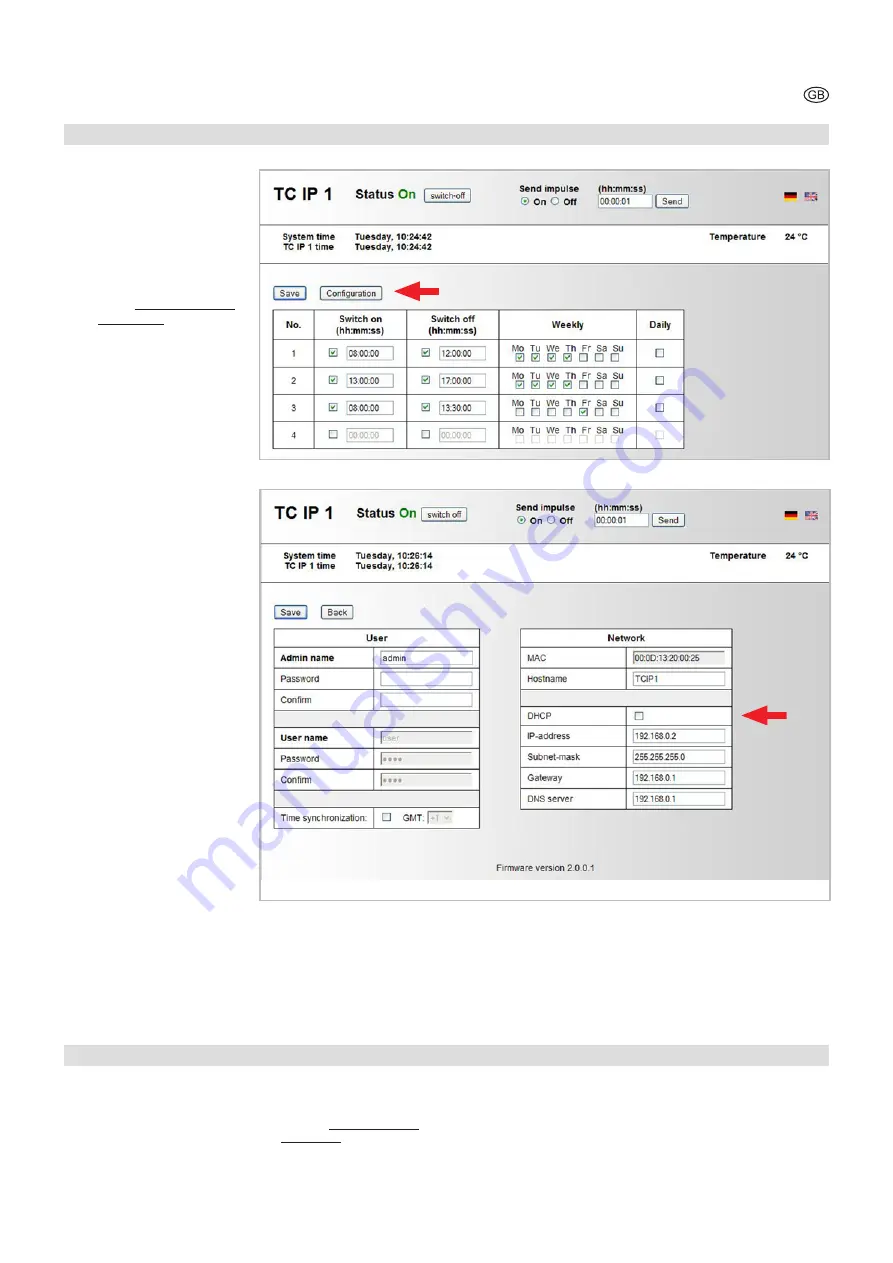
5. With the button „network
configuration“ in the main
menu (arrow, figure 2) you
will access the system set-
tings of TC IP 1 (figure 3).
6. In order to call up the TC
IP1 directly, choose under
“Network name” an individual
name.
7. Modify the IP-address of the
TC IP 1 according to your
own needs.
8. Increase the access protec-
tion of your network conec-
tion through an individual
user name and password.
Once a password has been
chosen, the user name and
password will be required to
have access to the website.
Three categories are possible:
· If neither “administrator
name” nor “user name” has
been saved, everyone has
full access to all functions.
· If an “administrator name”
has been saved but no
“user name”, everyone can
access the website and
perform the manual switch-
ing functions. The “network
configuration” can only be
done from the administrator.
· If an “administrator name”
and a “user name” have
been saved, the “adminis-
trator” and the “user” can
access the website and
perform the manual switch-
ing functions. The “network
configuration” can only be
done from the administrator.
9. Switch - if requested – the
automatic time synchroniza-
tion on. In order to use this
feature you must enter data for
“Gateway“ and “DNS Server“.
10. With “send” the configuration
will be saved.
1. Connect the TC IP 1 with a
patch cord (separately deliver-
able) to the local network.
2. Connect the temperature
sensor (optional) at the spring
terminals.
3. Push the TC IP 1 in a plug.
4. The TC IP 1 can be reached
with a browser entering the
address http://192.168.0.2 or
http://TCIP1.
5. With the button “network
configuration“ in the main
menu (arrow, figure 2) you will
access the system settings of
TC IP 1 (figure 3).
6. In order to call up the TC
IP1 directly, choose under
“Network name” an individual
name.
7. Now activate the DHCP-server
(arrow, figure 3).
8. Proceed as described above
under points 8 and 10.
The TC IP 1 will be assigned a free
IP-address.
9
Configuration
Figure 2
Figure 3


