

V1.2
•
Plug a monitor into the VGA, DVI or HDMI connector in the lower left of the back panel.
•
Plug the supplied USB to serial connector into the USB port as shown in Fig. 1. This will be your serial port for
configuring and controlling the Nuvo controller
•
You can now start your computer by tapping on the power button on the front of the Music Server. (
Note: all
audio cables must be plugged into the Music Server’s audio jacks before starting the computer!)
•
Once Windows has started, click on the Start button and type in “Device Manager” in the “Search Programs
and files” window just above the Start button. Find the Device Manager at the top of the list and run it.
•
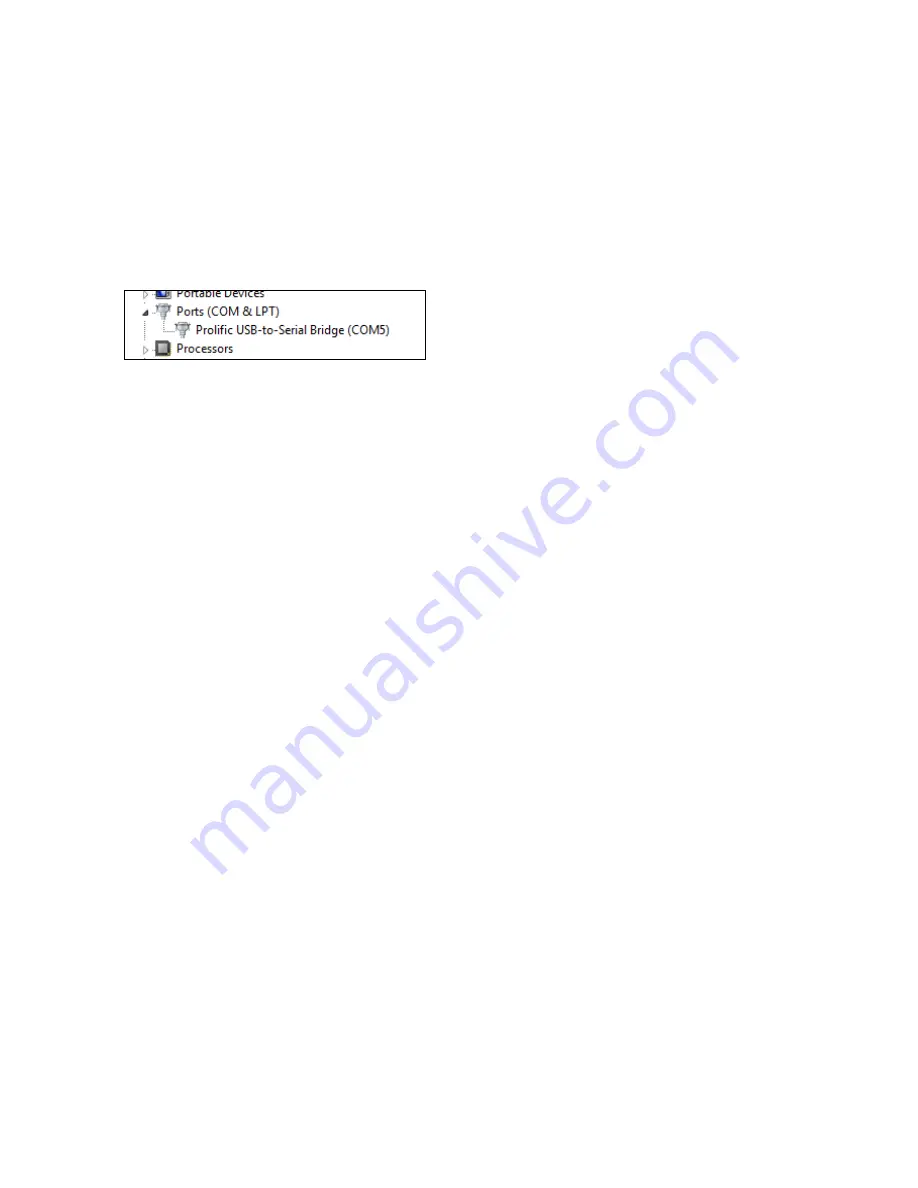
In Device Manager, click on “Ports” and find the COM port number used by the USB/serial adapter. Write this
down. In the following example, the COM port number is 5:
•
Once the computer starts, go to CasaTunes Setup (on the Windows desktop). You will find that the controller
tab should be pre-setup at our factory to show a Russound CAV6.6. Please change this if you are using a
different Russound controller. Add the serial port number from the previous step.
•
At our factory, we have set the CasaTunes software so that the four audio outputs on the back of the Music
Server are assigned to Source Inputs one through four on the Russound and the front Headphone output of
the Music Server is assigned as the fifth source input on the Russound. If you would like to change this, follow
the next step. Otherwise, skip the next step.
•
In the Sources tab, set the sources to match the way that you have wired your Russound. Music coming from
the Music Server to the Russound controller are called CasaTunes Players. We have set the first five sources
in CasaTunes Setup to be CasaTunes Players, but you can change them in the following manner: For the first
source that you will be using as a CasaTunes Player, select “CasaTunes Player” as “the type of source”,
“Speakers (Realtek High Definition Audio)” as “the Audio Device to use” and “Speakers 1&2 (Front
Right/Left)” as the “Speakers to use”. For the 2
nd
Player source, set it up the same except that the “Speakers
to use” should be “Speakers 3&4 (Rear Surrounds)”. Keep going in this manner for the 3
rd
and 4
th
Players,
using Speakers 5&6 and 7&8 respectively. If you are using the front headphones as a 5
th
CasaTunes Player,
select “CasaTunes Player” for the source associated with the Russound source input you are using, select
“Realtek HD Audio 2
nd
Output (Realtek High Definition Audio)” as “the Audio Device to use” and select
“Default Speaker Selection” as the “Speakers to use”.
•
Now set the non-CasaTunes Player sources to match the devices you have connected to the other source
inputs on the Russound. If we do not show a device to match the sources you are using, pick “unknown”.
•
In the Source tab and the Zone tab, you can rename the zones to room names and the sources to names that
make sense to you. For example, you could assign sources to different people in the house and name the
sources to match. Some people pick one source to constantly play all of their PC music randomly and call that
source “All Music”. Once you are done customizing CasaTunes, click on Summary and Finish.
Tips
•
Since the audio server built into CasaTunes will not function when the computer is in standby or sleep, we
have also set the computer to not time out and shutdown or go to sleep automatically.
•
Automatic updates for Windows 7, Windows Media Player and iTunes have been disabled to prevent
interruption of your music. You should manually check for updates occasionally.
•
We have placed a link to LogMeIn.com on your Windows desktop. Their LogMeIn program is excellent for
remotely accessing your server and it is free in its basic, but very complete version.